
Connecting a Nintendo controller to your phone opens up a whole new world of gaming possibilities. Whether you’re a fan of retro games or prefer the classic feel of a controller in your hands, this guide will walk you through the steps to connect a Nintendo controller to your phone. With the rise of mobile gaming, many users crave the tactile experience of using physical buttons instead of touch controls. Luckily, there are several ways to connect your Nintendo controller to your phone, so you can enjoy your favorite games with enhanced control and precision. In this article, we will explore different methods and provide a step-by-step guide to help you seamlessly connect your Nintendo controller to your phone and elevate your mobile gaming experience.
Inside This Article
- Compatibility of Nintendo Controllers with Phones
- Methods to Connect Nintendo Controllers to Phones
- – Bluetooth Connection
- – USB OTG Connection
- – Adapter Connection
- Troubleshooting Tips
- Conclusion
- FAQs
Compatibility of Nintendo Controllers with Phones
Nintendo controllers, known for their excellent build quality and ergonomic design, have gained popularity among gamers worldwide. While they are primarily designed for Nintendo gaming consoles, many models can also be used with smartphones. The compatibility of Nintendo controllers with phones depends on several factors, including the specific controller model, the operating system of the phone, and the availability of compatible apps or games.
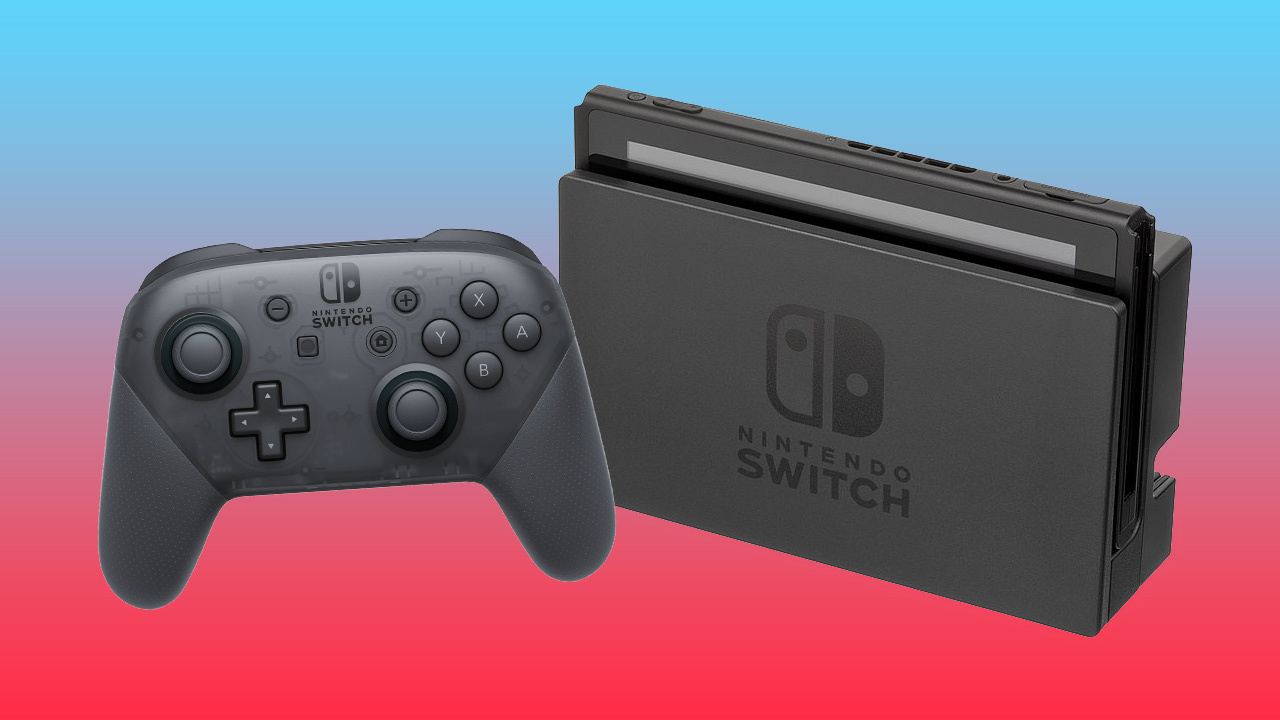
One of the most widely supported Nintendo controllers for phone compatibility is the Nintendo Switch Pro Controller. This controller is compatible with select Android and iOS devices, allowing users to enjoy their favorite games on the go. However, it’s important to note that not all devices are compatible, so it’s essential to check the compatibility list provided by Nintendo or the app/game developers.
On the other hand, older Nintendo controllers, such as the Wii Remote or the Wii U Gamepad, may have limited or no compatibility with smartphones. These controllers often require additional accessories, such as Bluetooth adapters or custom software, to connect and function properly with phones. It’s advisable to check online forums or consult with experts for specific instructions on how to connect these controllers to phones.
Additionally, it’s crucial to consider the operating system of the phone when determining the compatibility of a Nintendo controller. The majority of Nintendo controller compatibility lies with Android devices, as they offer more options for customization and support for external controllers. However, certain iOS devices also support Nintendo controllers, but the compatibility may vary based on the device model and iOS version.
Lastly, the availability of compatible apps and games is a significant factor in utilizing a Nintendo controller with a phone. While many popular games have built-in support for external controllers, not all apps or games are compatible. It’s important to check the app’s description or developer information to confirm if external controllers are supported.
Methods to Connect Nintendo Controllers to Phones
Connecting a Nintendo controller to your phone opens up a world of gaming possibilities. Whether you want to enjoy retro classics or play modern games with a controller, there are several methods you can use to connect your Nintendo controller to your phone. Let’s explore these methods in detail.
1. Bluetooth Connection:
Most modern Nintendo controllers, such as the Nintendo Switch Pro Controller or Joy-Con controllers, come with built-in Bluetooth functionality. To connect the controller to your phone via Bluetooth, follow these steps:
- Turn on the Bluetooth function on your phone and make sure it is discoverable.
- Put the Nintendo controller into pairing mode. Refer to the controller’s manual for instructions.
- On your phone, scan for available Bluetooth devices. You should see your Nintendo controller listed.
- Select the controller from the list and complete the pairing process.
2. USB OTG Connection:
If your phone supports USB On-The-Go (OTG) functionality, you can connect your Nintendo controller directly to your phone using a USB OTG adapter. Follow these steps:
- Get a USB OTG adapter that is compatible with your phone model.
- Connect the adapter to your phone’s charging port.
- Connect the Nintendo controller’s USB cable to the USB port on the adapter.
- Your phone should recognize the controller, and you can start using it for gaming.
3. Adapter Connection:
If your Nintendo controller uses a different connector than USB, such as the GameCube controller, you can use an adapter to connect it to your phone. Here’s how:
- Get an adapter that is specifically designed to connect the Nintendo controller to your phone.
- Connect one end of the adapter to your phone’s charging port.
- Connect the Nintendo controller to the other end of the adapter.
- Your phone should recognize the controller, and you can start gaming with it.
With these methods, you can easily connect your Nintendo controller to your phone and enjoy a more immersive gaming experience. Remember to check the compatibility of your specific controller with your phone before attempting to connect them. Happy gaming!
– Bluetooth Connection
Connecting a Nintendo controller to your phone via Bluetooth is a convenient and wireless option. With Bluetooth technology, you can enjoy gaming on your mobile device with the same level of control as you would on a traditional gaming console. Here’s how you can connect a Nintendo controller to your phone using Bluetooth:
1. Ensure that your phone has Bluetooth functionality. Most modern smartphones come equipped with Bluetooth capabilities, but it’s essential to double-check to ensure compatibility.
2. Turn on the Bluetooth feature on your phone. Navigate to the settings menu, select “Bluetooth,” and toggle it on. Your phone will then be in discoverable mode, allowing it to connect with other Bluetooth devices.
3. Put your Nintendo controller into pairing mode. Depending on the model, this may involve holding down a specific combination of buttons or using a dedicated pairing button. Check the controller’s user manual for instructions on how to activate pairing mode.
4. Once the controller is in pairing mode, it should appear in the list of available devices on your phone’s Bluetooth settings. Tap on the controller’s name to initiate the pairing process.
5. Your phone will then establish a connection with the Nintendo controller. Once paired successfully, you can start using the controller to play games on your phone.
Note that the specific steps to connect a Nintendo controller via Bluetooth may vary slightly depending on the controller model and the operating system of your phone. It’s always a good idea to refer to the user manuals or online resources for detailed instructions tailored to your specific setup.
In addition, remember to ensure that your phone and controller are within the Bluetooth range for a stable and uninterrupted connection. If you experience any connectivity issues, try turning off Bluetooth, restarting your phone, and repeating the pairing process.
Once the Bluetooth connection is established, you can enjoy a seamless gaming experience on your phone with the added precision and control of a Nintendo controller.
– USB OTG Connection
Another method to connect your Nintendo controller to your phone is through a USB OTG (On-The-Go) connection. USB OTG is a feature that allows your phone to act as a host and connect to USB peripherals like keyboards, mice, and yes, even gaming controllers.
To use USB OTG connection with your Nintendo controller, you will need an OTG adapter. This small and inexpensive adapter allows you to connect the USB end of the controller to your phone’s USB port. Simply plug the adapter into your phone, connect the Nintendo controller to the other end, and you’re ready to go.
It’s worth noting that not all phones support USB OTG. Some older models or budget devices may not have this feature, so it’s important to check if your phone supports USB OTG before purchasing an adapter.
Once you have the adapter and your phone supports USB OTG, the process is quite straightforward. Plug in the adapter to your phone’s USB port, connect the Nintendo controller, and wait for your phone to recognize it. In most cases, the controller should be automatically detected and ready for use.
If your phone doesn’t automatically recognize the controller, you may need to go into your phone’s settings and enable USB OTG support. This option is typically found in the developer settings or the USB settings section of your phone’s settings menu.
Keep in mind that the compatibility of Nintendo controllers with specific games may vary. While many popular games have built-in compatibility with Nintendo controllers, some may require additional configuration or third-party apps to work properly.
Overall, using a USB OTG connection to connect your Nintendo controller to your phone is a convenient and straightforward method for gaming on the go. Just make sure your phone supports USB OTG and you have the necessary adapter, and you’ll be enjoying your favorite games with a familiar controller in no time.
– Adapter Connection
The adapter connection method allows you to connect your Nintendo controller to your phone using a specialized adapter. This method is often used when your phone does not have built-in support for Bluetooth or USB OTG. An adapter acts as a bridge between your phone and the controller, providing the necessary connection.
To connect your Nintendo controller to your phone using an adapter, follow these steps:
- First, ensure that you have a compatible adapter for your Nintendo controller and phone. Different controllers may require different types of adapters, so make sure to check the specifications.
- Plug the adapter into your phone’s charging port or USB Type-C port, depending on the type of adapter you have.
- Connect the Nintendo controller to the adapter. Some adapters may have a dedicated port for connecting the controller, while others may use a wireless connection.
- Once the controller is connected, your phone should recognize it. You may need to adjust your phone’s settings to enable controller support.
The adapter method provides a reliable and convenient way to connect your Nintendo controller to your phone. It eliminates the need for a wireless connection and ensures a stable and lag-free gaming experience.
Remember to check the compatibility of the adapter with your specific phone model and Nintendo controller. Additionally, make sure to follow the manufacturer’s instructions for the adapter to ensure proper connection and functionality.
Troubleshooting Tips
If you encounter any issues while trying to connect your Nintendo controller to your phone, don’t worry. Here are some troubleshooting tips to help you resolve the problem:
1. Ensure that your Nintendo controller is charged: A low battery can often cause connectivity problems. Make sure your controller is fully charged before attempting to connect it to your phone.
2. Check the compatibility: Confirm that your Nintendo controller is compatible with your specific phone model. Some controllers are only compatible with certain operating systems or device versions.
3. Verify Bluetooth connectivity: If you’re using a Bluetooth connection, check that both your phone and the controller have Bluetooth turned on. Also, ensure that no other devices are actively connected to either the controller or your phone, as this can interfere with the pairing process.
4. Reset the connection: If you’re experiencing intermittent or unreliable connectivity, try resetting the connection. Turn off Bluetooth on both your phone and the controller, then turn them back on and attempt to reconnect.
5. Update firmware and software: Ensure that both your controller and phone have the latest firmware and software updates. Outdated software can sometimes cause compatibility issues.
6. Remove and re-pair devices: If the previous steps didn’t work, try removing the paired devices from both your phone and the controller. Then, go through the pairing process again and reconnect them.
7. Test with a different device: To determine if the issue is with your phone or the controller, try connecting the Nintendo controller to a different phone. If it works on another device, the problem may lie with your phone’s settings or compatibility.
8. Contact customer support: If you’ve exhausted all troubleshooting options and the issue persists, reach out to Nintendo customer support or the manufacturer of your controller for further assistance.
Remember to refer to the user manual or online resources for specific instructions on connecting your Nintendo controller to your phone. Troubleshooting steps may vary depending on the model of your controller and phone, so it’s always best to consult the official documentation.
Conclusion
Connecting a Nintendo controller to your phone can greatly enhance your gaming experience on the go. Whether you’re playing retro games or using it as a mobile gaming controller, the convenience and familiarity of a Nintendo controller can make all the difference.
By following the steps outlined in this guide, you can easily connect your Nintendo controller to your phone and enjoy your favorite games with precision controls.
Remember to check the compatibility of your phone and ensure that you have the necessary adapters or controllers to make the connection.
So, go ahead and unleash the power of your Nintendo controller on your phone and take your gaming to the next level!
FAQs
1. Can I connect a Nintendo controller to my phone?
Yes, you can connect a Nintendo controller to your phone using various methods. Bluetooth is a commonly used option to connect the controller wirelessly to your phone. However, please note that not all controllers are compatible with all phones, so it’s important to check for compatibility before attempting to connect.
2. How do I connect a Nintendo controller to my phone via Bluetooth?
To connect a Nintendo controller to your phone via Bluetooth, follow these steps:
1. Ensure that your phone has Bluetooth turned on.
2. Hold down the pairing button on the Nintendo controller until the LED light starts flashing.
3. Open the Bluetooth settings on your phone and search for nearby devices.
4. Select the Nintendo controller from the list of available devices.
5. Once connected, the LED light on the controller should become solid, indicating a successful pairing.
3. What types of Nintendo controllers can I connect to my phone?
There are several types of Nintendo controllers that can be connected to a phone, including Joy-Con controllers, Pro controllers, and even older controllers like the SNES or NES controllers. However, please note that compatibility may vary depending on the phone model and operating system.
4. Can I connect multiple Nintendo controllers to my phone?
The ability to connect multiple Nintendo controllers to your phone may depend on the specific game or app you are using. Some games support multiple controller connections, allowing you to play with friends or family. However, it’s important to ensure that your phone and the game/app you are using support multiple controller connections before attempting to connect more than one controller.
5. Are there any apps or emulators that help with connecting Nintendo controllers to phones?
Yes, there are several apps and emulators available that can assist with connecting Nintendo controllers to phones. These apps often provide additional features and customization options for your gaming experience. Some popular apps include “Bluetooth Auto Connect” and “Gamepad For VR” for Android devices, and “Controllers for All” for iOS devices.