
Are you looking to add a touch of sparkle and personalization to your phone case? Look no further! In this article, we will show you how to decorate a phone case with rhinestones. Rhinestones are small, dazzling gems that can be easily applied to your phone case to create a unique and eye-catching design. Whether you want something simple and elegant or bold and extravagant, rhinestones offer endless possibilities for customizing your phone case to reflect your personal style. Follow our step-by-step guide to transform your plain phone case into a dazzling piece of art with just a few simple materials and a creative touch. Get ready to unleash your inner designer and make your phone case stand out from the crowd!
Inside This Article
- Choosing the Phone Case
- Gathering the Materials
- Planning the Design
- Applying the Rhinestones
- Conclusion
- FAQs
Choosing the Phone Case
Choosing the right phone case is an essential step in decorating it with rhinestones. Not only will the case protect your phone from scratches and bumps, but it will also serve as the canvas for your dazzling design. When selecting a phone case, there are a few factors to consider.
Firstly, think about the type of phone you have. Each phone model has unique dimensions and button placements, so it’s important to choose a case that fits your specific device perfectly. This ensures that the rhinestones won’t obstruct the camera or interfere with any of the buttons or ports.
Next, consider the material of the phone case. There are various options available, such as silicone, plastic, or metal. The material you choose will not only affect the overall look and feel of the case but also determine the adhesive that will work best for attaching the rhinestones. For instance, if you opt for a silicone case, you’ll need an adhesive that sticks well to flexible surfaces.
Another key consideration is the color and style of the case. You want to pick a color that complements the color scheme of the rhinestones you plan to use. A neutral-colored case, like black or white, can be a versatile choice that allows your rhinestones to shine. Alternatively, you can select a case with a pattern or texture that adds an extra dimension to your design.
Lastly, evaluate the durability of the phone case. Since you’ll be decorating it with rhinestones, it’s crucial to choose a case that is sturdy enough to withstand the weight and movement of the embellishments. Look for a case with reinforced corners or extra shock-absorbing features to ensure your design stays intact.
Taking the time to carefully choose the right phone case will set the foundation for a successful rhinestone decoration project. Once you have your case, you can move on to gathering the necessary materials for the next step.
Gathering the Materials
Before you embark on your rhinestone phone case project, it’s essential to gather all the necessary materials. Here’s a list of items you’ll need:
- Phone case: Choose a phone case that is compatible with your specific mobile device. It’s important to ensure that the case is clean and free from any dust or debris before you start decorating.
- Rhinestones: Select rhinestones in the color, shape, and size of your choice. You can opt for regular rhinestones or decorative ones with different finishes.
- Adhesive: Use a strong adhesive specifically designed for attaching rhinestones to different surfaces. Be sure to choose one that dries clear and is suitable for the material of your phone case.
- Tweezers: Tweezers can help you handle the small rhinestones with precision and accuracy, making it easier to position them on the phone case.
- Toothpick or small brush: This handy tool can come in handy for applying the adhesive to the back of the rhinestones and spreading it evenly.
- Paper or cloth: Place a protective layer of paper or cloth on your working surface. This will prevent any adhesive or rhinestones from sticking to the table or damaging it.
- Optional embellishments: If you want to add extra flair to your phone case, consider including other decorative elements such as charms, pearls, or sequins.
Once you have gathered all the necessary materials, you’re all set to move on to the next stage: planning the design for your rhinestone phone case.
Planning the Design
Now that you have all the materials ready, it’s time to unleash your creativity and plan out your design for decorating your phone case with rhinestones. Here are some steps to help you in the planning process:
1. Think about the overall theme: Consider the style, colors, and patterns that you want to incorporate into your design. Do you want a simple and elegant look or a bold and vibrant one? This will guide you in selecting the right rhinestones and arranging them on your phone case.
2. Sketch your design: Take a piece of paper and sketch a rough layout of your design. You can draw the outline of your phone case and experiment with different placement options for the rhinestones. This will give you a visual representation of how your design will look on the actual case.
3. Consider placement and spacing: Pay attention to the placement and spacing of the rhinestones. You can create a focal point by clustering multiple rhinestones together or create a more scattered pattern for a subtle effect. Experiment with different arrangements to find the one that suits your style.
4. Play with colors: Rhinestones come in a variety of colors, so have fun exploring different color combinations. You can create a monochromatic design using shades of the same color, or opt for contrasting colors for a bold and vibrant look. Consider the color of your phone case as well to ensure a cohesive design.
5. Test the design: Before gluing the rhinestones onto your phone case, it’s a good idea to test your design by placing the rhinestones on the case without adhesive. This allows you to make any adjustments to the placement or color combination if needed.
6. Take breaks and review: Sometimes, stepping back and taking breaks from your design process can provide fresh perspective. Take some time to review your design and make any necessary refinements before moving on to the next step.
By following these steps and giving careful thought to your design, you’ll be able to create a unique and visually stunning phone case with rhinestones. Don’t be afraid to experiment and let your creativity shine through!
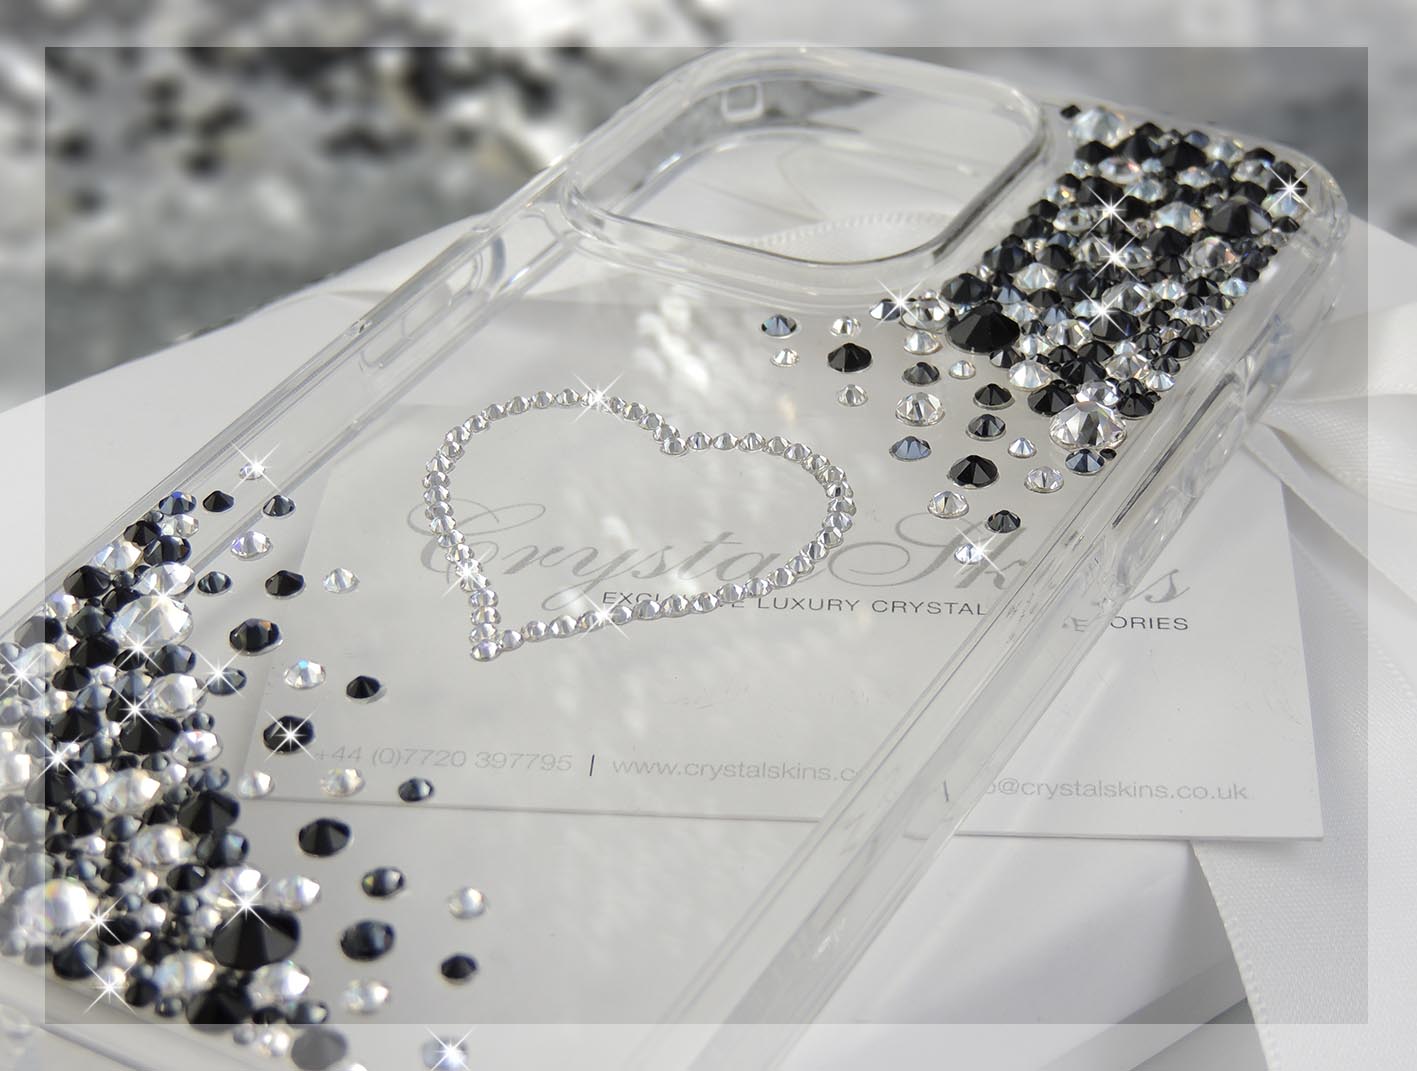
Applying the Rhinestones
Now that you have planned your design and gathered all the necessary materials, it’s time to start applying the rhinestones. Follow these simple steps to create a stunning and eye-catching design on your phone case:
1. Prepare the surface: Before you begin, make sure the surface of your phone case is clean and free from any dust or debris. This will ensure good adhesion of the rhinestones.
2. Apply the adhesive: Using a small brush or toothpick, apply a thin layer of adhesive to the area where you want to place the rhinestones. Be sure to work in small sections to avoid the adhesive drying out before you can place the rhinestones.
3. Place the rhinestones: Carefully pick up each rhinestone using a pair of tweezers or a wax pencil. Gently press the rhinestone onto the adhesive, ensuring it is firmly attached. Continue placing the rhinestones according to your planned design.
4. Fill in the gaps: If there are any gaps or empty spaces between the rhinestones, you can fill them in with smaller rhinestones or by adding additional adhesive and rhinestones to create a more intricate design.
5. Let it dry: Allow the adhesive to dry completely according to the manufacturer’s instructions. This may take a few hours or overnight, so be patient and avoid touching or moving the phone case during this time.
6. Seal the design: Once the adhesive is dry, you can optionally seal the design with a clear sealant or topcoat. This will help protect the rhinestones and ensure they stay in place for a longer period of time.
7. Allow it to cure: After sealing the design, let the clear sealant or topcoat cure for the recommended time. This will ensure maximum durability and longevity for your decorated phone case.
8. Enjoy your masterpiece: Once everything is dry and cured, your phone case is ready to be used and flaunted! Show off your creative skills and enjoy the sparkle and shine that the rhinestones add to your phone case.
Remember, practice makes perfect. Don’t worry if your first attempt doesn’t turn out exactly as you imagined. Experiment with different designs, colors, and arrangements to find the style that suits you best. With time and practice, you’ll become a rhinestone decorating expert!
Conclusion
In conclusion, decorating a phone case with rhinestones is a creative and fun way to personalize your device. With just a few simple steps, you can transform your phone case into a dazzling accessory that reflects your style and personality.
Whether you prefer a subtle and elegant look or a bold and extravagant design, rhinestones offer endless possibilities for customization. From geometric patterns to intricate motifs, you can let your imagination run wild and create a phone case that stands out from the crowd.
Not only does decorating a phone case with rhinestones add a touch of glamour, but it also provides an extra layer of protection for your device. The rhinestones act as a barrier against scratches and everyday wear and tear, ensuring that your phone stays in pristine condition.
So why settle for a plain and generic phone case when you can turn it into a dazzling accessory? Start experimenting with rhinestones today and let your creativity shine through!
FAQs
1. Can I decorate any type of phone case with rhinestones?
Yes, you can decorate almost any type of phone case with rhinestones. However, it is important to consider the material of the phone case. Hard plastic and silicone cases are the most suitable for rhinestone decorations due to their smooth surface. It might be more challenging to decorate textured or fabric phone cases.
2. What tools do I need to decorate a phone case with rhinestones?
To decorate a phone case with rhinestones, you will need the following tools:
– Rhinestones of your choice
– Adhesive, such as E6000 or jewel glue
– Tweezers or rhinestone picker
– Toothpicks or wooden skewers for application
– Toothpaste or rubbing alcohol to clean the surface
3. How do I adhere the rhinestones to the phone case?
Here’s a step-by-step guide to adhere rhinestones to your phone case:
– Clean the surface of the phone case with toothpaste or rubbing alcohol to remove any dirt or oils.
– Apply a small amount of adhesive, like E6000 or jewel glue, to the back of each rhinestone using a toothpick or wooden skewer.
– Use tweezers or a rhinestone picker to carefully place the rhinestones on the phone case in your desired pattern or design.
– Press down gently on each rhinestone to ensure they are securely attached to the case.
– Let the adhesive dry completely, following the manufacturer’s instructions, before handling the phone case.
4. How long does it take for the adhesive to dry?
The drying time for the adhesive will vary depending on the brand and type of adhesive you use. In general, it is best to wait at least 24 hours for the adhesive to fully cure and dry. Be sure to check the manufacturer’s instructions for the specific drying time of the adhesive you are using.
5. Can I remove rhinestones from my phone case if I change my mind?
Yes, you can remove rhinestones from your phone case if you change your mind or want to redesign it. The process of removal will depend on the adhesive you used. Some adhesives can be softened with heat or solvents, making it easier to peel off the rhinestones without damaging the case. However, it is important to be cautious and gentle while removing the rhinestones to avoid any scratches or marks on the phone case.