
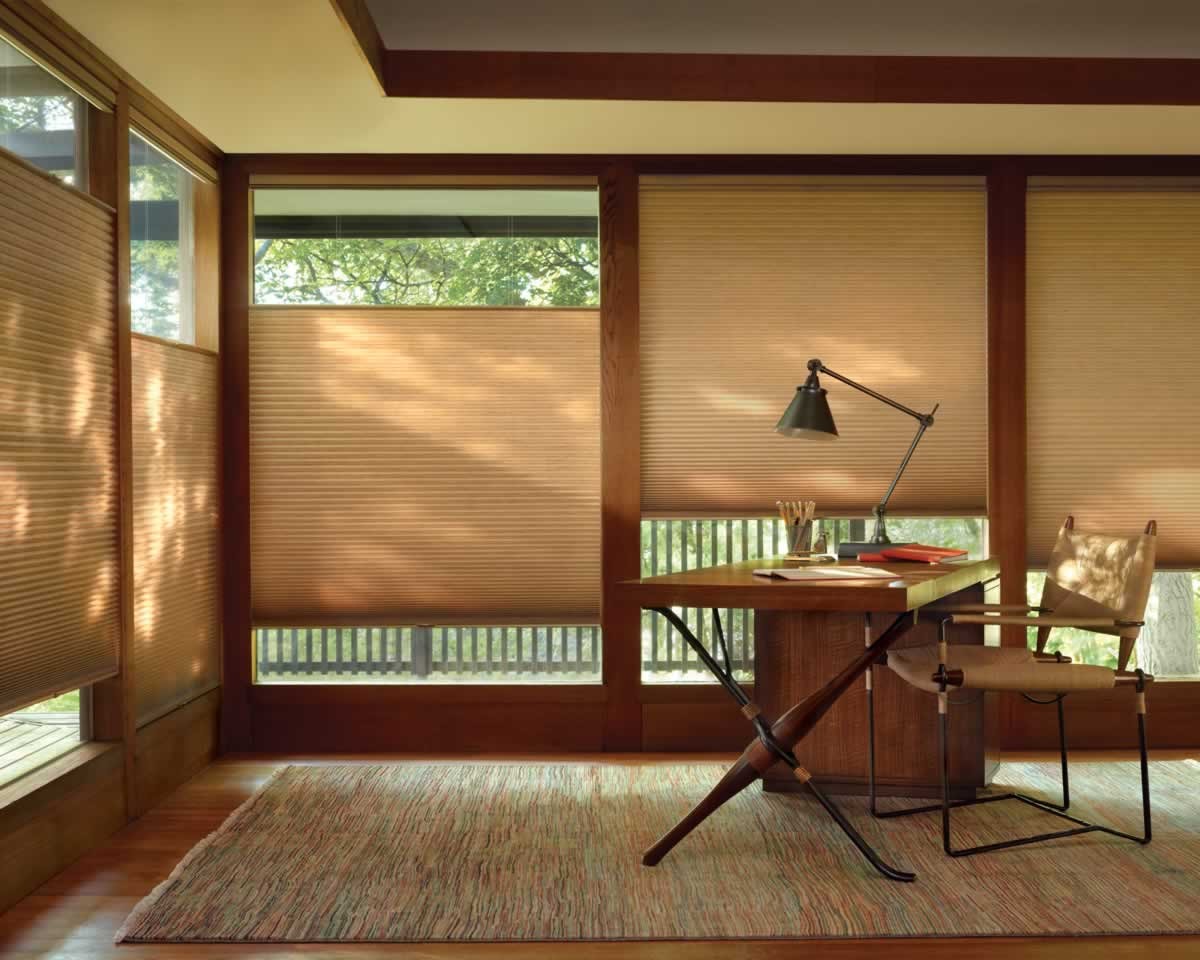
Are you looking to add some versatility and functionality to your windows? Installing cellular shades with the top-down bottom-up feature might be just what you need! These shades offer a unique way to control light and privacy by allowing you to adjust the position of the shade from both the top and bottom. Whether you want to allow natural light to filter in while maintaining privacy or enjoy an unobstructed view while still blocking out direct sunlight, top-down bottom-up cellular shades give you the flexibility to do so. In this article, we will guide you through the installation process of these shades step by step, ensuring that you can enjoy the benefits they offer in no time!
Inside This Article
- Overview
- Materials Needed
- Step 1: Measure the Window
- Step 2: Mount the Brackets
- Step 3: Install the Top Rail
- Step 4: Insert the Cellular Shades
- Step 5: Test the Top Down Bottom Up Functionality
- Step 6: Secure the Bottom Rail
- Step 7: Adjust the Shade Position
- Step 8: Check for Proper Operation
- Conclusion
- FAQs
Overview
Installing cellular shades with a top down bottom up function is a great way to enhance privacy and control the amount of light entering a room. They offer versatility and style, making them a popular choice among homeowners. In this guide, we will walk you through the step-by-step process of installing cellular shades with a top down bottom up functionality.
Cellular shades, also known as honeycomb shades, are constructed with a unique cellular design that creates air pockets. These air pockets help to insulate your home, keeping it cooler in the summer and warmer in the winter. The top down bottom up feature allows you to adjust the shades from both the top and the bottom, providing you with complete control over light and privacy.
Before you begin the installation process, it is important to gather the necessary materials. Here’s a list of what you’ll need:
- Cellular Shades with top down bottom up functionality
- Mounting brackets
- Screws
- Drill
- Measuring tape
- Screwdriver
Now that you have the materials ready, let’s move on to the step-by-step installation process.
Materials Needed
Before you start installing cellular shades with the top-down bottom-up functionality, make sure you have the following materials on hand:
- Tape Measure: A reliable tape measure will allow you to accurately measure the dimensions of your window.
- Cellular Shades: Purchase cellular shades with the top-down bottom-up feature. These shades are designed with adjustable sections, allowing you to control the amount of light and privacy.
- Brackets: Depending on the manufacturer, brackets may be included with your cellular shades. If not, make sure to purchase the appropriate brackets that will fit your window and the cellular shade specifications.
- Screws: You will need screws to mount the brackets onto the window frame or the wall, depending on the installation type.
- Drill: Use a drill and the appropriate drill bit size to create pilot holes for the screws.
- Screwdriver: A screwdriver will be needed to secure the brackets in place and to make any necessary adjustments.
- Level: A level will ensure that the brackets are mounted perfectly straight, resulting in a properly aligned cellular shade.
- Pencil: Use a pencil to mark the screw hole positions on the window frame or wall.
- Step Stool or Ladder: Depending on the height of your window, you may need a step stool or ladder to safely reach and install the cellular shades.
- Helper: Having an extra pair of hands can be helpful during the installation process, especially when mounting the brackets or adjusting the cellular shades.
Make sure you have all the necessary materials before you begin the installation process. This will help ensure a smooth and efficient installation of your cellular shades with top-down bottom-up functionality.
Step 1: Measure the Window
The first step in installing cellular shades top down bottom up is to accurately measure your window. Proper measurements ensure that the shades will fit snugly and function correctly.
Here’s how to measure your window:
- Start by using a metal measuring tape to measure the width of the window from left to right. Measure at three points – the top, middle, and bottom – and record the narrowest width.
- Next, measure the height of the window from top to bottom. Again, measure at three points – the left, center, and right – and record the shortest height.
- Take note of any obstructions, such as window locks or handles, that may affect the installation process or interfere with the operation of the shades. Make sure to measure around these obstructions to ensure accurate sizing.
Keep in mind that it’s essential to measure the actual window frame, not the size of any existing window treatments or coverings that may be present.
Once you have recorded the accurate measurements, you can proceed to the next step of installing cellular shades top down bottom up.
Step 2: Mount the Brackets
After measuring your window and determining the proper placement for your cellular shades, it’s time to mount the brackets. The brackets are essential components that will hold the shades securely in place.
Begin by locating the brackets included with your cellular shades. These brackets typically consist of two parts: the mounting bracket and the face bracket. The mounting bracket is the piece that will attach to the wall or window frame, while the face bracket is the part that will hold the shade.
Using a pencil, mark the position where you want to mount the brackets. Make sure to align them properly with the top of the window frame or the desired placement location. Take into consideration any obstructions such as handles or levers that might interfere with the installation.
Next, using a drill and the appropriate size drill bit, create pilot holes for the screws that will secure the brackets. Be mindful of the material you’re drilling into, as different surfaces may require different types of anchors or screws.
Once the pilot holes are created, position the mounting brackets over the holes and use a screwdriver or power drill to secure them tightly. Make sure the brackets are level and aligned correctly before fully tightening the screws.
Repeat this process for each bracket, ensuring that you place them at evenly spaced intervals along the window frame. It’s recommended to use at least two brackets for smaller shades and three brackets for larger ones to provide adequate support.
Once all the brackets are securely in place, give them a gentle tug to test their stability. They should feel firmly anchored to the wall or window frame without any signs of movement.
With the brackets mounted, you’re now ready to move on to the next step in the installation process: installing the top rail of the cellular shades.
Step 3: Install the Top Rail
Once you have measured the window and mounted the brackets, it’s time to install the top rail of your cellular shades. The top rail serves as the anchor for the shades and ensures proper positioning and functionality. Follow these steps to install the top rail:
1. Begin by inserting the top rail into the brackets. The brackets should have a groove or slot where the rail can slide in. Align the rail with the brackets and carefully push it into place.
2. Once the rail is securely inserted into the brackets, use a level to ensure that it is perfectly horizontal. This will ensure that your shades will function smoothly and that they will be properly aligned with the window frame.
3. With the rail in position, use a pencil to mark the locations of the screw holes on the rail. These holes will be used to secure the rail to the brackets.
4. Remove the rail from the brackets and set it aside. Use a drill with the appropriate-sized drill bit to create pilot holes at the marked locations. These pilot holes will make it easier to insert the screws later on.
5. Once the pilot holes are drilled, place the rail back into the brackets. Align the screw holes on the rail with the pilot holes, and insert the screws using a screwdriver or power drill. Tighten the screws securely, but be careful not to overtighten and strip the holes.
6. After all screws are tightened, double-check the levelness of the rail to ensure it hasn’t shifted during the installation process. Adjust if necessary.
7. Finally, give the rail a gentle tug to make sure it is securely attached to the brackets. If it feels loose or wobbly, recheck the screws and tighten as needed.
By following these steps, you will successfully install the top rail of your cellular shades. This crucial step creates a stable and secure foundation for the shades, allowing them to operate smoothly and effectively.
Step 4: Insert the Cellular Shades
After mounting the brackets and installing the top rail, it’s time to insert the cellular shades into the window frame. This step will complete the installation process and bring your window treatment to life.
Here’s how to insert the cellular shades:
-
Begin by unfolding the cellular shades and holding them with both hands. Make sure that the shades are facing the right direction, with the smooth side facing the room and the pleated side facing the window.
-
Align the shades with the top rail and gently guide the top edge of the shades into the grooves or channels on the rail. Slowly slide the shades into place, ensuring that they are centered and evenly distributed.
-
Continue inserting the shades into the grooves by guiding them downwards. Be careful to avoid any twisting or misalignment as you slide the shades into position.
-
Once the entire length of the shades is inserted into the top rail, verify that they are hanging straight and evenly. Adjust them if necessary by gently straightening or repositioning them.
-
Check that the bottom rail of the shades is aligned with the window sill. If needed, adjust the height of the shades by manually pulling down on the bottom rail and locking it in place at the desired position.
Remember to handle the cellular shades with care during the insertion process to avoid any damage or creasing. Take your time and ensure that the shades are properly aligned and smoothly inserted into the window frame.
Step 5: Test the Top Down Bottom Up Functionality
Once you have successfully installed the cellular shades and secured the top and bottom rails, it is time to test the top down bottom up functionality. This feature allows you to control the position of the shade, giving you the flexibility to let in natural light from the top while also maintaining privacy from the bottom.
To test the top down bottom up functionality, follow these steps:
- Lower the shade completely: Start by pulling the shade down to its fully extended position. This will ensure that the internal cords are properly aligned.
- Release the top latch: Find the latch located on the top rail of the cellular shade. Gently release the latch by pushing it away from the shade.
- Lower the top portion of the shade: With the latch released, gently pull down on the top rail to lower the upper portion of the shade. This will allow natural light to enter through the top of the window while maintaining privacy at the bottom.
- Raise the bottom portion of the shade: To bring the shade back to its fully extended position, lift the bottom rail upward. This will raise the bottom portion of the shade and provide a clear view of the window.
- Adjust the position: Once you have tested the top down bottom up functionality, you can adjust the position of the shade to your desired height. Simply raise or lower the top and bottom rails accordingly.
By testing the top down bottom up functionality, you can ensure that the cellular shades are working properly and providing the desired level of light control and privacy. This feature is especially useful in spaces where natural light is desired, but complete visibility is not.
It’s important to note that not all cellular shades have the top down bottom up functionality, so make sure to check the product specifications before purchasing. If this feature is important to you, be sure to select cellular shades that offer this option.
With the top down bottom up functionality tested and confirmed, you can now enjoy the benefits of cellular shades in your home. They provide insulation, privacy, and light control, all while adding a touch of elegance to your windows.
Step 6: Secure the Bottom Rail
Once you have successfully installed the top rail and inserted the cellular shades, the next step is to secure the bottom rail. This is an essential part of the installation process as it ensures that the shades are stable and will stay in place, providing you with optimal privacy and light control.
To secure the bottom rail, start by positioning it at the desired height. The bottom rail should align with the bottom edge of the window frame or sill. Make sure it is centered and level, using a level tool if necessary.
Next, mark the location of the mounting brackets for the bottom rail. Typically, there are two brackets that need to be installed – one on the left side and one on the right side of the window frame or sill. Use a pencil to mark these locations accurately.
Once you have marked the bracket locations, it’s time to install them. Use a drill and the appropriate screws to attach the brackets securely to the window frame or sill. Make sure the brackets are aligned with the pencil marks and are tightly fastened.
After the brackets are properly installed, you can now attach the bottom rail to them. Slide the bottom rail into the brackets, making sure it is seated securely. Give it a gentle tug to check if it is firmly attached and doesn’t move easily.
It is important to note that the bottom rail should be level and straight. You can use a level tool to double-check its alignment. If necessary, make minor adjustments to ensure the bottom rail is horizontally aligned.
Lastly, once you have secured the bottom rail, carefully check the entire installation for any signs of instability or unevenness. Ensure that the cellular shades move smoothly and without any obstructions. If any adjustments are needed, make them before moving on to the final step.
With the bottom rail securely in place, you have completed the crucial step of securing the cellular shades. This ensures that they will stay in position and provide you with the desired functionality and aesthetic appeal. Now, you can move on to the next step to adjust the shade position.
Step 7: Adjust the Shade Position
Once you have successfully installed the cellular shades and secured the bottom rail, it’s time to adjust the shade position to achieve the desired level of light and privacy in your space. Follow these simple steps to adjust the shade position:
1. Begin by pulling the cords or operating the control mechanism of the cellular shades to lower them to the desired height. This will give you an initial idea of how much light and privacy the current position offers.
2. If you find that the shade is too high and allows too much light to enter the room or compromises your privacy, you can lower it by gently pulling the cords or using the control mechanism. Keep lowering the shade until you reach the desired position.
3. On the other hand, if the shade is too low and restricts too much light or obstructs the view, you can slowly raise it by pulling the cords or operating the control mechanism. Gradually raise the shade until you achieve the desired balance of light and privacy.
4. As you make these adjustments, pay attention to the alignment of the shade with the window frame. Ensure that the shade is evenly positioned and centered within the frame for a neat and balanced appearance.
5. Don’t be afraid to experiment with different shade positions to find the perfect balance for your space. You may need to make multiple adjustments until you achieve the ideal combination of light control, privacy, and aesthetics.
6. While adjusting the shade position, be mindful of any obstructions or nearby objects that may interfere with the smooth operation of the shade. Ensure that the cords or control mechanism are not getting caught or tangled with furniture, window handles, or other items.
7. Finally, step back and take a moment to assess the shade position from both the inside and outside of the room. Observe how the light filters through the cellular fabric and the overall visual impact of the shades on the window and the surrounding space.
By carefully adjusting the shade position, you can customize the level of light and privacy to suit your preferences, create a cozy and comfortable ambiance, and enhance the overall aesthetics of your room.
Step 8: Check for Proper Operation
Once you have installed your cellular shades using the top down bottom up method, it is important to check if they are functioning properly. Here are some steps to ensure everything is working as it should:
1. Lower and raise the shades: Begin by testing the basic functionality of the shades. Lower them completely down and then raise them all the way up to the top. Make sure the shades move smoothly and without any obstructions. If you encounter any difficulties, check for any debris or objects that may be blocking the movement.
2. Test the top down feature: Now, it’s time to test the top down function. Lower the shades from the top, allowing them to stop at your desired height. Again, make sure the movement is smooth and effortless. If the shades get stuck or do not stay in position, adjust the tension on the control mechanism accordingly.
3. Try the bottom up feature: Next, test the bottom up functionality of the shades. Raise the shades from the bottom, allowing them to reach the desired height. Ensure that the shades move freely and lock into position without any issues. If you experience any resistance or failure to lock, adjust the tension or contact the manufacturer for assistance.
4. Check for proper alignment: Take a step back and observe the alignment of the shades when in the fully raised or lowered position. They should be aligned straight and evenly on both sides. If you notice any tilting or unevenness, make adjustments to the brackets or the positioning of the shades to rectify the issue.
5. Inspect for any damage: Carefully inspect the shades for any signs of damage or wear and tear. Check for any frayed cords, loose components, or bent rails. If you notice any issues, repair or replace the damaged parts before continuing to use the shades.
6. Ensure smooth and quiet operation: As you operate the shades, pay attention to any unusual noises or rough movements. Ideally, the shades should open and close smoothly and quietly. If you notice any grinding sounds or jerky motions, it may indicate a problem that needs to be addressed.
7. Test different positions: Finally, test the shades at various heights and positions to ensure consistent operation throughout. Raise and lower them partially, stopping at different points, and observe how they hold their position. The shades should stay in place without slipping or sliding on their own.
By following these steps and conducting a thorough check, you can ensure that your cellular shades are installed properly and operating smoothly. If you encounter any issues or need assistance, refer to the manufacturer’s instructions or reach out to a professional for help.
Conclusion
Installing cellular shades with the top-down, bottom-up feature offers a versatile and practical solution for controlling light, privacy, and insulation in your home. This innovative design allows you to adjust the shades from both the top and the bottom, giving you complete control over the amount of light and privacy you desire.
By following the step-by-step instructions outlined in this article, you can easily install cellular shades with the top-down, bottom-up functionality. Remember to gather all the necessary tools, measure your windows accurately, and double-check your work to ensure a proper fit and seamless installation.
With the installation complete, you will enjoy the benefits of cellular shades, such as energy efficiency, noise reduction, and a stylish aesthetic. Whether you want to bring in natural light while maintaining privacy or create a cozy, insulated environment, cellular shades with the top-down, bottom-up feature provide a practical and stylish solution for any home.
FAQs
Q: What are cellular shades?
A: Cellular shades, also known as honeycomb shades, are window coverings made of multiple layers of fabric. These layers are designed to form cells that trap air and provide insulation, making them highly energy-efficient.
Q: How do cellular shades work?
A: Cellular shades work by trapping air in their honeycomb-like cells. This air creates a barrier, preventing heat loss in winter and heat gain in summer. It helps in maintaining a comfortable and consistent temperature in your home, reducing the need for excessive heating or cooling.
Q: Can cellular shades be installed top-down bottom-up?
A: Yes, cellular shades can be installed top-down, bottom-up, or both. Top-down bottom-up cellular shades allow you to raise the shades from the bottom or lower them from the top. This versatile installation option gives you more control over privacy and lighting, allowing you to enjoy natural light while retaining privacy.
Q: How do I install cellular shades top-down bottom-up?
A: To install cellular shades in a top-down, bottom-up configuration, you will need mounting brackets, screws, a screwdriver, and a measuring tape. Follow these steps:
1. Measure and mark the desired height and width for your shades.
2. Install the brackets at the desired height using the provided screws.
3. Align the shade with the brackets and clip it in place.
4. Test the functionality by raising and lowering the shade from both the top and bottom.
Q: What are the benefits of installing cellular shades top-down bottom-up?
A: Installing cellular shades in a top-down, bottom-up configuration offers several benefits:
– Enhanced privacy: You can lower the shades from the top to maintain privacy while still allowing natural light to filter in.
– Flexible light control: By raising the shades from the bottom, you can control the amount of light entering the room, reducing glare and protecting your furniture from sun damage.
– Energy savings: The ability to adjust the shades at different heights allows you to maximize natural light and reduce the need for artificial lighting, saving on energy costs.