
Photo slideshows are a popular way to showcase your most cherished memories or create engaging presentations. However, when displaying your slideshows on external monitors or displays, you may encounter issues with the quality and resolution of your photos. In this tutorial, we will explore effective techniques to maximize the quality of your photo slideshow on external displays. Whether you are using a projector for a professional presentation or sharing your vacation photos on a large-screen TV, we will provide you with valuable tips and tricks to enhance the visual appeal of your slideshows. From optimizing image settings to selecting the right file formats, we will guide you through the steps to ensure that your photos look stunning and vibrant on any external display. Get ready to take your photo slideshows to the next level!
Inside This Article
- Understanding the Importance of Photo Slideshow Quality
- Choosing the Right External Display for Photo Slideshows
- Optimizing Image Resolution and Format
- Adjusting Display Settings for Maximum Quality
- Calibrating Colors for Accurate Reproduction
- Enhancing Image Sharpness and Clarity
- Properly Managing Slideshow Software Settings
- Conclusion
- FAQs
Understanding the Importance of Photo Slideshow Quality
When it comes to showcasing your photos, whether it’s for a personal slideshow or a professional presentation, the quality of the visuals is paramount. A photo slideshow allows you to bring your images to life, creating a captivating and immersive experience for your audience. But why does photo slideshow quality matter? Let’s delve deeper into its importance.
Firstly, the quality of your photo slideshow enhances the overall aesthetics of your presentation. High-resolution images with vibrant colors, rich details, and sharpness can make a significant impact on the viewer. It creates a sense of professionalism and attention to detail, ensuring that your photos are showcased in the best possible way.
Secondly, photo slideshow quality affects the viewer’s engagement and enjoyment. When images are displayed in high definition, with accurate color reproduction and clarity, it draws the viewer’s attention and captivates their interest. This leads to a more immersive and memorable experience, leaving a lasting impression on the audience.
Additionally, photo slideshow quality plays a crucial role in conveying the intended message and storytelling. Every photo has a story to tell, and a high-quality slideshow ensures that this narrative is conveyed effectively. With crisp details, vibrant colors, and optimal image sharpness, your photos will communicate their intended emotions and themes more powerfully.
Moreover, in a professional setting, the quality of your photo slideshow can impact your credibility and reputation. Whether you are presenting at a conference, showcasing your work to potential clients, or displaying your products, a visually stunning slideshow reflects your professionalism and attention to detail. It instills confidence and trust in your audience, making them more likely to engage with your content and take your message seriously.
Lastly, the importance of photo slideshow quality lies in preserving and honoring the artistry of your photography. As a photographer, you have invested time, effort, and creativity in capturing these moments and transforming them into visual masterpieces. By ensuring high-quality slideshow presentation, you are honoring your craft and showcasing your work in the best possible way.
Choosing the Right External Display for Photo Slideshows
When it comes to showcasing your photo slideshows, the quality of the external display you choose plays a crucial role in the overall impact of your images. While there are countless options available in the market, not all displays are created equal. To ensure that your photos are seen in the best possible light, it’s important to consider a few key factors when selecting an external display for your slideshows.
First and foremost, you’ll want to consider the size of the display. A larger screen allows for better visibility and detail, particularly when showcasing high-resolution images. Opt for a display with a size that suits the space in which you’ll be presenting your slideshows. Whether it’s a small gathering or a large event, the right display size will ensure that your photos are seen by everyone in the room.
Next, consider the resolution of the external display. Higher resolution displays offer sharper and more vibrant images. Look for a display with at least Full HD (1920×1080) resolution, but if you want to go the extra mile, consider displays with 4K resolution for unparalleled clarity and detail.
Furthermore, pay attention to the display’s color accuracy. A display with good color reproduction ensures that your photos are displayed as intended, with accurate and lifelike hues. Look for displays with a high color gamut and color calibration options for fine-tuning the colors to match your photos.
Connectivity options also play a role in choosing an external display. Consider the types of devices you’ll be using to connect to the display, such as laptops, cameras, or media players. Ensure that the display offers the necessary ports, such as HDMI or DisplayPort, and supports the appropriate resolutions for seamless connectivity.
Last but not least, consider the overall quality and build of the external display. Look for reputable brands with positive reviews that offer warranties and reliable customer support. Investing in a high-quality display not only ensures better image quality but also guarantees longevity and reliability for your future slideshows.
By taking these factors into consideration, you can choose the right external display that will maximize the quality and impact of your photo slideshows. Remember, a well-chosen display can truly elevate your photos and create a memorable visual experience for your audience.
Optimizing Image Resolution and Format
When it comes to creating a photo slideshow with stunning visual impact on external displays, optimizing image resolution and format is paramount. By ensuring that your images are of the highest quality and compatibility, you can guarantee an immersive and captivating experience for your viewers. Here are some essential tips to help you achieve optimal image resolution and format for your slideshow:
- Start with high-resolution images: The resolution of your images determines their quality and clarity when displayed on external screens. It’s recommended to use high-resolution photos, preferably with a resolution of at least 1920×1080 pixels or higher. This ensures that the images will appear sharp and detailed on larger displays.
- Consider the aspect ratio: Different screens may have different aspect ratios, so it’s important to choose images that match the intended display. The most common aspect ratio for slideshows and modern displays is 16:9. Ensure that your images are in this ratio or can be easily cropped without losing important elements.
- Choose the right file format: To maintain image quality and compatibility, it’s best to use common file formats such as JPEG or PNG. These formats offer a good balance between image quality and file size. Avoid using formats like GIF or BMP, as they may result in lower-resolution or bloated file sizes.
- Compress images without compromising quality: Large image file sizes can lead to slower loading times and may affect the overall performance of your slideshow. To optimize file size without sacrificing image quality, you can use image compression techniques. There are online tools and software available that enable you to compress images while preserving their visual integrity.
- Avoid excessive resizing: While resizing images can be necessary to fit them into your slideshow, avoid excessive resizing as it may result in pixelation or blurriness. If possible, use images that are already close to the desired resolution to maintain the best quality.
- Test your images on the target display: Before finalizing your slideshow, it’s crucial to test your images on the specific external display you’ll be using. This ensures that the visual quality and compatibility are optimized for that particular screen, taking into account its unique characteristics, such as color reproduction and sharpness.
By following these tips, you can optimize the resolution and format of your images for your photo slideshow, ensuring that each image is displayed with the utmost clarity and visual impact on external displays. Consider taking the time to fine-tune these aspects to create a truly mesmerizing and immersive experience for your viewers.
Adjusting Display Settings for Maximum Quality
When it comes to enjoying a photo slideshow on an external display, adjusting the display settings is paramount to achieving maximum quality. By making a few simple tweaks, you can enhance the visual impact of your photos, ensuring every detail is crisp and vibrant. Here are some tips to help you get the best possible display quality.
1. Resolution and Scaling: Start by adjusting the resolution and scaling settings on your external display. A higher resolution will provide sharper and more detailed images. Make sure the resolution is set to match the capabilities of your display and the aspect ratio of your photos. Avoid using scaling options that stretch or compress the images, as this can result in distortion.
2. Brightness and Contrast: Optimal brightness and contrast settings are crucial for a visually appealing photo slideshow. Adjust the brightness to a level that allows the colors to pop without appearing washed out. Similarly, find a contrast setting that accentuates the differences between light and dark areas of the image, providing depth and richness.
3. Color Temperature: The color temperature of your display can significantly impact the overall appearance of your photos. Experiment with different color temperature presets or manually adjust the color temperature to achieve the desired effect. Cooler temperatures tend to make the images appear bluer, while warmer temperatures give a more orange or yellowish tone.
4. Sharpness and Clarity: Enhancing the sharpness and clarity of your photos can make a world of difference in their visual impact. Most external displays have settings for sharpness that allow you to adjust the level of image detail. Be careful not to over-sharpen, as this can introduce artifacts. Find the right balance to bring out the fine details without sacrificing image quality.
5. Motion Blur Reduction: If you’re displaying a slideshow with moving images, enabling motion blur reduction can greatly improve the viewing experience. This feature minimizes the blurring caused by fast camera movements or actions in the photos. Check your display settings for any motion blur reduction options and enable them for smoother visuals.
6. Gamma Correction: Gamma correction helps adjust the brightness and contrast of different shades in an image. By default, your display may have a gamma setting, but tweaking it can lead to better overall image quality. Experiment with different gamma settings to find the sweet spot that brings out the details and colors in your photos.
7. Viewing Angle: Consider the viewing angle of your external display. Some displays have wide viewing angles, allowing the image to be viewed clearly from different positions. Adjust the placement and angle of your display to ensure everyone can enjoy the photo slideshow with maximum quality, regardless of where they are seated.
By adjusting these display settings, you can optimize the quality of your photo slideshow on an external display. Take the time to fine-tune each setting to bring out the best in your photos and create a visually stunning experience for everyone.
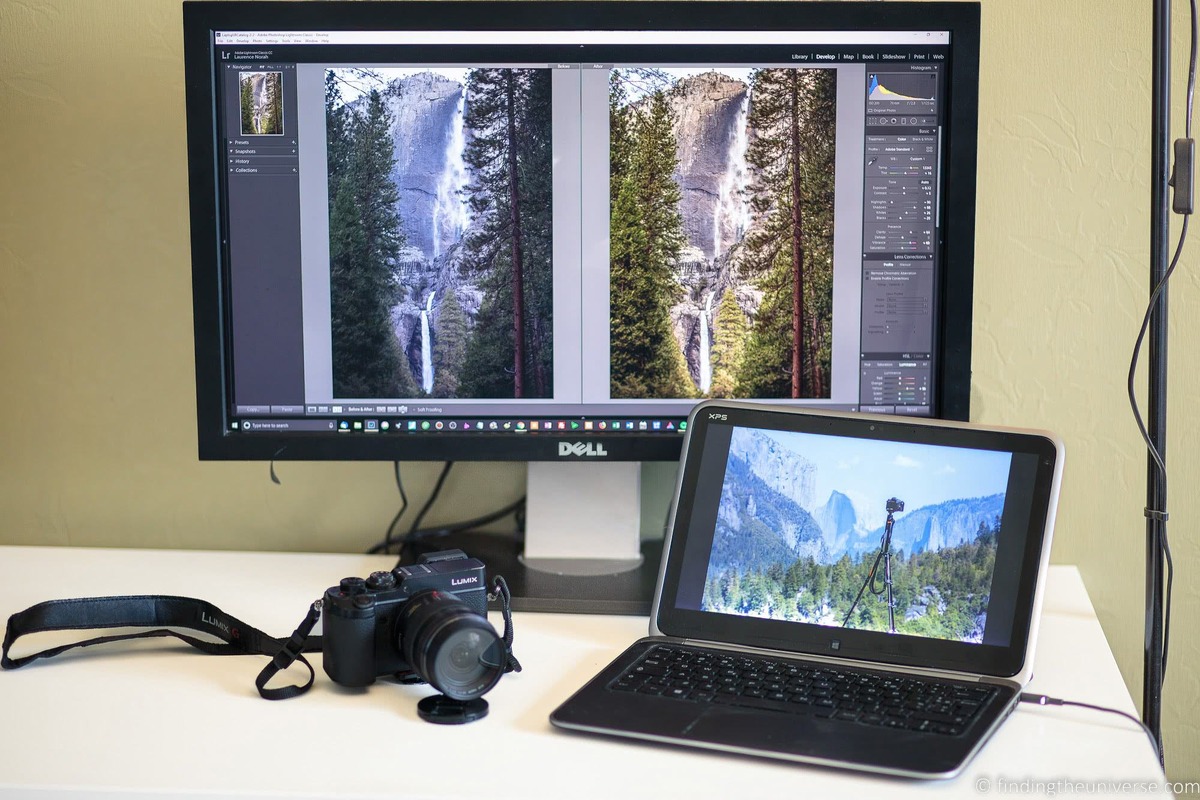
Calibrating Colors for Accurate Reproduction
Calibrating colors is a crucial step in maximizing the photo slideshow quality on external displays. Proper calibration ensures that the colors displayed on the screen match the colors of the original images, resulting in accurate reproduction.
When it comes to calibrating colors, there are a few options to consider. One of the most popular methods is using a color calibration tool or device. These tools measure and adjust the color accuracy of the display, taking into account factors like brightness, contrast, and color temperature.
Before calibrating colors, it’s important to ensure that the external display is properly connected to your device. Make sure that the display is recognized and set as the primary monitor. This will ensure that the calibration settings are applied correctly.
Once your display is properly connected, you can begin the color calibration process. Start by accessing the display settings on your device. Look for options related to color calibration or color management. These settings may vary depending on your operating system and graphics card.
Some calibration tools come with their own software that guides you through the calibration process step by step. Follow the instructions provided by the software to adjust the color settings accordingly. This may involve adjusting the RGB values, gamma, and hue levels to achieve accurate color reproduction.
During the calibration process, it’s important to view a variety of images to ensure that the colors are accurately represented. Look for images with different color tones and shades, as well as images with vibrant colors, to test the accuracy of the calibration.
It’s also worth noting that ambient lighting can affect the perception of colors. Ideally, calibrate your display in a well-lit room with neutral lighting conditions. Avoid harsh overhead lighting or direct sunlight, as it can skew the perception of colors and compromise the accuracy of the calibration.
Once you have calibrated the colors, it’s a good practice to periodically recheck and recalibrate to maintain the accuracy of the display. Over time, factors like aging of the display or changes in lighting conditions can affect color reproduction.
By calibrating the colors of your external display, you can ensure that your photo slideshow is displayed with accuracy and true-to-life colors. This enhances the overall viewing experience and allows your photos to shine in their full glory.
Enhancing Image Sharpness and Clarity
When it comes to creating a visually stunning photo slideshow on external displays, enhancing image sharpness and clarity is crucial. A sharp and clear image can make a significant difference in the overall quality of your slideshow, allowing viewers to fully appreciate the details and nuances of each photo.
Here are some tips and techniques to help you enhance the sharpness and clarity of your images:
1. Start with high-resolution images: The quality of your slideshow largely depends on the resolution of the images you use. High-resolution photos have more pixels, which means more details and better clarity. Make sure to use images with a resolution suitable for your external display to maximize sharpness and clarity.
2. Use image editing software: Image editing software like Adobe Photoshop or Lightroom can be a powerful tool for enhancing sharpness and clarity. These programs offer various features and filters that allow you to sharpen edges, reduce noise, adjust contrast, and improve overall image quality.
3. Avoid over-sharpening: While it’s important to sharpen your images, be careful not to overdo it. Over-sharpening can create unnatural artifacts and make your images appear harsh or exaggerated. Use the sharpening tools in your editing software judiciously, and always preview the changes to ensure a natural-looking result.
4. Optimize image compression: When saving your images, choose the appropriate compression level to balance file size and image quality. High levels of compression can result in loss of details and introduce artifacts that affect sharpness and clarity. Experiment with different compression settings to find the right balance for your images.
5. Pay attention to lighting and exposure: Proper lighting and exposure play a crucial role in image sharpness. Good lighting conditions can minimize noise and maximize the sharpness of your photos. Take care to properly expose your images and avoid under or overexposure, which can negatively impact sharpness and clarity.
6. Consider using sharpening filters: Some slideshow software or image editing tools offer sharpening filters specifically designed to enhance sharpness and clarity in photos. These filters intelligently analyze the image and apply sharpening techniques to bring out details and improve overall image quality.
7. Display at the correct resolution: One often overlooked aspect is ensuring that your external display is set to its native resolution. If the display is not set to its optimal resolution, it can negatively affect the sharpness and clarity of your slideshow. Adjust the display settings to match your external display’s recommended resolution for the best results.
8. Use high-quality cables: The quality of the cable connecting your device to the external display can also impact image sharpness and clarity. Investing in high-quality cables that support high resolutions and ensure a stable connection can make a noticeable difference in the visual quality of your slideshow.
By following these tips and techniques, you can significantly enhance the sharpness and clarity of your images in your photo slideshow. Remember to experiment with different settings and preview the changes to achieve the desired results. With a well-optimized slideshow, you can captivate your audience and showcase your photos in all their stunning glory.
Properly Managing Slideshow Software Settings
When it comes to creating high-quality photo slideshows, properly managing the settings in your slideshow software is crucial. By optimizing the software settings, you can ensure that your photos are displayed in the best possible way, with accurate colors, smooth transitions, and optimal performance. Here are some key factors to consider when managing slideshow software settings:
1. Transition Effects: Choose the right transition effects that complement your photos and enhance the visual appeal of the slideshow. Avoid using too many fancy effects that may distract viewers from the main focus, but also make sure there is enough variety to keep the slideshow engaging.
2. Timing and Duration: Adjust the timing and duration of each slide to create a natural flow and pacing. Avoid making the slides too short or too long, as it can disrupt the viewing experience. Experiment with different timings to find the perfect balance.
3. Background Music: Incorporate suitable background music that complements the mood and theme of your slideshow. Ensure that the volume level is appropriate and the music does not overpower the visuals. Also, consider copyright restrictions when using music.
4. Image Display Options: Explore the image display options available in your slideshow software. This may include features like pan and zoom effects, automatic image cropping, or custom layouts. Use these options to showcase your photos in a visually appealing and dynamic way.
5. Slideshow Navigation: Test the slideshow navigation options to ensure that viewers can easily navigate through the slides. Allow for manual control if desired, but also provide an option for an automatic playthrough. Also, consider implementing navigation buttons like play/pause, next/previous, and a slideshow progress bar.
6. Exporting and Sharing: Choose the appropriate exporting settings for your slideshow. Consider the resolution, file format, and compression settings to balance between file size and image quality. Additionally, explore the various sharing options, such as social media platforms or cloud storage, to share your slideshow with others.
By properly managing slideshow software settings, you can elevate the overall quality and impact of your photo slideshows. Take the time to experiment with different options and fine-tune the settings until you achieve the desired results. Remember to preview your slideshow before sharing it to ensure everything looks and functions as intended.
Conclusion
In conclusion, maximizing the quality of your photo slideshow on external displays is crucial to delivering a captivating visual experience. By following the steps and tips outlined in this tutorial, you can ensure that your photos are displayed with the utmost clarity, color accuracy, and detail.
Start by selecting the right resolution and aspect ratio for your slideshow, taking into consideration the capabilities of the external display. Then, optimize the image quality by using high-resolution photos and adjusting the brightness, contrast, and saturation levels as needed.
It’s also important to consider the file format and compression settings to maintain the highest quality possible without sacrificing loading speed. Lastly, double-check the compatibility between your device and the external display for seamless connectivity.
By implementing these strategies, you can create a stunning photo slideshow that will leave your audience in awe, whether it’s for a personal event, professional presentation, or showcasing your photography skills. So, don’t compromise on quality. Follow this tutorial and make your photo slideshow shine on external displays!
FAQs
1. Can I connect my mobile phone to an external display?
Yes, most mobile phones have the capability to connect to an external display. By using the appropriate cable or wireless connection, you can easily mirror your phone’s screen onto a larger display.
2. What cables do I need to connect my phone to an external display?
The type of cable you need to connect your phone to an external display depends on the specific connections available on your phone and the display. Some common cable options include HDMI, USB-C, or MHL cables. Check the ports on both your phone and the display to determine the compatible cable type.
3. How do I project a photo slideshow from my phone to an external display?
To project a photo slideshow from your phone to an external display, follow these steps:
1. Connect your phone to the external display using the appropriate cable or wireless connection.
2. On your phone, open the photo slideshow app or gallery.
3. Select the photos you want to include in the slideshow.
4. Start the slideshow and enjoy seeing your photos on the larger external display.
4. Can I control the photo slideshow on the external display using my phone?
Yes, in most cases, you can control the photo slideshow on the external display using your phone. Some apps and display settings allow you to navigate through the photos, pause or play the slideshow, and adjust the settings directly from your phone.
5. How can I optimize the photo slideshow quality on the external display?
To maximize the photo slideshow quality on the external display, consider the following tips:
– Ensure that your phone’s resolution matches the display’s resolution for the best compatibility and clarity.
– Use high-resolution photos for a crisp and detailed slideshow.
– Adjust the display settings, such as brightness, contrast, and color calibration, to optimize the viewing experience according to the external display’s capabilities.