
Are you looking to turn your favorite mobile phone photo into a tangible piece of art? Printing photos from your phone has become increasingly popular as smartphones have become the primary camera for many people. Whether it’s capturing a breathtaking landscape or a precious moment with loved ones, printing photos allows you to showcase those memories in a physical form.
In this article, we will guide you step-by-step on how to print a photo from your phone. We will explore various options, such as using a photo printing service, connecting your phone directly to a printer, or transferring your photos to a computer for printing. By the end of this guide, you’ll have everything you need to bring your mobile phone photos to life and decorate your home with cherished moments.
Inside This Article
- Option 1: Printing via Wireless Connection
- Option 2: Transferring the Photo to a Computer
- Option 3: Using a Mobile Photo Printer
- Conclusion
- FAQs
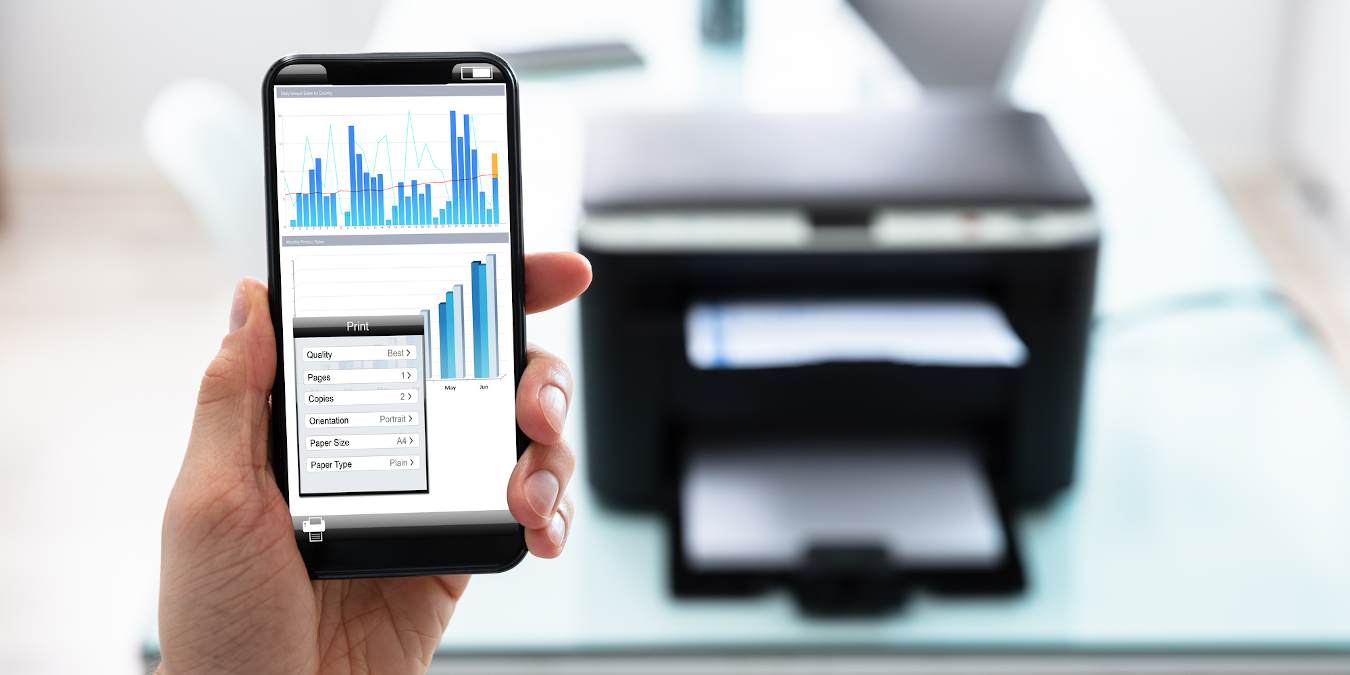
Option 1: Printing via Wireless Connection
Printing photos directly from your phone via a wireless connection is a convenient and efficient method. This option allows you to send the photo wirelessly to a compatible printer and have it printed in no time. To use this method, follow the steps below:
1. Ensure that your phone and the printer are connected to the same Wi-Fi network. This is crucial for establishing a successful connection between the two devices.
2. Open the photo that you want to print on your phone. You can either access the image from your photo gallery or download it from a cloud storage service.
3. Tap on the share icon, which is usually represented by a box with an arrow pointing upwards. This action will open a menu with various sharing options.
4. Look for the “Print” option in the sharing menu and tap on it. Your phone will then search for available printers on the network.
5. Once your phone detects the printer, select it from the list of available devices. You may also need to adjust the print settings, such as the paper size and print quality, depending on your printer model.
6. After confirming the print settings, tap on the “Print” button to start the printing process. Your phone will send the photo to the printer, and you will see the progress on your device’s screen.
7. Wait for the printer to complete the printing job. The time taken for the printing process may vary depending on the printer’s speed and the size of the photo.
8. Once the print job is finished, collect your printed photo from the printer’s output tray. You now have a physical copy of your photo that you can cherish or share with others.
Printing via wireless connection offers the convenience of not needing to transfer the photo to another device or connect any cables. It is a quick and straightforward method, especially when you have a compatible wireless printer available.
Note: Ensure that your printer supports wireless printing and that you have the necessary apps or drivers installed on your phone to enable this functionality.
Option 2: Transferring the Photo to a Computer
If you prefer to print your photos from a computer rather than directly from your phone, you have the option to transfer the photo to your computer. This method allows you to have more control over the printing process, as you can edit the photo and adjust the settings before sending it to the printer.
Here’s how you can transfer a photo from your phone to a computer for printing:
- Connect your phone to your computer using a USB cable. Ensure that the phone is unlocked, and choose the “File Transfer” mode if prompted on your phone.
- On your computer, open the file explorer or finder and locate your connected phone. It may appear as a separate device or under the “This PC” or “My Computer” section.
- Open the folder that contains your photos on your phone. This could be the “DCIM” folder or another folder where your photos are saved.
- Select the photo you want to print by clicking on it once.
- Right-click on the selected photo and choose “Copy” from the context menu.
- Navigate to the desired folder on your computer where you want to save the photo. Right-click inside the folder and choose “Paste” to transfer the photo from your phone to your computer.
- Once the photo is transferred to your computer, open the photo editing software of your choice, such as Photoshop or Lightroom.
- Import the transferred photo into the photo editing software by choosing the “File” or “Import” option and navigating to the folder where the photo is saved.
- Edit the photo as desired, adjusting the brightness, contrast, cropping, and any other settings to enhance the image.
- Once you’re satisfied with the edited photo, go to the “File” menu and select the “Print” option.
- Choose the desired printer from the list of available printers and adjust the print settings, such as paper size, orientation, and quality.
- Click “Print” to start the printing process.
By transferring the photo to your computer and using photo editing software, you can have more flexibility in printing and produce high-quality prints. This option also allows you to organize your photos in folders and easily access them for future printing needs.
Keep in mind that after printing, you can save the digital copy of the photo on your computer for safekeeping, or you can even delete it from your phone to free up storage space.
Option 3: Using a Mobile Photo Printer
Another convenient way to print a photo directly from your phone is by using a mobile photo printer. These portable printers are designed to connect wirelessly to your smartphone and produce high-quality prints in a matter of seconds.
Mobile photo printers are compact and lightweight, making them perfect for on-the-go printing. They usually come with their own smartphone app that allows you to select, edit, and enhance your photos before printing them.
To use a mobile photo printer, you’ll first need to ensure that your smartphone is compatible with the printer. Most mobile printers support both iOS and Android devices. Once you have confirmed compatibility, simply download the printer’s app from the respective app store.
Next, open the app on your phone and follow the on-screen instructions to connect your phone to the printer via Bluetooth or Wi-Fi. Once connected, you can select the photo you want to print directly from your phone’s gallery or through the printer app’s interface.
Before printing, you can make adjustments to the photo, such as cropping, resizing, applying filters, or adding text. Once you’re satisfied with the result, simply tap the print button in the app and wait for the printer to work its magic.
Mobile photo printers use special thermal printing technology that doesn’t require ink cartridges. Instead, they utilize heat-sensitive paper that is coated with dye crystals. The printer applies heat to the paper, activating the dye crystals and creating the desired image.
After the printing process is complete, your photo will be ready to be enjoyed. You can keep it as a physical keepsake, frame it, or even give it as a gift to someone special.
Mobile photo printers are a convenient and fun way to print photos directly from your phone. They allow you to capture precious moments and turn them into tangible memories with just a few taps on your smartphone.
Conclusion
Printing a photo from your phone has never been easier. With the advancement in technology, there are various methods to accomplish this task conveniently. Whether you prefer the traditional way of transferring the photo to a computer and then printing it, or utilizing wireless printing options directly from your phone, you have several options to choose from.
Remember to choose a method that suits your needs and preferences. Consider factors such as convenience, quality, and cost when deciding which method to use. Additionally, make sure to use high-quality photo paper and a good printer to ensure the best results.
By following the steps outlined in this article, you can turn your cherished memories captured on your mobile phone into beautiful physical prints that you can enjoy and share with others.
FAQs
Q: Can I print a photo directly from my phone?
A: Yes, you can easily print a photo directly from your phone. There are several methods you can use, such as connecting your phone to a printer with a USB cable, using a wireless printer that supports mobile printing, or utilizing a mobile printing app.
Q: What do I need to print a photo from my phone?
A: The requirements may vary depending on the method you choose. If you are connecting your phone to a printer with a USB cable, you will typically need a printer that supports USB connectivity. For wireless printing, you will need a compatible wireless printer. If you prefer to use a mobile printing app, you will need to install the app on your phone.
Q: How do I connect my phone to a printer with a USB cable?
A: To connect your phone to a printer with a USB cable, you will need a USB OTG (On-The-Go) adapter. This adapter allows you to connect your phone’s USB port to the printer’s USB port. Once connected, you can use your phone’s file management or photo gallery app to select the photo you want to print and send it to the printer.
Q: What if I don’t have access to a USB cable?
A: If you don’t have access to a USB cable, you can explore other options such as using a wireless printer that supports mobile printing. Many modern printers offer Wi-Fi or Bluetooth connectivity, allowing you to print directly from your phone without the need for a cable connection.
Q: Are there any mobile printing apps I can use?
A: Yes, there are several mobile printing apps available for both Android and iOS devices. These apps, such as Google Cloud Print, Epson iPrint, or HP Smart, allow you to print photos and documents from your phone to compatible printers. You can search for these apps in the Google Play Store or the Apple App Store and install the one that suits your needs.