
In today’s digital age, staying connected on the go has become essential. Whether it’s for work or personal purposes, being able to send and receive emails while using a mobile phone is a game-changer. One popular email client that provides seamless mobile connectivity is Outlook Mobile. With its user-friendly interface and powerful features, Outlook Mobile makes it easy to manage your emails effectively. In this article, we will guide you on how to send emails on Outlook Mobile, allowing you to stay organized and productive no matter where you are. So, let’s dive in and discover the simple steps to compose and send emails using the Outlook Mobile app.
Inside This Article
- # How To Send Email On Outlook Mobile
- Set Up Outlook Mobile
- Compose a New Email
- Add Recipients and Subject
- Compose and Format Email Body
- Conclusion
- FAQs
# How To Send Email On Outlook Mobile
Microsoft Outlook is a popular email client used by individuals and businesses worldwide. With the Outlook mobile app, you can now access your emails on the go and send messages from your mobile device. In this article, we’ll guide you through the process of sending an email on Outlook Mobile, ensuring that your message reaches its intended recipient with ease.
Set Up Outlook Mobile
Before you can send emails on Outlook Mobile, you’ll need to set up the app on your mobile device. Start by downloading and installing the Outlook app from your device’s app store. Once installed, open the app and sign in with your Outlook or Microsoft account credentials. Follow the on-screen instructions to complete the setup process, including granting necessary permissions.
Compose a New Email
Once you’ve successfully set up Outlook Mobile, it’s time to compose a new email. To do this, launch the app and tap on the “New Email” button, usually represented by a pencil or a plus sign. This will open a blank email template where you can begin crafting your message.
Add Recipients and Subject
The next step is to add the recipients and subject to your email. Tap on the “To” field, and a contact list will appear. You can type the email address of the recipient manually or choose from your contacts. If you need to add multiple recipients, separate their email addresses with a comma. After adding the recipients, tap on the “Subject” field to enter a concise and descriptive subject line for your email.
Compose and Format Email Body
With the recipients and subject added, it’s time to compose the body of your email. Tap on the body of the email to start typing your message. Outlook Mobile provides various formatting options like bold, italic, underline, and bullet points, allowing you to customize the appearance of your email. You can also add attachments, such as photos or documents, by tapping on the attachment icon. Once you’ve finished composing your email, review it for any errors or typos.
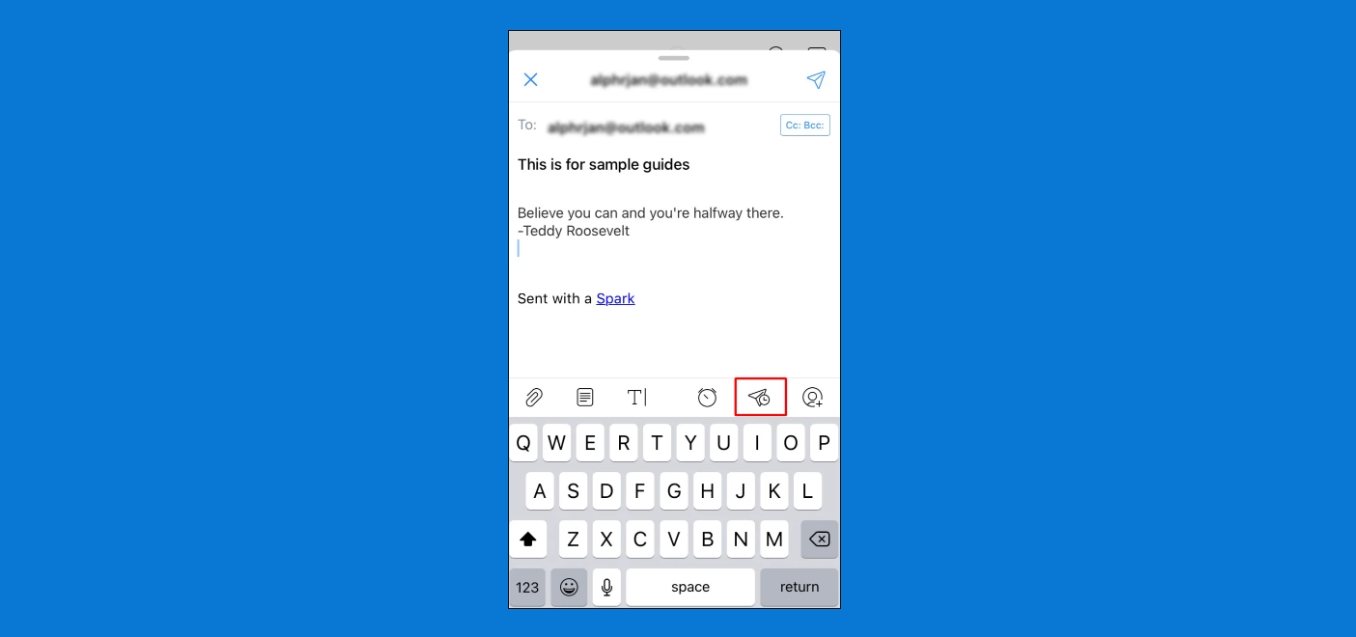
When you’re ready to send the email, tap on the send button, usually represented by a paper airplane icon. Outlook Mobile will then deliver your message to the recipients’ email addresses. You can view your sent emails in the “Sent” folder of the app.
Now that you’re familiar with the process, you can use Outlook Mobile to send emails from your mobile device with confidence. Stay connected and organized with the power of Outlook, even when you’re on the move.
Set Up Outlook Mobile
Outlook Mobile offers a seamless and convenient way to manage your email on the go. Whether you are using an Android or iOS device, setting up Outlook Mobile is a breeze. Follow these simple steps to get started:
- Download and Install the App: Start by downloading the Outlook Mobile app from your device’s app store. Once the installation is complete, launch the app to begin the setup process.
- Sign In: If you already have a Microsoft account, sign in using your existing credentials. For new users, you can create a new Microsoft account directly within the app.
- Add Email Account: After signing in, you’ll be prompted to add an email account. Enter your email address and password, and the app will automatically detect the server settings for popular email providers. Alternatively, you can manually input the server settings for your email account.
- Customize Settings: Once your email account is added, you can customize the app settings according to your preferences. This includes setting up notifications, organizing folders, and managing your signature.
That’s it! You have successfully set up Outlook Mobile and can now start sending and receiving emails on the go. It’s worth mentioning that Outlook Mobile supports multiple email accounts, so you can easily manage all your email addresses from one convenient app.
Now that you have set up Outlook Mobile, let’s move on to the next step: composing a new email.
Compose a New Email
When it comes to composing a new email on Outlook Mobile, the process is simple and user-friendly. Whether you’re drafting a professional message or a personal note, Outlook Mobile provides all the necessary tools to create a well-formatted and engaging email.
To get started, open the Outlook Mobile app on your mobile device. Once you’re in the app, locate and tap on the “New Email” button. It is usually represented by a pencil icon or a “+” symbol, depending on the version of the app you’re using.
After tapping on the “New Email” button, a blank email composition screen will appear. Here, you can begin typing your email’s content. The email composition screen on Outlook Mobile is intuitive and resembles a standard text editor, allowing you to easily enter and format your message.
As you type, you can use the various formatting options available to customize your email’s appearance. Outlook Mobile provides options for bold, italics, underline, bullet points, numbering, and more. You can access these formatting options by selecting the desired text and tapping on the formatting toolbar that appears.
In addition to formatting options, Outlook Mobile also allows you to insert images, attach files, and include hyperlinks in your email. These features come in handy when you need to add visual elements or share important documents with your recipients.
Once you’ve composed your email, take a moment to review it for any errors or typos. Outlook Mobile includes a built-in spell checker that can help you identify and correct common spelling mistakes. To utilize the spell checker, simply tap on the “Spelling” option within the formatting toolbar.
When you’re satisfied with your email’s content, you can move on to adding recipients and a subject before sending it. This ensures that your recipients know who the email is from and what it pertains to.
Overall, composing a new email on Outlook Mobile is a straightforward process. Whether you need to send a quick message or a detailed proposal, Outlook Mobile has you covered with its user-friendly interface and robust editing features.
Add Recipients and Subject
Once you have launched Outlook Mobile and are ready to compose a new email, the next step is to add recipients and a subject line. This ensures that your email reaches the desired recipients and provides them with a clear understanding of its content.
To add recipients, you can start by typing the email addresses of the intended recipients in the “To” field. Outlook Mobile provides a convenient auto-complete feature that suggests contacts from your address book as you type. You can also tap on the “+” icon next to the “To” field to browse and select recipients from your contact list.
It’s important to double-check the email addresses to ensure accuracy and avoid any miscommunication. You can add multiple recipients by separating their email addresses with commas.
After adding the recipients, you can proceed to the subject line. The subject line briefly summarizes the content of your email and helps recipients understand its purpose at a glance. It’s important to make it informative and concise.
When crafting the subject line, try to use descriptive keywords that accurately reflect the main topic of the email. This will help recipients quickly identify the relevance of your email and prioritize their inbox accordingly.
It’s worth noting that some email clients and devices may truncate long subject lines, so keeping it within a reasonable length is advisable. Aim for a subject line that is around 50 characters or less to ensure it displays fully on most devices.
Remember, the subject line is the first thing recipients see when your email arrives in their inbox. A well-crafted subject line can capture their attention and encourage them to open and read your email promptly.
Once you have added the recipients and a subject line, you are ready to move on to composing the body of your email, which we will cover in the next section.
Compose and Format Email Body
Once you have added recipients and a subject line to your email, it’s time to compose the body of the email. Outlook Mobile provides several formatting options to help you create professional-looking emails.
1. Text Formatting: You can make your text bold, italic, or underlined. Simply select the desired text and tap on the corresponding formatting option in the toolbar. This is especially useful when you want to highlight important points or emphasize certain words.
2. Bulleted and Numbered Lists: To create a bulleted list, tap on the bullet point icon in the toolbar. Each time you press enter, a new bullet point will be created. To create a numbered list, tap on the numbered list icon. This is helpful when you want to present information in a clear and organized manner.
3. Inserting Links: If you want to include a link in your email, tap on the link icon in the toolbar. You can enter the URL and customize the display text. This is great for sharing webpages, articles, or any other online resources.
4. Attaching Files: To attach files to your email, tap on the attachment icon. You can select files from your device, cloud storage, or recent attachments. This is perfect for sending documents, images, or any other files that need to be shared with the recipient.
5. Inserting Images: If you want to include images in your email, tap on the image icon. You can select an image from your device or recent attachments. You can also resize the image and add captions. Including images can make your email more visually appealing and engaging.
6. Signature: Outlook Mobile allows you to set up a signature that will be automatically added to the end of your emails. Tap on the settings icon, go to your account settings, and select “Signature”. You can enter your desired signature text and customize the formatting.
Remember to proofread your email before sending it. Pay attention to spelling, grammar, and overall clarity. You can use the built-in spell checker to catch any errors before hitting the send button.
Once you are satisfied with the composition and formatting of your email, tap on the send button to deliver it to the recipients. Outlook Mobile will automatically sync and send the email, ensuring that it reaches the recipients in a timely manner.
The ability to send emails on Outlook Mobile is a convenient and efficient way to stay connected and productive on the go. With its user-friendly interface and robust features, Outlook Mobile offers a seamless email experience that rivals its desktop counterpart. Whether you’re using an iOS or Android device, sending emails on Outlook Mobile is a breeze.
By following the simple steps outlined in this article, you can easily compose and send emails, manage your inbox, and stay organized while using Outlook Mobile. With its powerful search functionality and advanced filtering options, finding and managing your emails has never been easier.
So, next time you’re away from your computer and need to send an important email, don’t fret. Just grab your mobile phone, open Outlook Mobile, and start composing that message. With Outlook Mobile, you can stay connected, productive, and in control of your emails wherever you are.
FAQs
1. Can I send email on Outlook Mobile without an internet connection?
No, Outlook Mobile requires an internet connection to send and receive emails. However, you can compose emails and save them as drafts until you have a stable internet connection to send them.
2. Can I attach files to my emails using Outlook Mobile?
Absolutely! Outlook Mobile allows you to attach various types of files to your emails, including documents, images, and videos. Simply tap on the attachment icon while composing your email and select the desired file from your device’s storage.
3. Can I schedule emails to be sent at a later time on Outlook Mobile?
Yes, Outlook Mobile offers a “Send Later” feature, which allows you to schedule emails to be sent at a specific date and time in the future. This is particularly useful when you want to send an email during non-business hours or when you want to automate follow-up messages.
4. How can I manage multiple email accounts on Outlook Mobile?
Outlook Mobile supports the management of multiple email accounts from different providers, such as Gmail, Yahoo, and Microsoft 365. You can easily add and switch between accounts by tapping on the profile icon in the top-left corner and selecting “Add Account.” This enables you to stay organized and access all your emails in one place.
5. Can I customize the email signature in Outlook Mobile?
Certainly! Outlook Mobile allows you to personalize your email signature with your name, contact information, and even a professional quote. To set up your email signature, navigate to the settings menu by tapping on the profile icon, select “Settings,” and then choose “Signature.” From there, you can create and customize your signature to reflect your personal or professional style.