
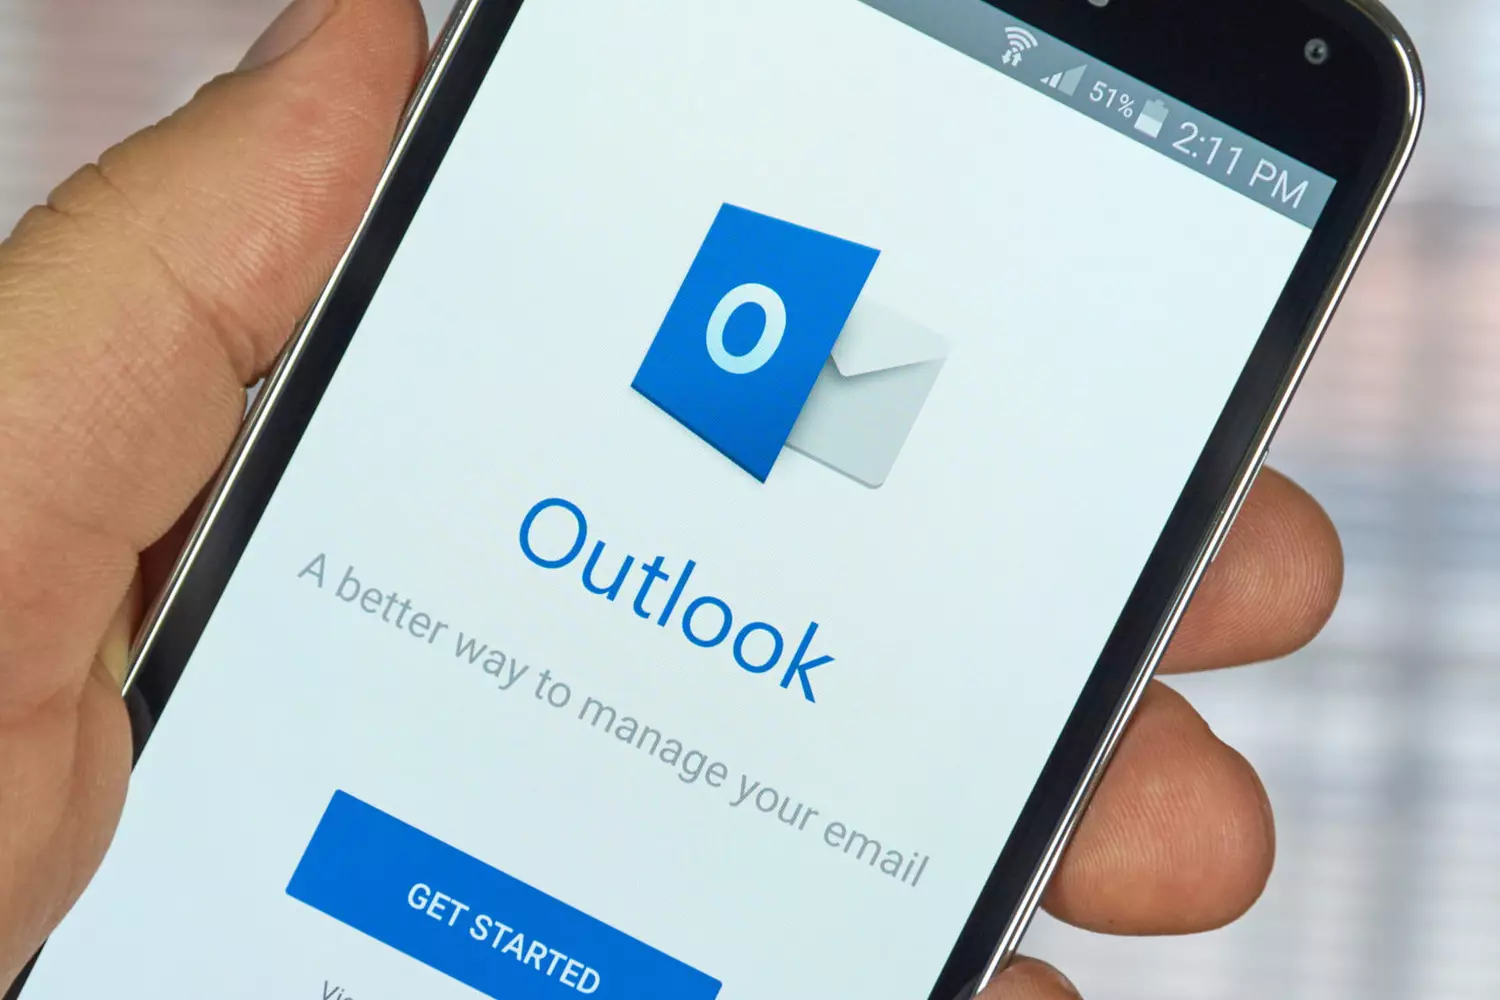
Welcome to the world of mobile communication! In this fast-paced digital era, staying connected is more important than ever. And when it comes to sending emails on the go, Outlook Mobile App for Android is a reliable and convenient option. But what if you have an urgent message that requires immediate attention? That’s where the High Priority feature comes in. In this article, we will explore how you can send high priority emails using the Outlook Mobile App on your Android device. Whether you need to notify your boss about an important meeting or urgently update a client, the high priority feature will ensure your important emails stand out in your recipient’s inbox. So, let’s dive in and discover how to make your emails a priority in the Outlook Mobile App for Android!
Inside This Article
- Overview
- Purpose of the Article
- Setting Up High Priority Email in Outlook Mobile App for Android
- # Step 1: Open the Outlook Mobile App
- # Step 2: Access the Settings Menu
- # Step 3: Go to the Mail Settings
- # Step 4: Configure High Priority Email Settings
- Sending a High Priority Email in Outlook Mobile App for Android
- # Step 1: Compose a New Email
- # Step 2: Indicate Priority Level
- # Step 3: Enter Recipients and Subject
- # Step 4: Compose the Email Content
- # Step 5: Send the High Priority Email
- Editing or Removing High Priority Status in Outlook Mobile App for Android
- # Step 1: Access the Sent Folder
- # Step 2: Locate the High Priority Email
- # Step 3: Edit or Remove Priority Status
- Recap and Benefits of Sending High Priority Email
- Conclusion
- FAQs
Overview
Are you tired of your important emails getting lost among the sea of unread messages in your Outlook mobile app on Android? Don’t worry, we’ve got you covered! In this guide, we’ll show you how to send high-priority emails using the Outlook Mobile App on your Android device. With the high-priority flag, you can ensure that your important messages stand out, grabbing the attention of recipients and increasing the chances of a prompt response.
Sending a high-priority email not only helps you prioritize your communication, but it also conveys a sense of urgency and importance to the recipient. Whether it’s for work, an urgent request, or a time-sensitive message, setting the importance level of your email to high priority ensures that it stands out among the countless emails flooding your recipient’s inbox.
Now let’s dive into the step-by-step process of sending high-priority emails in the Outlook Mobile App on Android.
Purpose of the Article
The purpose of this article is to provide a step-by-step guide on how to send high priority email in the Outlook Mobile App for Android. With the increasing reliance on mobile devices for communication, it is important to know how to mark certain emails as high priority to ensure they receive immediate attention.
Whether you need to urgently notify a client about an important update or send time-sensitive information to your colleagues, sending high priority emails can help ensure that your message stands out and receives the attention it deserves.
In this article, we will explore the process of enabling the high priority flag in the Outlook Mobile App for Android, as well as how to compose, set the importance of, and send a high priority email. Additionally, we will provide troubleshooting tips and highlight other useful features and tips related to high priority emails in the Outlook Mobile App.
By the end of this article, you will have a comprehensive understanding of how to utilize the high priority feature in the Outlook Mobile App for Android, allowing you to effectively communicate important information and prioritize your emails on the go.
Setting Up High Priority Email in Outlook Mobile App for Android
Outlook Mobile app for Android provides a convenient and efficient way to manage your emails on the go. One useful feature is the ability to send high priority emails, which can help ensure that your important messages are noticed and addressed promptly by the recipients. In this article, we will guide you through the process of setting up high priority email in the Outlook Mobile app for Android.
Step 1: Launch the Outlook Mobile app on your Android device and sign in to your account, if you haven’t already done so.
Step 2: Once you’re signed in, tap on the “Compose” button to start a new email.
Step 3: In the email composition window, tap on the three-dot menu icon in the top-right corner of the screen to access additional options.
Step 4: From the menu that appears, select “Set Importance”.
Step 5: A pop-up window will appear with three options: “Normal”, “High”, and “Low”. Tap on “High” to set the email as high priority.
Step 6: After selecting “High”, you will see a checkmark next to it, indicating that the email has been marked as high priority.
Step 7: Proceed with composing your email as usual, and when you’re ready, tap on the send button to send the high priority email.
Congratulations! You have successfully set up and sent a high priority email using the Outlook Mobile app for Android. The recipient will be notified of the email’s importance, increasing the chances of it being addressed promptly.
If you encounter any issues or have trouble sending high priority emails, here are a few troubleshooting tips:
1. Check the version of your Outlook Mobile app and ensure that it’s up to date. Update the app if necessary to access the latest features and bug fixes.
2. Make sure you have a stable internet connection. Poor or intermittent connectivity can affect the sending and receiving of high priority emails.
3. If you’re experiencing persistent issues, try clearing the app cache and data. This can help resolve any temporary glitches that might be affecting the app’s performance.
Additionally, Outlook Mobile offers a few more features and customization options for managing high priority emails:
– You can set up email notifications to receive alerts specifically for high priority messages. This ensures that you’re immediately notified when an important email arrives in your inbox.
– Customizing the high priority options allows you to tailor the level of urgency based on your specific needs. You can choose between options like “Urgent”, “Do Not Forward”, or “Follow Up” to effectively convey the importance of the email to the recipient.
# Step 1: Open the Outlook Mobile App
The first step in sending a high priority email using the Outlook Mobile App on your Android device is to open the app. Locate the Outlook Mobile App icon on your home screen or in the app drawer and tap on it to launch the application. If you haven’t downloaded and installed the app yet, you can find it in the Google Play Store and install it for free.
Once the app is open, you will be prompted to sign in to your Outlook or Office 365 account. Enter your email address and password to log in. If you have multiple accounts, choose the appropriate account from the list of available options. If you haven’t set up an account yet, you can do so by tapping on the “Add Account” option and following the on-screen instructions.
After successfully signing in to your account, you will be taken to the main inbox screen, where you can access all your emails and folders. Ensure that you have a stable internet connection for a seamless experience while sending the high priority email.
# Step 2: Access the Settings Menu
In order to send a high priority email in the Outlook Mobile App for Android, you need to access the settings menu. Here’s how you can do it:
1. Open the Outlook Mobile App on your Android device.
2. Tap on the hamburger menu icon (three horizontal lines) located in the top left corner of the screen. This will open the menu options.
3. Scroll down the menu until you find the “Settings” option and tap on it. This will take you to the settings menu.
4. In the settings menu, you will find various options to customize your Outlook experience. Look for the “Mail” or “Email” section, depending on the version of the app.
5. Tap on the “Mail” or “Email” section to access the email settings.
6. Within the email settings, you will find different options related to email composition and formatting. Look for the option that says “Email Priority” or “Message Importance”. Tap on it to proceed.
7. In the “Email Priority” or “Message Importance” settings, you will see different priority options such as “Normal”, “High”, or “Low”. Tap on “High” to set the email priority as high.
8. Once you have selected “High” as the email priority, navigate back to the main email composition screen or exit the settings menu.
Now that you have successfully accessed the settings menu and set the email priority to high, you are ready to compose and send your high priority email in the Outlook Mobile App for Android.
# Step 3: Go to the Mail Settings
Once you have composed a new email and set its importance to high priority, the next step is to head to the mail settings in the Outlook Mobile App Android. Follow the instructions below to access the mail settings:
- Open the Outlook Mobile App on your Android device.
- In the app, tap on the hamburger menu icon located at the top left corner of the screen. This will open the navigation menu.
- Scroll down the navigation menu and tap on the “Settings” option. It is represented by a gear icon.
- Within the settings menu, locate and tap on the “Mail” option. This will open the mail settings.
By accessing the mail settings, you can make certain customizations to your email account, including the high priority settings.
Now that you have successfully reached the mail settings, you are ready to proceed to the final step of sending the high priority email. This step involves specifying the high priority email options and sending the email to the recipient. Continue reading to learn how to complete this process.
# Step 4: Configure High Priority Email Settings
In Outlook Mobile App for Android, you have the option to configure additional high priority email settings to suit your preferences. These settings allow you to further customize the behavior and appearance of high priority emails.
To configure high priority email settings, follow the steps below:
- Open the Outlook Mobile App on your Android device.
- Tap on the hamburger menu icon located in the top left corner of the app.
- Select “Settings” from the menu options.
- Scroll down and tap on “Mail” under the “Settings” section.
- Tap on “High Priority” under the “Mail” settings.
Once you are in the “High Priority” settings, you will find various options that you can customize:
- Enable High Priority Badge: Toggle this option on if you want to see a badge indicating high priority emails in your inbox.
- High Priority Notifications: Choose whether you want to receive notifications for high priority emails or not. You can select various options like “Only for new emails,” “Always,” or “Never.”
- Sound for High Priority Emails: Select a specific sound to play when receiving high priority emails.
- Vibrate for High Priority Emails: Toggle this option on if you want your device to vibrate when receiving high priority emails.
- LED Light for High Priority Emails: Enable this option to have your device’s LED light flash when receiving high priority emails.
Once you have configured the high priority email settings according to your preferences, the changes will be applied to the Outlook Mobile App on your Android device. This allows you to have a more tailored experience when dealing with high priority emails.
It’s important to note that these settings are specific to the Outlook Mobile App and may vary depending on your Android device and operating system version.
Sending a High Priority Email in Outlook Mobile App for Android
When it comes to sending urgent messages, sometimes a regular email just doesn’t cut it. That’s where the high priority option comes in handy. With the Outlook Mobile App for Android, you can easily send a high priority email to ensure that your message gets immediate attention. Whether it’s an important deadline, a time-sensitive request, or a critical update, using this feature will help your email stand out in the recipient’s inbox.
Here’s a step-by-step guide on how to send a high priority email in the Outlook Mobile App for Android:
- Enable High Priority Flag: First, make sure that the high priority flag is enabled in your app settings. Open the Outlook Mobile App on your Android device, tap on the menu icon in the top left corner, go to Settings, and then select your email account.
- Compose a New Email: Tap on the compose icon (usually a pencil or a plus sign) to start a new email. Enter the recipient’s email address, subject, and the body of the email.
- Set Email Importance to High Priority: While composing the email, tap on the three-dot menu in the top right corner. From the options menu, select “Set Importance” or “Message Options.”
- Send the High Priority Email: Finally, tap on the send button to deliver your high priority email. It will be flagged as important, ensuring that the recipient notices it with a greater sense of urgency.
If you encounter any issues while trying to send a high priority email, here are a few troubleshooting tips:
- Check Mobile App Version: Ensure that you have the latest version of the Outlook Mobile App installed on your Android device. Outdated versions may not have the high priority feature or may have compatibility issues.
- Ensure Proper Network Connection: Make sure that your device has a stable internet connection. Poor network connectivity may impact the successful delivery of high priority emails.
- Clear App Cache and Data: If you’re still experiencing issues, try clearing the app’s cache and data. This can help resolve any temporary glitches or conflicts that may be affecting the high priority feature.
In addition to sending high priority emails, the Outlook Mobile App for Android offers additional features and customization options:
- Setting Email Notifications for High Priority Messages: You can configure the app to send you specific notifications for high priority emails, ensuring that you never miss an urgent message.
- Customizing High Priority Options: The app allows you to customize the high priority settings according to your preferences. You can define what elements constitute a high priority email and set your own criteria.
# Step 1: Compose a New Email
To send a high priority email in the Outlook Mobile app for Android, you first need to compose a new email. Follow these simple steps:
1. Open the Outlook Mobile app on your Android device.
2. Tap on the “Compose” button, usually located at the bottom right corner of the screen.
3. A blank email draft will appear with fields to enter the recipient’s email address, subject line, and the body of the email.
4. Enter the recipient’s email address in the “To” field. You can also add recipients in the “Cc” or “Bcc” fields if needed.
5. Next, type in a clear and concise subject line for your email. This will give the recipient an idea of the email’s importance even before they open it.
6. In the body of the email, compose your message. Be sure to keep it concise and to the point, highlighting the key information you want to convey.
7. If necessary, you can also attach files by tapping on the attachment icon, usually represented by a paperclip.
8. Once you have finished composing your email, you are now ready to set the email’s importance level to high priority.
Continue to the next step to learn how to set the email importance to high priority.
# Step 2: Indicate Priority Level
Once you have composed your email in the Outlook Mobile App on your Android device, it’s time to indicate the priority level. This step is crucial as it alerts the recipient to the urgency of your message. Fortunately, Outlook Mobile App makes it easy to set the priority level with just a few simple taps.
To indicate the priority level of your email, follow these steps:
- After composing your email, locate the priority options. These options are typically displayed as icons or text labels, such as “Low”, “Normal”, or “High”. They may be located in the header area or the toolbar of the email composition screen.
- Tap on the priority option that corresponds to your desired priority level. If you need to send a high priority email, look for the “High” option and tap on it.
- Once you have selected the appropriate priority level, you should see a visual indicator, such as an icon or text label, confirming your selection. This serves as a reminder that you have successfully indicated the priority level of your email.
It’s important to remember that setting the priority level alone does not guarantee that the recipient will prioritize your email. The effectiveness of the high priority indicator depends on the recipient’s email client and their personal email management practices. Nevertheless, indicating the priority level can serve as a helpful way to emphasize the urgency of your message.
# Step 3: Enter Recipients and Subject
After composing your high priority email in the Outlook Mobile App on your Android device, it’s time to enter the recipients and subject of your message. This step is crucial as it ensures that your email reaches the intended recipients and conveys the importance of the content contained within.
To begin, tap on the “To” field to bring up the contact selection screen. Here, you can manually enter the email addresses of the recipients or search for them in your contacts. The Outlook Mobile App also offers suggestions based on your recent conversations, making it quick and convenient to add recipients.
Once you have entered the email addresses of all the recipients, you can move on to the subject line. The subject line is the first thing recipients see, so it’s important to make it informative and relevant. Briefly summarize the purpose of the email in a concise and clear manner.
Remember, a compelling subject line not only grabs the attention of the recipients but also helps them understand the urgency and importance of your message. This is especially crucial when sending a high priority email, as you want to ensure that it stands out among the sea of emails in your recipients’ inboxes.
Once you have entered the recipients and crafted a compelling subject line, you are ready to proceed to the next step and set the importance of your email to high priority. This will ensure that your message gets the attention it deserves and stands out from regular emails.
# Step 4: Compose the Email Content
Now that you have set the high priority flag and selected the recipients for your email, it’s time to craft the content of the email. This is where you have the opportunity to convey your message effectively. Follow these tips to compose an impactful email:
- Clear and concise: Keep your email content clear, concise, and to the point. Avoid lengthy paragraphs and focus on the main message you want to convey.
- Subject line: Write a compelling subject line that grabs the recipient’s attention and summarizes the purpose of your email.
- Introduction: Start your email with a brief and friendly introduction. Set the tone for the rest of the email and create a positive first impression.
- Highlight key points: Use bullet points or numbered lists to highlight the main points you want to convey. This improves readability and makes your message more easily digestible.
- Be polite and professional: Maintain a polite and professional tone throughout your email. Use appropriate language and avoid any offensive or inappropriate content.
- Call-to-action: Clearly state what action you expect the recipient to take, whether it’s a response, a request, or any other specific action.
- Closing: End your email with a polite closing, such as “Best regards” or “Thank you.” Sign off with your name and any relevant contact information.
Remember, the content of your email is crucial in conveying your message effectively and ensuring that your high priority email is received and acted upon accordingly. Take the time to proofread your email for any spelling or grammatical errors before sending it.
# Step 5: Send the High Priority Email
Once you have composed your email and set the importance level to high priority, it’s time to send it. Follow the steps below to send your high priority email using the Outlook Mobile App on Android.
1. At the bottom of the email composition screen, you will find the send button. It is usually represented by a paper plane icon.
2. Tap on the send button to initiate the sending process. The Outlook Mobile App will now process your email and deliver it to the intended recipient(s).
3. As soon as the high priority email is sent, it will be marked with a red exclamation mark in the recipient’s inbox. This visual indicator informs the recipient that the email requires immediate attention.
4. You can also check the status of your sent email by navigating to the Sent Items folder in the Outlook Mobile App. Here, you will find a record of all the emails you have sent, including the high priority ones.
5. Keep in mind that even though you have sent a high priority email, it does not guarantee an immediate response. The recipient’s email settings and workload will determine how quickly they are able to address your message.
By following these simple steps, you can send high priority emails using the Outlook Mobile App on your Android device. This feature allows you to ensure that your urgent messages stand out and receive the attention they deserve.
Editing or Removing High Priority Status in Outlook Mobile App for Android
If you’ve sent an email with a high priority status in Outlook Mobile App for Android but later realize that it was unnecessary or no longer relevant, don’t worry. Outlook Mobile App provides an easy way to edit or remove the high priority status from your emails. In this section, we will guide you through the steps to perform this action seamlessly.
Step 1: Open the Outlook Mobile App on your Android device and navigate to the email with the high priority status that you wish to edit or remove.
Step 2: Tap on the email to open it, and then click on the three-dot menu icon located at the top-right corner of the screen. A drop-down menu will appear.
Step 3: From the drop-down menu, select “Edit” to make changes to the email.
Step 4: In the email editor, you can modify the subject, body, recipients, and other details as needed. To remove the high priority status, simply uncheck the “High Importance” checkbox.
Step 5: Once you have made the necessary changes, tap on the “Send” button to save the updated email. If you removed the high priority status, the email will be sent without the high priority flag.
It’s important to note that editing or removing the high priority status can only be done before sending the email. Once it has been sent, the high priority status cannot be changed. Therefore, double-check your email before hitting the send button to ensure it has the appropriate level of importance.
Now you know how to edit or remove the high priority status from your emails in the Outlook Mobile App for Android. This feature allows you to fine-tune the importance of your messages, ensuring effective communication with your contacts.
Remember that the high priority status is just one of the many useful features offered by Outlook Mobile App. Explore the app further to discover other valuable tools that can enhance your email experience.
Whether you’re using Outlook Mobile App for personal or professional communication, knowing how to edit or remove the high priority status gives you more control over your emails and ensures that you can adapt to changing circumstances with ease.
# Step 1: Access the Sent Folder
Accessing the sent folder in the Outlook Mobile App Android is the first step towards sending high priority emails. Follow these instructions to access the sent folder:
- Launch the Outlook Mobile App on your Android device.
- Tap on the menu icon, typically represented by three horizontal lines, located at the top-left corner of the app.
- Scroll down until you see the “Folders” option. Tap on it to expand the list of available folders.
- Locate and tap on the “Sent” folder. This will open up the folder, displaying your previously sent emails.
By accessing the “Sent” folder, you can view all the emails you have previously sent using the Outlook Mobile App on your Android device. This step is crucial for sending high priority emails, as it allows you to track your sent messages and prioritize any follow-ups or important responses.
Once you have successfully accessed the sent folder, you can proceed to the next step of enabling the high priority flag and composing your email.
Below is the content for the section “# Step 2: Locate the High Priority Email”:
# Step 2: Locate the High Priority Email
Once you have successfully sent a high priority email using the Outlook Mobile App on your Android device, the next step is to locate it in your mailbox. Follow the steps below to find the high priority email:
- Open the Outlook Mobile App on your Android device.
- Tap on the “Inbox” or “Focused” folder, depending on your email settings.
- Scroll through your emails until you come across the high priority email.
- Look for the flag or icon that signifies a high priority email. In the Outlook Mobile App, this can be a red exclamation mark or an indicator that shows the email’s importance.
- Tap on the high priority email to open and view its contents.
By following these steps, you will be able to easily locate and identify the high priority email that you have sent using the Outlook Mobile App on your Android device. This feature ensures that important messages are not missed or overlooked in the midst of a crowded inbox.
Remember, the high priority flag helps draw attention to the email and indicates its urgency or significance. Utilizing this feature can improve communication and ensure that important messages receive the attention they deserve.
# Step 3: Edit or Remove Priority Status
After setting the email importance to high priority, you may realize that you need to make some changes or remove the priority status. Luckily, the Outlook Mobile App for Android provides options to edit or remove the priority status before sending the email. Here’s how you can do it:
- Edit Priority Status: To edit the priority status, open the email from the Drafts folder in the Outlook Mobile App. Tap on the email to open it, and then tap on the three-dot menu icon usually located at the top-right corner of the screen. From the menu options, select “Edit” to make necessary changes to the email content, including the priority status. After making the desired modifications, tap on the “Send” button to send the email with the updated priority status.
- Remove Priority Status: If you decide to remove the priority status altogether, open the email from the Drafts folder in the Outlook Mobile App. Similar to editing the priority status, tap on the email to open it and tap on the three-dot menu icon. From the menu options, select “Edit.” In the email composition window, locate the priority status indicator, which is usually denoted by a high priority flag or an exclamation mark. Tap on the indicator to remove the priority status. Once done, tap on the “Send” button to send the email without the priority status.
By following these simple steps, you can easily edit or remove the priority status of the high-priority email before sending it through the Outlook Mobile App for Android.
Recap and Benefits of Sending High Priority Email
When it comes to managing your inbox, there are times when certain emails require immediate attention. That’s where the option to send high priority emails can be incredibly useful. In this section, we’ll recap the steps to send high priority emails in Outlook Mobile App on Android, and explore the benefits of this feature.
1. Ensure Urgent Messages Stand Out: By marking an email as high priority, you signal its importance to the recipient. This helps them identify and prioritize urgent messages, ensuring that crucial information doesn’t get lost in a sea of other less important emails.
2. Catch Recipient’s Attention: High priority emails are designed to grab the recipient’s attention. This can be particularly useful when you need to communicate time-sensitive information, such as meeting updates, deadlines, or urgent requests. By indicating the urgency of the message, you increase the chances of it being noticed and actioned promptly.
3. Improve Response Times: When you send a high priority email, you’re signaling to the recipient that a quick response is expected. This can help expedite the decision-making process, allowing for faster and more efficient communication. Whether you’re working on a project with tight deadlines or resolving an urgent issue, the high priority flag can help ensure timely responses.
4. Streamline Communication Channels: By using high priority emails, you can effectively streamline communication channels. Instead of resorting to multiple messaging platforms or phone calls, you can use the email platform to convey the urgency and importance of the message. This helps consolidate communication and avoid confusion, ensuring that all relevant information is documented in one place.
5. Prioritize Workload: High priority emails allow recipients to prioritize their workload and allocate their time and resources accordingly. By clearly indicating the importance of the message, you provide recipients with the necessary guidance to manage their tasks and address urgent matters first.
6. Enhance Collaboration and Decision-Making: When sending high priority emails, you enable prompt communication and facilitate quicker decision-making within teams or across departments. By flagging time-sensitive issues or critical updates, you can ensure that the necessary stakeholders are aware of the situation and can take appropriate action.
7. Stand Out in Busy Inboxes: In today’s fast-paced digital world, inboxes can quickly become cluttered with numerous emails demanding attention. By sending high priority emails, you increase the visibility of your message and improve the chances of it being noticed and acted upon. This is particularly beneficial when you need to cut through the noise and reach recipients who receive a high volume of emails daily.
8. Demonstrate Professionalism: Using the high priority email feature can showcase your professionalism and respect for others’ time. It demonstrates that you understand the importance of clear communication and have taken measures to ensure your message receives the attention it deserves.
Conclusion
In conclusion, the Outlook mobile app for Android offers a convenient and efficient way to send high-priority emails. By following the steps outlined in this article, you can easily prioritize your emails, ensuring that important messages are noticed and responded to promptly. The ability to mark emails as high priority can be a valuable tool in managing your communication effectively, especially in a fast-paced and demanding work environment. With Outlook’s intuitive interface and user-friendly features, you can streamline your email management process and stay on top of your inbox. So, give it a try and experience the benefits of sending high-priority emails on the go with the Outlook mobile app for Android.
FAQs
Q: Can I send high priority emails using the Outlook Mobile App on Android?
Yes, you can send high priority emails using the Outlook Mobile App on Android. Outlook offers a variety of features to help you manage your emails efficiently, including setting the priority level of your messages.
Q: How can I send a high priority email in the Outlook Mobile App?
To send a high priority email in the Outlook Mobile App on Android, follow these steps:
- Open the Outlook Mobile App on your Android device.
- Tap on the compose button (usually depicted as a pencil or plus icon).
- Enter the recipient’s email address in the “To” field.
- Compose your email message.
- Tap on the three dots icon in the toolbar (usually found in the upper right corner).
- Select “Set the priority” from the options menu.
- Choose the desired priority level for your email: High, Normal, or Low.
- Complete any remaining email fields and send your message.
Q: What does a high priority email mean?
A high priority email indicates to the recipient that the message requires urgent attention. It notifies the recipient that the email contains crucial or time-sensitive information, prompting them to prioritize and respond to it promptly.
Q: Will setting an email as high priority make it more likely to be seen?
While setting an email as high priority highlights its importance, it does not guarantee that the recipient will see or prioritize it over other emails. The effectiveness of using the high priority flag depends on various factors, such as the recipient’s email settings and their personal email management practices.
Q: How can I tell if an email I received is marked as high priority?
When viewing an email in the Outlook Mobile App, emails marked with high priority are typically indicated by an exclamation mark or a lightning bolt icon next to the sender’s name or subject line. Additionally, some email clients may display high priority emails in a distinct color or font to help them stand out in the inbox.