
Setting up cellular connectivity on the latest iPhone 14 is an essential step to ensure that you can stay connected wherever you go. With its advanced features and cutting-edge technology, the new iPhone 14 offers seamless cellular capabilities that allow you to make calls, send messages, browse the internet, and enjoy all the benefits of being connected on the go.
In this article, we will guide you through the process of setting up cellular on your iPhone 14, ensuring that you can take full advantage of its cellular features. We will cover everything from choosing the right mobile carrier to configuring the cellular settings on your device. Whether you are a seasoned iPhone user or new to the world of smartphones, we have got you covered. Let’s dive in and get your iPhone 14 ready for cellular connectivity!
Inside This Article
- Getting Started
- Step 1: Accessing the Cellular Settings
- Step 2: Inserting the SIM Card
- Step 3: Activating Cellular Service
- Troubleshooting
- Conclusion
- FAQs
Getting Started
Welcome to the world of mobile connectivity with the all new iPhone 14! Setting up cellular service on your device is a simple and straightforward process that will enable you to make calls, send messages, and access the internet from anywhere. In this guide, we will walk you through the steps to get your cellular service up and running seamlessly.
Before we begin, make sure you have your SIM card from your carrier ready. If you don’t have a SIM card, you’ll need to contact your carrier to obtain one for your iPhone 14.
Now, let’s dive into the steps to get started with cellular on your iPhone 14:
- Step 1: Accessing the Cellular Settings
- Step 2: Inserting the SIM Card
- Step 3: Activating Cellular Service
To begin, unlock your iPhone 14 by entering your passcode or using Face ID or Touch ID. Then, navigate to the Home Screen and tap on the “Settings” app, which is represented by a gear icon.
Next, locate the SIM tray on your iPhone 14. You can find it on the right side of the device. Use the SIM eject tool or a small paperclip to gently press into the small hole next to the tray. The tray will pop out, allowing you to insert your SIM card. Make sure the gold contacts on the SIM card are facing down and align the notched corner of the card with the notch in the tray. Once inserted, gently push the tray back into the iPhone.
After inserting the SIM card, your iPhone 14 will prompt you to activate your cellular service. Follow the on-screen instructions to complete the activation process. You may need to provide your carrier account details or contact your carrier’s customer service if additional assistance is required.
Congratulations! You have successfully set up cellular service on your iPhone 14. Now you can enjoy the full range of features and benefits that come with your mobile connectivity. Remember to regularly check your network signal and data usage to ensure smooth and uninterrupted communication.
Step 1: Accessing the Cellular Settings
Setting up the cellular features on your iPhone 14 is a breeze. Whether you’re activating a new SIM card or need to make changes to your existing cellular settings, accessing the cellular settings menu is the first step in the process. Here’s how you can do it:
- Unlock your iPhone 14 by entering your passcode or using Face ID.
- From the home screen, locate and tap on the “Settings” app. It’s represented by a gear icon.
- In the Settings menu, scroll down and tap on “Cellular”.
Once you’ve opened the Cellular settings menu, you’ll have access to various options and settings related to your cellular service.
Keep in mind that the steps to access the cellular settings on an iPhone can slightly differ depending on the iOS version or any customizations made by the device manufacturer. However, the general process remains the same, so you should be able to find the Cellular settings option easily.
Now that you’ve successfully accessed the cellular settings on your iPhone 14, you’re ready to move on to the next step of setting up your cellular service or making any necessary changes.
Step 2: Inserting the SIM Card
Now that you have accessed the Cellular settings on your iPhone 14, it’s time to insert the SIM card. The SIM card contains important information such as your phone number and carrier details, allowing your device to connect to the cellular network.
To insert the SIM card into your iPhone 14, follow these simple steps:
- Locate the SIM card tray. On the iPhone 14, it is typically found on the side of the device.
- Take the SIM card ejector tool (or a paperclip) and insert it into the small hole on the SIM card tray. Apply a little pressure until the tray pops out.
- Remove the SIM card tray from the iPhone 14.
- Place the SIM card into the tray. There is usually a diagram on the tray indicating the correct orientation of the SIM card.
- Carefully slide the SIM card tray back into the iPhone 14 until it fits snugly.
- Gently press the tray to ensure it is securely in place.
It’s important to note that the SIM card should be properly aligned and inserted without bending or forcing it. Be gentle during the process to prevent any damage to the card or the device.
Once you have successfully inserted the SIM card, you can proceed to the next step of activating your cellular service on your iPhone 14.
Step 3: Activating Cellular Service
Once you have inserted the SIM card into your iPhone 14 and have accessed the Cellular settings, the next crucial step is to activate your cellular service. Activating your cellular service ensures that you can make calls, send text messages, and access the internet using your mobile network.
The activation process may vary depending on your cellular provider, but here are some general steps to help guide you through the process:
- Check your network coverage: Before activating your cellular service, it’s a good idea to check the network coverage in your area. This will ensure that you can receive a strong signal and enjoy uninterrupted service. You can usually find this information on your provider’s website or by contacting their customer support.
- Follow the provider’s instructions: Your cellular provider will typically provide instructions on how to activate your service. This could involve making a phone call, sending a text message, or using a dedicated activation app. It’s important to follow these instructions carefully to ensure a successful activation.
- Provide necessary information: During the activation process, you may need to provide some personal information such as your name, address, and Social Security number. This information is necessary to verify your identity and set up your account. Make sure to have this information readily available before starting the activation process.
- Set up a payment method: To activate your cellular service, you will usually need to set up a payment method. This can be a credit card, debit card, or a specified payment app. This step ensures that you can pay for your monthly service plan and any additional charges that may arise.
- Confirm activation: Once you have completed all the necessary steps, your cellular service should be successfully activated. You can check this by making a test call or accessing the internet through your mobile network. If you encounter any issues, reach out to your cellular provider for further assistance.
Activating your cellular service on your iPhone 14 is a straightforward process, but it may require some initial setup steps and communication with your cellular provider. By following these general guidelines, you can ensure a seamless activation experience and start enjoying the full benefits of your mobile connectivity.
Troubleshooting
If you encounter any issues while setting up cellular on your iPhone 14, don’t worry, as there are several troubleshooting steps you can take to resolve them. Here are some common problems you may face and their possible solutions:
No Service
If you notice that your iPhone 14 displays “No Service” or you are unable to make or receive calls, there are a few things you can try. First, make sure that your SIM card is properly inserted and that it is compatible with your carrier. You can also try restarting your device by holding down the power button and sliding to power off. If the issue persists, contact your carrier to check for any network outages or account-related problems.
Poor Signal Strength
If you are experiencing weak signal strength or frequent call drops, there are a couple of steps you can take. Ensure that you are in an area with good network coverage. If you are indoors, try moving closer to a window or an area with better signal reception. You can also try toggling the airplane mode on and off in the settings, as this can sometimes help refresh the connection to the network. Additionally, you may want to consider contacting your carrier for assistance or using a signal booster to improve your signal strength.
Data Connectivity Issues
If you are having trouble connecting to the internet or experiencing slow data speeds, there are a few troubleshooting steps you can follow. First, check if your cellular data is enabled in the settings. You can also try turning off Wi-Fi and connecting to the internet solely through your cellular connection to see if the issue is specific to Wi-Fi. Resetting your network settings can also help resolve any network configuration issues. If you are still experiencing issues, reach out to your carrier for further assistance.
Invalid SIM Card
If your iPhone 14 displays an “Invalid SIM Card” error message, it could mean that the SIM card is not properly inserted or there is an issue with the SIM card itself. Start by removing the SIM card and reinserting it, making sure it is properly aligned. If the problem persists, try inserting the SIM card into another compatible device to see if it works. If it does not, contact your carrier to report the issue and request a replacement SIM card.
Software Update
If you are still experiencing issues after trying the troubleshooting steps mentioned above, it is possible that your iPhone 14’s software needs to be updated. Check for any available software updates by going to Settings > General > Software Update. If there is an update available, download and install it, as it may contain bug fixes or improvements that could resolve the issues you are facing.
Remember, if you are unable to resolve the problem on your own, do not hesitate to reach out to your carrier or Apple support for further assistance. They will be able to provide specialized guidance and solutions to help get your cellular service up and running smoothly on your iPhone 14.
Conclusion
In conclusion, setting up cellular on your iPhone 14 is a straightforward process that allows you to stay connected wherever you go. By following the steps outlined in this article, you can ensure that your phone is properly configured to use cellular data and make calls on a mobile network.
With the advancements in mobile technology, the iPhone 14 offers even more features and capabilities to enhance your communication experience. Whether you’re browsing the internet, streaming videos, or making important phone calls, having a reliable cellular connection is essential.
Remember to check with your mobile service provider for any specific instructions or settings related to your cellular plan. Additionally, keeping your iPhone 14 updated with the latest software version will ensure that you have access to the newest features and improvements.
So, get your iPhone 14 set up with cellular, and enjoy the convenience of staying connected on the go.
FAQs
Q: How do I set up cellular on iPhone 14?
Setting up cellular on your iPhone 14 is a straightforward process. All you need to do is follow these steps:
- Ensure you have a valid and activated SIM card from your mobile service provider.
- Go to the “Settings” app on your iPhone 14.
- Tap on “Cellular” or “Mobile Data” (depending on your iOS version).
- Toggle the “Cellular Data” switch to enable it.
- If available, enter your mobile service provider’s APN settings. You can usually obtain these settings from your service provider’s website or by contacting their customer support.
- You can also enable “Voice & Data Roaming” if you plan to use your iPhone 14 while traveling internationally. However, please note that data roaming charges may apply in such cases.
- Once you’ve completed these steps, your iPhone 14 should be connected to your mobile network, and you’ll be able to make calls, send messages, and access the internet using cellular data.
Q: Can I use a nano-SIM card on the iPhone 14?
Yes, the iPhone 14 supports nano-SIM cards. The nano-SIM card slot is located on the side of the device. Insert the nano-SIM card into the slot, ensuring that the metal contacts are facing down. Gently push the card until it clicks into place. You can then proceed with the setup process and activate cellular services on your iPhone 14.
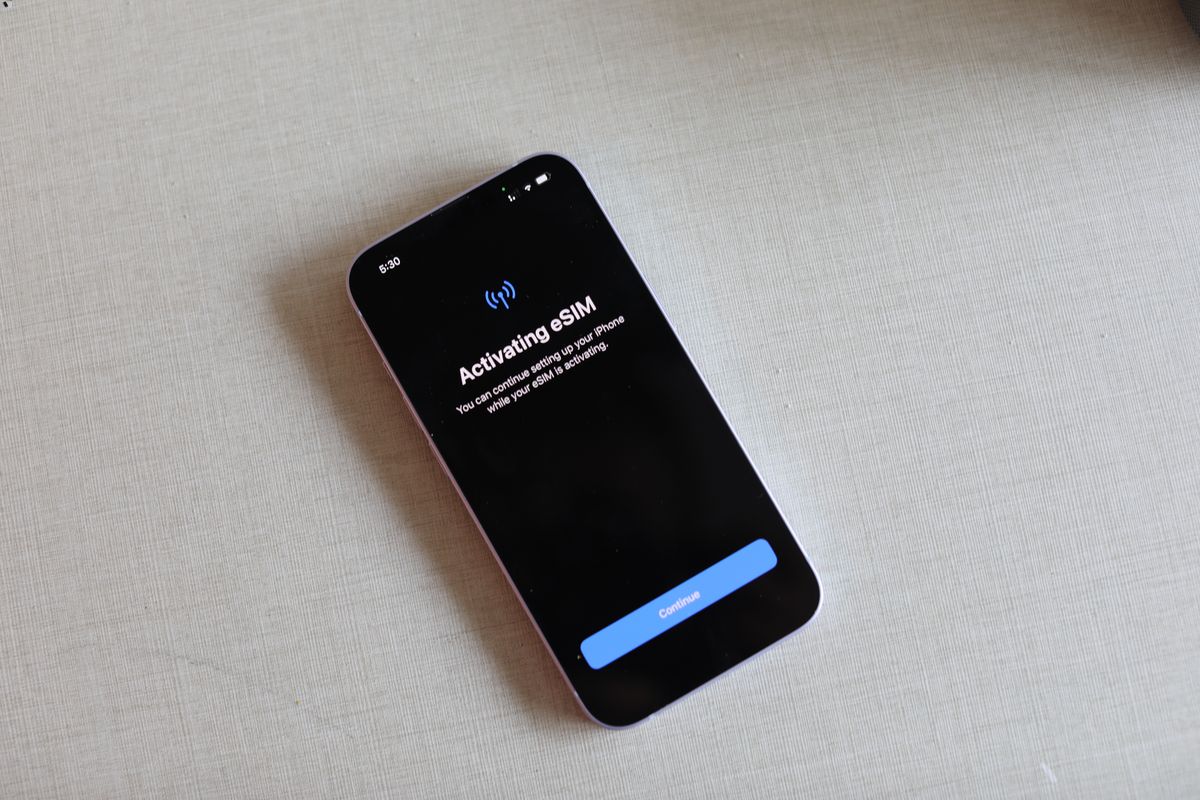
Q: Does the iPhone 14 support eSIM?
Yes, the iPhone 14 is compatible with eSIM technology. An eSIM, or embedded SIM, allows you to activate a cellular plan without the need for a physical SIM card. You can set up an eSIM on your iPhone 14 by going to the “Settings” app, selecting “Cellular,” and following the prompts to add a cellular plan. Please note that not all mobile service providers support eSIM, so you will need to check with your provider to ensure compatibility.
Q: How can I check my cellular data usage on the iPhone 14?
To check your cellular data usage on the iPhone 14, follow these steps:
- Open the “Settings” app.
- Tap on “Cellular” or “Mobile Data”.
- Scroll down to the “Cellular Data” section and you will see your data usage displayed.
- You can also view a more detailed breakdown of your data usage by tapping on “Cellular Data Usage” and selecting the desired time frame.
Q: What should I do if I’m unable to connect to cellular data on my iPhone 14?
If you’re experiencing issues with connecting to cellular data on your iPhone 14, try the following troubleshooting steps:
- Make sure you have an active cellular plan and that your account is in good standing with your mobile service provider.
- Restart your iPhone 14 by turning it off and on again.
- Ensure that cellular data is enabled in the “Settings” app. Go to “Cellular” or “Mobile Data” and make sure the “Cellular Data” switch is toggled on.
- Try toggling Airplane Mode on and off. Open the Control Center by swiping down from the top-right corner (or up from the bottom on older iPhones without a notch) and tap on the Airplane Mode icon.
- Reset your network settings by going to “Settings” > “General” > “Reset” > “Reset Network Settings”. Note that this will erase your saved Wi-Fi networks and passwords, so make sure you have them handy.
- If none of the above steps solve the problem, contact your mobile service provider for further assistance.