
Are you excited about setting up your new iPad with cellular data capabilities? With the convenience of a cellular connection, you can stay connected and access the internet on the go, without relying on Wi-Fi networks. In this comprehensive guide, we will walk you through the step-by-step process of setting up your iPad with cellular data. Whether you’re a first-time iPad user or simply want to upgrade to a newer model with cellular capabilities, we’ve got you covered. From choosing the right cellular data plan to activating your data service, we’ll provide you with all the information you need to get started. So, grab your iPad and let’s dive into the world of seamless connectivity and unlimited possibilities.
Inside This Article
- Setting Up Cellular Data on iPad
- Step 1: Check Cellular Data Compatibility
- Step 2: Insert SIM Card
- Step 3: Turn on Cellular Data
- Step 4: Configure Cellular Data Settings
- Step 5: Enable Roaming (Optional)
- Step 6: Monitor Data Usage
- Troubleshooting Tips
- Conclusion
- FAQs
Setting Up Cellular Data on iPad
When it comes to setting up cellular data on your iPad, there are a few simple steps to follow. Whether you have just purchased a new iPad with cellular capability or want to activate cellular data on your existing device, this guide will walk you through the process. So, let’s dive in and get your iPad connected to the internet on the go!
Step 1: Check Cellular Data Compatibility
The first thing you need to do is ensure that your iPad is compatible with cellular data. Not all iPads have this capability, so you must check if your model supports it. To do this, go to the “Settings” app on your iPad, tap “Cellular Data,” and check if the option is available. If it is, great! You can proceed to the next step.
Step 2: Insert SIM Card
If your iPad has cellular capability, the next step is to insert a SIM card. The SIM card is what allows your iPad to connect to cellular networks and access data. Depending on your iPad model, you may need a nano-SIM or an eSIM. Locate the SIM card slot on your iPad (usually found on the side), and carefully insert the SIM card. If you have an eSIM, you may need to contact your carrier to activate it.
Step 3: Turn on Cellular Data
Once the SIM card is inserted, it’s time to turn on cellular data. Open the “Settings” app, tap “Cellular Data,” and toggle the switch to the “On” position. Your iPad will now start searching for available cellular networks.
Step 4: Configure Cellular Data Settings
After turning on cellular data, you may need to configure some additional settings. Tap on “Cellular Data” in the Settings app, and you will find options like “Data Roaming,” “Personal Hotspot,” and “Carrier Services.” Depending on your preferences, you can enable or disable these features. It’s a good idea to review these settings and adjust them according to your needs.
Step 5: Enable Roaming (Optional)
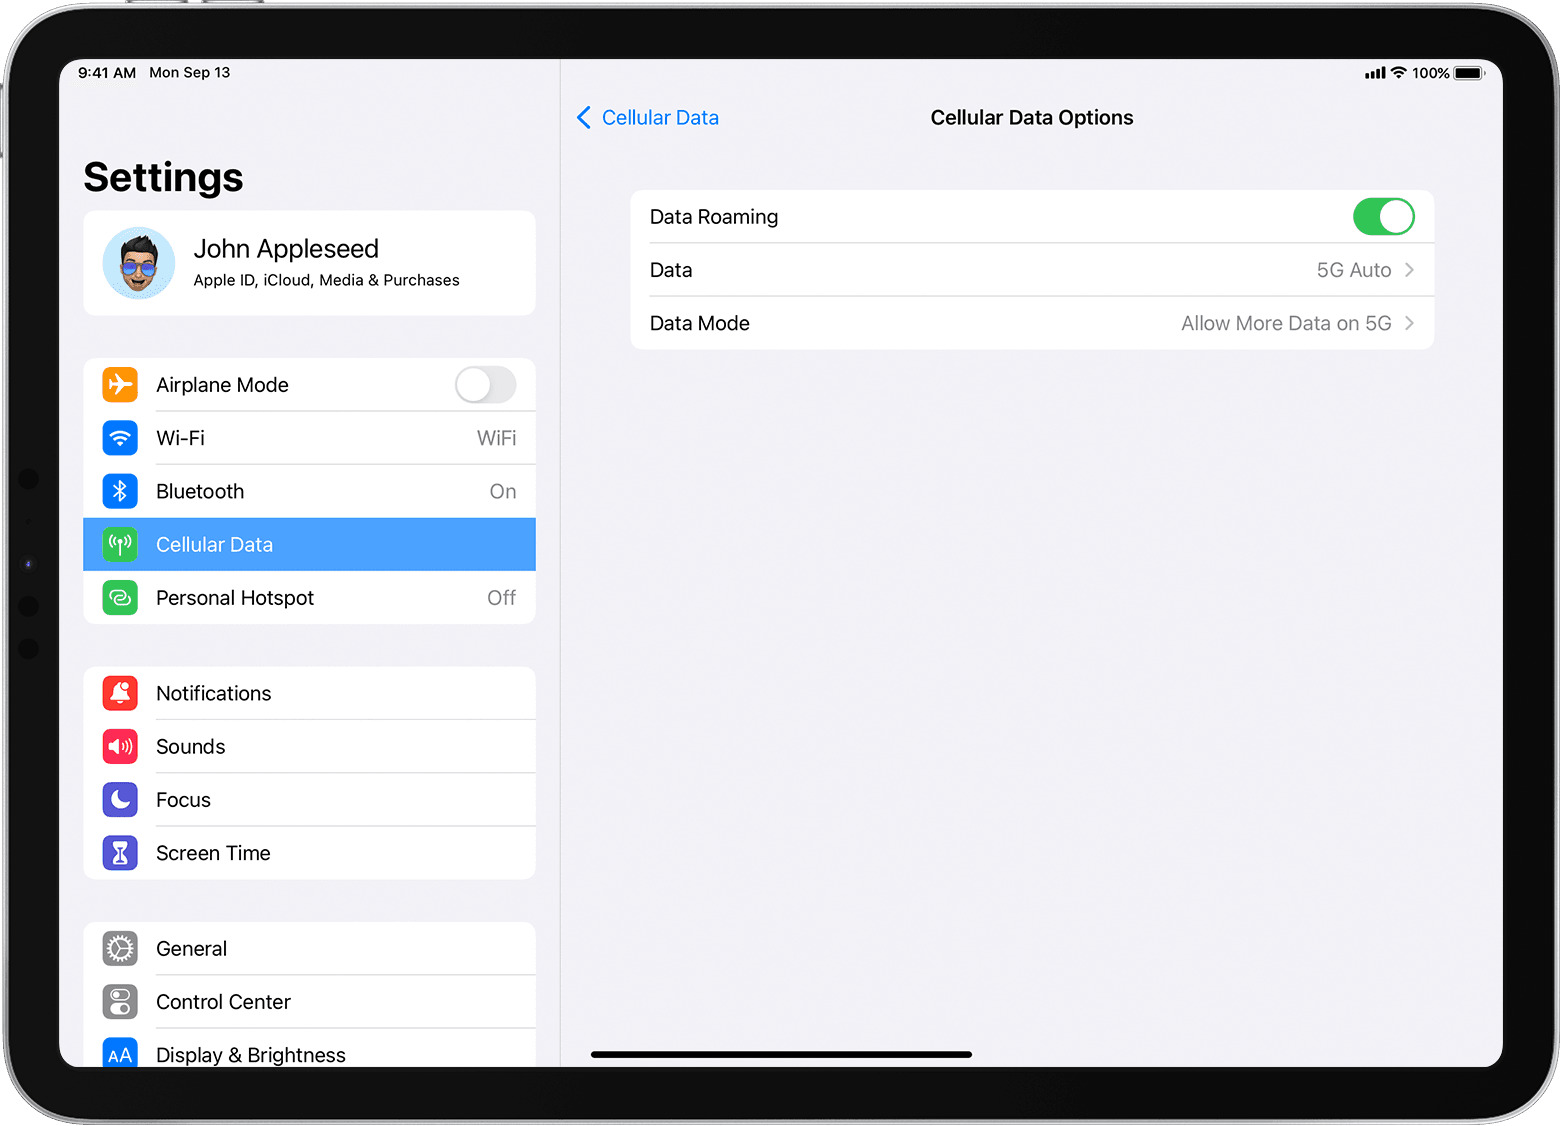
If you plan to use your iPad while traveling internationally, you may need to enable data roaming. This allows your iPad to connect to overseas networks and access data. However, please note that international roaming charges may apply, so it’s essential to check with your carrier beforehand. To enable data roaming, go to “Cellular Data” in the Settings app and toggle the “Data Roaming” switch to the “On” position.
Step 6: Monitor Data Usage
Now that your iPad is set up with cellular data, it’s important to keep track of your data usage. You can monitor your data usage in the “Settings” app under “Cellular Data.” Here, you can see how much data you’ve used and set data usage limits or reset statistics if needed. Monitoring your data usage can help you avoid overage charges and manage your data effectively.
Troubleshooting Tips
If you encounter any issues while setting up cellular data on your iPad, here are a few troubleshooting tips:
- Restart your iPad: Sometimes, a simple restart can fix minor connectivity issues.
- Check for software updates: Ensure that your iPad has the latest software updates installed, as these updates often include bug fixes and improvements.
- Contact your carrier: If you’re still experiencing problems, reach out to your cellular service provider for assistance. They can help troubleshoot any network or account-related issues.
Congratulations! You have successfully set up cellular data on your iPad. Now you can enjoy the freedom of staying connected wherever you go. Whether it’s checking emails, streaming videos, or browsing the web, your iPad with cellular data will keep you connected on the move.
Step 1: Check Cellular Data Compatibility
Before setting up cellular data on your iPad, it is important to ensure that your device is compatible with cellular connectivity. Not all iPads support cellular data, so it’s crucial to check for compatibility.
The easiest way to determine if your iPad is cellular-compatible is to look for the presence of a SIM card slot. If your iPad has a SIM card slot, it means it is designed to support cellular data. You can typically find the SIM card slot on the side or the top of the iPad, depending on the model.
If you’re uncertain about whether your iPad has a SIM card slot, you can check the specifications of your device. Visit the official Apple website or refer to the user manual that came with your iPad. These resources will provide detailed information about the model-specific features, including the availability of cellular data support.
It’s important to note that not all iPad models have the same cellular capabilities. Some may support 4G LTE connectivity, while others may support only 3G. Therefore, it’s essential to verify the specific cellular capabilities of your iPad to ensure a seamless setup process.
Once you have confirmed that your iPad is cellular-compatible, you can proceed with the setup process to enjoy the benefits of cellular data on your device.
Step 2: Insert SIM Card
Inserting a SIM card is an important step in setting up your iPad with cellular data. This small, rectangular card contains your mobile network information and allows your device to connect to the internet using a cellular connection.
To insert the SIM card, locate the SIM card slot on your iPad. The location of the slot may vary depending on the iPad model you have. Typically, you can find it on the side or at the bottom of the device.
Once you have identified the SIM card slot, use the SIM card ejector tool provided with your iPad or a small paperclip to gently push into the small hole next to the slot. This will release the tray holding the SIM card.
Now, carefully remove the tray from the slot. You will notice a small compartment where the SIM card should be placed. Take your SIM card and ensure it is properly aligned with the SIM card tray.
Place the SIM card into the compartment and gently push the tray back into the slot until it clicks into place. Make sure the tray is fully inserted to ensure a secure connection.
Once you have inserted the SIM card, your iPad should recognize it and display the cellular network signal. This indicates that your iPad is ready to connect to the internet using cellular data.
Keep in mind that if you are using a new SIM card, you may need to activate it with your mobile network provider. Follow any activation instructions provided by your carrier to ensure your SIM card is fully operational.
Now that you have successfully inserted the SIM card, you can proceed to the next step of setting up your iPad with cellular data.
Step 3: Turn on Cellular Data
After inserting the SIM card and ensuring its compatibility, the next step in setting up your iPad with cellular data is to turn on the cellular data feature. Here’s how you can do it:
- Unlock your iPad by entering your passcode or using Touch ID (if applicable).
- Go to the “Settings” app on your iPad. You can find the app icon on your home screen.
- In the left-hand menu, tap on “Cellular Data” or “Mobile Data” (depending on your iOS version).
- On the right-hand side, you’ll find the option to enable or disable cellular data. Tap on the toggle switch to turn it on.
- You may be prompted to activate the cellular data service with your carrier. Just follow the on-screen instructions to complete the activation process.
Once you have successfully turned on the cellular data feature, your iPad is now ready to connect to the internet using the cellular network. You can now browse the web, stream videos, and use online apps even without a Wi-Fi connection.
It’s important to note that using cellular data can consume your data plan, so make sure to keep an eye on your data usage to avoid exceeding your allocated limit. As a precaution, you may want to consider enabling the “Low Data Mode” in the Cellular Data settings, which helps reduce data usage for certain apps and tasks.
If you experience any difficulties in turning on cellular data or activating the service, you can reach out to your carrier’s customer support for assistance. They will be able to guide you through any troubleshooting steps and ensure that your iPad is properly connected to the cellular network.
Now that you have successfully turned on cellular data on your iPad, you can enjoy the convenience of staying connected wherever you go. Whether you’re traveling, working on the go, or simply enjoying some downtime, having cellular data on your iPad enhances your productivity and entertainment experience.
Step 4: Configure Cellular Data Settings
After inserting your SIM card and turning on cellular data on your iPad, the next step is to configure the cellular data settings. This will ensure that your device can connect to the internet seamlessly and make the most of your cellular data plan. Here’s how to do it:
1. Go to the Settings app on your iPad and tap on “Cellular Data.”
2. In the Cellular Data settings, you will see options to enable or disable certain features that use cellular data. These options may vary depending on your cellular carrier:
- Cellular Data: Make sure this option is enabled. It allows your iPad to connect to the internet using cellular data.
- Enable 5G: If your iPad supports 5G connectivity, you can enable it to take advantage of faster network speeds. Keep in mind that using 5G may consume more data.
- Personal Hotspot: This feature allows you to share your iPad’s cellular data connection with other devices. You can enable or disable it as per your preference.
- Wi-Fi Assist: When enabled, this option allows your iPad to automatically switch to cellular data when the Wi-Fi connection is weak or unstable.
3. Scroll down to the “Cellular Data” section to find more settings related to your data plan:
- View Account: This option redirects you to your cellular carrier’s website or app, where you can manage your data plan, view usage details, and make changes to your account settings.
- Roaming: If you want to use your cellular data while traveling abroad, make sure the roaming option is enabled. Please note that international roaming charges may apply.
- APN Settings: APN (Access Point Name) settings are required if you need to configure specific network settings for your carrier. Usually, these settings are pre-configured, and you don’t need to change them.
- Carrier Lock: This option allows or restricts the use of SIM cards from different carriers on your iPad. If your device is carrier-locked, you may need to contact your carrier to unlock it.
4. In addition to these settings, you may see other options related to specific carrier services or features. It is recommended to explore each option to customize your cellular data settings according to your preferences and needs.
5. Once you have configured the necessary settings, exit the Settings app and you’re ready to use your iPad with cellular data.
Remember to always keep an eye on your cellular data usage to avoid exceeding your plan’s limits and incurring additional charges. The iPad provides an option to monitor your data usage under the “Cellular Data” section in the Settings app.
By configuring the cellular data settings on your iPad, you can ensure a smooth and reliable internet connection on the go, allowing you to stay connected, browse the web, stream videos, and use your favorite apps without relying on Wi-Fi networks.
Step 5: Enable Roaming (Optional)
When you travel internationally, enabling roaming on your iPad allows you to continue using cellular data services while outside your home network coverage area. Roaming enables your iPad to connect to the available cellular networks in the foreign country you’re visiting.
To enable roaming on your iPad, follow these steps:
- Open the Settings app on your iPad.
- Select Cellular Data from the left-hand menu.
- Tap on Roaming.
- Toggle the Data Roaming switch to the position that says “On”.
Enabling roaming on your iPad may incur additional charges, so it’s important to check with your cellular service provider beforehand to understand the roaming rates and policies. Some data plans may include free or discounted roaming options, while others may charge higher rates for international data usage.
If you decide to enable roaming, it’s advisable to monitor your data usage closely to avoid unexpected charges. You can do this by regularly checking the data usage statistics in the Cellular Data section of the Settings app.
Keep in mind that some countries may have limited or restricted access to certain networks or services while roaming. It’s always a good idea to familiarize yourself with the local regulations and restrictions before traveling to ensure a smooth experience.
If you’re unsure about whether to enable roaming or have any concerns, it’s recommended to reach out to your cellular service provider for guidance. They can provide you with the necessary information and help you make an informed decision based on your specific needs and preferences.
Step 6: Monitor Data Usage
Once you have set up cellular data on your iPad, it’s important to monitor your data usage to avoid unexpected charges and to ensure that you stay within your plan’s limits. Here are some tips for effectively monitoring your data usage:
1. Check your data usage regularly: Keep a close eye on your data consumption by checking the usage statistics provided by your carrier or within your iPad’s settings. This will give you an idea of how much data you have used and how much you have remaining in your billing cycle.
2. Set data usage alerts: Many carriers offer the option to set data usage alerts that will notify you when you are approaching your monthly limit. This can help you stay aware of your usage and avoid any unwanted overages.
3. Identify data-hungry apps: Some apps consume more data than others. Take a look at the apps on your iPad and identify any that may be using excessive data. You can limit their background data usage or even consider deleting them if they are not essential.
4. Use Wi-Fi whenever possible: To conserve cellular data, connect to Wi-Fi whenever it is available. Whether you’re at home, in the office, or at a café, using Wi-Fi can help reduce your reliance on cellular data and save you from using up your allotted data quickly.
5. Disable automatic app updates and downloads: By turning off automatic app updates and downloads, you can have more control over when and where large amounts of data are used. Manually update apps and download content only when connected to Wi-Fi to avoid eating into your cellular data allowance.
6. Monitor data usage by apps: Some carriers and software applications provide detailed reports on data usage by individual apps. This allows you to identify specific apps that are consuming excessive data and make informed decisions about whether to limit their usage or find alternatives.
7. Consider using a data usage monitoring app: There are numerous third-party apps available that can help you track and monitor your data usage. These apps often provide visual representations of your usage, allowing you to easily see how much data you have used and how much you have left.
8. Review your plan: Regularly review your cellular plan to ensure that it still meets your data usage needs. If you consistently find yourself exceeding your data limit, it may be time to consider upgrading to a plan with a higher data allowance to avoid potential overage charges.
By following these tips and actively monitoring your data usage, you can better manage your cellular data consumption on your iPad. This will help you stay within your plan’s limits, avoid unexpected charges, and make the most out of your mobile internet experience.
Troubleshooting Tips
Setting up cellular data on your iPad can sometimes come with its fair share of challenges. If you encounter any issues, don’t worry! Here are some troubleshooting tips to help you get your iPad connected to cellular data smoothly:
1. Check your signal strength: Poor signal strength can greatly affect your cellular data connection. Make sure you are in an area with good network coverage. If the signal is weak, try moving to a different location or contacting your service provider.
2. Restart your iPad: Sometimes, a simple restart can resolve common connectivity issues. Press and hold the power button until the “slide to power off” option appears. Slide it to turn off your iPad, wait for a few seconds, and then press the power button again to turn it back on.
3. Reset network settings: If restarting doesn’t help, try resetting your network settings. Go to “Settings” > “General” > “Reset” and tap on “Reset Network Settings.” Keep in mind that this will remove all saved Wi-Fi networks and passwords, so be prepared to re-enter them.
4. Update your iPad’s software: Outdated software can cause compatibility issues. Check for any available software updates by going to “Settings” > “General” > “Software Update.” If an update is available, follow the on-screen instructions to install it.
5. Check for carrier updates: Occasionally, carriers release updates specifically for cellular connectivity. To check for carrier updates, go to “Settings” > “General” > “About.” If an update is available, a prompt will appear. Follow the instructions to install it.
6. Verify your cellular data plan: Ensure that your cellular data plan is active and that you have sufficient data allowance. Contact your service provider to confirm the status of your plan and check for any potential issues on their end.
7. Reset your SIM card: In some cases, resetting your SIM card can help resolve connectivity problems. To do this, remove the SIM card from your iPad, wait for a few seconds, and then reinsert it carefully.
8. Contact your service provider: If you have tried all the troubleshooting tips above without success, it may be necessary to reach out to your service provider’s customer support. They can assist you in diagnosing and resolving any underlying network issues.
By following these troubleshooting tips, you’ll increase your chances of successfully setting up cellular data on your iPad. Remember, persistence is key, and with a little patience, you’ll soon be enjoying the convenience of staying connected wherever you go!
Setting up an iPad with cellular data is a simple and convenient way to stay connected and enjoy the benefits of mobile internet on-the-go. With just a few steps, you can activate your cellular plan, configure the settings, and start browsing, streaming, and downloading content from anywhere.
By following this guide, you can ensure a smooth and hassle-free setup process for your iPad with cellular data. Whether you’re a frequent traveler, a professional on the move, or simply want the flexibility to use your iPad without relying on Wi-Fi, setting up cellular data will provide you with the freedom and convenience you need.
Remember to choose the right data plan that suits your needs, keep your iPad updated, and manage your data usage wisely. With cellular data, you can take full advantage of all the amazing features and possibilities your iPad has to offer, making it an indispensable tool in your digital toolkit.
FAQs
Q: Can I use my iPad with cellular data?
A: Yes, you can use your iPad with cellular data by purchasing a cellular-enabled iPad model and subscribing to a cellular data plan from a supported carrier.
Q: How do I set up my iPad with cellular data?
A: To set up your iPad with cellular data, follow these steps:
- Ensure that you have a cellular-enabled iPad model.
- Insert a SIM card or eSIM into the designated slot on your iPad.
- Go to “Settings” on your iPad and tap on “Cellular Data.”
- Tap on “Set Up Cellular Data” and follow the prompts to activate your data plan.
- You may need to enter the necessary information provided by your cellular carrier. Once done, your iPad will be set up with cellular data.
Q: How do I check my cellular data usage on my iPad?
A: To check your cellular data usage on your iPad, follow these steps:
- Go to “Settings” on your iPad and tap on “Cellular Data.”
- Under the “Cellular Data” section, you will see a breakdown of your data usage by app.
- Scroll down to view a list of apps and the amount of data each app has consumed.
Q: Can I switch from using cellular data to Wi-Fi on my iPad?
A: Yes, you can switch from using cellular data to Wi-Fi on your iPad. To do so:
- Go to “Settings” on your iPad and tap on “Wi-Fi.”
- Toggle the switch to enable Wi-Fi.
- Select a Wi-Fi network from the available options and enter the password if prompted.
Once connected to a Wi-Fi network, your iPad will prioritize using Wi-Fi for internet access instead of cellular data.
Q: Can I share my iPad’s cellular data connection with other devices?
A: Yes, you can share your iPad’s cellular data connection with other devices using a feature called Personal Hotspot. To set up a Personal Hotspot:
- Go to “Settings” on your iPad and tap on “Cellular Data.”
- Under the Cellular Data section, tap on “Personal Hotspot.”
- Toggle the switch to enable Personal Hotspot.
- If prompted, set a Wi-Fi password for the Personal Hotspot.
- On the device you want to connect to the Personal Hotspot, go to Wi-Fi settings and connect to the network with the name of your iPad’s hotspot.
- Enter the Wi-Fi password if prompted.
Once connected, the other device will be able to use your iPad’s cellular data connection to access the internet.