
In today’s mobile-driven world, capturing and sharing precious moments through photos has become an integral part of our lives. With the advancements in technology, smartphones such as the iPhone have made it easier than ever to snap high-quality pictures on the go. And with the advent of cloud storage services like Google Photos, users can effortlessly store and access their photo collections from any device. If you’ve been wondering how to upload photos from your iPhone to Google Photos, you’ve come to the right place. In this article, we will guide you through the process step by step, ensuring that your cherished memories are safely backed up and readily available for sharing or revisiting at any time. So let’s dive in and discover how to seamlessly transfer your iPhone photos to the convenient storage solution offered by Google Photos.
Inside This Article
- Step 1: Install Google Photos App
- Step 2: Sign in to Your Google Account
- Step 3: Grant Access to Photos
- Step 4: Select Photos to Upload
- Step 5: Choose Upload Quality
- Step 6: Start the Upload
- Step 7: Check Upload Status
- Step 8: View Uploaded Photos in Google Photos
- Step 9: Enable Backup and Sync (Optional)
- Step 10: Upload Photos Directly from Apple Photos App (Optional)
- Step 11: Delete Uploaded Photos from iPhone (Optional)
- Step 12: Troubleshooting Tips
- Conclusion
- FAQs
Step 1: Install Google Photos App
The first step in uploading photos from your iPhone to Google Photos is to install the Google Photos app on your device. The app is available for free in the App Store, so you can easily download and install it on your iPhone.
To install the Google Photos app, open the App Store on your iPhone and search for “Google Photos” in the search bar. Once you find the app, tap on it to open the app page. Then, tap on the “Get” or “Install” button to download and install the app on your iPhone.
Once the installation is complete, you can find the Google Photos app on your home screen. Tap on the app icon to launch it.
Installing the Google Photos app on your iPhone is the first step towards seamlessly uploading and organizing your photos in the cloud. With the app installed, you can easily access your photos from any device with an internet connection and manage them efficiently.
Step 2: Sign in to Your Google Account
Once you have installed the Google Photos app on your iPhone, the next step is to sign in to your Google Account. This will allow you to access and manage your Google Photos library from your device.
To sign in to your Google Account, open the Google Photos app and tap on the “Get Started” button if prompted. You will then be presented with a screen that asks you to sign in or create a new account.
If you already have a Google Account, tap on the “Sign in” option. Enter your email address or phone number associated with your account and tap “Next.” On the following screen, enter your password and tap “Next” again to proceed.
If you don’t have a Google Account, you can tap on the “Create account” option and follow the prompts to set up a new account. This will require you to provide some personal information and create a password.
Once you have signed in to your Google Account, you may be prompted to grant the Google Photos app access to your photos. This is necessary for the app to upload and synchronize your photos with Google Photos.
It’s important to note that signing in to your Google Account gives you access to all of your Google services, not just Google Photos. This means that you can easily switch between applications like Gmail, Google Drive, and Google Calendar using the same account credentials.
Now that you have successfully signed in to your Google Account, you are ready to move on to the next step and grant the necessary access to your iPhone’s photos.
Step 3: Grant Access to Photos
Once you have installed the Google Photos app on your iPhone, the next step is to grant access to your photos. This will allow the app to access your photo library and upload the selected photos to your Google account.
To grant access to your photos, follow these simple steps:
- Open the Google Photos app on your iPhone.
- Sign in to your Google account. If you don’t have an account, you can create one by tapping on “Create account” and following the on-screen instructions.
- After signing in, the app will prompt you to give access to your photos. Tap on “Allow” to grant permission. This will enable Google Photos to access and upload your photos.
- If prompted, you may also need to allow the app access to your device’s camera. This will allow you to use the built-in camera feature of Google Photos to take and upload photos directly from the app.
By granting access to your photos, you can take full advantage of the features and functionalities offered by Google Photos. It ensures that your selected photos are securely stored and backed up in your Google account, making it easy to access them from any device with internet connectivity.
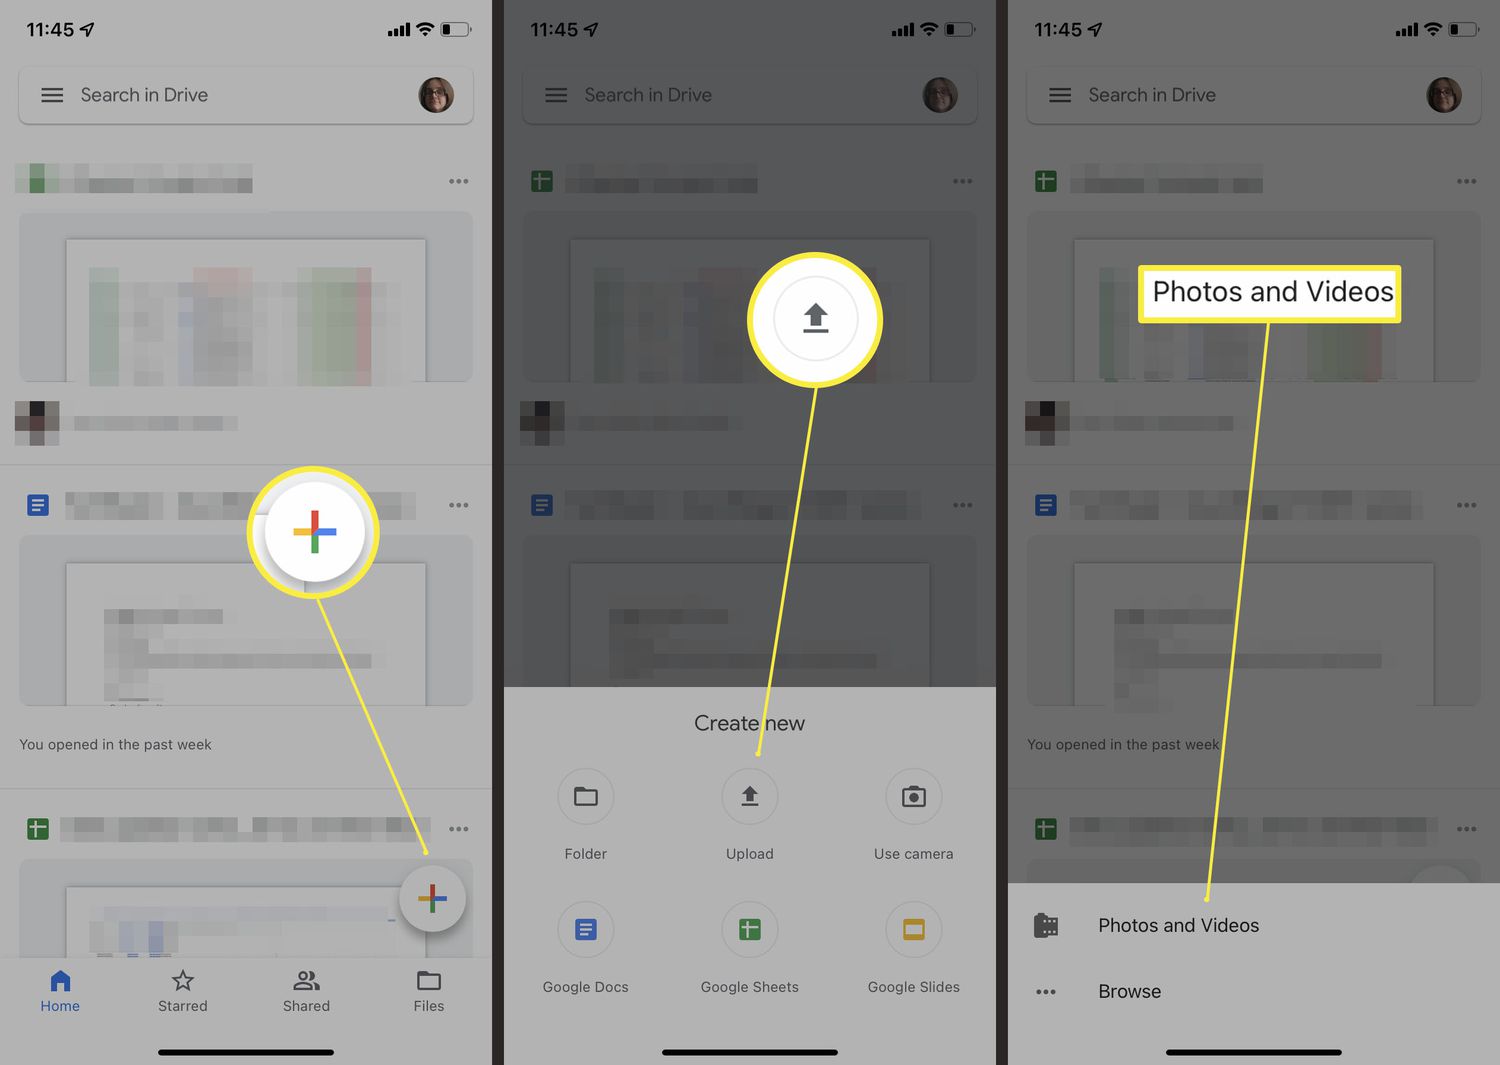
Step 4: Select Photos to Upload
Now that you have the Google Photos app installed and have signed in to your Google account, it’s time to select the photos you want to upload. Here’s how:
1. Open the Google Photos app on your iPhone.
2. Tap on the “Assistant” tab at the bottom of the screen. This will take you to the Assistant section where you can find suggestions for photos to upload or create albums.
3. Alternatively, you can choose the “Photos” tab at the bottom of the screen. This will display all the photos stored on your iPhone.
4. Browse through your photos and tap on the ones you want to upload. You can select multiple photos by tapping and holding on the first photo, then sliding your finger to select the rest.
5. Once you have selected all the photos you want to upload, tap on the “Add to” icon at the top of the screen. This icon looks like a square with a plus sign inside.
6. Choose the album or create a new album where you want to upload the selected photos. If you want to upload them to the main photo library, select “Photos” as the destination.
7. After selecting the destination, tap on the “Done” button at the top right corner of the screen.
8. The selected photos will now be added to the chosen album or the main photo library, and the upload process will begin.
Remember, you can always go back and select additional photos to upload at any time. Just follow the same steps and choose the desired photos.
Note: If you have a large number of photos to upload, it may take some time for the process to complete. You can keep the Google Photos app open in the foreground or let it run in the background while the upload is in progress.
Step 5: Choose Upload Quality
Once you have selected the photos you want to upload to Google Photos from your iPhone, the next step is to choose the upload quality. Google Photos offers two options for upload quality: High Quality and Original Quality. Here’s what you need to know about each option:
1. High Quality: When you choose High Quality, Google Photos will compress your photos to a slightly lower resolution, but still maintain good image quality. This option is recommended for most users as it allows unlimited storage for free. The photos will be resized to a maximum resolution of 16 megapixels if they exceed this limit.
2. Original Quality: If you prefer to upload your photos without any compression, you can choose the Original Quality option. With this option, your photos will be uploaded in their original resolution and file size. However, keep in mind that this will count towards your Google storage limit if you exceed the free storage tier.
To choose the upload quality, follow these steps:
- Tap on the Settings option in the Google Photos app.
- Select Back up & sync.
- Under Upload size, choose either High quality or Original.
It’s important to note that once you have chosen the upload quality, it will apply to all future uploads from your iPhone to Google Photos. However, you can always change the upload quality setting whenever you want by following the steps mentioned above.
Remember, if you choose the Original Quality option and you have a large number of photos or videos, it may take longer to upload and may consume more data. So, consider your storage and data usage preferences when making the choice between High Quality and Original Quality.
Now that you have chosen the upload quality, you are ready to proceed with the uploading process. Move on to the next step to learn how to start the upload.
Step 6: Start the Upload
After you have selected the photos you want to upload, it’s time to start the upload process. Here’s how you can do it:
1. Once you have chosen the photos, tap on the “Upload” button. This button is usually represented by an upward arrow or an icon that looks like a cloud with an arrow pointing up.
2. Depending on the size and number of photos you are uploading, the process may take some time. You will see a progress bar or an indicator showing the upload status. Be patient and let the app do its work.
3. Keep in mind that if you are using a mobile data connection, uploading a large number of photos may consume a significant amount of data. It’s recommended to connect to a Wi-Fi network to avoid excessive data usage.
4. You can also choose to upload your photos in the background. This means that the upload process will continue even if you switch to another app or lock your phone. To enable this feature, check the settings of your Google Photos app and make sure the “Background Upload” option is turned on.
5. During the upload, you can monitor the progress by checking the upload status in the app. You may also receive notifications when the upload is complete or if there are any issues with the process.
6. Once the upload is finished, you will be able to access your photos on Google Photos from any device with internet access. This includes not only your iPhone but also your computer, tablet, or other mobile devices.
Remember, you can always pause or cancel the upload if needed. Just tap on the respective options in the app to take control of the upload process.
By following these simple steps, you can easily start the upload of your photos from your iPhone to Google Photos. Now, it’s time to move on to the next step and learn how to check the upload status in Google Photos.
Step 7: Check Upload Status
After you have initiated the upload of your photos from your iPhone to Google Photos, it’s important to keep track of the upload progress. This will ensure that all of your precious memories are safely stored in the cloud.
Here’s how you can check the upload status:
- Open the Google Photos app on your iPhone.
- Tap on the ‘Library’ tab at the bottom of the screen.
- Scroll down to the bottom of the Library screen and tap on ‘Uploads’.
- Here, you will see a list of all the photos and videos that are currently being uploaded to Google Photos.
- You can tap on a specific photo or video to view its upload status.
- If the upload is complete, you will see a green checkmark next to the photo or video.
- If the upload is still in progress, you will see a progress bar indicating the percentage of the upload completed.
- You can also swipe down on the ‘Uploads’ screen to refresh the upload status and see the latest progress.
By regularly checking the upload status, you can ensure that all your photos and videos are successfully backed up to Google Photos. If you encounter any issues or errors during the upload process, refer to the troubleshooting tips provided in Step 12.
Congratulations! You are one step closer to having all your iPhone photos backed up securely in the cloud. Moving on to Step 8, we will explore how to view your uploaded photos in Google Photos.
Step 8: View Uploaded Photos in Google Photos
Once you have successfully uploaded your photos from your iPhone to Google Photos, you can easily view and organize them within the Google Photos app or web interface. Here’s how:
1. Open the Google Photos app on your iPhone or go to the Google Photos website on your computer.
2. Sign in to your Google account if you haven’t already done so.
3. In the Google Photos app, tap on the “Photos” tab at the bottom of the screen. On the website, click on the “Photos” tab in the left-hand menu.
4. Here, you will see all the photos that you have uploaded from your iPhone. The photos are organized chronologically, with the most recent ones appearing first.
5. You can browse through your photos by swiping left or right in the app or by scrolling up and down on the website. Alternatively, you can use the search bar at the top of the screen to search for specific photos by date, location, or even by the content of the photos themselves.
6. To view a photo in full screen, simply tap on it in the app or click on it on the website. You can zoom in or out on the photo by pinching or spreading your fingers on the screen.
7. Google Photos also offers various ways to organize your photos. You can create albums to group photos together, add tags or labels to categorize them, and even create collages or animations with your photos.
8. To access these organizing features, look for the menu icon (three horizontal lines) in the top-left corner of the screen in the app or in the left-hand menu on the website. From there, you can choose options like “Albums,” “Tags,” or “Assistant” to manage and customize your photo collection.
9. In addition to viewing your photos, Google Photos also allows you to share them with others. You can easily share a photo or an entire album by tapping the “Share” button on the app or by clicking on the “Share” icon on the website. You can share the photos through email, social media platforms, or by generating a shareable link.
That’s it! You can now enjoy your uploaded photos in Google Photos and take advantage of its powerful features for organizing and sharing your memories.
Step 9: Enable Backup and Sync (Optional)
Enabling backup and sync on Google Photos allows you to automatically upload and store all your iPhone photos to your Google account. This feature ensures that your precious memories are safely backed up and can be easily accessed from any device with an internet connection. Here’s how you can enable backup and sync:
1. Open the Google Photos app on your iPhone. If you don’t have the app installed, download it from the App Store and sign in to your Google account.
2. Tap on the profile icon in the top right corner of the app to access the settings menu.
3. Scroll down and select “Backup & sync.”
4. Toggle the switch next to “Backup & sync” to enable it. When enabled, the switch will turn blue.
5. You can choose the upload quality for your photos. Select “High Quality” to store your photos in compressed form, which provides unlimited storage. If you prefer to retain the original image quality, select “Original Quality,” but be aware that this may count towards your Google storage quota.
6. Once backup and sync is enabled, all your iPhone photos will start uploading to your Google account. The process may take some time depending on the number of photos you have.
7. You can check the upload progress by tapping on the “Photos” tab at the bottom of the app and then tapping on “Backup & sync” at the top.
8. To view your uploaded photos, tap on the “Photos” tab and you’ll see all your photos stored in Google Photos.
Enabling backup and sync ensures that you have a reliable backup of your iPhone photos in the cloud. This not only provides peace of mind but also frees up storage space on your device. Give it a try and never worry about losing your precious memories again!
Step 10: Upload Photos Directly from Apple Photos App (Optional)
If you have been using the Apple Photos app to manage your photo library on your iPhone, you can also upload photos directly from the app to your Google Photos account. This convenient feature allows you to seamlessly transfer your photos without the need for any additional steps or third-party apps.
To upload photos from the Apple Photos app to Google Photos, follow these simple steps:
- Open the Apple Photos app on your iPhone.
- Navigate to the photo or photos you want to upload. You can select multiple photos by tapping and dragging or using the “Select” option.
- Once you have selected the photos, tap the share icon, which resembles a box with an upward arrow.
- From the sharing options, scroll and find the Google Photos icon. Tap on it to proceed.
- If prompted, sign in to your Google account using your credentials.
- Grant access to the Apple Photos app to access your Google Photos account.
- Choose the desired upload quality for your photos: High quality or Original quality. Keep in mind that High quality uploads are free, while Original quality uploads may count towards your Google storage limit.
- Tap the “Upload” button to start the upload process. You can monitor the progress of the upload in the notification center.
- Once the upload is complete, you can access your photos in the Google Photos app or on the Google Photos website.
By uploading photos directly from the Apple Photos app, you can easily migrate your entire photo library to Google Photos without having to manually transfer individual photos. This is especially useful if you have a large collection of photos that you want to preserve and access across multiple devices.
Remember, this step is optional and you can still upload photos to Google Photos using the Google Photos app. The choice ultimately depends on your personal preference and convenience.
Step 11: Delete Uploaded Photos from iPhone (Optional)
If you have successfully uploaded your photos to Google Photos and no longer need them on your iPhone, you may choose to delete them to free up storage space. Here’s how you can delete the uploaded photos from your iPhone:
1. Open the Google Photos app on your iPhone.
2. Tap on the “Library” tab at the bottom of the screen.
3. Navigate through the albums or search for the uploaded photos you want to delete.
4. Once you locate the photos you wish to remove, tap and hold on one of them until a checkmark appears on it.
5. While still holding onto the first photo, you can either tap on additional photos to select them, or use your other hand to navigate through the album and select multiple photos.
6. After selecting all the photos you want to delete, tap on the “Trash” icon at the bottom right corner of the screen.
7. A confirmation message will appear, asking if you want to move the selected photos to the trash. Tap on “Move to Trash” to proceed with the deletion.
8. Google Photos will now delete the selected photos from your iPhone. Once the process is complete, you will no longer see these photos in your Google Photos library or your iPhone’s Photos app.
It’s important to note that deleting photos from your iPhone will not affect the copies stored in your Google Photos account. They will remain safely backed up in the cloud, and you can access them anytime by logging into your Google account.
If you accidentally delete any photos and want to recover them, you can visit the “Trash” or “Bin” section in the Google Photos app or website to restore them.
Deleting uploaded photos from your iPhone is optional but can be a useful step in optimizing storage space on your device. It is especially handy for those who regularly upload their photos to the cloud and rely on services like Google Photos for long-term storage.
Step 12: Troubleshooting Tips
If you encounter any issues while uploading your photos from the iPhone to Google Photos, don’t worry. Here are some troubleshooting tips that can help you resolve common problems:
1. Check your internet connection: Make sure that your iPhone is connected to a stable internet connection, preferably Wi-Fi. Uploading large files over cellular data may result in slower speeds or failed uploads.
2. Update Google Photos app: Ensure that you have the latest version of the Google Photos app installed on your iPhone. Outdated versions may have bugs or compatibility issues that can affect the upload process.
3. Restart your iPhone: Sometimes, simply restarting your iPhone can resolve temporary glitches or software conflicts that might be preventing the photos from uploading. Press and hold the power button, then swipe to power off. Wait a few seconds and then turn your iPhone back on.
4. Clear app cache: If you’re experiencing issues specific to the Google Photos app, try clearing its cache. Go to Settings on your iPhone, then select Storage & iCloud Usage. Tap on “Manage Storage” and find Google Photos in the list of apps. Tap on it, then choose “Delete App” to remove it along with its cache. Reinstall the app from the App Store and try uploading your photos again.
5. Check storage space: Ensure that you have enough storage space both on your iPhone and Google Photos. If either of them is running low on storage, it may cause problems during the upload process. Delete unnecessary files or apps to free up space, and check your Google Photos storage to ensure you have enough available.
6. Disable battery-saving mode: If your iPhone is in a battery-saving mode, it may restrict certain features, including background uploading. Disable battery-saving mode temporarily while uploading your photos to ensure smooth and uninterrupted progress.
7. Verify Google account settings: Double-check the account settings associated with your Google Photos app. Make sure you’re signed in with the correct Google account and that it has the necessary permissions to upload photos. If needed, sign out and sign back in to refresh the settings.
8. Contact Google support: If you’ve tried all the troubleshooting steps and are still facing issues with uploading photos, reach out to Google support for further assistance. They can provide specific guidance and help resolve any underlying technical problems.
By following these troubleshooting tips, you should be able to overcome any hurdles and successfully upload your photos from your iPhone to Google Photos.
Conclusion
In conclusion, uploading photos from your iPhone to Google Photos is a seamless and convenient process. With the help of the Google Photos app or the Google Photos website, you can easily transfer your precious memories to the cloud and access them from any device with an internet connection. The process involves selecting the photos you want to upload, choosing the desired upload method, and ensuring a stable internet connection for a smooth transfer. Whether you want to free up storage space on your iPhone or create a backup of your photos, Google Photos offers a reliable solution. So, don’t let those cherished moments stay trapped on your phone, start uploading them to Google Photos today and enjoy the benefits of easy access and peace of mind.
FAQs
1. Can I Upload Photos from my iPhone to Google Photos?
Absolutely! Uploading photos from your iPhone to Google Photos is a breeze. In fact, Google offers a dedicated app for iOS that allows you to seamlessly transfer your photos to the cloud.
2. Do I need to have a Google account to use Google Photos on my iPhone?
Yes, you will need a Google account to access Google Photos on your iPhone. If you don’t have one already, you can create a Google account for free.
3. Are there any limitations on the size or number of photos I can upload?
Google Photos offers unlimited storage for photos up to 16 megapixels and videos up to 1080p resolution. However, if you choose to store higher quality photos or videos, it will count against your Google Drive storage quota.
4. Can I upload photos to Google Photos using cellular data?
Yes, you can upload photos to Google Photos using cellular data. However, keep in mind that uploading large files over cellular data may use a significant amount of your data plan, so it’s advisable to connect to a Wi-Fi network if possible.
5. What are the advantages of using Google Photos on my iPhone?
Using Google Photos on your iPhone has several advantages. Firstly, it provides you with a secure backup solution for your photos, ensuring that they are safe even if your device is lost or damaged. Additionally, Google Photos offers powerful search and organization features, making it easier to find and organize your photos. Lastly, with the ability to free up space on your iPhone by storing your photos in the cloud, you can have more storage capacity for other content on your device.