
In today’s digital age, our smartphones have become an essential tool for storing and accessing our files, photos, and videos. However, the limited storage capacity of iPhones and iPads can quickly become a hurdle when it comes to managing and organizing our data. Thankfully, there is a solution – external storage.
By using external storage devices, such as USB flash drives or external hard drives, you can expand the storage capacity of your iPhone or iPad, allowing you to store more files, media, and documents. But how exactly do you use external storage with your Apple devices? In this article, we’ll explore the different methods you can use to connect, transfer, and manage external storage on your iPhone or iPad. So, let’s get started!
Inside This Article
- Connecting External Storage to iPhone or iPad
- Transferring Files to External Storage
- Managing Files on External Storage
- Disconnecting External Storage
- Conclusion
- FAQs
Connecting External Storage to iPhone or iPad
With the advancements in technology, it is now possible to expand the storage capacity of your iPhone or iPad by using external storage devices. This allows you to store and access files, photos, videos, and more without filling up your device’s internal memory. To connect external storage to your iPhone or iPad, follow these simple steps:
1. Check compatibility: Before purchasing an external storage device, make sure it is compatible with your iPhone or iPad. Most devices support both Lightning and USB connections, so choose the one that matches your device’s port.
2. Purchase an external storage device: There are various options available in the market, from USB flash drives to portable hard drives. Consider factors such as storage capacity, speed, and ease of use when selecting the right device for your needs.
3. Connect the external storage: Plug the external storage device into the corresponding port on your iPhone or iPad. For devices with a Lightning port, use a Lightning to USB adapter. For devices with a USB-C port, use a USB-C to USB adapter.
4. Allow access: Once the external storage device is connected, your device may prompt you to allow access. Tap “Allow” to give permission for the device to communicate with your iPhone or iPad.
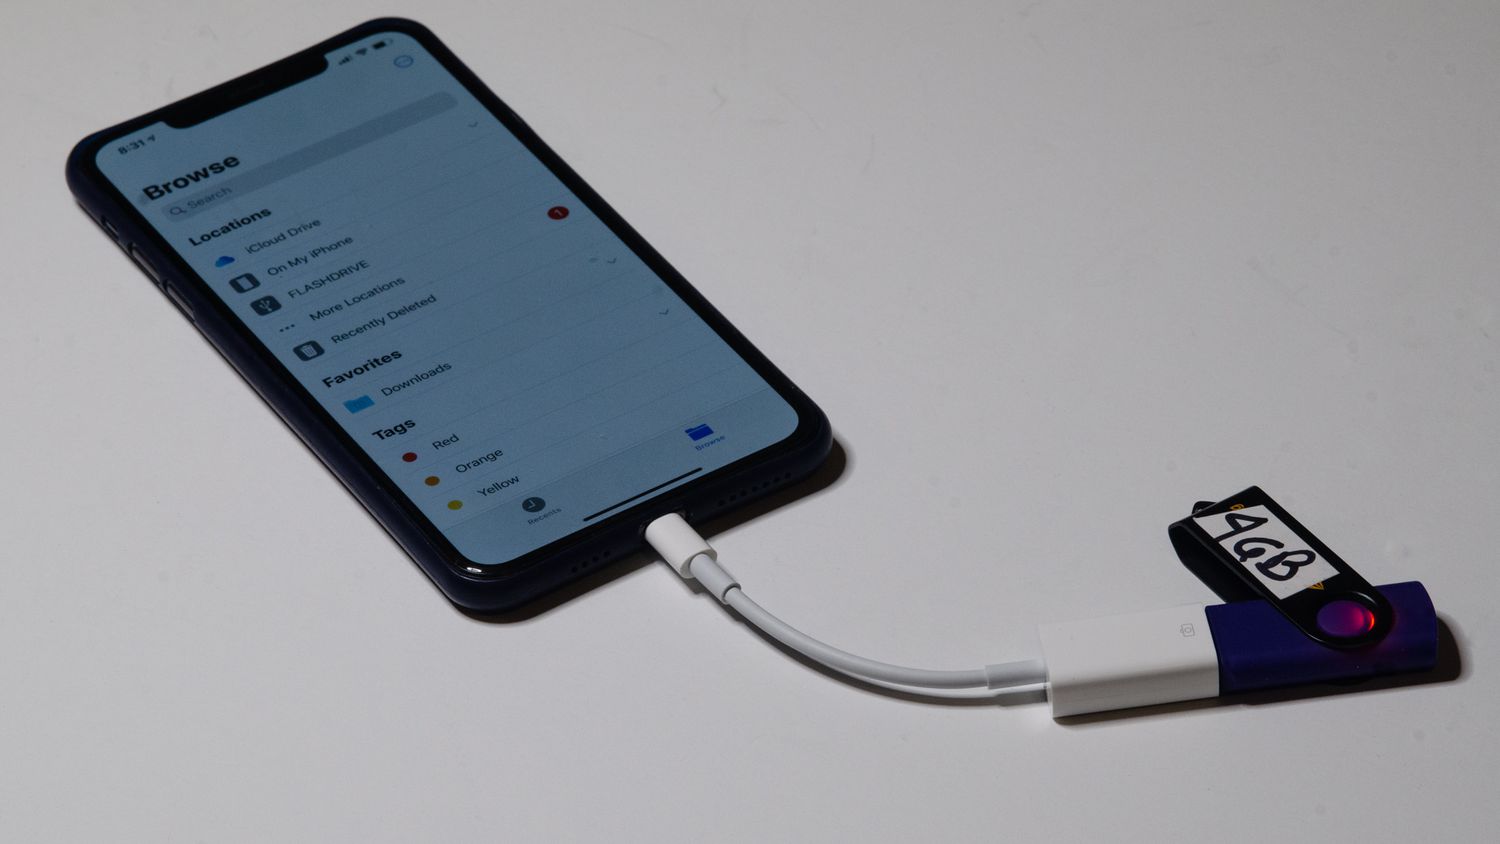
5. Access the external storage: Open the Files app on your iPhone or iPad. You should now see the connected external storage device listed under the “Locations” section. Tap on the device name to access its contents.
6. Transfer files: To transfer files from your iPhone or iPad to the external storage device, simply select the files you want to move and tap the “Move” option. Choose the external storage device as the destination and the files will be transferred.
7. Safely eject the external storage: Before disconnecting the external storage device, make sure to properly eject it from your iPhone or iPad. This ensures that all data is saved and there is no risk of data loss. You can do this by tapping the “Eject” icon next to the device name in the Files app.
By following these steps, you can easily connect external storage to your iPhone or iPad and expand your device’s storage capacity. It provides a convenient way to store and access files on the go, without worrying about running out of space on your device’s internal memory.
Transferring Files to External Storage
Transferring files to external storage on your iPhone or iPad is a simple and convenient process. Whether you want to free up space on your device or backup important data, external storage offers a reliable solution. Follow these steps to transfer files:
1. Connect the external storage device to your iPhone or iPad using the appropriate connector or cable. Most devices use either a lightning or USB-C connector.
2. Once connected, your device will recognize the external storage. A notification may appear on your screen indicating that an external storage device has been detected.
3. Open the Files app on your iPhone or iPad. This app allows you to manage files stored on your device and external storage.
4. Navigate to the location of the files you want to transfer. This could be in the Photos app, iCloud Drive, or any other compatible app that stores files.
5. Select the files you want to transfer by tapping on them. You can select multiple files by tapping and holding on the first file, then tapping on the other files you want to include.
6. Tap the Share button, which is typically represented by a square with an arrow pointing upward. It is usually located at the bottom-left or bottom-right corner of the screen.
7. In the share menu, scroll through the options until you find the external storage device. It may be listed as an option with the name of the device or as a generic option such as “Save to Files” or “Save to External Storage”.
8. Tap on the external storage option. You may be prompted to choose a specific folder or location on the external storage device to save the files.
9. Confirm the transfer by tapping on the Save or Transfer button. The files will then be transferred from your iPhone or iPad to the external storage device.
10. Once the transfer is complete, you can safely disconnect the external storage device from your iPhone or iPad. Remember to properly eject or disconnect the device to avoid data corruption.
Transferring files to external storage on your iPhone or iPad gives you the flexibility to store and access your data conveniently. Whether you’re backing up important files or clearing up space on your device, external storage is a valuable option to consider.
Managing Files on External Storage
Once you have connected your external storage device to your iPhone or iPad, you will need to manage the files stored on it. Here are some tips to help you efficiently manage your files:
1. Organize your files: To keep your files organized, create folders on your external storage device. This will allow you to categorize your files and easily locate them when needed. For example, you can create separate folders for photos, videos, documents, and more.
2. Rename files: If you want to give your files more descriptive or meaningful names, you can easily rename them on your iPhone or iPad. Simply locate the file you want to rename, tap on it, and select the “Rename” option. Enter the new name and tap “Done” to save the changes.
3. Move and copy files: You can easily move or copy files between different folders on your external storage device. Simply select the file you want to move or copy, tap on the “Move” or “Copy” option, and choose the destination folder. This allows you to organize your files in a way that suits your needs.
4. Delete files: If you no longer need certain files, you can delete them directly from your external storage device. Select the files you want to delete, tap on the “Delete” option, and confirm the action. Be cautious when deleting files, as they cannot be recovered once they are deleted.
5. Share files: If you need to share files from your external storage device, you can do so directly from your iPhone or iPad. Select the file you want to share, tap on the “Share” option, and choose the method of sharing, such as email, messaging apps, or cloud storage platforms.
6. Backup your files: It is always a good practice to regularly backup your files to ensure you don’t lose any important data. You can backup your files from your external storage device to your iCloud or other cloud storage services. This provides an extra layer of protection for your files.
7. Secure your files: If you have sensitive or confidential files on your external storage device, it is important to secure them. You can use file encryption apps or password-protect your files to prevent unauthorized access.
8. Check for updates: Keep your external storage device up to date by checking for any software updates. Manufacturers often release firmware updates that can improve performance, fix bugs, or introduce new features. Check the manufacturer’s website regularly or use their official app to stay updated.
9. Safely eject your external storage: Before disconnecting your external storage device from your iPhone or iPad, make sure to safely eject it. This allows the device to properly finish any ongoing read or write operations and prevents data corruption. Access the “Settings” menu, select the “External Storage” option, and choose the “Eject” option to safely remove the device.
10. Keep track of available storage: Lastly, regularly monitor the available storage on your external storage device to ensure you have enough space for your files. Delete unnecessary files or transfer them to another storage device to free up space if needed.
By following these tips, you can effectively manage the files on your external storage device connected to your iPhone or iPad. Whether you are organizing files, sharing documents, or securing sensitive data, these strategies will help you make the most out of your external storage.
Disconnecting External Storage
When you are done using external storage with your iPhone or iPad, it is important to safely disconnect the device to avoid data loss or corruption. Here’s how you can properly disconnect external storage from your iOS device:
1. Close any apps or files that you have opened from the external storage device. This ensures that all data is properly saved and not in use.
2. Go to the home screen of your iPhone or iPad by pressing the home button or swiping up from the bottom of the screen (depending on your device model).
3. Locate the external storage device icon on your home screen or in the Files app. It may appear as a folder or a removable storage device icon.
4. Tap and hold the external storage icon until a contextual menu appears.
5. In the contextual menu, select the option that says “Eject” or “Unmount.” This will safely disconnect the external storage device from your iOS device.
6. Once you have ejected or unmounted the external storage, you can safely remove it from your iPhone or iPad. Make sure to handle the device carefully and avoid pulling it out forcefully.
By following these steps, you can ensure that your data is safely disconnected from the external storage device and there is no risk of data loss or corruption. It is always a good practice to properly eject or unmount external storage before physically removing it from your iPhone or iPad.
Conclusion
In conclusion, using external storage with an iPhone or iPad can greatly expand the storage capacity and enhance the usability of these devices. Whether you need additional space to store photos, videos, or documents, or want to easily transfer files between devices, external storage options offer a convenient solution.
By following the steps mentioned in this article, you can seamlessly connect and manage external storage devices with your iPhone or iPad. Whether you opt for a Lightning-based solution, such as an SD card reader or a flash drive, or choose a wireless external storage device, you’ll have the flexibility and freedom to store and access your files on the go.
Remember to consider factors such as storage capacity, compatibility, and ease of use when selecting an external storage option that best suits your needs. With the right external storage, you can enjoy a more versatile and efficient mobile experience with your iPhone or iPad.
FAQs
1. How can I use external storage with my iPhone or iPad?
To use external storage with an iPhone or iPad, you will need to have a compatible external storage device and the appropriate adapter or cable. Connect the external storage device to your iPhone or iPad using the adapter or cable, and then access the files on the external storage through the Files app or the app-specific file management system.
2. What types of external storage are compatible with iPhones and iPads?
There are different types of external storage devices that are compatible with iPhones and iPads. Some options include USB flash drives, external hard drives, SD cards, and wireless storage devices. It’s important to check the compatibility of the storage device with your specific iPhone or iPad model to ensure it is supported.
3. Are there any limitations in using external storage with an iPhone or iPad?
While external storage can expand the available storage space on your iPhone or iPad, there are some limitations to keep in mind. Not all apps may support accessing files directly from external storage, and some files may need to be transferred to the device’s internal storage to be used with certain apps. Also, the transfer speeds between the device and the external storage may vary depending on the connection type and device capabilities.
4. Can I transfer photos and videos directly to external storage from my iPhone or iPad?
Yes, you can transfer photos and videos directly to external storage from your iPhone or iPad. Using the Files app or app-specific file management systems, you can select the photos and videos you want to transfer and move them to the external storage device. This can free up space on your device and allow you to access the media files from the external storage whenever needed.
5. Are there any security measures to consider when using external storage with an iPhone or iPad?
When using external storage with your iPhone or iPad, it’s important to consider security measures. It is recommended to encrypt sensitive files before transferring them to external storage to protect them from unauthorized access. Additionally, always ensure the external storage device is protected from physical damage and keep it in a safe place when not in use.