
If you’re looking for a convenient way to expand the storage capacity of your iPhone or iPod Touch and turn it into a network drive, then you’re in luck! With the free Files app, you can easily transform your iOS device into a portable storage solution. This innovative app allows you to store and access files on your iPhone or iPod Touch, making it a versatile tool for professionals, students, and anyone in need of extra storage. Whether you want to transfer documents, photos, videos, or any other file type, the Files app simplifies the process by providing a user-friendly interface and seamless integration with your device. Say goodbye to limited storage space and hello to enhanced productivity with the Files app on your iPhone or iPod Touch.
Inside This Article
- How to Use the Files App on your iPhone/iPod Touch
- Step 1: Download and Install the Files App
- Step 2: Connect your iPhone/iPod Touch to a Wi-Fi network
- Step 3: Open the Files App and tap on the “Network” tab
- Step 4: Tap on the “+” (plus) icon to add a new network drive
- How to Connect to a Network Drive
- Step 1: Enter the IP address or server name of the network drive
- Step 2: Enter your login credentials (username and password) if required
- Step 3: Tap on “Connect” to establish the connection to the network drive
- How to Access and Manage Files on the Network Drive
- Step 1: Tap on the network drive to view its contents
- Step 2: Browse through folders and files and tap on a file to open or preview it
- Step 3: Use the built-in file management tools to rename, delete, or move files
- How to Transfer Files to and from the Network Drive
- Step 1: To upload files, tap on the “Upload” button and select the files from your device
- Step 2: To download files from the network drive, tap and hold on a file and select the download option
- Troubleshooting Tips and FAQs
- Conclusion
- FAQs
How to Use the Files App on your iPhone/iPod Touch
The Files app on your iPhone or iPod Touch is a powerful tool that allows you to turn your device into a network drive, providing you with the ability to access and manage files on different devices connected to the same network. Whether you want to transfer files between your iPhone and computer or share files with other devices, the Files app is the perfect solution.
Follow these simple steps to get started:
- Step 1: Download and Install the Files App
- Step 2: Connect your iPhone/iPod Touch to a Wi-Fi network
- Step 3: Open the Files App and tap on the “Network” tab
- Step 4: Tap on the “+” (plus) icon to add a new network drive
The Files app comes pre-installed on iPhones and iPod Touch devices running iOS 11 or later. If you haven’t updated your device, make sure to do so before proceeding. If you don’t have the Files app, you can download it for free from the App Store.
In order to access network drives, both your iPhone/iPod Touch and the devices you want to connect to must be connected to the same Wi-Fi network. Make sure your device is connected to a stable Wi-Fi network before continuing.
Launch the Files app on your device by tapping on its icon. Once the app opens, you’ll see various tabs at the bottom of the screen. Tap on the “Network” tab to access the network drive options.
To connect to a network drive, tap on the “+” (plus) icon located in the top-left corner of the screen. This will bring up a pop-up menu where you can add a new network drive manually.
Congratulations! You’ve now successfully set up the Files app on your iPhone or iPod Touch and are ready to connect to a network drive.
Step 1: Download and Install the Files App
In order to turn your iPhone or iPod Touch into a network drive, you will need to download and install the Files app. This app is available for free on the App Store, so you can easily get it on your device.
To download the Files app, follow these steps:
- Open the App Store on your iPhone or iPod Touch.
- Tap on the “Search” tab at the bottom of the screen.
- Type “Files” in the search bar and tap on the search button.
- Locate the Files app in the search results and tap on it.
- Tap on the “Get” or “Install” button next to the app.
- If prompted, enter your Apple ID password or use Touch ID/Face ID to initiate the download and installation.
Once the Files app is downloaded and installed on your device, you can proceed to the next step to connect your iPhone or iPod Touch to a Wi-Fi network.
Step 2: Connect your iPhone/iPod Touch to a Wi-Fi network
In order to use the Files app on your iPhone or iPod Touch as a network drive, you need to ensure that your device is connected to a Wi-Fi network. Connecting to a Wi-Fi network is a straightforward process and can be done in a few simple steps.
To connect your iPhone or iPod Touch to a Wi-Fi network:
- Go to the Settings app on your device.
- Select “Wi-Fi”.
- You will see a list of available Wi-Fi networks. Tap on the network you want to connect to.
- If the network is password-protected, enter the password when prompted.
- Your device will then attempt to establish a connection to the Wi-Fi network.
- Once connected, you will see a checkmark next to the Wi-Fi network name in the Settings app.
It is important to note that you need to connect your iPhone or iPod Touch to the same Wi-Fi network as the device or computer you intend to access the network drive from. This ensures smooth communication between devices and allows you to seamlessly transfer files.
Once your device is connected to a Wi-Fi network, you are ready to move on to the next step and open the Files app to add a network drive.
Step 3: Open the Files App and tap on the “Network” tab
Once you have successfully downloaded and installed the Files app on your iPhone or iPod Touch, it’s time to open the app and access the “Network” tab to connect to a network drive. Follow these steps:
- Locate the Files app icon on your device’s home screen and tap on it to launch the app.
- Once the Files app is open, you will see various tabs at the bottom of the screen. Tap on the “Network” tab to proceed.
- The “Network” tab will display a list of available network drives that you can connect to. This includes both local network drives and remote storage options.
- Scroll through the list or use the search function to locate the network drive you want to connect to. Tap on the drive to select it.
By tapping on the “Network” tab, you are opening up a whole new world of possibilities. Now, let’s move on to the next step, where we will learn how to connect to a network drive using the Files app on your iPhone or iPod Touch.
Step 4: Tap on the “+” (plus) icon to add a new network drive
Once you have opened the Files app and tapped on the “Network” tab, it’s time to add a new network drive. This will enable you to connect to a specific server or device and access its files and folders directly from your iPhone or iPod Touch.
To do this, simply locate the “+” (plus) icon usually located at the top-right corner of the screen. Tap on it, and a new window or prompt will appear, allowing you to input the necessary details for the network drive.
When adding a new network drive, you will typically be required to provide the IP address or server name of the device you want to connect to. This information will enable your iOS device to establish a connection to the desired network drive.
Additionally, you may be prompted to enter your login credentials, such as a username and password, depending on the network drive’s security settings. This is to ensure that only authorized individuals can access the files and folders stored on the network drive.
Once you have filled in the required information, tap on the “Connect” or “Add” button to initiate the connection. The Files app will attempt to establish a secure connection to the network drive, and if successful, the drive will be added to your list of available network drives.
Now you are ready to access the files and folders stored on the network drive directly from your iPhone or iPod Touch. This convenient feature allows for seamless file management and easy retrieval of important documents, photos, music, and more, even when you are away from your computer.
So, make sure to tap on the “+” (plus) icon and add a new network drive to expand the capabilities of your Files app and transform your iOS device into a powerful network storage solution.
How to Connect to a Network Drive
Connecting your iPhone or iPod Touch to a network drive allows you to access and manage files stored on that drive, right from your device. With the help of the Files app, you can easily establish a connection to a network drive and start accessing your files on the go. Follow these simple steps to get connected:
Step 1: Enter the IP address or server name of the network drive. This information is typically provided by your network administrator or can be found in the drive’s user manual.
Step 2: Enter your login credentials, such as username and password, if prompted. Make sure to input the correct information to establish a successful connection.
Step 3: Tap on the “Connect” button to initiate the connection to the network drive. The Files app will attempt to establish a connection using the provided information.
Once the connection is established, you will have access to the files stored on the network drive directly from your iPhone or iPod Touch. You can browse through folders, open and preview files, and even perform various file management tasks. It’s like having a portable network drive in the palm of your hand!
Remember, the ability to connect to a network drive depends on the compatibility of the drive and the Files app. Some drives may require additional setup or support specific protocols. Be sure to review the drive’s documentation for any specific instructions or requirements.
Now that you know how to connect to a network drive, you can easily access your files anytime, anywhere. It’s a convenient way to have your important files with you, even when you’re away from your computer. So go ahead and give it a try!
Step 1: Enter the IP address or server name of the network drive
Once you have the Files app installed and you’re connected to a Wi-Fi network, it’s time to connect to your network drive. To do this, you’ll need to enter the IP address or server name of the network drive. This information is usually provided by your network administrator or can be found in the documentation that came with the network drive.
To enter the IP address or server name, open the Files app and tap on the “Network” tab. Here, you’ll see a list of available network drives. Tap on the “+” (plus) icon to add a new network drive. A dialog box will appear, prompting you to enter the connection details.
If you know the IP address or server name, simply type it into the appropriate field. If you’re unsure about this information, you may need to consult with your network administrator or refer to the manual that came with your network drive.
It’s important to ensure that you enter the correct IP address or server name, as any errors can prevent you from establishing a successful connection to the network drive. Double-check the information before proceeding to the next step.
Once you have entered the IP address or server name, you can move on to Step 2 to enter your login credentials (username and password) if required.
Step 2: Enter your login credentials (username and password) if required
If the network drive you are connecting to requires authentication, you will need to enter your login credentials. This ensures that only authorized users can access and manage the files on the network drive.
To enter your login credentials, simply tap on the appropriate fields in the Files app. This will bring up the on-screen keyboard, allowing you to input your username and password. Make sure that you enter the correct information to establish a successful connection.
It is important to note that not all network drives will require authentication. Some drives may be set up with public access, allowing anyone on the network to connect without the need for login credentials. However, if you’re connecting to a drive with sensitive or private files, it is likely that authentication will be required.
If you are unsure about your login credentials or encounter any issues, reach out to the network drive administrator for assistance. They will be able to provide you with the necessary information to establish a secure connection.
Step 3: Tap on “Connect” to establish the connection to the network drive
Once you have entered the IP address or server name of the network drive and provided your login credentials (if required), you are ready to establish the connection. To do this, simply tap on the “Connect” button within the Files app.
By tapping on “Connect,” the app will initiate the connection process and attempt to establish a secure link between your iPhone or iPod Touch and the network drive. This process may take a few moments depending on your network speed and the device you are connecting to.
While the connection is being established, you may see a loading or connecting indicator. This is normal and indicative that the Files app is working on setting up the connection. Once the connection is successfully established, you will be granted access to the files and folders located on the network drive.
It is important to note that you may be prompted to accept any certificate or security measures put in place by the network drive. This is to ensure the integrity and security of your data. Once you have accepted any necessary security prompts, the connection will be fully established and ready for you to explore the contents of the network drive.
Additionally, some network drives may require you to establish a connection each time you want to access its files and folders. In such cases, you will need to repeat this step whenever you want to connect to the network drive.
With the connection established, you are now ready to access and manage your files on the network drive, transfer files to and from your device, and make the most of the Files app’s features and capabilities.
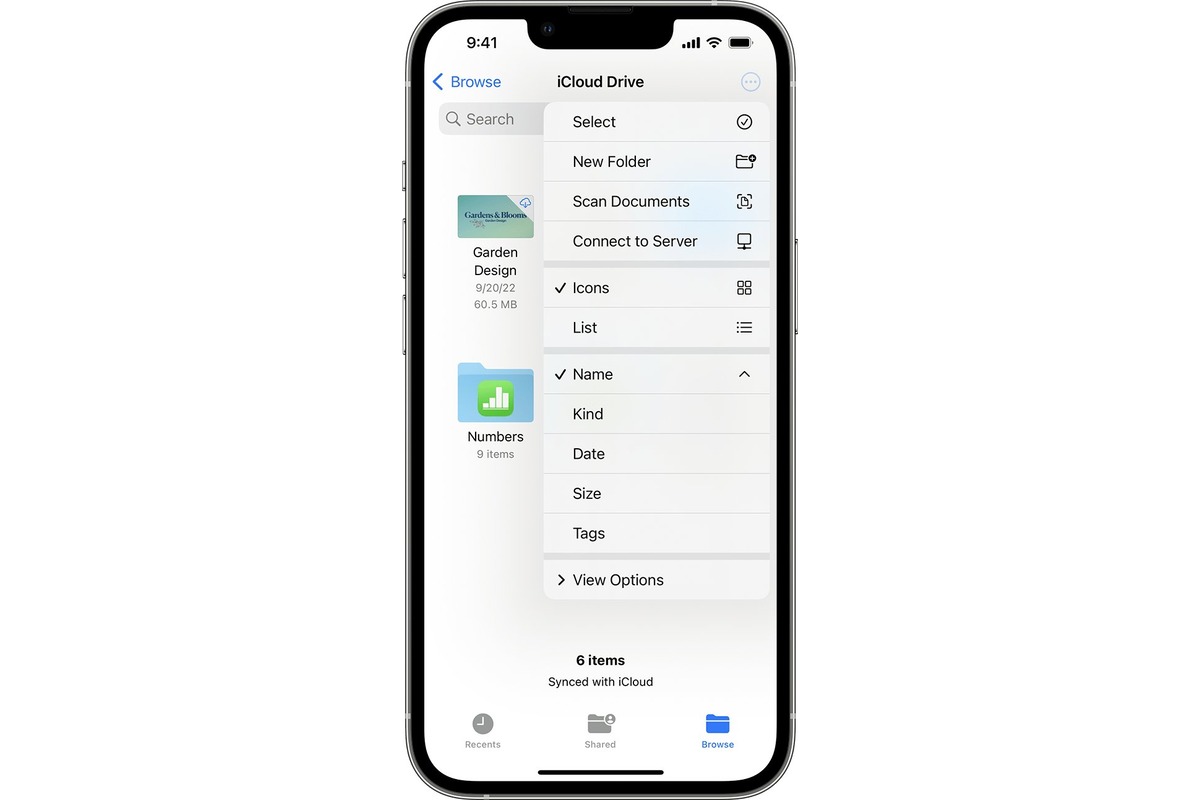
How to Access and Manage Files on the Network Drive
Once you have successfully connected to a network drive using the Files app on your iPhone or iPod Touch, you can easily access and manage files stored on the drive.
To begin, open the Files app and tap on the network drive you wish to explore. This will allow you to view the contents of the network drive, including folders and files.
Browsing through the folders is as simple as tapping on them to open them and see their contents. You can navigate through the hierarchical structure of the network drive just like you would on a computer.
When you locate a file you want to access, simply tap on it to open or preview it. Depending on the file type, you may be able to view it directly within the Files app, or you may need to use a compatible app installed on your device.
The Files app also provides built-in file management tools to help you organize and manipulate files. For example, you can rename a file by tapping on its name, selecting the “Rename” option, and then entering a new name.
If you want to delete a file, simply swipe left on its name and tap the “Delete” button. Be cautious when deleting files, as they may not be recoverable once deleted.
Moving files is also possible with the Files app. To do this, tap and hold on a file until a menu appears, then select the “Move” option. You can then choose a new location within the network drive to move the file to.
Keep in mind that the exact features and functionality of the Files app may vary based on the specific network drive you are connected to. Some network drives may offer additional features such as file sharing, collaboration, and more.
Remember to always disconnect from the network drive when you are finished accessing and managing your files. This will help ensure the security of your data and prevent unauthorized access.
By using the Files app on your iPhone or iPod Touch, you can easily access, manage, and manipulate files on a network drive, making it a convenient tool for both personal and professional use.
Step 1: Tap on the network drive to view its contents
Once you have successfully connected to the network drive using the Files app on your iPhone or iPod Touch, the next step is to tap on the network drive to view its contents. This will allow you to browse through the files and folders stored on the network drive and access them right from your device.
When you tap on the network drive, you will be taken to a screen that displays the contents of the drive. This screen will typically show a list of folders and files that are stored on the network drive.
By tapping on a folder, you can navigate deeper into the directory structure and access the files stored inside that particular folder. The files can be documents, images, videos, or any other type of file that is compatible with your iPhone or iPod Touch.
Furthermore, the Files app also provides you with various options to sort and organize the files within the network drive. You can choose to view the files in a list or grid format, sort them by name, date modified, or size, and even create custom folders to better organize your files.
Additionally, you can perform various actions on the files within the network drive directly from the Files app. This includes copying or moving files, renaming them, deleting them, or even sharing them with others via email or other messaging apps installed on your iPhone or iPod Touch.
Overall, tapping on the network drive in the Files app grants you valuable access to the files and folders stored on the drive, allowing you to conveniently view and manage them right from your iPhone or iPod Touch.
Step 2: Browse through folders and files and tap on a file to open or preview it
Once you’ve successfully connected to the network drive using the Files app on your iPhone or iPod Touch, you can now browse through the folders and files stored on the drive. This allows you to access and manage your files with ease, just like you would on your computer.
To start browsing, simply tap on the network drive that you’ve connected to. You will be taken to the main interface of the drive, where you can see all the folders and files stored within it. The Files app organizes the contents of the drive in a familiar folder structure, making it easy to navigate and find what you’re looking for.
If you want to explore a specific folder, just tap on it to open it. You will be able to see its contents, which may include more folders and individual files. As you navigate through the folders, you can always go back to the previous level by tapping on the “Back” button at the top left corner of the screen.
When you come across a file that you want to open or preview, simply tap on it. The Files app supports a wide range of file types, including documents, images, videos, and more. Depending on the file type and the apps installed on your device, the file will either open directly within the Files app or launch in a relevant app that can handle it.
If the file can be previewed within the Files app, you will be able to view its contents without leaving the app. This is especially useful for quickly checking the contents of a document or glancing at an image or video before deciding what to do with it.
If the file requires a specific app to open, such as a document editor or a media player, the Files app will seamlessly transition to that app. Once you’ve finished working with the file, you can easily go back to the Files app by using the app switcher or tapping on the “Back” button within the specific app.
Additionally, the Files app provides you with options to share, copy, or move files. If you want to share a file via email or a messaging app, simply tap on the share button and choose the desired sharing option. To copy or move a file to a different folder within the network drive, tap and hold on the file until the context menu appears, and then select the appropriate option.
Step 3: Use the built-in file management tools to rename, delete, or move files
Once you have connected to a network drive using the Files app on your iPhone or iPod Touch, you can take advantage of its built-in file management tools to easily rename, delete, or move files. These tools make it convenient to organize your files and keep your network drive clutter-free. Here”s how you can use them:
Rename Files: To rename a file on your network drive, simply tap and hold on the file you want to rename. A pop-up menu will appear, offering various options. Tap on “Rename” and enter the new name for your file. Once you”re done, tap outside the text field or press the “Done” button to save the changes. The file will be renamed with the new name you provided.
Delete Files: If you want to delete a file from your network drive, again, tap and hold on the file you wish to remove. From the pop-up menu, select “Delete.” A confirmation dialog will appear asking if you are sure you want to delete the file. Tap on “Delete” to confirm the deletion. The file will be permanently removed from your network drive.
Move Files: Moving files from one folder to another within your network drive is a breeze with the Files app. Simply tap and hold on the file you want to move, and from the pop-up menu, select “Move.” The screen will then display the folder structure of your network drive. Navigate to the desired destination folder and tap on “Move Here” to complete the file relocation. The file will be moved to the new location.
The ability to easily rename, delete, and move files using the built-in file management tools of the Files app provides you with a seamless and efficient way to manage your files on your network drive. It ensures that you can keep your files organized and accessible, enhancing your productivity while using your iPhone or iPod Touch.
How to Transfer Files to and from the Network Drive
Once you have successfully connected to a network drive using the Files app on your iPhone or iPod Touch, you can easily transfer files between your device and the network drive. Here’s how:
Step 1: To upload files to the network drive, tap on the “Upload” button located within the Files app. This button can usually be found at the bottom or top-right corner of the interface.
Step 2: After tapping the “Upload” button, you will be prompted to select the files you want to transfer from your device. You can choose multiple files by tapping on each one or use the “Select” option to choose multiple files at once.
Step 3: Once you have selected the files, tap on “Upload” or “Done” to start the file transfer process. The Files app will automatically begin uploading the selected files to the network drive.
Step 4: To download files from the network drive to your device, navigate to the folder or directory where the desired files are located. You can do this by tapping on the network drive’s name and browsing through its contents.
Step 5: Once you have found the file you want to download, tap and hold on it to activate the context menu. From the options presented, select the “Download” or “Save” option to initiate the file transfer to your device.
Step 6: The Files app will begin downloading the selected file from the network drive to your iPhone or iPod Touch. The file will be saved in a location specified by your device’s default download settings, such as the Downloads folder.
Using these steps, you can seamlessly transfer files between your iPhone or iPod Touch and a network drive, making it convenient to access and manage your files from anywhere within the network. Whether you need to upload important documents or download media files, the Files app simplifies the process and ensures secure file transfers.
Now that you know how to transfer files to and from the network drive, you can take full advantage of the Files app’s capabilities on your iPhone or iPod Touch. Stay organized, access your files on the go, and enjoy a hassle-free file management experience!
Step 1: To upload files, tap on the “Upload” button and select the files from your device
Once you have successfully connected to the network drive using the Files app on your iPhone or iPod Touch, you can easily upload files from your device to the network drive. To do this, follow the simple steps below:
1. Open the Files app on your iPhone or iPod Touch. It is the blue folder icon with a white background.
2. Tap on the “Network” tab located at the bottom of the screen. This will display a list of all the network drives that you have connected to.
3. Locate the network drive to which you want to upload the files. Tap on it to open it.
4. Once inside the network drive, you will see various icons at the top right corner of the screen. Look for the “Upload” button, which is represented by an upward-pointing arrow inside a box. Tap on it to initiate the upload process.
5. A file picker window will appear, showing the files and folders on your iPhone or iPod Touch. Navigate through your device’s storage to find the files you wish to upload. You can tap on individual files to select them, or tap and hold to select multiple files.
6. Once you have selected the files you want to upload, tap on the “Upload” button located at the bottom right corner of the file picker window. This will start the file transfer process, and the selected files will be uploaded to the network drive.
7. Depending on the size of the files and the speed of your network connection, the upload process may take some time. You can monitor the progress of the upload by checking the status bar at the top of the screen.
8. Once the upload is complete, you will see a notification indicating that the files have been successfully uploaded to the network drive. You can now access these files from any device connected to the same network drive.
By following these simple steps, you can easily upload files from your iPhone or iPod Touch to a network drive using the Files app. Whether you need to transfer important documents, photos, or videos, this feature provides a convenient way to backup and access your files from anywhere within the network.
Step 2: To download files from the network drive, tap and hold on a file and select the download option
After successfully connecting to a network drive using the Files app on your iPhone or iPod Touch, you can easily download files from the drive onto your device. This can be useful when you want to access documents or media files while you are offline or away from a stable internet connection.
To start the download process, simply navigate to the network drive’s folder where the desired file is located. Once you have located the file, you can initiate the download by tapping and holding on the file.
An options menu will appear, providing you with various actions you can take with the file. Select the “Download” option from the menu to initiate the download process. The file will then start downloading to your device’s local storage.
The time it takes to download the file will depend on the size of the file and the speed of your internet connection. Larger files may take longer to download, while smaller files will download relatively quickly.
Once the download is complete, you can access the downloaded file from within the Files app. To locate the downloaded file, go to the “Downloads” section in the Files app and look for the file with the same name as the one you downloaded. You can then open, view, or share the file as needed.
It’s worth noting that the downloaded file will be saved to your device’s local storage and will take up space. If you need to free up storage space, you can delete the downloaded file from your device without affecting the original file on the network drive.
Downloading files from a network drive using the Files app on your iPhone or iPod Touch is a convenient way to access and store files locally on your device. Whether it’s a document, photo, or video, you can easily download files and access them anytime, anywhere.
So, the next time you need to download a file from a network drive, simply tap and hold on the file in the Files app and select the download option. Enjoy the convenience of having your files readily available on your device!
Troubleshooting Tips and FAQs
Having trouble with the Files app? Don’t worry, we’ve got you covered! Here are some troubleshooting tips and frequently asked questions to help you navigate through any issues you may encounter:
Q: I can’t seem to connect to my network drive. What should I do?
A: First, make sure you are connected to the same Wi-Fi network as your network drive. Double-check the IP address or server name you entered for any typographical errors. If you are still unable to connect, try restarting both your device and the network drive. If the problem persists, you may need to consult your network administrator or check if there are any firewall restrictions in place.
Q: I can connect to the network drive, but I can’t see any files. What could be the issue?
A: This might be due to permission settings on the network drive. Ensure that you have the necessary access rights to view and access the files. If you are using a username and password to connect, double-check that you have entered them correctly. Additionally, check if the network drive has been properly configured to share files with your device.
Q: I accidentally deleted a file on the network drive. Can I recover it?
A: Unfortunately, if a file is deleted from the network drive, it is not sent to the device’s recycle bin or trash folder. However, some network drives may have a built-in trash folder where deleted files are temporarily stored. Check if your network drive has this feature and locate the trash folder to see if you can restore the deleted file from there.
Q: Can I stream media files directly from the network drive?
A: Yes! The Files app supports streaming media files such as videos and audio directly from the network drive. Simply tap on the file to open it and the app will stream it for playback. This allows you to enjoy your favorite movies, songs, and podcasts without the need for downloading them onto your device.
Q: How can I backup files from the network drive to my device?
A: To backup files from the network drive to your device, you can simply select the files you want to backup and tap on the “Download” option. This will download the selected files to your device’s local storage, making them easily accessible even when you are offline. Remember to regularly backup important files to ensure their safety and availability.
Q: Is the Files app available for other devices?
A: The Files app is exclusively available for iPhone and iPod Touch users running iOS 11 or later. If you are using a different mobile device or operating system, you may need to explore alternative file management apps that offer similar functionalities for your specific platform.
With these troubleshooting tips and FAQs, you should be able to resolve any issues you encounter while using the Files app on your iPhone or iPod Touch. Enjoy the convenience of turning your device into a network drive and accessing your files on the go!
Conclusion
Turning your iPhone or iPod Touch into a network drive with the help of the free Files app is a game-changer. Not only does it provide you with the convenience of accessing your files anytime, anywhere, but it also eliminates the need for additional storage devices or cloud services.
The Files app is incredibly user-friendly and offers a seamless experience for transferring and managing files between your mobile device and other devices on the same network. Whether you want to share documents, multimedia files, or even backup important data, the Files app has got you covered.
With its secure and efficient file transfer capabilities, you can rest assured that your data remains protected while enjoying the flexibility of accessing your files on the go. So, why limit yourself to the storage space on your mobile device when you can transform it into a portable network drive? Give the Files app a try and experience the power of turning your iPhone or iPod Touch into a versatile file-sharing solution.
FAQs
1. Can I use the Files app on my iPhone/iPod Touch to turn it into a network drive?
2. Is the Files app free to download and use?
3. What types of files can I store and access using the Files app?
4. How do I connect my iPhone/iPod Touch to my computer as a network drive using the Files app?
5. Can I password protect my network drive created with the Files app?