
In the digital age, data is the lifeblood of any business, and ensuring its accuracy and integrity is crucial for making informed decisions. Google Sheets, a popular cloud-based spreadsheet program, provides a powerful set of tools for managing and analyzing data. One such tool is data validation, which allows you to define rules and restrictions on the data that is entered into your spreadsheet.
Whether you’re using Google Sheets for personal finance management, project tracking, or collaborative work, knowing how to add data validation can help you maintain data consistency and reliability. In this article, we will guide you through the process of adding data validation in Google Sheets, step-by-step. So let’s dive in and unlock the full potential of your Google Sheets!
Inside This Article
- Overview
- Step 1: Open Google Sheets
- Step 2: Select the Cell(s) to Add Data Validation
- Step 3: Access the Data Validation Menu
- Step 4: Choose the Validation Criteria
- Step 5: Set the Input Message (optional)
- Step 6: Set the Error Alert Message (optional)
- Step 7: Apply Data Validation to Multiple Cells (optional)
- Step 8: Edit or Remove Data Validation
- Step 9: Test Data Validation Rules
- Conclusion
- FAQs
Overview
Adding data validation to your Google Sheets can help ensure that the data entered is accurate and meets specific criteria. Data validation is a useful feature that allows you to set rules and restrictions on the type of data that can be entered into a cell or range of cells. This helps to minimize errors and inconsistencies in your spreadsheet.
By using data validation, you can set parameters for the type of data, such as numbers, dates, or text, that can be entered. You can also define specific criteria, such as minimum and maximum values, character length, or even create a dropdown list for easy selection.
Adding data validation to your Google Sheets makes it easier to maintain the integrity and accuracy of your data. It can be especially helpful when working with others on a collaborative project, as it ensures that everyone follows the same guidelines and standards.
In this tutorial, we will guide you through the process of how to add data validation in Google Sheets, step by step. Whether you are a beginner or an experienced user, you will find the instructions easy to follow. So let’s get started!
Step 1: Open Google Sheets
Google Sheets is a powerful spreadsheet program that allows you to organize and manipulate data in a user-friendly way. To get started, you need to open Google Sheets on your computer or mobile device. Here’s how:
1. Open your preferred web browser (e.g., Google Chrome, Mozilla Firefox, Safari).
2. In the browser’s search bar, type in “Google Sheets” or go directly to the Google Sheets website (https://www.google.com/sheets).
3. If you have a Google account, sign in by clicking on the “Sign in” button in the top right corner of the page and entering your login credentials. If you don’t have an account, click on the “Create account” button to set up a new Google account.
4. Once you are signed in, you will be redirected to the Google Sheets homepage. Here, you can access all your existing spreadsheets or create a new one by clicking on the “+ New” button in the top left corner of the page.
5. If you are using Google Sheets on a mobile device, you can download the Google Sheets app from the App Store (iOS) or Google Play Store (Android). Once downloaded, open the app and sign in with your Google account to access your spreadsheets.
Now that you have successfully opened Google Sheets, you are ready to start working on your data validation process. Let’s move on to the next step!
Step 2: Select the Cell(s) to Add Data Validation
To add data validation to your Google Sheets, you first need to select the cell or range of cells where you want to apply the validation rules. This step allows you to specify the input requirements and restrictions for the selected cells.
To select a single cell, simply click on it. If you want to choose multiple cells, you can do so by clicking and dragging your cursor across the desired range of cells. Alternatively, you can use the Ctrl key (Command key on Mac) to select non-adjacent cells.
It’s important to note that data validation can be applied to both individual cells and entire ranges of cells, which can be very useful when you have a large dataset that needs consistent validation rules applied throughout.
Once you have selected the cell(s), you can proceed to the next step to access the data validation menu and set the validation criteria.
Step 3: Access the Data Validation Menu
Once you have selected the desired cell or range of cells, you can now access the Data Validation menu in Google Sheets. This menu allows you to set the validation criteria and customize the input and error messages for your data.
To access the Data Validation menu, follow these simple steps:
- Right-click on the selected cell(s) to display the context menu.
- In the menu that appears, click on “Data validation” to open the Data Validation dialog box.
- Alternatively, you can also access the Data Validation menu by going to the “Data” tab in the Google Sheets toolbar, then selecting “Data validation” from the dropdown menu.
Once you have accessed the Data Validation menu, you are ready to proceed to the next step and choose the validation criteria for your selected cells.
Step 4: Choose the Validation Criteria
Once you have selected the cell(s) to apply data validation to, the next step is to choose the validation criteria. This is where you define the rules that will determine what data is allowed in the selected cell(s).
In Google Sheets, you have several options for validation criteria:
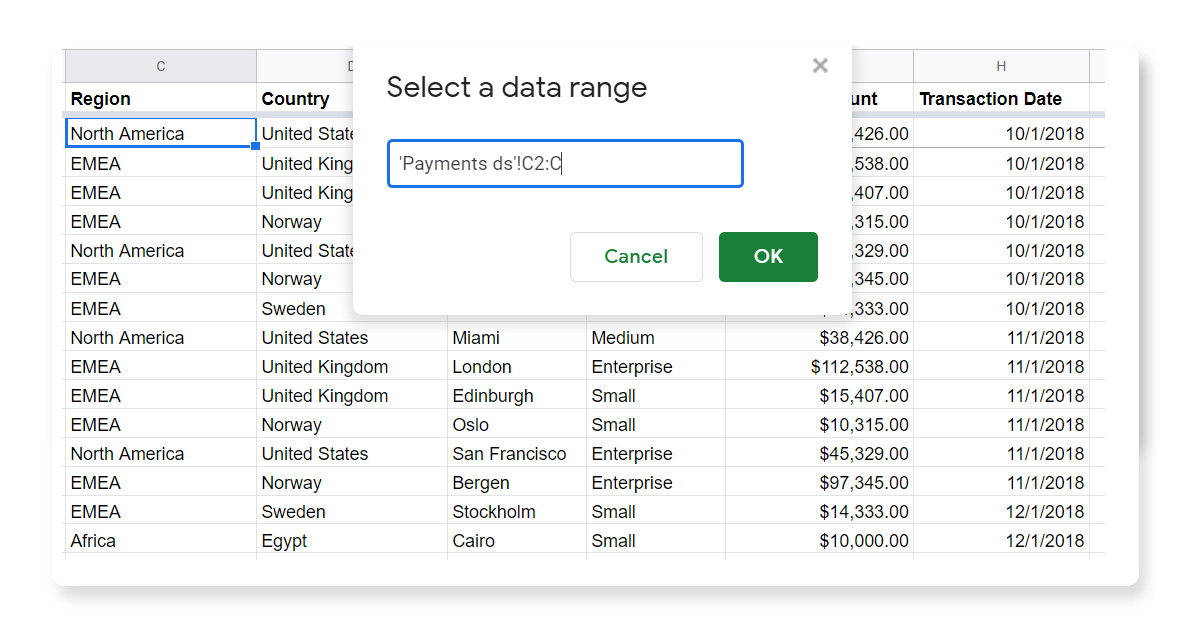
- List from a Range: With this option, you can choose a range of cells that will serve as a list of allowable values. The selected cell must match one of the values in the specified range.
- List of Items: This option allows you to manually enter a list of specific values that are allowed in the selected cell(s). Separate each value with a comma.
- Number: If you want to restrict the cell(s) to accept only numerical data, you can choose this option. You can set a minimum and/or maximum value for the input.
- Text: This option allows you to specify a minimum and/or maximum length for the text in the cell(s). You can also choose to allow or disallow specific text patterns, such as uppercase or lowercase letters.
- Date: With this option, you can set a date range for the cell(s). You can choose to allow dates before, after, or between specific dates.
- Checkbox: If you prefer a simple checkbox validation, you can choose this option. The cell(s) will have a checkbox that can be checked or unchecked.
- Custom Formula: This option allows you to define a custom formula that will determine the validity of the data entered in the cell(s). You can use logical operators and functions in your formula.
Choose the validation criteria that best suits your needs by clicking on the corresponding option in the validation menu. Once selected, you can further customize the criteria by providing additional details, such as the range for a list of items or the minimum length for text.
Data validation criteria help ensure the integrity and accuracy of your data in Google Sheets. By carefully choosing the validation criteria, you can control what data is entered in specific cells and reduce the risk of errors or inconsistencies in your spreadsheet.
Step 5: Set the Input Message (optional)
Setting an input message is an optional step, but it can be helpful for users to understand the expected data input. An input message appears as a small pop-up when the user selects the cell with data validation.
To set the input message, follow these steps:
- After opening the Data Validation menu, navigate to the “Input message” tab.
- Check the box that says “Show validation help text”.
- In the “Title” field, provide a concise title for the input message. This title should give users a clear idea of what kind of data is expected in the cell.
- In the “Message” field, provide a more detailed description of the validation criteria and any additional instructions for the user. The message should be informative and user-friendly, helping users understand what kind of input is allowed or required.
- Click on the “Save” button to apply the input message to the selected cell(s).
By setting an input message, you can provide users with clear guidance on what type of data is expected. This can help prevent data entry errors and improve the overall quality of the data in your Google Sheets.
Step 6: Set the Error Alert Message (optional)
When adding data validation in Google Sheets, you have the option to set an error alert message. This message will be displayed if the user enters invalid data into the cell. The error alert helps to ensure data integrity and provides clear instructions to users when they make an error.
To set the error alert message, follow these steps:
- Select the cell or range of cells where you have applied data validation.
- Access the “Data” menu, and click on “Data Validation”.
- In the “Data Validation” dialog box, go to the “Error message” tab.
- Check the box next to “Show validation help text” to enable the error alert.
- Enter the desired error title in the “Title” field. This will appear in bold at the top of the error message.
- In the “Message” field, enter the specific error message that you want to display to the user.
Once you have entered the error title and message, click “Save”. Now, when a user enters invalid data into the validated cell or range, the error alert message will be displayed, providing clear instructions and guiding them to correct their input.
It is important to craft error alert messages that are concise and informative. Use language that is easy to understand and clearly communicates the issue with the input. By providing clear instructions, users will be able to quickly identify and rectify any errors, improving the accuracy and reliability of your data.
Step 7: Apply Data Validation to Multiple Cells (optional)
If you have a large dataset or need to apply the same data validation rules to multiple cells in Google Sheets, you can use the “Apply to range” option to expedite the process. This option allows you to quickly select a range of cells and apply the same data validation rules to all of them simultaneously.
To apply data validation to multiple cells:
- Select the range of cells where you want to apply data validation. You can do this by clicking and dragging the cursor over the desired cells.
- With the cells selected, access the Data Validation menu by clicking on “Data” in the top navigation and selecting “Data validation” from the dropdown menu.
- In the Data Validation dialog box that appears, choose the validation criteria and set any input or error message if necessary, just like in the previous steps.
- Instead of clicking “Save,” click on the “Apply to range” box located at the bottom-left corner of the dialog box.
- Enter the range where you want the data validation rules to be applied. For example, if you selected cells A1 to A10, you would enter “A1:A10” in the “Apply to range” box.
- After entering the range, click “Save.” The data validation rules will now be applied to all the selected cells.
Applying data validation to multiple cells can save you time and effort, especially when working with large datasets or complex spreadsheets. It ensures consistency and accuracy in your data entry and helps to prevent errors or invalid entries across a range of cells.
If you need to make changes to the data validation rules applied to multiple cells, you can simply follow the steps mentioned earlier for editing or removing data validation.
Remember, while applying data validation to multiple cells is optional, it can be a powerful tool to streamline data entry and improve the quality of your spreadsheet.
Step 8: Edit or Remove Data Validation
Once you have added data validation to your cells in Google Sheets, you may find the need to edit or remove the validation rules. Here’s how you can easily make changes or delete the data validation:
To edit the data validation rules:
- Select the cell(s) with the data validation you want to edit.
- Go to the Data menu and choose “Data validation.”
- In the dialog box that appears, you can modify the criteria, input message, and error alert settings as needed.
- Click “Save” to update the data validation rules for the selected cells.
If you want to remove data validation from a cell or range of cells:
- Select the cell(s) that have the data validation you want to remove.
- Go to the Data menu and choose “Data validation.”
- In the dialog box, click on the “Remove validation” button at the bottom left corner.
- Click “Save” to remove the data validation from the selected cells.
Note: When you remove data validation from a cell, any previously entered values that violated the validation rules will remain in the cell. However, you won’t be able to enter new invalid values once the data validation is removed.
By having the ability to edit or remove data validation in Google Sheets, you can easily adjust your validation rules based on your changing needs or remove validation when it is no longer necessary.
Step 9: Test Data Validation Rules
Once you have set up data validation rules in Google Sheets, it is important to test them to ensure they are working correctly. It is crucial to verify that the rules you have implemented are correctly restricting the input and providing appropriate error messages when needed.
To test your data validation rules, simply try entering various types of data into the validated cells. If the entered data meets the specified criteria, it should be accepted without any issues. On the other hand, if the entered data violates the validation rules, an error message will be displayed, indicating that the input is not allowed.
It is recommended to test different scenarios to thoroughly validate your data validation rules. Try entering values that are below or above the allowed range, as well as values that do not meet any other specified criteria. By doing so, you can ensure that the rules are correctly applied and that the error messages are triggered when necessary.
Keep in mind that testing data validation rules can be an iterative process. If you find that the results are not as expected, you may need to adjust the validation criteria or error messages accordingly. It is important to keep testing and refining until you achieve the desired outcome.
By thoroughly testing your data validation rules, you can be confident that the data you collect in Google Sheets is accurate, reliable, and meets the required criteria. This will help maintain the integrity of your data and ensure that you can make informed decisions based on reliable information.
In conclusion, adding data validation in Google Sheets is a powerful feature that allows you to create structured and error-free spreadsheets. By setting up data validation rules, you can ensure that the data entered meets specified criteria, reducing the chances of inaccuracies or inconsistencies. This not only enhances the overall quality of your data but also improves the efficiency and reliability of your spreadsheets.
FAQs
FAQs
1. How do I add data validation in Google Sheets?
To add data validation in Google Sheets, follow these steps:
- Select the cell or range of cells where you want to apply the data validation.
- Click on “Data” in the top menu bar and select “Data validation” from the dropdown menu.
- In the data validation dialog box, choose the type of validation you want to apply (e.g., list, number, text, etc.) and set the criteria accordingly.
- Customize the validation settings based on your requirements, such as allowing or rejecting invalid entries, displaying error messages, or showing dropdown menus.
- Click on “Save” to apply the data validation rules to the selected cells.
2. Can I apply data validation to multiple cells at once?
Yes, you can apply data validation to multiple cells at once in Google Sheets by selecting the range of cells where you want to apply the validation. Simply follow the steps mentioned in the previous question, and all the selected cells will have the same data validation rules applied to them.
3. How can data validation help me in Google Sheets?
Data validation can help you in Google Sheets by allowing you to control and restrict the type of data that can be entered into a cell or range of cells. It helps maintain data integrity, prevents errors, and ensures that only valid and accurate data is entered. This can be particularly useful when working with large datasets, creating forms, or collaborating with others on a shared spreadsheet.
4. Can I use formulas in data validation?
Yes, you can use formulas in data validation rules in Google Sheets. For example, you can set a validation rule to only allow entries that meet a certain condition, such as being greater than a specific value or falling within a certain range. By using formulas, you can create dynamic data validation rules that adjust based on the contents of other cells, making your data validation more powerful and flexible.
5. Does data validation affect existing data in Google Sheets?
By default, data validation rules in Google Sheets do not affect existing data. They only validate new entries or modifications made to the cell values. However, you can choose to apply data validation rules to existing data by selecting the “Apply to all existing data in the range” option in the data validation dialog box. This will check and validate all the existing data against the specified criteria.