
If you’re looking to enhance the security of your wireless network by implementing authentication, configuring a RADIUS server in Windows 2012 Server is an excellent option. RADIUS (Remote Authentication Dial-In User Service) is a widely-used protocol that provides centralized authentication and authorization services for network devices and users. By setting up a RADIUS server, you can ensure that only authorized users can access your wireless network and prevent unauthorized access.
In this article, we will guide you through the process of configuring a RADIUS server in Windows 2012 Server for wireless authentication. We will cover the necessary steps, including the installation of the Network Policy Server (NPS), configuring the RADIUS client, creating network policies, and testing the configuration. By the end, you will have a secure and efficient system in place to authenticate wireless users on your network.
Inside This Article
- Overview of Radius Server
- Installing and Configuring Radius Server in Windows 2012 Server
- Configuring Wireless Authentication using Radius Server
- Troubleshooting Radius Server Connectivity Issues
- Conclusion
- FAQs
Overview of Radius Server
Radius (Remote Authentication Dial-In User Service) is a widely used protocol for AAA (Authentication, Authorization, and Accounting) services in network communication. It provides a centralized authentication and authorization mechanism for users accessing network resources. In a Windows 2012 server environment, Radius Server can be configured to enable wireless authentication.
Radius Server acts as a gatekeeper, controlling access to the network based on user credentials. When a user attempts to connect to a wireless network using a device, the Radius Server authenticates the user’s identity and grants access to the network if the authentication is successful. This adds an extra layer of security and ensures that only authorized users can connect.
Radius Server utilizes a client-server architecture. The network device, such as a wireless access point, acts as the client and communicates with the Radius Server for user authentication. The server verifies the user’s credentials against a database or directory service, such as Active Directory, and returns a response indicating whether the authentication is accepted or denied.
Radius Server also allows for granular control over network access policies. It enables administrators to define specific rules and restrictions for different user groups or individual users. This includes limiting the number of simultaneous connections, setting data transfer limits, and defining access permissions based on time of day or location.
Overall, Radius Server plays a crucial role in establishing a secure and efficient wireless network environment. By implementing this protocol in a Windows 2012 server, administrators can ensure that only authorized users are granted access to the network, maintaining confidentiality, integrity, and availability of network resources.
Installing and Configuring Radius Server in Windows 2012 Server
Radius server is a crucial component for authenticating and authorizing network users. In this article, we will guide you through the process of installing and configuring Radius Server in Windows 2012 Server. By following these steps, you can ensure secure and reliable wireless authentication for your network.
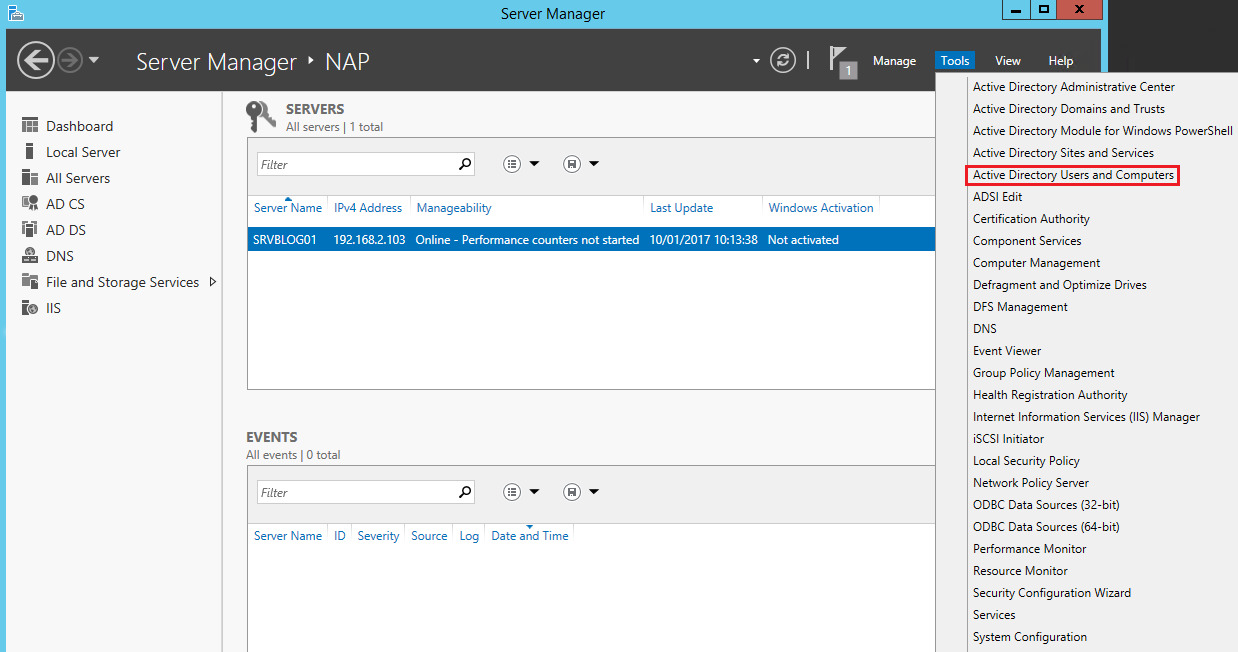
1. Open the Server Manager on your Windows 2012 Server and click on ‘Add Roles and Features’.
2. In the ‘Add Roles and Features Wizard’ window, click ‘Next’ to proceed.
3. Select ‘Role-Based or Feature-Based Installation’ and click ‘Next’.
4. Choose the desired server from the server pool and click ‘Next’.
5. Scroll down and check the box next to ‘Network Policy and Access Services’ and then click ‘Next’.
6. On the ‘Features’ page, click ‘Next’ without making any changes.
7. In the ‘Role Services’ window, select ‘Network Policy Server’ and click ‘Next’.
8. Review the information on the ‘Confirmation’ page and click ‘Install’ to begin the installation process.
9. Once the installation is complete, open the Network Policy Server (NPS) console.
10. In the NPS console, click on ‘RADIUS Clients and Servers’ in the left-hand menu.
11. Right-click on ‘RADIUS Clients’ and select ‘New’ to add a new RADIUS client.
12. Enter a friendly name for the client and its IP address or hostname. Click ‘OK’ to add the client.
13. Next, right-click on ‘RADIUS Clients’ again and select ‘New’ to add a new RADIUS server.
14. Enter a friendly name for the server and its IP address. Click ‘OK’ to add the server.
15. Now, navigate to ‘Policies’ in the NPS console and click on ‘Network Policies’ in the left-hand menu.
16. Right-click on ‘Network Policies’ and select ‘New’ to create a new network policy.
17. Provide a name for the policy and click ‘Next’.
18. Select ‘Access Granted’ as the ‘Connection Type’ and click ‘Next’.
19. On the ‘Access Permission’ page, select ‘Grant access’ and click ‘Next’.
20. In the ‘Conditions’ window, you can add any additional conditions for the network policy. Click ‘Next’ when you are done.
21. On the ‘Settings’ page, select ‘RADIUS Standard’ under ‘Authentication Methods’ and click ‘Next’.
22. In the ‘Configure Authentication Methods’ window, choose the appropriate authentication methods. Click ‘Next’ when you are done.
23. On the ‘Configure Constraints’ page, you can add any additional constraints for the network policy. Click ‘Next’ when you are done.
24. Review the information on the ‘Completing the New Network Policy Wizard’ page and click ‘Finish’ to create the policy.
25. Finally, make sure that the network policies are ordered correctly by navigating to ‘Policies’ and selecting ‘Network Policies’ in the NPS console. Use the ‘Move Up’ and ‘Move Down’ buttons to reorder the policies if necessary.
Congratulations! You have successfully installed and configured Radius Server in Windows 2012 Server. Your network is now ready to handle wireless authentication using Radius authentication protocol.
Configuring Wireless Authentication using Radius Server
Wireless networks have become an essential part of our daily lives, providing us with the convenience of internet access on the go. However, security is a critical aspect when it comes to wireless networks. One effective way to ensure secure access is by implementing wireless authentication using a Radius server.
A Radius server acts as a central authentication and authorization server for network devices, including wireless access points. It provides a way to verify the identity of users attempting to connect to the wireless network and allocate appropriate access privileges.
Here are the steps to configure wireless authentication using a Radius server in Windows 2012 Server:
- Create a new Network Policy: Open the Network Policy Server (NPS) console and navigate to Policies > Network Policies. Right-click on Network Policies and select “New” to create a new policy.
- Configure the Network Policy: In the Policy Properties window, give a name to the policy and specify the conditions for wireless authentication, such as the encryption type and authentication methods.
- Specify the Radius server: In the Policy Properties window, navigate to the “Constraints” tab and click on “Add”. Choose “Authentication Methods” and select “Microsoft: Protected EAP (PEAP)”.
- Configure the Radius server settings: In the “Constraints” tab, click on “Specify the IPv4 address of the RADIUS server” and enter the IP address of the Radius server.
- Set up the shared secret key: In the “Constraints” tab, click on “Specify the shared secret key” and enter a strong secret key to be shared between the Radius server and the wireless access points.
- Configure wireless access points: On your wireless access points, configure the Radius server settings. Enter the IP address of the Radius server and the shared secret key.
- Test the configuration: Connect a client device to the wireless network and enter the correct credentials. The Radius server will authenticate the user and grant access based on the configured policies.
By configuring wireless authentication using a Radius server, you can ensure a secure and controlled access to your wireless network. It adds an additional layer of protection and allows you to effectively manage user authentication and access privileges.
Remember to regularly review and update your network policies and ensure that the Radius server and wireless access points are properly configured to maintain a secure wireless environment.
Troubleshooting Radius Server Connectivity Issues
When it comes to configuring a Radius server in Windows 2012 Server for wireless authentication, it is important to ensure that the server is properly connected and accessible. However, there may be instances when you encounter connectivity issues with your Radius server. In this section, we will explore some troubleshooting techniques to help you resolve these issues and ensure a smooth authentication process.
1. Check Network Connectivity: The first step in troubleshooting Radius server connectivity issues is to verify that your server is connected to the network. Ensure that the network cables are securely plugged in and that there are no physical connectivity issues. Additionally, check the network configuration to ensure that the server has a valid IP address and is correctly configured to communicate with other devices.
2. Test Firewall Settings: Firewalls can sometimes block communication between the Radius server and other devices. Verify that the necessary ports for Radius authentication (usually UDP port 1812 for authentication and UDP port 1813 for accounting) are open on both the Radius server and any firewall devices between the server and the client. Alternatively, you may consider temporarily disabling the firewall for testing purposes.
3. Verify Server Reachability: Ensure that the Radius server is reachable from the client devices. You can use the ping command to check if the server is responding to ICMP ping requests. If the server is not reachable, check for any network routing issues or incorrect IP configuration on the server or client side.
4. Review Server Logs: Radius servers often generate log files that can provide valuable information about any errors or issues that may be occurring. Check the server logs to identify any error messages or warnings related to the connectivity problem. These logs can often point you in the right direction for troubleshooting and resolving the issue.
5. Test Authentication from Different Clients: Verify if the connectivity issue is specific to a particular client or if it affects multiple clients. Try authenticating from different devices to see if the problem persists. If the issue is isolated to one client, check the network settings, firewall configuration, or any other factors that could be causing the problem on that particular device.
6. Update Radius Server Software: If you have exhausted all other troubleshooting steps and the connectivity issue persists, consider updating the Radius server software to the latest version. Software updates often include bug fixes and improvements, which may help resolve the connectivity problem.
7. Seek Assistance from the Vendor or Community: If you are still unable to resolve the Radius server connectivity issue, it may be beneficial to reach out to the vendor or consult the relevant online community or forum for assistance. Others who have encountered similar issues may be able to provide valuable insights or suggest potential solutions.
By following these troubleshooting techniques, you will be able to identify and resolve most Radius server connectivity issues. Remember to approach troubleshooting systematically, ruling out possibilities one by one until you find the root cause of the problem. With patience and persistence, you will be able to optimize the functionality and reliability of your Radius server for wireless authentication.
Configuring a RADIUS server in Windows 2012 Server for wireless authentication can be a complex process, but with careful planning and attention to detail, it can be successfully implemented. By following the steps outlined in this article, you can ensure that your wireless network remains secure and protected, allowing only authenticated users to access it.
Remember to keep in mind the importance of strong passwords and regular updates to maintain the integrity of your network. Regular monitoring and audits of your RADIUS server settings are also crucial to identify and address any potential vulnerabilities.
With the proper configuration and ongoing maintenance, your Windows 2012 Server can become a reliable and efficient RADIUS server for wireless authentication, providing a seamless and secure experience for your users.
FAQs
1. What is a Radius server?
A Radius server is a networking protocol that provides centralized authentication, authorization, and accounting (AAA) services. It is commonly used for wireless authentication, enabling devices to connect securely to a wireless network.
2. Why do I need to configure a Radius server in Windows 2012 Server?
Configuring a Radius server in Windows 2012 Server allows you to strengthen the security of your wireless network. It ensures that only authorized users can access the network and provides a centralized management system for authentication.
3. How do I configure a Radius server in Windows 2012 Server?
To configure a Radius server in Windows 2012 Server, you need to install the Network Policy and Access Services (NPAS) role, add the Radius server role, configure the Radius client, create network policies, and set up user authentication. Detailed step-by-step instructions can be found in the Windows Server documentation.
4. Can I use a Radius server for wired network authentication?
Yes, a Radius server can be used for both wireless and wired network authentication. It provides a unified authentication system for all network devices, ensuring consistent security protocols across the network.
5. What are the benefits of using a Radius server for wireless authentication?
Using a Radius server for wireless authentication offers several benefits, including:
- Enhanced security: Only authorized users can connect to the wireless network, reducing the risk of unauthorized access.
- Centralized management: All authentication processes are handled by the Radius server, allowing for centralized control and monitoring.
- Scalability: A Radius server can handle a large number of users and devices, making it suitable for both small and enterprise-level networks.
- Integration with other systems: Radius servers can be integrated with other security systems, such as LDAP, Active Directory, or TACACS+, for seamless authentication.