
As technology evolves, so does our ability to connect and integrate different devices seamlessly. One common challenge many iPad users face is how to connect their device to a wireless printer, such as an Epson printer. Whether you need to print documents, photos, or other materials, being able to wirelessly connect your iPad to your Epson printer can make life more convenient and efficient.
In this article, we will guide you through the step-by-step process of connecting your iPad to your Epson wireless printer. We will provide you with easy-to-follow instructions, troubleshooting tips, and recommendations to ensure a seamless printing experience. Whether you’re a tech-savvy individual or a novice in the realm of wireless printing, we’ve got you covered!
Inside This Article
- Step 1: Ensure Your Epson Wireless Printer is Ready
- Step 2: Connect Your iPad to the Same Wi-Fi Network as the Printer
- Step 3: Install the Epson iPrint App on Your iPad
- Step 4: Set Up Printer Connection in the Epson iPrint App
- Step 5: Print from Your iPad to the Epson Wireless Printer
- Troubleshooting Tips
- Conclusion
- FAQs
Step 1: Ensure Your Epson Wireless Printer is Ready
Before you can connect your iPad to your Epson wireless printer, it’s important to ensure that your printer is ready for the connection. Here are some steps to follow:
1. Check the Power and Connections: Make sure that your Epson printer is powered on and properly connected to a power source. Also, ensure that the printer’s network connection, whether it’s via Wi-Fi or Ethernet, is active and working.
2. Confirm the Wi-Fi Functionality: If you’re planning to print wirelessly from your iPad, ensure that your Epson printer has built-in Wi-Fi functionality. Most modern Epson printers come with wireless capabilities, but it’s always recommended to double-check the printer’s specifications to confirm this feature.
3. Update Firmware and Software: To ensure optimal performance and compatibility, it’s a good practice to update the firmware and software of your Epson printer. Visit Epson’s official website and search for your printer model to find the latest firmware and software updates. Follow the provided instructions to update your printer’s firmware.
4. Load Paper and Verify Ink Levels: Before you start printing, make sure that your printer has enough paper in the paper tray. Additionally, check the ink levels of your printer’s cartridges and replace them if necessary. This step will ensure uninterrupted printing once you connect your iPad to the printer.
5. Test Print a Document: As a final step, you can test print a document from your Epson printer to ensure that it is functioning correctly. This will help identify any potential issues or errors that may need to be resolved before proceeding with the connection to your iPad.
By following these steps, you can ensure that your Epson wireless printer is ready for the connection process. Once you’ve confirmed that your printer is in proper working condition, you can move on to the next step of connecting your iPad to the same Wi-Fi network as the printer.
Step 2: Connect Your iPad to the Same Wi-Fi Network as the Printer
In order to connect your iPad to your Epson wireless printer, you need to ensure that both devices are connected to the same Wi-Fi network. This is crucial for establishing a seamless connection between your iPad and the printer.
Here are the steps to connect your iPad to the same Wi-Fi network as the printer:
- On your iPad, go to the Settings app. You can find the Settings app on your home screen.
- Once you’re in the Settings app, tap on the Wi-Fi option. This will open the Wi-Fi settings menu.
- Make sure that the Wi-Fi toggle switch is turned on. If it’s already on, you should see a list of available Wi-Fi networks.
- Look for the name of your Wi-Fi network and tap on it to connect. If your Wi-Fi network is password-protected, you’ll be prompted to enter the password.
- After entering the correct password, your iPad will attempt to connect to the Wi-Fi network. Once connected, you’ll see a checkmark next to the Wi-Fi network name.
- Now that your iPad is connected to the Wi-Fi network, it’s time to move on to the next step: installing the Epson iPrint app.
Connecting your iPad to the same Wi-Fi network as your Epson wireless printer is essential for establishing a stable and reliable connection. Once both devices are connected to the same network, you’ll be able to seamlessly print documents, photos, and other files directly from your iPad.
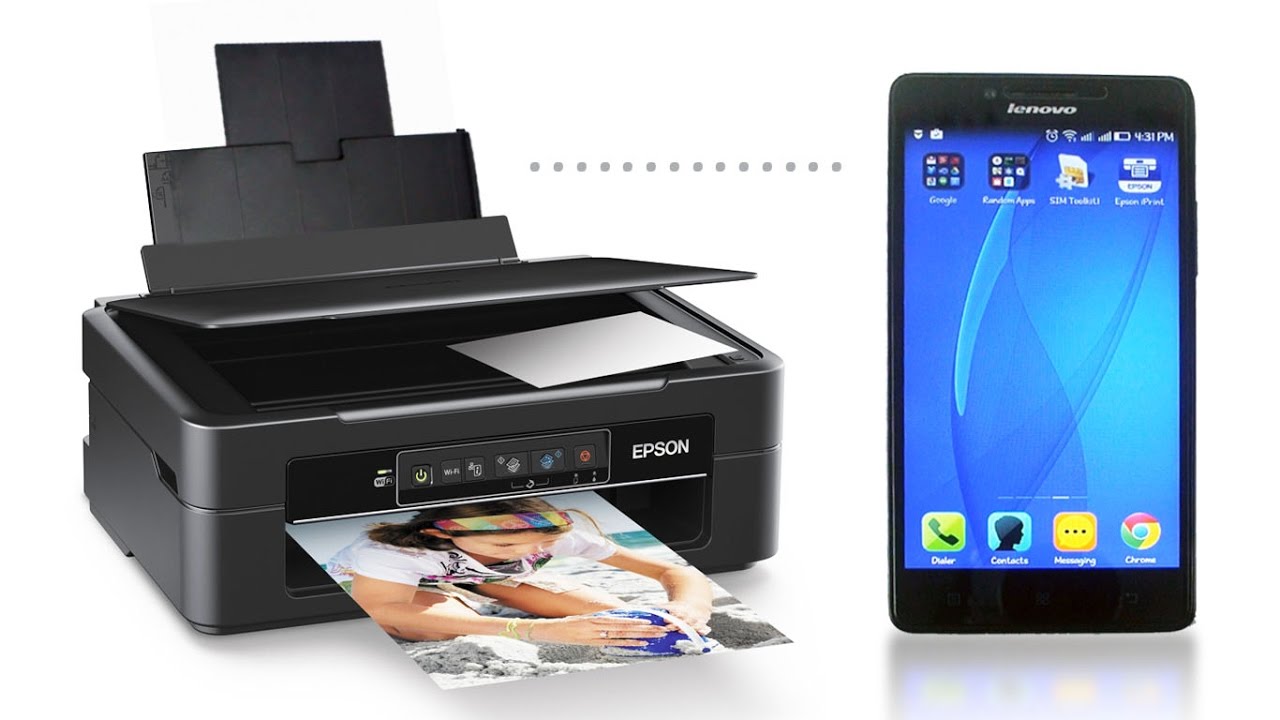
Step 3: Install the Epson iPrint App on Your iPad
Now that you have made sure your Epson wireless printer is ready and your iPad is connected to the same Wi-Fi network, the next step is to install the Epson iPrint app on your iPad. With this app, you will be able to easily print documents, photos, and more straight from your iPad to your Epson wireless printer.
Follow these simple steps to install the Epson iPrint app on your iPad:
- Open the App Store on your iPad.
- Tap on the search icon at the bottom of the screen and type “Epson iPrint” into the search bar.
- From the search results, locate the Epson iPrint app and tap on it.
- Tap on the “Get” or “Install” button next to the app to initiate the installation process.
- If prompted, enter your Apple ID password or use Touch ID/Face ID to authorize the installation.
- Wait for the app to finish downloading and installing on your iPad.
- Once the installation is complete, you will find the Epson iPrint app on your iPad’s home screen.
That’s it! You have successfully installed the Epson iPrint app on your iPad. Now you can move on to the next step and set up the printer connection within the app.
Step 4: Set Up Printer Connection in the Epson iPrint App
Setting up your printer connection in the Epson iPrint app is a straightforward process that ensures you can seamlessly print from your iPad to your Epson wireless printer. Follow these steps to get started:
1. Open the Epson iPrint app on your iPad. If you haven’t downloaded it yet, you can find it in the App Store.
2. Once the app is open, tap on the “Printer” icon located at the bottom of the screen. This will take you to the Printer Selection screen.
3. On the Printer Selection screen, you should see a list of available printers. Tap on your Epson wireless printer from the list. If your printer is not listed, make sure it is turned on and connected to the same Wi-Fi network as your iPad. You can also try restarting the app or refreshing the printer list.
4. After selecting your printer, you may be prompted to enter a printer password if one is set up. Enter the password and tap “Done” to proceed.
5. Once your printer is connected, you can customize various print settings. Tap on the “Print Settings” icon to access options such as paper size, print quality, and color mode. Adjust these settings according to your preferences.
6. With the printer connection and settings configured, you are now ready to print. Simply select the document, photo, or webpage you want to print from your iPad, and choose the “Print” option. The Epson iPrint app will send the print job to your Epson wireless printer, and you can monitor its progress from the app.
7. After the printing process is complete, ensure you disconnect your iPad from the printer by tapping on the “Printer” icon and selecting “Disconnect Printer”. This prevents any unintended printing and helps preserve the battery life of your iPad.
By following these steps, you can easily set up the printer connection in the Epson iPrint app and start printing wirelessly from your iPad to your Epson wireless printer. Enjoy the convenience and efficiency of mobile printing with this seamless integration between your devices.
Step 5: Print from Your iPad to the Epson Wireless Printer
Now that you have your Epson wireless printer set up and your iPad connected to the same Wi-Fi network, it’s time to learn how to print from your iPad to the printer. Follow these steps to conveniently print documents, photos, and other files directly from your iPad:
1. Open the app or file you want to print: Start by opening the app or file that contains the content you wish to print. This could be a document in a word processing app, a photo in your gallery, or even a webpage in a browser.
2. Tap the share icon: Look for the share icon in the app or file you just opened. This icon typically looks like a square with an arrow pointing upwards or a symbol that represents sharing. Tap on the share icon to bring up a list of sharing options.
3. Select the print option: In the list of sharing options, look for the option that says “Print” or features a printer icon. Tap on this option to move forward with the printing process.
4. Choose your printer: The printing dialogue box will now appear on your iPad screen. From this screen, you need to select your Epson wireless printer as the destination printer. Tap on the printer name to ensure your iPad sends the print job to the correct device.
5. Set print options: Depending on the app or file you are printing from, you may have different print options available. This can include selecting the number of copies, choosing the paper size, or adjusting the print quality. Take a moment to review and configure any necessary print settings.
6. Review and confirm: Before finalizing the print job, double-check the content preview on the printing dialogue box. Ensure that it looks correct and matches what you want to print. If everything is in order, tap the “Print” button to start the printing process.
7. Collect your printed document: Your iPad will send the print job wirelessly to the Epson printer. Wait for the printer to complete the task and collect your printed document from the printer tray.
That’s it! You have successfully printed from your iPad to your Epson wireless printer. This simple process allows you to enjoy the convenience of wireless printing, saving you time and effort. Whether you need to print important documents for work or capture memorable photos on paper, your iPad and Epson printer work together seamlessly to provide reliable and efficient printing capabilities.
Troubleshooting Tips
While connecting your iPad to your Epson wireless printer is generally a smooth process, there may be occasions where you encounter some difficulties. Don’t worry, we’ve got you covered with these troubleshooting tips to help you resolve common issues:
- Ensure the printer is turned on: Double-check that your Epson wireless printer is powered on and ready to go. Sometimes, a simple oversight can lead to connection problems.
- Check the Wi-Fi connection: Verify that both your iPad and printer are connected to the same Wi-Fi network. If they are not, go to your iPad’s settings and connect it to the correct network.
- Restart your devices: Sometimes, restarting both your iPad and printer can clear any temporary glitches. Turn off and then turn on both devices to initiate a fresh connection attempt.
- Update your printer’s firmware: Outdated firmware can cause compatibility issues. Visit Epson’s official website and check if there are any firmware updates available for your printer model. If so, follow the instructions to install the latest firmware.
- Reinstall the iPrint app: If you are experiencing persistent issues with the Epson iPrint app, try uninstalling and reinstalling it from the App Store. This can help resolve any software conflicts that may be causing connectivity problems.
- Confirm printer compatibility: Ensure that your Epson printer model is compatible with the Epson iPrint app and your iPad’s operating system version. Check the official Epson website or refer to the product documentation for the most up-to-date information.
- Reset network settings: If all else fails, resetting your network settings on your iPad can sometimes resolve connectivity issues. Go to your iPad’s settings, navigate to “General,” then “Reset,” and select “Reset Network Settings.” Keep in mind that this will remove all saved Wi-Fi networks, so be prepared to reconnect to them afterward.
- Contact Epson support: If none of the troubleshooting tips seem to resolve your connection issues, it may be time to reach out to Epson’s customer support team. They will have the expertise to assist you further and guide you in resolving any technical difficulties.
By following these troubleshooting tips, you should be able to overcome any obstacles and successfully connect your iPad to your Epson wireless printer. Remember to remain patient and take the necessary steps to ensure a seamless printing experience!
Conclusion
In conclusion, connecting your iPad to your Epson wireless printer is a simple and convenient process that allows you to print documents and photos directly from your device. By following the steps outlined in this article, you can easily set up the connection and enjoy the benefits of wireless printing. Whether you need to print important business documents or family photos, the ability to connect your iPad to your Epson printer gives you the flexibility to print from anywhere in your home or office. Embrace the convenience and efficiency of wireless printing and take full advantage of the capabilities of your Epson wireless printer and iPad combo. Happy printing!
FAQs
1. Can I connect my iPad to my Epson wireless printer?
Yes, you can connect your iPad to your Epson wireless printer. Epson printers are designed to be compatible with various devices, including iPads. By following a few simple steps, you can easily establish a wireless connection between your iPad and Epson wireless printer.
2. How do I connect my iPad to my Epson wireless printer?
To connect your iPad to your Epson wireless printer, follow these steps:
- Ensure that your Epson printer is turned on and connected to the same Wi-Fi network as your iPad.
- On your iPad, go to the Settings app and tap on Wi-Fi.
- Select the same Wi-Fi network that your Epson printer is connected to.
- Open the document or photo you want to print on your iPad.
- Tap the share icon (usually represented by a square with an arrow pointing up) and select Print.
- In the Printer Options, choose your Epson wireless printer.
- Adjust any print settings, such as paper size or number of copies.
- Tap Print to start printing your document or photo.
3. Do I need any special apps to connect my iPad to my Epson wireless printer?
No, you don’t need any special apps to connect your iPad to your Epson wireless printer. The built-in AirPrint feature on iPads allows you to easily print wirelessly to compatible printers, including Epson printers. Just make sure your iPad and printer are connected to the same Wi-Fi network, and you’ll be able to print without the need for additional apps.
4. What if my Epson wireless printer is not showing up when I try to print from my iPad?
If your Epson wireless printer is not showing up when you try to print from your iPad, there are a few possible solutions you can try:
- Make sure both your iPad and printer are connected to the same Wi-Fi network.
- Check if your Epson printer supports AirPrint. Not all Epson printers are compatible with AirPrint.
- Restart your iPad and printer to refresh their wireless connections.
- Update the firmware of your Epson printer to the latest version.
- If none of these solutions work, you can try installing the Epson iPrint app, which provides additional printing options for Epson printers.
5. Can I print from other apps on my iPad, or only specific ones?
You can print from various apps on your iPad, not just specific ones. The AirPrint feature on iPads allows you to print directly from compatible apps, including Safari, Mail, Photos, Notes, and more. Additionally, many third-party apps also support AirPrint and allow you to print from within the app.