
Setting up a wireless router can be a daunting task for many, but with the right knowledge and guidance, it becomes a simple and straightforward process. In today’s interconnected world, having a reliable and secure wireless network is essential for smooth internet connectivity and seamless communication. Whether you’re a tech-savvy individual or someone with limited technical expertise, this article will guide you through the process of setting up your wireless router in a hassle-free manner. From connecting the cables to configuring the settings, we will cover all the necessary steps to get your wireless network up and running. So, let’s dive in and explore the world of wireless router setup!
Inside This Article
- Section 1: Preparing for Setup
- Section 2: Connecting the Router
- Section 3: Configuring the Router
- Section 4: Securing the Wireless Network
- Conclusion
- FAQs
Section 1: Preparing for Setup
Before setting up your wireless router, it’s important to make sure you have everything you need and that you’re prepared for a smooth installation. Taking the time to gather the necessary materials and do some initial planning will save you time and frustration later on. Here are some steps to help you prepare for the wireless router setup process:
1. Check your internet connection: Ensure that you have an active internet service provider (ISP) and that your modem is functioning properly. Without a stable internet connection, your wireless router won’t be able to provide access to the internet.
2. Determine the router’s placement: Find a suitable location for your wireless router. Consider placing it in a central area of your home or office to ensure optimal coverage. Keep in mind that the router’s signal strength may be affected by walls, furniture, and other obstacles.
3. Select a secure password: Prepare a strong, unique password that will be used to access the router’s settings and secure your wireless network. Avoid using common words or easily guessable patterns to prevent unauthorized access.
4. Clear the area: Remove any obstructions or clutter around the area where you plan to set up the router. This will help avoid interference and improve signal reception.
5. Gather the necessary materials: Check that you have all the components required for the setup, including the wireless router, power adapter, Ethernet cable, and any additional accessories or antennas that came with the router.
6. Verify compatibility: Ensure that your devices, such as laptops, smartphones, and smart home devices, are compatible with the wireless standard supported by the router. Most modern routers support the latest Wi-Fi standards, but it’s always a good idea to double-check.
7. Read the router’s manual: Familiarize yourself with the user manual or setup guide provided by the manufacturer. It contains valuable information about the router’s features, installation steps, and troubleshooting tips.
By following these preparatory steps, you’ll be well-equipped to proceed with the setup process. Taking the time to prepare ensures that you have a solid foundation before diving into the technical aspects of connecting and configuring your wireless router.
Section 2: Connecting the Router
Once you have prepared for the setup of your wireless router, the next step is connecting it to your modem or existing network. Follow these simple steps to ensure a smooth installation process:
Step 1: Unbox the Router
Start by unboxing your wireless router and locating the necessary components, including the router itself, power adapter, Ethernet cable, and any additional accessories that may have come with it. Keep these items close at hand for easy access during the setup process.
Step 2: Position the Router
Choose a suitable location for your router. It should be placed in a central area of your home or office to maximize coverage and minimize signal interference. Avoid placing it near thick walls, metal objects, or other electronic devices that could potentially disrupt the wireless signal.
Step 3: Power up the Router
Connect the power adapter to the router and plug it into a power outlet. Make sure the power source is stable and reliable. Once the router is properly powered up, you should see the LED lights on the front panel indicating that it is functioning.
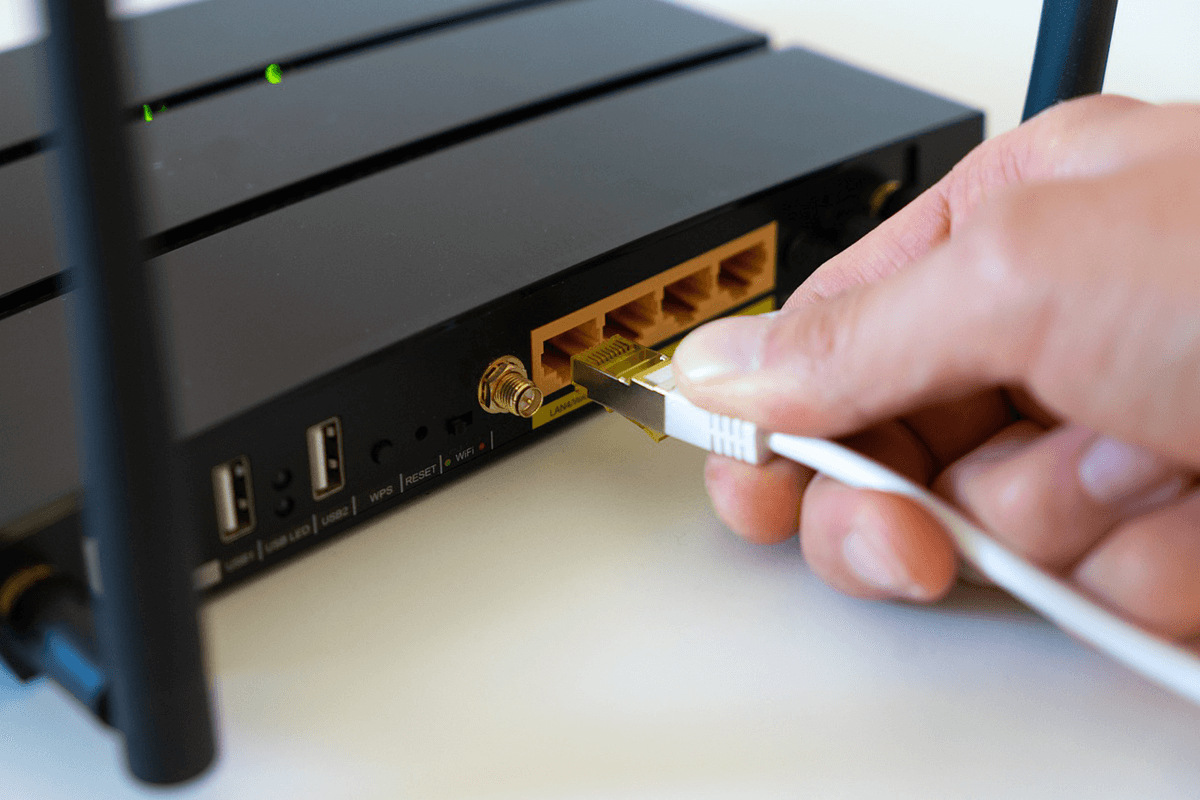
Step 4: Connect to the Modem
Take the Ethernet cable provided with your router and connect one end to the WAN or Internet port on the router. Then, plug the other end into the Ethernet port on your modem or existing network device. This connection will allow your router to access the internet and establish a network connection.
Step 5: Secure the Connections
Ensure that all connecting cables are securely plugged in. Check for any loose connections that may disrupt the signal or cause connectivity issues. Properly securing the connections will help maintain a stable and reliable network connection.
Step 6: Power On
After all the connections have been made and verified, power on your modem and router. Wait for a few minutes to allow them to fully initialize and establish a connection. You may need to refer to the router’s manual for specific instructions on the initialization process.
Step 7: Validate the Connection
Once the router has fully initialized, connect a device such as a laptop, smartphone, or tablet to the Wi-Fi network. Open a web browser and try to access a website to ensure that the internet connection is working properly. If you encounter any issues, refer to the troubleshooting section of your router’s manual for assistance.
By following these steps, you will be able to successfully connect your wireless router and establish a secure and reliable network connection. The next section will cover how to configure your router to customize your network settings.
Section 3: Configuring the Router
After successfully connecting your wireless router, the next step is to configure it. Configuring the router involves accessing the router’s administrative interface and making necessary changes to customize your network settings. Follow the steps below to configure your wireless router:
1. Open a web browser on your device and enter the default IP address of your router in the address bar. The IP address can usually be found in the router’s manual or on the manufacturer’s website. Press Enter to access the router’s login page.
2. On the login page, enter the default username and password provided by the manufacturer. If you’re unsure of the default credentials, check the router’s manual or look for a sticker on the router itself. Once entered, click on the login or submit button.
3. Once logged in, you will be directed to the router’s administrative interface. The interface may vary depending on the make and model of your router, but it generally consists of a series of tabs or menus for different settings.
4. Navigate to the “Wireless” or “Wireless Settings” tab/menu. In this section, you can configure the network name (SSID), security type, channel, and password for your wireless network. It’s recommended to set a unique and strong password to secure your network from unauthorized access.
5. Choose a unique and easily identifiable SSID for your network. This name will be visible to anyone searching for available networks in the area. You can be creative with the SSID, but avoid using personal information or sensitive data.
6. Select the appropriate security type for your network, such as WPA2-PSK (AES), which provides a high level of encryption. Avoid using outdated security protocols, as they may be vulnerable to attacks.
7. Set the channel for your wireless network. It’s advisable to choose a channel with less interference from other nearby networks. If unsure, you can use auto-channel selection to allow the router to automatically select the best channel.
8. Save the changes you made to the wireless settings. The router will then apply the new configuration, and your wireless network will be updated accordingly.
9. Finally, test the connection by connecting a Wi-Fi enabled device to your newly configured wireless network. Ensure you can browse the internet and access other network resources seamlessly.
By following these steps, you can successfully configure your wireless router, ensuring a secure and reliable wireless network for all your devices.
Section 4: Securing the Wireless Network
Securing your wireless network is essential to protect your data and ensure that only authorized devices can connect to it. Here are some steps you can take to enhance the security of your wireless network:
1. Change the default administrator password: The first step in securing your wireless network is to change the default administrator password for your router. Many routers come with a default password that is easily guessable, so it’s crucial to change it to a unique and strong password. This will prevent unauthorized access to your router settings.
2. Enable network encryption: Network encryption is a vital security measure that protects your wireless network from eavesdropping and unauthorized access. Look for the encryption options in your router’s settings and enable WPA2 encryption, which is currently the most secure option available. This will require a password to connect to your network, ensuring that only those with the password can access it.
3. Change the default SSID: The SSID, or network name, is the identifier for your wireless network. It is often set to a default value by the router manufacturer, making it easier for attackers to identify vulnerable networks. Change the default SSID to a unique name that doesn’t reveal any personal information or the type of router you are using.
4. Enable MAC address filtering: MAC address filtering allows you to specify which devices are allowed to connect to your wireless network. Each device has a unique MAC address, and by enabling MAC address filtering, you can create a whitelist of approved devices. This adds an extra layer of security by ensuring that only authorized devices can access your network.
5. Disable SSID broadcasting: By disabling SSID broadcasting, you prevent your wireless network from being visible to other devices. This can make it harder for attackers to find and target your network. Keep in mind that this feature may cause inconvenience when connecting new devices, as you will need to manually enter the SSID.
6. Regularly update your router’s firmware: Router manufacturers often release firmware updates that include security patches and bug fixes. It’s crucial to regularly check for updates and install them to ensure that your router has the latest security enhancements. This will help protect your network against emerging threats.
By following these steps, you can significantly improve the security of your wireless network. It’s important to remember that maintaining the security of your network is an ongoing process, and it’s essential to stay vigilant and keep up to date with the latest security practices.
Conclusion
Setting up a wireless router may seem like a daunting task, but with the right approach and a little bit of knowledge, it can be a simple and straightforward process. By following the steps outlined in this guide, you can ensure that your wireless network is secure, efficient, and ready to provide seamless connectivity for all your devices.
Remember to choose a router that meets your specific needs and supports the latest wireless standards. Take the time to position your router in an optimal location for maximum coverage, and configure it with a strong and unique password to protect your network from unauthorized access.
Whether you are setting up a new wireless router or just updating your existing network, the key is to take your time, read the instructions carefully, and troubleshoot any issues that may arise. With a little patience and effort, you’ll be enjoying fast and reliable wireless internet in no time.
FAQs
1. Why do I need a wireless router?
A wireless router is essential for creating a home or office network that enables multiple devices to connect to the internet wirelessly. It eliminates the need for cables and allows for convenient internet access from anywhere within the router’s range.
2. How do I set up a wireless router?
Setting up a wireless router is relatively easy. Start by connecting the router to your modem using an Ethernet cable. Power on both devices and wait for the router to boot up. Then, access the router’s settings via a web browser, usually through the default IP address provided in the router’s manual. Follow the on-screen instructions to configure your network settings, including Wi-Fi name (SSID) and password.
3. How can I secure my wireless network?
To secure your wireless network, you can enable encryption (such as WPA2) and set a strong password. This prevents unauthorized users from accessing your network. Additionally, you can disable broadcasting the network’s SSID to make it less visible to others. It is also recommended to regularly update your router’s firmware to ensure optimal security.
4. What should I do if I forget my router’s password?
If you forget your router’s password, you can usually reset it to factory defaults by pressing and holding the reset button on the router for about 10 seconds. This will erase all custom settings and restore the router to its default state. However, keep in mind that this will also remove any other customized configurations you have made.
5. How can I improve my wireless router’s performance?
There are several ways to improve the performance of your wireless router. Firstly, ensure that the router is placed in a central location, away from walls and obstructions, to maximize signal coverage. You can also try adjusting the router’s antennas for better signal strength. Additionally, updating your router’s firmware and using the latest Wi-Fi technology (such as 802.11ac) can enhance performance.