
Are you tired of dealing with tangled printer cables and limited mobility? Look no further than Epson wireless printers! With Epson’s cutting-edge technology, you can now print documents and photos from anywhere within your home or office. Whether you’re working on a crucial report or capturing precious memories, the flexibility and convenience of an Epson wireless printer will revolutionize your printing experience. In this comprehensive guide, we will walk you through the steps of setting up and using an Epson wireless printer, making printing hassle-free and efficient. Say goodbye to the constraints of traditional wired printers and say hello to the freedom of wireless printing with Epson!
Inside This Article
- Getting Started with Your Epson Wireless Printer
- Step 1: Unboxing the Printer and Accessories
- Step 2: Connecting the Printer to a Power Source
- Step 3: Installing Ink Cartridges
- Step 4: Connecting the Printer to a Wi-Fi Network
- Step 5: Installing Printer Software on Your Computer
- Step 6: Configuring Printer Settings
- Step 7: Testing the Printer Connection
- Troubleshooting Common Wireless Printer Issues
- Conclusion
- FAQs
Getting Started with Your Epson Wireless Printer
Welcome to the world of wireless printing with your new Epson printer! With its advanced technology and convenience, you can now print effortlessly from any device connected to your Wi-Fi network. Setting up and using your Epson wireless printer is a simple and straightforward process. In this guide, we will walk you through the steps to get started with your printer and have you printing wirelessly in no time.
The first step is to unbox your Epson printer and gather all the accompanying accessories. The package should include the printer itself, power cables, ink cartridges, and any user manuals or installation CDs. Make sure everything is in good condition and ready for setup.
Once everything is unboxed, it’s time to connect your printer to a power source. Plug one end of the power cable into the printer and the other end into a power outlet. Ensure that the printer is receiving power by checking if the power LED lights up.
Next, you will need to install the ink cartridges into your printer. Open the printer cover and locate the cartridge slots. Remove the protective tape from the cartridges and insert them into their corresponding slots. Push them gently until they click into place. Close the printer cover once the ink cartridges are installed.
Now it’s time to connect your Epson printer to your Wi-Fi network. Use the printer’s control panel to navigate to the Wi-Fi settings. Select your network from the available options and enter your network password if prompted. Follow any additional on-screen instructions to complete the connection process.
With your printer now connected to Wi-Fi, it’s time to install the necessary software on your computer. Visit the Epson website and search for your printer model. Download the appropriate printer software for your operating system and follow the on-screen instructions to install it. The software will allow your computer to communicate with the printer and send print jobs wirelessly.
After installing the printer software, it’s important to configure the printer settings according to your preferences. This includes options such as paper size, print quality, and printing mode. You can access these settings through the printer software on your computer or directly on the printer’s control panel.
To ensure that everything is set up correctly, it’s a good idea to test the printer connection. Open a document or photo on your computer and click “Print.” Select your Epson printer from the list of available printers and click “Print” again. If the printer successfully receives and prints the document, then the wireless connection is working properly.
While Epson wireless printers are designed to provide a seamless printing experience, you may encounter some common issues along the way. If you face any difficulties or experience printing problems, refer to the troubleshooting section in the user manual or visit the Epson support website for assistance.
Step 1: Unboxing the Printer and Accessories
When you first receive your brand new Epson wireless printer, the first step is to unbox it and familiarize yourself with the included accessories. Follow the steps below to unbox your printer and get it ready for setup.
1. Find a flat and sturdy surface to unbox the printer. Make sure to avoid any sharp or rough surfaces that could potentially damage the printer or its components.
2. Carefully remove the printer from its packaging. Use scissors or a knife to cut through any tape or plastic seal that is securing the box.
3. Gently lift the printer out of the box and place it on the designated surface. Be cautious while handling the printer to avoid dropping or mishandling it.
4. Locate the power cord and any other included cables, such as a USB cable for connecting the printer to your computer. Ensure that all accessories are included and in good condition.
5. Remove any protective materials, such as plastic covers or tapes, from the printer. These are often placed to prevent any damage during shipping.
6. Take a moment to inspect the printer for any visible damage. Check for any broken parts, loose connections, or missing components. If you notice any issues, contact the supplier or manufacturer for assistance.
7. Set aside the printer accessories, such as user manuals, setup CDs, or installation guides, that came with the printer. These will be helpful during the setup process.
8. Keep the printer packaging and all relevant documents in a safe place. It’s always a good idea to retain these items for warranty purposes or future reference.
By following these steps, you have successfully unboxed your Epson wireless printer and ensured that all the necessary accessories are included and in good condition. You are now ready to move on to the next step of connecting the printer to a power source.
Step 2: Connecting the Printer to a Power Source
After unboxing your new Epson wireless printer, the next step is to connect it to a power source. Follow these simple instructions to get your printer up and running:
1. Locate the power cable included in the box. It should have a plug that matches the power socket in your region.
2. Find a suitable power outlet near your printer. It should be easily accessible and within reach of the power cable.
3. Insert one end of the power cable into the port labeled “AC IN” or a similar designation on the back of your printer.
4. Take the other end of the power cable and plug it securely into the power outlet. Make sure the connection is tight and stable.
5. Once the printer is connected to the power source, locate the power button. It is typically located near the control panel or on the front of the printer.
6. Press the power button to turn on the printer. You should see the printer’s control panel lighting up and the initialization process beginning.
7. Wait for the printer to complete its startup process. This may take a few moments as the printer initializes its internal components.
8. Once the printer is ready, check the control panel or LCD display for any prompts or instructions. Follow these instructions if any setup or configuration is required.
9. Congratulations! You have successfully connected your Epson wireless printer to a power source. Now you can move on to the next step of installing the ink cartridges.
It is important to note that each printer model may have slight variations in the placement of the power button and the design of the power cable. Always refer to the printer’s user manual for specific instructions related to your printer model.
By following these simple steps, you can ensure that your Epson wireless printer is properly connected to a power source, ready to print and fulfill your document needs.
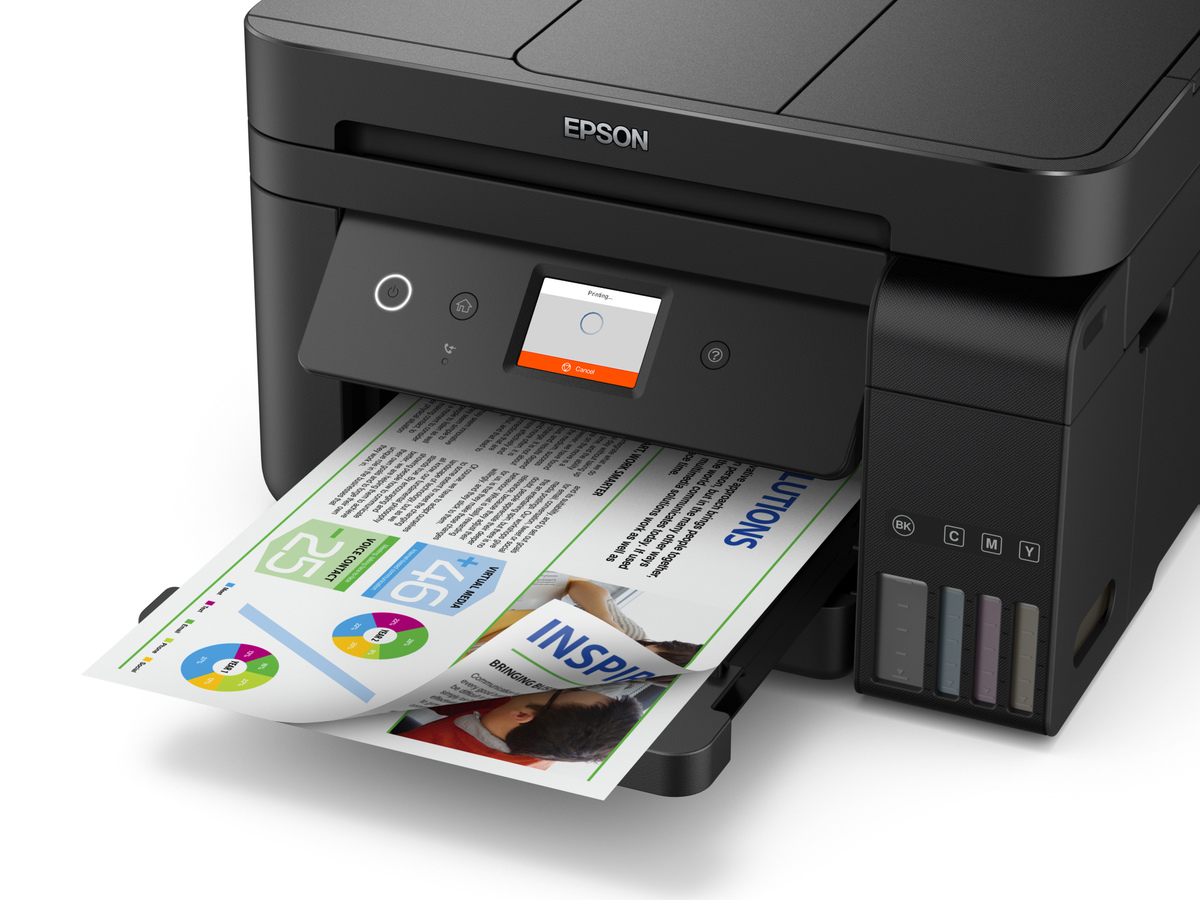
Step 3: Installing Ink Cartridges
Once you’ve successfully connected your Epson wireless printer to your Wi-Fi network, the next step is to install the ink cartridges. The ink cartridges are an essential component of your printer as they contain the ink needed to print documents and images. Here’s a step-by-step guide on how to install ink cartridges in your Epson printer.
1. Start by turning on your Epson printer. Make sure the printer is connected to a power source and has completed the initialization process.
2. Open the printer cover or access panel. This step may vary depending on the model of your Epson printer. Some printers have a front panel that opens, while others may have a top panel that lifts up.
3. Locate the ink cartridge slots. Each slot is usually labeled with a specific color, such as cyan, magenta, yellow, and black. Refer to the instructions or the printer manual if you’re unsure about the location of the slots.
4. Take the ink cartridges out of their packaging. Remove the protective plastic cover or tape from each cartridge. Be careful not to touch the gold contacts on the cartridges as it can interfere with their performance.
5. Insert the ink cartridges into their corresponding slots. Match the color of the cartridge with the label on the slot to ensure proper installation. Gently push the cartridge into the slot until it clicks into place. Repeat this step for all the cartridges.
6. Close the printer cover or access panel. Make sure it is securely closed to prevent any dust or debris from entering the printer.
7. Wait for the printer to recognize the newly installed ink cartridges. This may take a few minutes, but the printer will display a message on the screen or have a status indicator to indicate that the cartridges are ready for use.
That’s it! You have successfully installed the ink cartridges in your Epson wireless printer. You can now proceed to the next step of connecting your printer to your computer and installing the necessary software to start printing.
Remember to follow the manufacturer’s instructions and guidelines specific to your Epson printer model for the best results. Properly installed ink cartridges ensure optimal print quality and prevent any potential printing issues.
Step 4: Connecting the Printer to a Wi-Fi Network
Connecting your Epson wireless printer to a Wi-Fi network is a crucial step in ensuring that you can print documents from any device connected to the network. Follow these simple steps to establish a seamless connection:
- Ensure that your printer is turned on and in a ready state.
- On your printer’s control panel, navigate to the Wi-Fi settings or network setup menu. The exact location may vary depending on your printer model.
- Select the option to connect to a wireless network. This may be labeled as “Wi-Fi Setup”, “Network Setup”, or similar.
- Your printer will search for available Wi-Fi networks. Locate and select your desired network from the list.
- If prompted, enter the Wi-Fi network password using the printer’s control panel. Take care to enter the password correctly to avoid connection issues.
- Once the password is entered, your printer will attempt to establish a connection to the Wi-Fi network. This may take a few moments.
- Once the connection is established, a confirmation message will appear on the printer’s display. You can also print a network status report to verify the successful connection.
- To ensure proper functioning of the printer, it is recommended to assign a static IP address to your printer. This will prevent the printer’s IP address from changing and potentially interrupting the connection. Consult your printer’s user manual for instructions on setting a static IP address.
Congratulations! You have successfully connected your Epson wireless printer to a Wi-Fi network. Now you can enjoy the convenience of wirelessly printing your documents from any device connected to the same network.
Step 5: Installing Printer Software on Your Computer
After successfully connecting your Epson wireless printer to the Wi-Fi network, the next step is installing the printer software on your computer. This software, also known as drivers, allows your computer to communicate and interact with the printer, ensuring smooth printing operations.
Here’s a step-by-step guide on how to install the printer software on your computer:
- Ensure that your computer is connected to the internet. Having a stable internet connection during the installation process is essential.
- Locate the installation CD that came with your Epson printer. Insert it into your computer’s CD/DVD drive. If you don’t have an installation CD, don’t worry! You can download the software from the official Epson website.
- Once the CD is inserted, the installation process should start automatically. Follow the on-screen instructions to proceed. If the installation doesn’t start automatically, navigate to the CD/DVD drive and double-click on the setup file.
- If you’re downloading the software from the Epson website, visit the support page for your printer model. Look for the “Drivers and Downloads” section and select your operating system. Download the driver software and save it on your computer.
- Locate the downloaded file, usually in your computer’s “Downloads” folder, and double-click on it to begin the installation process.
- Follow the prompts and agree to any terms and conditions presented during the installation. Make sure to read through them carefully before proceeding.
- Once the installation is complete, restart your computer to finalize the setup.
- After restarting your computer, test the printer software by opening a document or image and selecting the “Print” option. Ensure that your Epson printer is selected as the default printer in the print settings.
- If the printer software installation was successful, you should be able to print documents wirelessly from your computer to the Epson printer without any issues.
Remember to keep the printer software updated by periodically checking for driver updates on the Epson website or using the included software update tool. This will ensure compatibility with the latest operating system updates and optimize printing performance.
Installing the printer software on your computer is an important step in utilizing the full functionality of your Epson wireless printer. It enables seamless communication between your computer and the printer, allowing you to conveniently print documents, photos, and other materials from the comfort of your workspace.
Step 6: Configuring Printer Settings
After successfully connecting your Epson wireless printer to your Wi-Fi network, the next step is to configure the printer settings. This will ensure that your printer is ready to meet your printing needs and preferences. Here are the steps to help you configure your printer settings.
1. Open the printer software on your computer by clicking on the printer icon or accessing it through the Start menu. Once the printer software is launched, you will see a variety of options and settings to choose from.
2. Explore the printer settings menu to customize your preferences. You can choose the paper size, print quality, layout, and other relevant settings based on your specific requirements. Some printers even offer options for borderless printing, so make sure to check if this feature is available.
3. Adjust the print settings according to your needs. For example, if you are printing documents with text, you may want to select the “Text” or “Text with Graphics” option for optimal print quality. Similarly, if you are printing photos, you can choose the “Photo” or “Photo with Graphics” option for vibrant and detailed prints.
4. Take advantage of the advanced settings available in the printer software. These settings allow you to customize further parameters such as color management, ink usage, and print speed. Experiment with these options to find the best balance between quality and efficiency.
5. Don’t forget to check the printer preferences to ensure that the printer is set to the correct paper type and size. Additionally, you can select the default settings such as double-sided printing, grayscale printing, or draft mode for everyday printing needs.
6. Save your preferences and exit the printer settings menu. Your printer is now configured to deliver the desired output based on your settings. Take a moment to review your selections and make any necessary adjustments before proceeding with your print job.
Remember, printer settings may vary depending on the model and manufacturer of your Epson wireless printer. Refer to the user manual or the manufacturer’s website for specific instructions and details on advanced features.
With the printer settings configured, you are now ready to maximize the performance and capabilities of your Epson wireless printer. Whether you need to print documents, photos, or other materials, having the right settings in place will ensure that you get the best possible results every time.
Step 7: Testing the Printer Connection
After completing the previous steps of unboxing, setting up, and installing the necessary software for your Epson wireless printer, it’s time to test the printer connection. This step ensures that your printer is properly linked to your computer or device and ready to print.
To test the printer connection, follow these simple steps:
- Prepare a test document: Open a text document, a PDF file, or any other file that you want to print as a test document. Ensure that your printer is powered on and properly loaded with paper.
- Select the printer: Go to the Print menu by pressing “Ctrl + P” for Windows or “Command + P” for Mac users. From the available printer options, select your Epson wireless printer as the default printer.
- Adjust print settings (if necessary): Before proceeding with the printing process, it’s essential to customize your print settings. You can choose the page orientation, paper size, print quality, and the number of copies you want to print.
- Initiate the print job: Once you have configured the print settings, click on the “Print” button to initiate the print job. You may hear the printer start and see the print progress on your computer screen.
Once the printing is complete, check for any errors or issues. Take a look at the printed document to ensure that the output matches your expectations. If there are any problems, refer to the troubleshooting section for potential solutions.
If the test document prints successfully without any issues, congratulations! Your Epson wireless printer is now connected and ready to use. You can proceed with printing your desired documents, photos, or any other files.
Remember to periodically check for printer updates and maintain your printer’s consumables, such as ink cartridges and paper, to ensure optimal performance and longevity of your Epson wireless printer.
Keep in mind that testing the printer connection is a crucial step in the setup process. It helps identify any connectivity or compatibility issues, ensuring a hassle-free printing experience.
Troubleshooting Common Wireless Printer Issues
If you’re experiencing issues with your wireless printer, don’t worry! Many common problems can be easily resolved with some troubleshooting steps. In this section, we’ll cover some of the most common wireless printer issues and provide you with the solutions to fix them.
1. Print Jobs Stuck in Queue: One of the most common issues is when print jobs get stuck in the print queue and don’t print. To fix this, try restarting both your printer and your computer. You can also try cancelling all pending print jobs and then try printing again.
2. Slow Printing Speed: If your wireless printer is taking a long time to print, check your Wi-Fi signal strength. Make sure that your printer is close enough to the router for a strong connection. Another solution is to update your printer’s firmware to the latest version, as this can often improve printing speed.
3. Printer Offline: If your printer shows up as “offline” on your computer, try restarting both your printer and your computer. Make sure that your printer is connected to the Wi-Fi network properly. You can also try deleting the printer from your computer’s printer list and then adding it again.
4. Connection Issues: If your printer is having trouble staying connected to the Wi-Fi network, try moving it closer to the router. You can also try resetting the network settings on your printer and reconnecting it to the Wi-Fi network. Updating the printer’s drivers and firmware can also help resolve connection issues.
5. Ink or Toner Problems: If your prints are coming out faded or streaked, it may be due to low ink or toner levels. Check the ink or toner cartridges and replace them if they are empty or low. You can also try cleaning the printhead to improve print quality.
6. Paper Jams: Paper jams can be frustrating, but they can often be easily resolved. Make sure to follow the printer’s manual on how to clear a paper jam. It’s also important to use the correct size and type of paper to prevent future jams.
7. Printer Not Found on Network: If your printer is not showing up on the network, make sure that it is connected to the same Wi-Fi network as your computer. Double-check the Wi-Fi settings on both the printer and the computer. You may also need to reinstall the printer software on your computer.
8. Error Messages: If you’re encountering error messages on your printer’s display, take note of the error code or message. Look up the error code in the printer’s manual or on the manufacturer’s website to find specific troubleshooting steps. If needed, contact the manufacturer’s support for further assistance.
9. Outdated Software: Another common issue is using outdated printer software. Check the manufacturer’s website for the latest software updates and install them on your computer. This can help resolve compatibility issues and improve overall printer performance.
10. Security Settings: Sometimes, security settings on your Wi-Fi network can interfere with your printer’s connection. Check your router’s settings and make sure that it allows devices to connect to the network. Adjusting these settings may help resolve any connectivity issues.
By following these troubleshooting steps, you can resolve many common wireless printer issues. Remember to consult your printer’s manual or contact the manufacturer’s support if the problem persists. Troubleshooting can be a trial-and-error process, but with a little patience, you’ll have your printer up and running smoothly once again!
Conclusion
Using an Epson wireless printer offers convenience, flexibility, and efficiency in your daily printing tasks. With the ability to connect multiple devices through Wi-Fi, you can print documents and photos from your smartphone, tablet, or laptop without the need for cables. This eliminates the hassle of transferring files or physically connecting your devices to the printer.
Whether you are a student, professional, or someone who frequently needs to print documents at home, an Epson wireless printer provides a reliable and user-friendly solution. Its wireless capabilities enable you to print from anywhere within your network, allowing for seamless printing without the need to be physically near the printer.
Additionally, Epson printers are known for their high-quality printing output, ensuring crisp text and vibrant images. They also offer a wide range of functionalities, including scanning and copying, making them versatile devices for various printing needs.
In conclusion, investing in an Epson wireless printer is a smart choice for those seeking convenience, flexibility, and excellent print quality. Embrace the wireless printing revolution, simplify your printing process, and begin enjoying the benefits of seamless wireless printing with an Epson printer.
FAQs
1. How do I connect my Epson wireless printer to my Wi-Fi network?
To connect your Epson wireless printer to your Wi-Fi network, follow these steps:
- Make sure your printer is turned on and connected to a power source.
- Go to the settings or setup menu on your printer.
- Select “Wireless LAN” or “Wi-Fi setup” and choose “Wireless LAN Setup Wizard” or a similar option.
- Follow the on-screen prompts to select your Wi-Fi network and enter the network password.
- Once connected, your printer will display a confirmation message. You can now print wirelessly from any device connected to the same Wi-Fi network.
2. Can I print from my smartphone or tablet with an Epson wireless printer?
Yes, you can print from your smartphone or tablet with an Epson wireless printer. Epson provides a mobile printing solution called Epson Connect, which allows you to print directly from your mobile device. To do this, you need to download and install the Epson iPrint app from your device’s app store. Once installed, open the app, select the file you want to print, choose your printer, and hit the print button. Your Epson wireless printer will receive the print job and start printing wirelessly.
3. How do I troubleshoot common issues with my Epson wireless printer?
If you are facing issues with your Epson wireless printer, here are a few troubleshooting steps you can try:
- Check the Wi-Fi connection: Ensure that your printer is connected to the same Wi-Fi network as your device.
- Restart the printer and your device: Sometimes a simple restart can resolve connectivity issues.
- Update the printer firmware: Visit the Epson website and check if there are any firmware updates available for your printer model. Updating the firmware can often fix compatibility issues.
- Verify ink or toner cartridges: Make sure that the ink or toner cartridges are properly installed and have enough ink or toner to print.
- Reinstall the printer driver: If you are unable to print, try uninstalling and reinstalling the printer driver on your device.
If the issue persists, it is recommended to contact Epson customer support for further assistance.
4. Can I print wirelessly even if my Epson printer doesn’t have built-in Wi-Fi?
Yes, even if your Epson printer doesn’t have built-in Wi-Fi, you can still print wirelessly using a Wi-Fi enabled computer or laptop as a middleman. Follow these steps:
- Connect your printer to your computer or laptop using a USB cable.
- Ensure that your computer or laptop is connected to a Wi-Fi network.
- Share the printer over the Wi-Fi network: Go to the control panel on your computer or laptop, select “Devices and Printers,” right-click on your Epson printer, and choose “Printer properties.” In the properties window, click on the “Sharing” tab and enable printer sharing.
- Once the printer is shared, you can print wirelessly from any device connected to the same Wi-Fi network as your computer or laptop.
5. How do I connect multiple devices to my Epson wireless printer?
To connect multiple devices to your Epson wireless printer, you need to make sure that the printer is connected to the Wi-Fi network. Once connected, follow these steps for each device:
- Make sure the device is connected to the same Wi-Fi network as the printer.
- Download and install the Epson iPrint app on your device from the respective app store.
- Open the app, select the file you want to print, choose your Epson printer, and hit the print button.
Repeat these steps for each device you want to connect to your Epson wireless printer.