
Are you experiencing issues with your iPhone 13 Pro and need to perform a deep restore or troubleshoot a persistent problem? Entering Device Firmware Update (DFU) mode can be a helpful solution. DFU mode allows you to interact with your iPhone's firmware directly, making it an effective method for resolving software glitches or initiating a fresh iOS installation. In this article, we will guide you through the step-by-step process of putting your iPhone 13 Pro into DFU mode, empowering you to take control of your device's firmware and address any persistent issues. Whether you're encountering software malfunctions or preparing for a clean iOS installation, understanding how to enter DFU mode can be invaluable. So, let's delve into the essential steps for entering DFU mode on your iPhone 13 Pro.
Inside This Article
- What is DFU Mode?
- Why Put iPhone 13 Pro in DFU Mode?
- How to Prepare for DFU Mode
- Steps to Put iPhone 13 Pro in DFU Mode
- Conclusion
- FAQs
Sure, I can help with that. Here's the content for the "What is DFU Mode?" section:
What is DFU Mode?
DFU stands for Device Firmware Update. DFU mode is a state that allows your iPhone to interface with iTunes without loading the operating system or boot loader. In this mode, the iPhone can still communicate with iTunes, and the user can perform various actions such as restoring or updating the device’s firmware.
DFU mode is different from recovery mode, as it enables a deeper level of interaction with the iPhone’s firmware. It is often used for troubleshooting and fixing issues related to the device’s firmware, bootloader, or operating system.
Entering DFU mode is a useful technique for resolving software-related problems, performing firmware downgrades, and initiating custom firmware installations. It provides a way to access and manipulate the device’s firmware at a lower level than what is possible in normal operation or recovery mode.
Why Put iPhone 13 Pro in DFU Mode?
Putting your iPhone 13 Pro in DFU (Device Firmware Update) mode can be a helpful troubleshooting step in certain situations. It allows for a deeper level of access to the device’s software, enabling you to perform actions that are not possible in standard recovery mode. DFU mode is particularly useful when you need to fix severe software issues, such as a bricked device, failed software updates, or persistent system errors.
By entering DFU mode, you can perform a more thorough restoration of the iPhone’s firmware, which can help to resolve complex software glitches and restore the device to a stable state. This mode is also commonly used when preparing to jailbreak an iPhone, as it provides a clean slate for modifying the device’s software and firmware.
Furthermore, putting your iPhone 13 Pro in DFU mode can be crucial when you need to troubleshoot hardware-related issues. It allows you to test the device’s functionality without interference from the operating system, making it easier to identify whether a problem is software or hardware-related. This can be invaluable when diagnosing issues such as persistent crashes, unresponsive touchscreens, or connectivity problems.
How to Prepare for DFU Mode
Before putting your iPhone 13 Pro into DFU (Device Firmware Update) mode, it’s essential to prepare both your device and the environment to ensure a smooth and successful process.
First, make sure to back up all your important data on your iPhone 13 Pro. This includes photos, videos, contacts, messages, and any other crucial information. You can back up your device using iCloud or iTunes, ensuring that your data is safely stored in case of any unexpected issues during the DFU mode process.
Additionally, ensure that your iPhone 13 Pro has sufficient battery charge. It’s recommended to have at least 50% battery life to prevent any interruptions during the DFU mode activation. If your device’s battery is low, charge it for a sufficient period before initiating the DFU mode process.
Furthermore, ensure that you have a reliable and stable connection between your iPhone 13 Pro and the computer you will be using for the DFU mode procedure. Use a high-quality USB cable to connect your device to the computer, and ensure that the computer is running the latest version of iTunes or Finder, depending on your operating system.
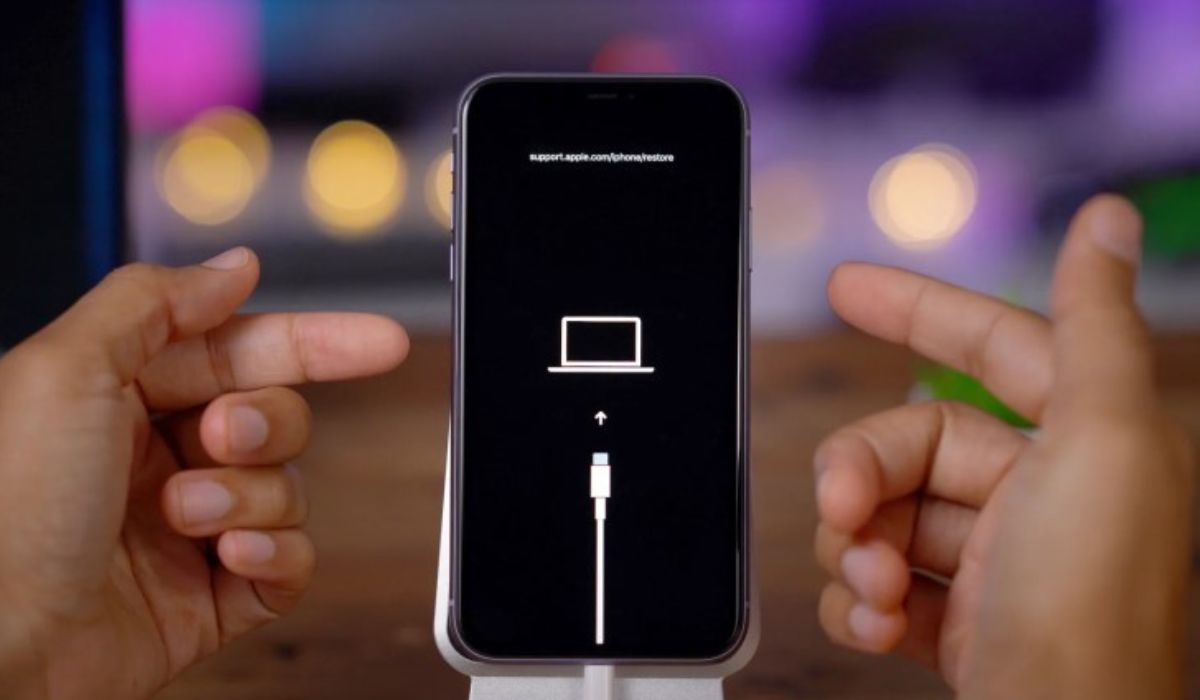
Steps to Put iPhone 13 Pro in DFU Mode
Putting your iPhone 13 Pro in DFU (Device Firmware Update) mode can be a useful troubleshooting step when your device is experiencing persistent issues. Follow these steps carefully to enter DFU mode on your iPhone 13 Pro.
Step 1: Connect to Computer
Start by connecting your iPhone 13 Pro to a computer using a USB cable. Ensure that you have the latest version of iTunes or Finder (for macOS Catalina and later) installed on your computer.
Step 2: Open iTunes or Finder
Launch iTunes on your computer if you’re using a Windows PC, or open Finder if you’re using a Mac with macOS Catalina or later. Make sure your iPhone 13 Pro is recognized and appears in the software.
Step 3: Quick Press Volume Up
Quickly press and release the Volume Up button on your iPhone 13 Pro.
Step 4: Quick Press Volume Down
Quickly press and release the Volume Down button on your iPhone 13 Pro.
Step 5: Press and Hold Side Button
Press and hold the Side button (also known as the Power button) until the screen goes black. As soon as the screen turns black, proceed to the next step.
Step 6: Hold Side Button and Volume Down
While still holding the Side button, press and hold the Volume Down button for 5 seconds. If the Apple logo appears, you’ve held the buttons for too long and will need to start over.
Step 7: Release Side Button
Release the Side button while continuing to hold the Volume Down button for another 5 seconds. If your screen remains black, you have successfully entered DFU mode on your iPhone 13 Pro.
Following these steps precisely will put your iPhone 13 Pro into DFU mode, allowing you to perform troubleshooting or restore your device using iTunes or Finder. Remember to carefully follow each step and pay close attention to the timing to ensure success.
Putting your iPhone 13 Pro in DFU mode can be a powerful troubleshooting tool when dealing with software issues. Whether you’re attempting to restore your device to factory settings or resolve persistent software glitches, DFU mode provides a deeper level of access and control. By following the step-by-step instructions outlined in this guide, you can confidently navigate the process, knowing that you have a valuable resource at your disposal. Remember to always back up your data before initiating any major changes to your device. With DFU mode in your arsenal, you can effectively address software-related challenges and keep your iPhone 13 Pro running smoothly.
FAQs
**Q: What is DFU mode on iPhone 13 Pro?**
A: DFU (Device Firmware Update) mode is a state in which your iPhone 13 Pro can interface with iTunes but does not load the operating system or boot loader. It allows for advanced troubleshooting and restoration of the device.
Q: When should I use DFU mode on my iPhone 13 Pro?
A: DFU mode is typically used when standard recovery or restore procedures fail. It's also useful for downgrading iOS versions, fixing persistent software issues, or preparing the device for jailbreaking.
Q: How do I enter DFU mode on my iPhone 13 Pro?
A: Entering DFU mode on your iPhone 13 Pro involves specific button combinations and timing. It's essential to follow the precise steps to ensure successful entry into DFU mode.
Q: Can I exit DFU mode on my iPhone 13 Pro without restoring it?
A: Yes, you can exit DFU mode without restoring your iPhone 13 Pro by performing a force restart. This will exit DFU mode without affecting the device's data.
Q: Will putting my iPhone 13 Pro in DFU mode erase all data?
A: Entering DFU mode alone does not erase data. However, if you perform a restore while in DFU mode, it will erase all data on your iPhone 13 Pro.