
In today’s fast-paced world, having an efficient and organized workflow is crucial. Whether you’re a student, professional, or simply someone who likes to stay on top of their tasks, checklists can be an invaluable tool. And with the advent of smartphones, creating and managing checklists has become easier than ever before. If you own an iPhone with 3D Touch capabilities, you’re in luck! In this article, we will guide you through the process of quickly creating a new checklist in Notes using the power of 3D Touch. Say goodbye to the hassle of scrolling through menus and submenus – with just a simple touch, you can have a new checklist ready to go in an instant. Get ready to boost your productivity and streamline your daily routines with this time-saving feature!
Inside This Article
- Method 1: Creating a New Checklist using 3D Touch
- Method 2: Creating a New Checklist without 3D Touch
- Conclusion
- FAQs
Method 1: Creating a New Checklist using 3D Touch
If you own an iPhone with 3D Touch capabilities, creating a new checklist in the Notes app is quick and convenient. 3D Touch is a technology that allows your iPhone to detect the pressure of your finger on the screen, providing additional functionalities based on the force applied.
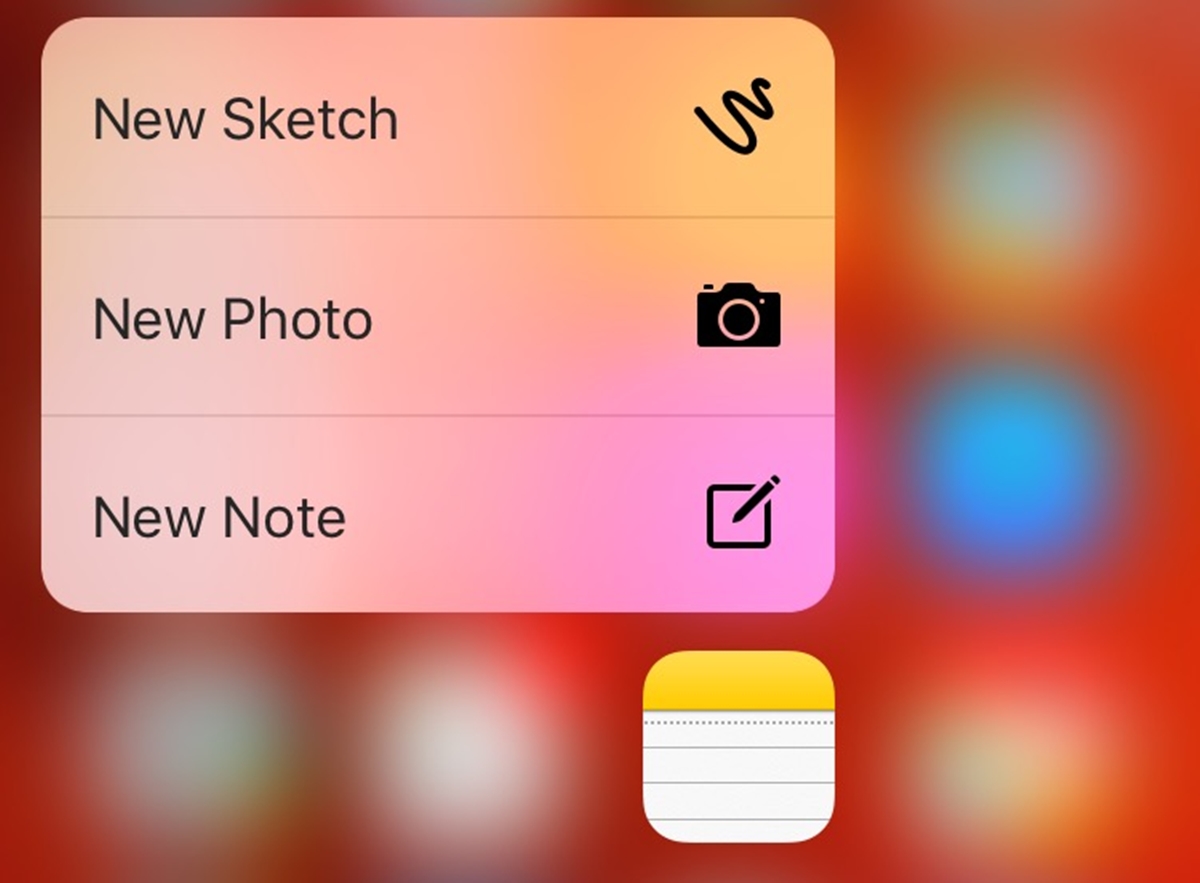
To start, locate the Notes app on your iPhone’s home screen and gently press on its icon. This action will trigger a menu of shortcuts related to the app. Look for the “New Checklist” option and tap on it. The Notes app will launch, and a blank checklist will be created.
Once you’re inside the new checklist, you can start adding items by tapping on the empty lines provided. The keyboard will appear, allowing you to type in the tasks or items you want to include. As you complete each task, simply tap the checkbox to mark it as done.
In addition to creating a new checklist, 3D Touch offers other useful features within the Notes app. You can quickly access your most recent note drafts, create a new note, or start a sketch without having to navigate through the app’s interface. This streamlined process saves you time and effort while organizing your tasks.
Remember, to take advantage of this method, you need an iPhone model with 3D Touch capabilities, such as the iPhone 6s or later. If you have an older iPhone model or a device without 3D Touch, don’t worry; there’s another method you can use to create a new checklist, which we’ll cover next.
Method 2: Creating a New Checklist without 3D Touch
If you don’t have a device with 3D Touch capability or prefer not to use it, you can still create a new checklist in Notes using an alternative method. Although it may require a few extra steps, it’s just as easy and efficient.
1. Open the Notes app on your iPhone or iPad.
2. Tap the “New Note” button located in the lower right corner of the screen to create a new blank note.
3. Once the note is open, tap on the “Aa” icon in the toolbar above the keyboard.
4. This will bring up the formatting options. Tap on the checklist icon, which looks like a bulleted list with checkboxes.
5. Now, you can start creating your checklist by typing the items you want to include and pressing “Enter” after each item to create a new checkbox.
6. To mark an item as complete, simply tap on the empty checkbox to fill it in. Tap it again to remove the checkmark and mark the item as incomplete.
7. If you want to add additional items to the checklist, just press “Enter” after the last item to create a new checkbox.
8. To exit the checklist format and continue typing regular text, tap on the “Aa” icon again and select the regular text option.
9. Once you have finished creating your checklist, tap “Done” in the upper left corner to save the note.
10. Your checklist will be saved in the Notes app and can be accessed anytime for reference or editing.
By following these simple steps, you can easily create a new checklist in Notes without using 3D Touch. Whether you’re organizing your tasks, making a grocery list, or planning a trip, this method allows you to stay organized and keep track of your important items.
In conclusion, creating a new checklist in Notes with 3D Touch is a quick and convenient way to stay organized and keep track of tasks. With just a few simple steps, you can easily create a checklist, add items, and mark them as completed, all within the Notes app on your iPhone. Whether you’re managing a daily to-do list, planning a project, or organizing your thoughts, the Notes app provides a user-friendly interface and intuitive functionality to simplify your workflow.
By utilizing the power of 3D Touch, you can streamline your checklist creation process and save valuable time. Take advantage of this feature on compatible iPhones, and enjoy the benefits of seamless productivity within the Notes app. With the ability to create and manage checklists on-the-go, you can stay focused, stay organized, and accomplish your tasks efficiently.
FAQs
Q: What is 3D Touch?
A: 3D Touch is a feature available on select iPhones that allows users to interact with their devices using varying degrees of pressure on the screen. It enables users to access additional features and shortcuts by applying different levels of pressure to the display.
Q: How can I quickly create a new checklist in Notes using 3D Touch?
A: To quickly create a new checklist in Notes using 3D Touch, follow these steps:
1. Press firmly on the Notes app icon on your iPhone’s home screen to reveal Quick Actions.
2. Tap on “New Checklist” from the Quick Actions menu.
3. The Notes app will open with a new checklist ready for you to start adding items.
Q: Can I customize the Quick Actions in the Notes app?
A: Unfortunately, the Quick Actions in the Notes app cannot be customized. The available Quick Actions are predefined by the app and cannot be changed to suit individual preferences.
Q: Which iPhones support 3D Touch?
A: 3D Touch is supported on certain iPhone models starting from the iPhone 6s and later. This feature is not available on older iPhone models, so it is important to check if your device supports 3D Touch before attempting to use this functionality.
Q: Is there a way to disable 3D Touch on my iPhone?
A: Yes, you can disable 3D Touch on your iPhone if you prefer not to use this feature. To do so, go to the “Settings” app, select “Accessibility,” then “Touch,” and finally toggle off the “3D Touch” option. Disabling 3D Touch will remove the ability to use Quick Actions and other related features that rely on pressure-sensitive input.