
A lot of people love to take videos wherever they go. They can capture school activities, any casual or important occasions, and many others. These videos serve as a remembrance of special events and wonderful experiences. They save them on their phones, send to their friends and loved ones, and share on social media. However, most of them, before sending and sharing, edit their photos and videos. They do that to achieve good impressions and have flawless photos and videos from a memorable time.
For iPhone, iPad, or Mac users, iMovie will be of great help to them. It is because it lets them edit their videos in any way they want. The software can be used by people who love editing videos, work as video editors, and want to be a moviemaker. Also, they can have some fun doing any creative stuff on their precious videos.
In this article, we will discuss iMovie, its features, how to install it, and some of its alternatives.
What Is iMovie
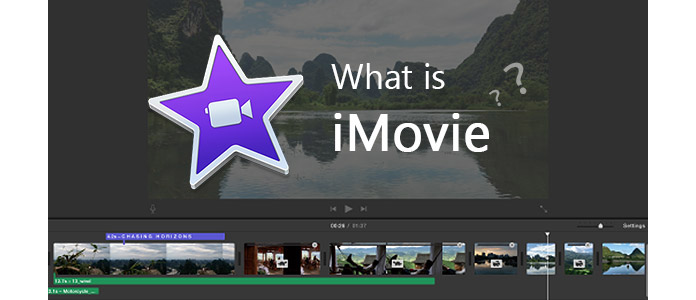
iMovie is a video editing software app that Apple Inc. developed for Mac and iOS devices, such as iPhone, iPad, and iPod Touch. iMovie started out as a macOS release back in 1999. In 2003, for every purchase of new Mac computers, this app was included free. However, it has since been free to all since April 2017.
It is one of the excellent video editing software that lets you make the most out of your favorite videos. Although its features are very simple, it is very useful even for the average users. It is because it lets them create videos that are of high quality anytime, anywhere. This app allows its users to edit photos and video clips. Moreover, users have options of adding themes, music, titles, and effects to every video that they edit.
iMovie’s Version History
macOS
iMovie
- It was launched back on October 5, 1999.
- iMovie came in a bundle along with iMac DV.
iMovie 2
- This upgraded version was released on July 19, 2000.
- This version came in a pack along with FireWire-enabled Macs. It added new sound effects and removed the older ones.
- It was both for Mac OS 9 and Mac OS X.
iMovie 3
- The third iMovie version came out on January 7, 2003.
- It came as part of the Life pack and, later on, became available for free.
iMovie 4
- Released on January 6, 2004
- Bundled with all new Macs (separate purchase – iLife ’04)
iMovie HD 5
- Released on January 6, 2005
- Included support for HDV and combination with some of the iLife suite.
- Import images and music from iPhoto and iTunes respectively
- Ability to fix the setting of chapter markers to be exported to iDVD via toolbox buttons
- Added new feature “Magic iMovie”
iMovie HD 6
- Came out on January 10, 2006
- Released as part of the iLife ’06 suite and preferably included with iLife as a substitute for iMovie ’08, then removed after the release of iLife ’09.
- Also merged with several Apple programs, which includes photos
- Added real-time effects and introduced real-time titling, upgraded audio tools, and effects
- Ability to simultaneously open multiple projects
iMovie ’08 (Version 7.0)
- Released on August 7, 2007
- Part of the iLife ’08 suite package
- Offered a much better HD output and more formats to convert to
- Added a feature called “skimming” and a feature that lets the user highlight parts of the video clips
- Ability to export movies to the website of YouTube’s web sharing
iMovie ’09 (Version 8.0)
- Released on January 27, 2009
- Released as part of the iLife ’09 package
- Revived some features from old versions and introduced new features
- Established the application of more advanced features, which include picture-in-picture, Chroma keying, and Full-screen Library Browser
- Improvements in editing, which include a more accurate cut editor, clip trimmer, and support for hard-drive-based cameras
- Full iDVD support added
iMovie ’11 (Version 9.0)
- Came out on October 20, 2010
- Included in the iLife ’11 package
- Allowed you to create your own trailers
- Additional controls for features such as instant replay and audio
- Video can be watched through several Apple devices
- Videos can be shared on different platforms including YouTube and Facebook
- On January 6, 2011, made available to the then-new Mac App Store
iMovie 10.0
- Came out on October 22, 2013
- Offered more options to share a movie
- More movie and trailer theme options for the iOS version
- Allowed users easier ways of attaining effects
- Additional green screen effects added
iMovie 10.1
- Launched on October 13, 2015
- 4K video editing added
- A massive overhaul on the interface
iOS
iMovie for iOS 1.0
- Launched on June 22, 2010
- Initial release for iPhone 4
iMovie for iOS 1.0.1
- Launched on July 6, 2010
- Improved the reliability of exports with photos and general performance
- Resolved music playback issues
iMovie for iOS 1.1
- Launched on September 8, 2010
- 4th gen iPod Touch support added
iMovie for iOS 1.2
- Released on March 10, 2011
- Support for iPad 2 and iPhone 4s models added
iMovie for iOS 1.2.1
- Released on June 1, 2011
- Apple Digital AV Adapter improved compared to previous versions
- Improvements in various performance and reliability
iMovie for iOS 1.2.2
- Went live on October 12, 2011
- Improvements for imported videos
iMovie for iOS 1.3
- Came out on March 7, 2012
- Added support for the 3rd gen iPad and the creation of movie trailers
- Allowed you to import songs from GarageBand
iMovie for iOS 1.3.1
- Released on May 1, 2012
- Added the ability to access help while editing a project
iMovie for iOS 1.4
- Released on September 19, 2012
- Added support for iPhone 5, iPod Touch (5th gen), iPad (4th gen) and iPad Mini
iMovie for iOS 1.4.1
- Launched on February 13, 2013
- Improved reliability and stability
iMovie for iOS 1.4.2
- Launched on September 3, 2013
- Fixes compatibility issues
iMovie for iOS 2.0
- Launched on October 22, 2013
- iPhone 5C, 5S, iPad Air, and Mini 2 support added
- Had a new design to match iOS 7
iMovie for iOS 2.1
- Came out on September 17, 2014
- Featured support for iOS 8 software
- New features like filters and support for iCloud Drive
iMovie for iOS 2.1.1
- Launched on November 6, 2014
- Support for iCloud Photo Library beta
- Performance and stability improvements
- Ability to share photos with iCloud Photo Sharing
iMovie for iOS 2.1.2
- Released on April 30, 2015
- Fixed YouTube sharing compatibility
iMovie for iOS 2.2
- Launched on September 16, 2015
- Added 4K support on iPhone 6s, 6s Plus, and iPad Pro
iMovie for iOS 2.2.1
- Launched on October 22, 2015
- Added 4K support on iPad Air 2
iMovie for iOS 2.2.2
- Released on April 20, 2016
- Fixed stability issues
iMovie for iOS 2.2.3
- Came out on July 28, 2016
- Ability to start a project by selecting multiple photos and videos
- Ability to share to Facebook and Vimeo
- Stability and performance improvements
iMovie for iOS 2.2.4
- Launched on September 5, 2017
- Fixed YouTube sharing compatibility
iMovie for iOS 2.2.5
- Launched on April 12, 2018
- Support for the iPhone X’s Super Retina display
- Integration of Apple’s Metal API
- Improved localization for Simplified Chinese
- A handful of bug fixes
iMovie for iOS 2.2.6
- Released on November 7, 2018
- Added support for an external display to preview while editing on iPhone 7 or later and iPad (6th gen), iPad Pro (2017), or later
iMovie for iOS 2.2.7
- Released on June 11, 2019
- Allowed users to transform videos with the green-screen effects
- 80 new soundtracks in different genres
- ClassKit
- Sharing to iMovie Theater no longer supported
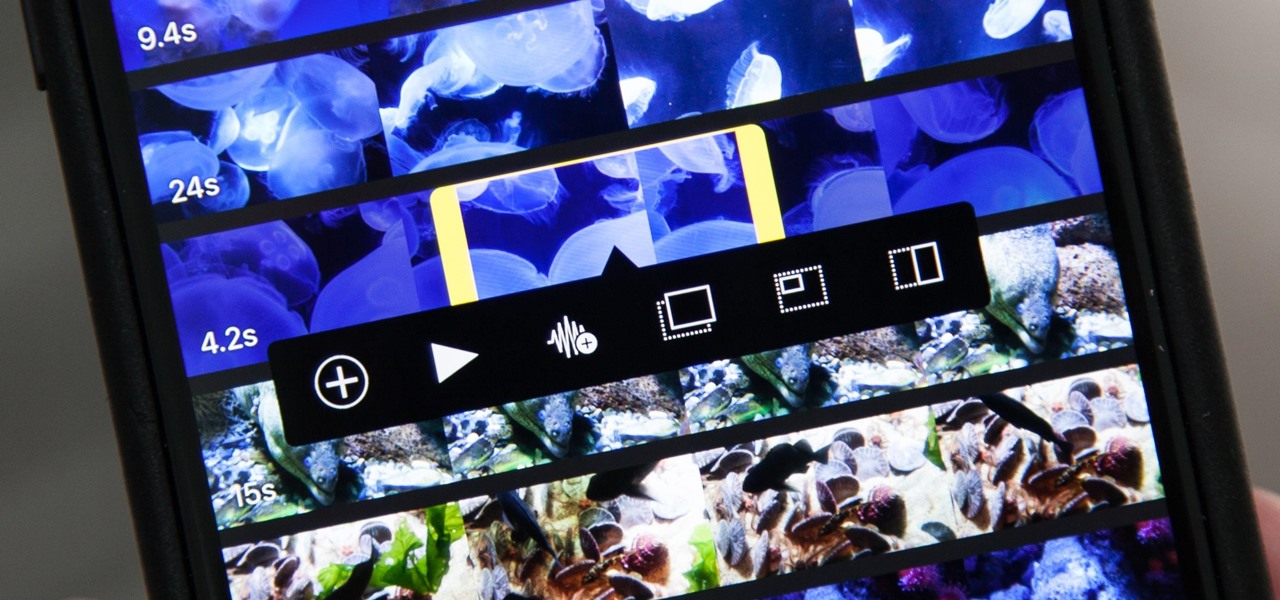
iMovie App Features
- Automated video editing
- Audio and music editing
- HD and 4K video support
- Video color settings
- Cropping and rotating a video clip
- Stabilization
- Video effects & transitions
- Video speed change
- Clip browser
- Timeline
- Photo and music import
- Pre-built themes and backdrops
- Real-time titling
- Opening multiple projects simultaneously
- Full-screen video browser
- Video and clip sharing
- Favorite moments marking
- Trailer templates
- Custom elements
- Themes
- Effects
How to Add Movie Clips to iMovie
You can use a digital camcorder or an iPad to record videos that you want to transfer to your Mac.
- Launch iMovie on your Mac.
- If you are going to import videos from your iPhone or iPad, connect the device to your Mac using a lightning cable.
- Press “Import Media.” Wait until your Mac and iPhone finish syncing. If it’s the first time that you connect your devices, it will take a while, depending on how many videos are to be imported.
- After the syncing of the two devices, click on the clips on your iPhone. Look for the clips that you want to import. For a random selection of video clips, press Cmd and click on your preferred clips.
- After selecting the clips, click on the dropdown arrow beside “Import To.” This way, you can select on which Event you want to import your clips.
- Tap on “Import Selected.”
- Click on “Project Media” if you wish to add more video clips.
- After that, click on “Import Media.”
- An import window will then launch.
- After importing, you will find the clips in “My Movie.”
How to Edit a Video on iMovie
How to Create a Project
- The iMovie window has three tabs on top of the interface that you can select.
- Go to the “Projects” option to start a new project.
- You can choose between “Movie” and “Trailer.”
- Click the “Movie” option. After clicking, a window will pop up that will allow you to see the video. Also, it is a place where you can drag and drop the clips.
- You will see folders with the clips that you have imported.
- Click on the folder to see the available clips on your editing window.
How to Edit the Length of the Clip
If you are not satisfied with your clip and you want to change the beginning and ending, you can change the point where you want your clip to begin and end.
- Place an outline on your video by tapping on it. With that, you can now shorten your clip.
- Drag the yellow bar at the start of the video and drag it to your desired duration. This will now be the start of your video.
- For your preferred ending, go to the end of the clip.
- Click on it to be outlined in yellow, so you can edit it. Click and hold it back to the part where you want your clip to end.
How to Split Video Clips on iMovie
If you want to split your long clips into shorter ones, follow these steps:
- Launch iMovie and upload the video that you want to split.
- To continue, drag your video clip into the iMovie timeline.
- Click on it to select it.
- Using your mouse, move the playhead to the exact point where you want to split your video.
- On the main menu bar, click on “Modify,” then choose “Split Clip.” Alternatively, you can use the keyboard shortcut Cmd + B. This way, you can split your original clip into two small separate clips.
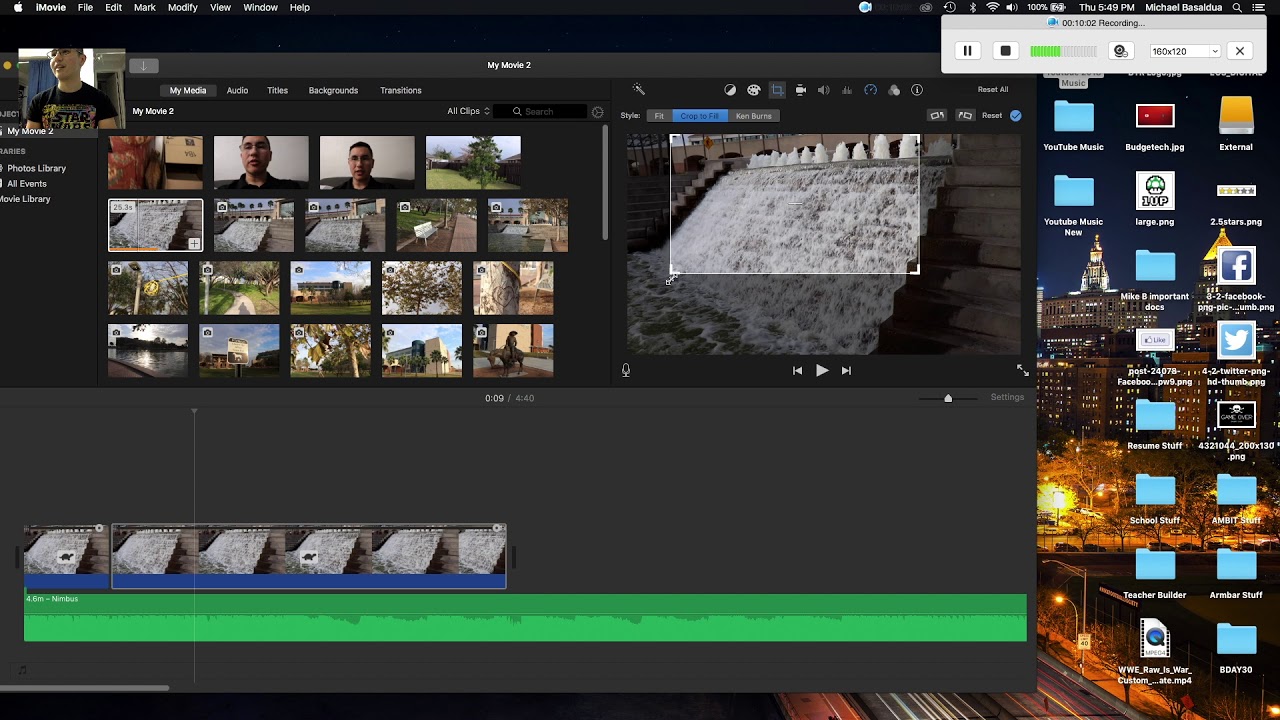
How to Add Filters on iMovie
iMovie offers a variety of filters that you can use when editing. These filters will help you to achieve your preferred style or look on your video. If you already have your video clip in your Timeline, you can now add filters and effects to the video clip.
- In your Timeline, double-click on the video clip that you want to modify or edit. The said video can now be found on the clip inspector window. On the Viewer window of iMovie, you will see a row of icons over your video clip.
- Press the “Clip Filter and Audio Effects” icon, it’s the one that looks like three overlapping circles.
- Click on the drop-down menu. There, you’ll be able to see an array of filters.
- From the list of effects, you can choose whatever you want for your video clip.
- To see how your chosen filter will look on your video, you can hover your mouse over each selection.
- If you find the effect that suits your preference, click on it for it to be applied to your video clip. However, if you want to apply the filter you’ve selected to all clips, press Cmd + A at the same time. This way, all your clips will be selected. On the other hand, if you want to apply the filter to only a few clips, hold the Cmd key and click on the clips.
- The “Clip Filter” button will then display the name of your selected effect.
How to Add Audio Effects on iMovie
On iMovie, it is also possible to add audio effects on your video clip.
- Go to the Clip Filter and then select the Audio Effects option.
- Click on the drop-down menu that you will find beside the “Audio Effect.”
- You will see a collection of audio effects besides the clip inspector window.
- You can choose from various audio effects. Also, if you want to make the voice higher or lower, you can choose from various pitch options.
- To listen to your chosen audio effect, hover your mouse over each effect.
- Select your preferred audio effect by clicking on it, and it will be applied to your video clip.
How to Download iMovie On Mac
- Open the App Store on your Mac.
- Click on the “Search” box to type in what you will look for.
- Enter “iMovie” into the “Search” box to quickly search and find the iMovie app.
- As soon as the “iMovie” app appears, you can then press the “Get” button. Then, it will turn into a green “Install App” button.
- You need to enter your Apple ID and password when prompted.
- The iMovie program will then start downloading on your Mac. Wait for it to finish downloading.
- After downloading, you will find the iMovie app in the Applications folder of your Mac.
How to Download iMovie on iOS
- Enter the App Store.
- You will get a list of Apple applications.
- To get the iMovie app for your iOS device, click the free icon of iMovie.
- This will allow you to start downloading the program.
How to Download iMovie for Windows

iMovie is for iOS and Mac users only. However, if you want to have iMovie on your PC, you need to use an iOS emulator. With this, you can use an iPadian for you to be able to download iMovie for PC.
- On your PC, download the iPadian from its official site.
- You will be given some steps on how to install the emulator on your PC.
- Follow the steps to easily install it.
- After the installation, launch the iPadian emulator. You will see that your device screen is just like the Mac screen.
- Look for the search bar then type iMovie.
- Press on the “Download” button to continue.
- Wait for the app to download.
- You will find the software on the download folder.
- When you find the downloaded software, open it, and click on the “Install” button to begin the installation.
- After the installation, you can start editing your photos and videos.
Pros and Cons of iMovie
Pros
- Fixing shaky video
- Mac and iOS versions work similarly
- Changing the audio over a video clip
- Editing each clip up close
- Adding background music, titles, themes, and some visual effects
- Intuitive functions
- Adding text and making credits easily.
- Auto-save feature
- Trimming video clips
- High-quality video in multiple resolutions
- Ingesting multiple video, audio, and graphics types
- Decent performance
- High-end trailers with templates
- Green-screen editing
- Flexibility in any design that you want
- Easy to understand and use
- Seamless transfer of projects from mobile to Mac
- Importing videos from an external device
Cons
- Not user-friendly layout
- Lacking video editing functionality
- Not user-friendly on Windows
- Overlapping of the video cuts for crossfade
- The limited headline and text options
- Limited capabilities
- Limited audio for video editing
- Imprecise clip trim feature
- Can’t customize the title fonts and size
Alternatives to iMovie
WeVideo

WeVideo is an online professional-quality video editing service. It lets its users upload photos, videos, and music, and at the same time, organize them in any way that they like. Also, it offers themes, music, or sounds from its library. Besides, it has impressive video editing capabilities, and it enables its users to capture their computer screen.
Users can use WeVideo without a need to download it. Moreover, it is available on Mac, Windows, Linux, Chrome OS, iPhone, iPad, and Android phones or tablets. With that, it becomes handy and makes creating and sharing videos fun anytime, anywhere.
Clipchamp

It is an online tool that lets its users convert and compress videos and even record webcam videos. Also, it lets users create videos and upload them to Facebook, Instagram, Vimeo, or YouTube of up to 20 times faster. It is also useful in creating slide shows for presentations and even small video clips. More importantly, since it is an online tool, there’s no need to install any software.
Adobe Spark

This gives both the web and mobile users the power to create and share attention-grabbing visual ideas. The users don’t need a lot of time to use it. They just have to choose from different designs, add photos and text, resize the photo, and add their creative touch to have wonderful creations. However, the user should create an account before using it and work on a project. The tools are simple, but they let you have beautiful outcomes effortlessly and make them like they are done by a pro.
Show off Amazing Videos With iMovie
No one is perfect and nothing in this world has no flaws. This also applies to the videos that we capture, most especially those that were taken from special moments. We always want them to be perfect, so we can share them with everyone. For them to be amazing as we want to be, we tend to edit them. iMovie is one of the amazing tools that we can use to edit our videos. We can make the best out of these videos by using this app. We may not be able to please everyone with the edited outcome, but at least, we satisfy ourselves. Moreover, we can also have fun and learn from using this app. We can make the best of our videos and have them stored on our phones as a keepsake. Or, show off to our friends and family on social media!
If you’re using Android and can’t use iMovie, here are the best video editing apps for Android devices. Also, you might want to check our in-depth articles talking about InShot and VivaVideo.