
So, you've got your hands on the coveted iPhone 10, and now you're ready to dive into the world of seamless connectivity and unparalleled user experience. Activating your iPhone 10 is the crucial first step to unlocking its full potential and enjoying all the amazing features it has to offer. Whether you're upgrading from an older iPhone or making the switch from a different device, the activation process is essential to get your new iPhone up and running. In this article, we'll guide you through the simple yet essential steps to activate your iPhone 10, ensuring that you can start exploring its capabilities in no time. Let's embark on this exciting journey and get your iPhone 10 activated seamlessly!
Inside This Article
- Checking for Activation
- Connecting to Wi-Fi or Cellular Network
- Setting up Face ID
- Restoring from iCloud or iTunes Backup
- Conclusion
- FAQs
**
Checking for Activation
**
When you first get your iPhone 10, the activation process is a crucial step to start using your device. Here’s how to check for activation and ensure a smooth setup.
Once you power on your iPhone 10, you’ll be greeted with the “Hello” screen. This indicates that the device needs to be activated before you can proceed with the setup. If the “Hello” screen doesn’t appear, your device may already be activated and ready for use.
If the “Hello” screen is displayed, you can proceed with the activation process by following the on-screen instructions. Typically, you’ll be prompted to select your language, country, and connect to a Wi-Fi network. This is an essential step to ensure a successful activation.
During the activation process, your iPhone 10 will attempt to communicate with Apple’s servers to verify the device’s status and activate it for use. It’s important to have a stable internet connection to facilitate this communication and complete the activation seamlessly.
Connecting to Wi-Fi or Cellular Network
Once you’ve powered on your iPhone 10 and completed the initial setup, the next step is to connect to a Wi-Fi or cellular network. This is essential for accessing the internet, making calls, and using various apps and services on your device.
To connect to a Wi-Fi network, navigate to the “Settings” app on your iPhone 10. Tap on “Wi-Fi” and toggle the switch to turn it on. Your device will then scan for available Wi-Fi networks. Select your preferred network from the list and enter the password if required. Once connected, you’ll see a Wi-Fi icon in the status bar at the top of the screen.
If you prefer to use a cellular network, ensure that your SIM card is properly inserted into the iPhone 10. Go to “Settings,” tap on “Cellular,” and switch on the “Cellular Data” option. Your device should automatically connect to the available cellular network, and you’ll see the signal strength indicator in the status bar.
It’s important to note that connecting to a Wi-Fi network is generally faster and more cost-effective for data-intensive tasks, especially if you have limited cellular data. However, having access to a reliable cellular network is crucial for staying connected while on the go.
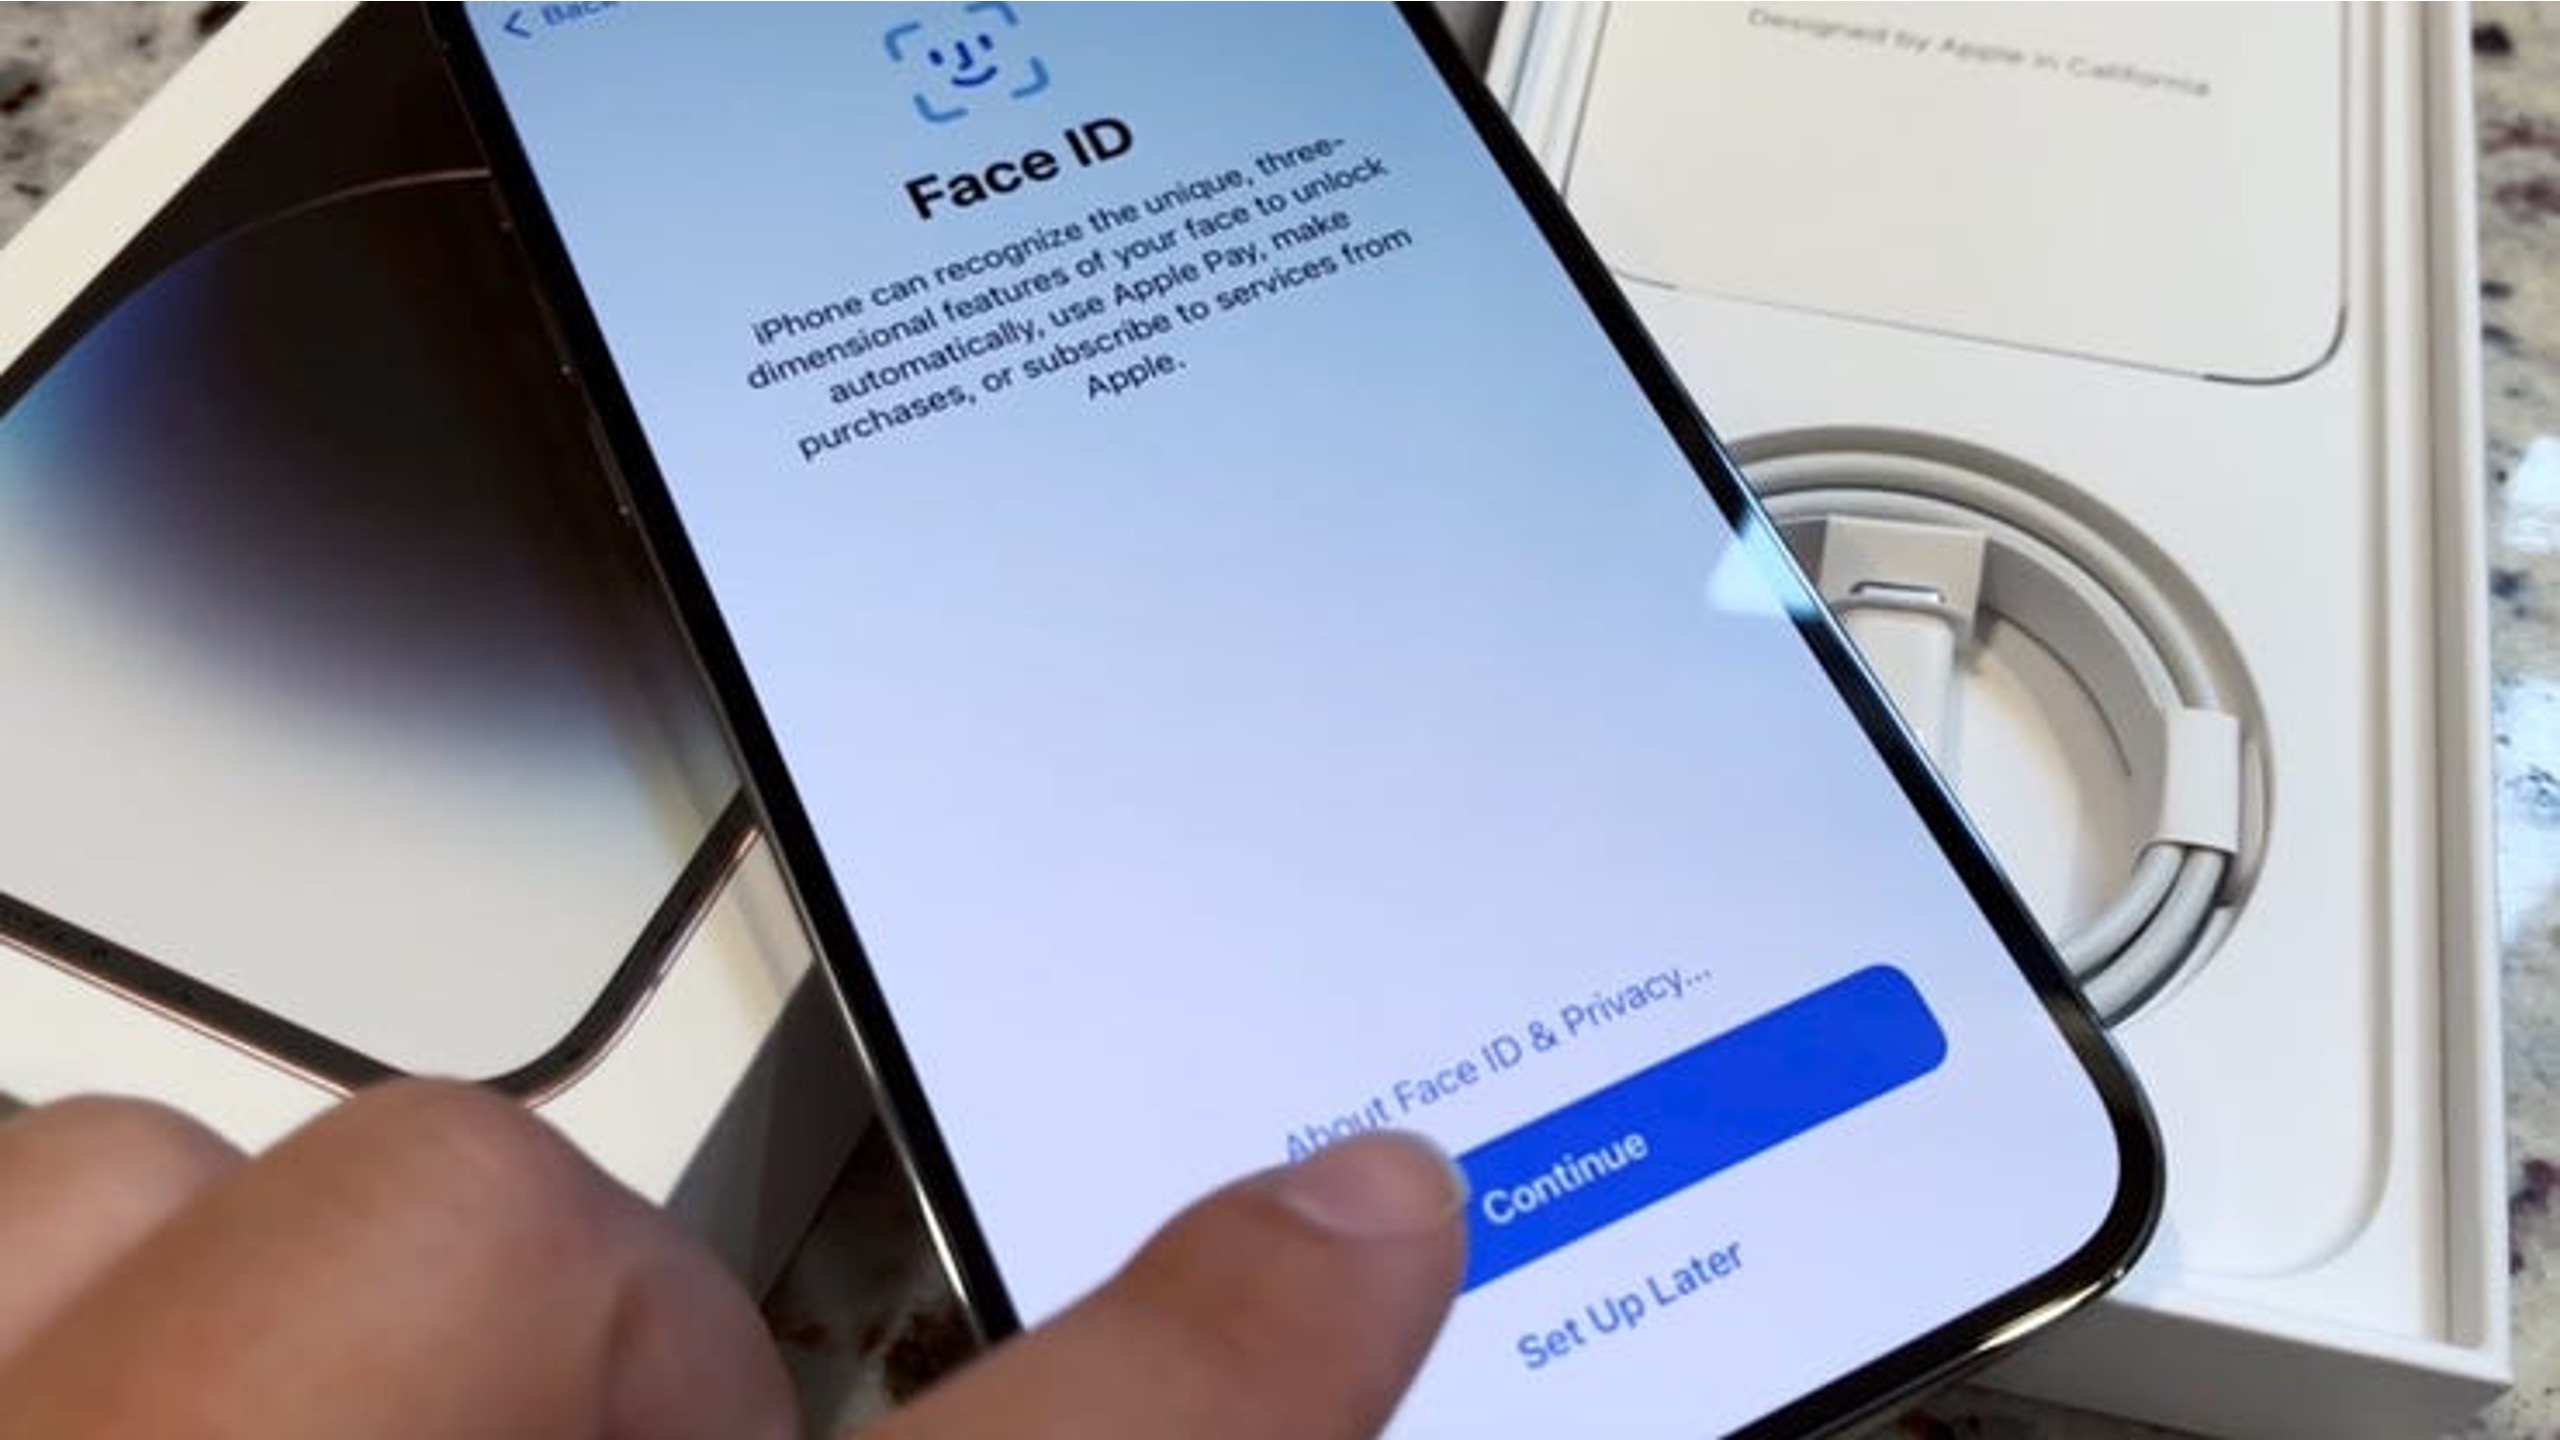
Setting up Face ID
Setting up Face ID on your iPhone 10 is a straightforward process that enhances the security and convenience of unlocking your device and authorizing purchases. Face ID uses advanced facial recognition technology to authenticate your identity, providing a seamless and secure way to access your device and sensitive information. Here’s how to set up Face ID on your iPhone 10.
To begin, navigate to the “Settings” app on your iPhone 10 and select “Face ID & Passcode.” You will be prompted to enter your device passcode to access the Face ID settings. Once entered, tap on “Set Up Face ID” to initiate the setup process.
Hold your iPhone 10 in front of your face at a comfortable distance, ensuring that your face is clearly visible within the on-screen frame. Follow the on-screen instructions to move your head in a circular motion, allowing the TrueDepth camera system to capture the unique features of your face from various angles.
After the initial scan is complete, you will be prompted to perform a second facial scan to further enhance the accuracy and reliability of Face ID. Repeat the process of positioning your face within the on-screen frame and moving your head in a circular motion as guided.
Once the setup process is finished, you can test the effectiveness of Face ID by locking your device and then attempting to unlock it by simply looking at the screen. If successful, your iPhone 10 will seamlessly recognize your face and grant access to the home screen, providing a convenient and secure authentication method.
Sure, here's the content for "Restoring from iCloud or iTunes Backup" section:
Restoring from iCloud or iTunes Backup
Restoring your iPhone 10 from an iCloud or iTunes backup is a convenient way to transfer your data, settings, and apps to your new device. Whether you’re upgrading to a new iPhone or recovering from a malfunction, this process ensures that your new device mirrors the content of your previous one.
To restore from an iCloud backup, ensure that you have a stable Wi-Fi connection. During the initial setup, choose “Restore from iCloud Backup” and sign in to your iCloud account. Select the most relevant backup from the list, and the restoration process will commence. This may take some time, depending on the size of the backup and your internet connection speed.
If you prefer to restore from an iTunes backup, you’ll need to connect your iPhone 10 to a computer with the latest version of iTunes installed. After connecting your device, select it in iTunes and choose “Restore Backup.” From the available backups, select the most suitable one, and let iTunes complete the restoration process.
It’s important to note that restoring from a backup will overwrite the current data on your iPhone 10. Therefore, ensure that you have an up-to-date backup to avoid losing any recent information. Additionally, some settings and passwords may need to be re-entered after the restoration is complete.
Conclusion
Activating your iPhone 10 is a straightforward process that ensures you can start using your device to its full potential. Whether you’re setting up a new iPhone or restoring from a backup, the activation steps are designed to be user-friendly and efficient. By following the guidelines provided by Apple or your carrier, you can swiftly complete the activation process and begin exploring the features and capabilities of your iPhone 10. Remember to safeguard your personal information and ensure a stable internet connection throughout the activation process. With your iPhone 10 activated, you’re ready to enjoy the seamless functionality and impressive performance that this innovative device has to offer.
FAQs
**Q: How do I activate my iPhone 10?**
To activate your iPhone 10, simply turn it on and follow the on-screen instructions. If you’re switching from another device, you can use Quick Start or manually activate it through iTunes or iCloud.
Q: What do I need to activate my iPhone 10?
To activate your iPhone 10, you'll need a SIM card (unless you're activating it through Wi-Fi), a Wi-Fi or cellular connection, and your Apple ID and password.
Q: Can I activate my iPhone 10 without a SIM card?
Yes, you can activate your iPhone 10 without a SIM card by connecting to a Wi-Fi network and following the on-screen instructions. However, certain features, such as cellular calling and messaging, will require a SIM card.
Q: What is Quick Start and how can I use it to activate my iPhone 10?
Quick Start is a feature that allows you to quickly set up a new iPhone using your current iPhone or iPad running iOS 11 or later. To use Quick Start, simply place your current device next to your new iPhone 10 and follow the on-screen instructions.
Q: What should I do if I encounter issues during the activation process?
If you encounter issues during the activation process, ensure that you have a stable internet connection and try restarting your iPhone 10. If the issue persists, you can contact Apple Support for further assistance.