
In the digital age, subscribing to various services has become a common practice, especially on our beloved iPhones. Whether it’s streaming platforms, music services, or monthly app subscriptions, it’s easy to accumulate a long list of automatic charges. However, there comes a time when we may need to cancel one or more of these subscriptions. But how exactly do you go about doing that on your iPhone?
Today, we will guide you through the process of canceling subscriptions on your iPhone, ensuring that you have control over your finances and can manage your subscriptions effortlessly. We’ll cover step-by-step instructions and provide useful tips to make the process as smooth as possible. So, if you’re ready to take charge of your subscriptions and enjoy a clutter-free digital life, let’s dive right into it.
Inside This Article
- Checking Active Subscriptions
- Canceling Subscriptions through App Store
- Managing Subscriptions in Settings
- Restoring Cancelled Subscriptions
- Conclusion
- FAQs
Checking Active Subscriptions
If you’re an iPhone user, it’s essential to keep track of your active subscriptions to ensure you’re only paying for services you still use and enjoy. Checking your active subscriptions is a straightforward process that can be done through the App Store or your iPhone’s Settings menu.
To begin, open the App Store on your iPhone by tapping the icon on your home screen. Once the App Store opens, tap on your profile picture located in the top right corner of the screen. This will bring you to your account page.
On your account page, scroll down until you see the “Subscriptions” option. Tap on it to access the Subscriptions menu, where you’ll find a list of all your active subscriptions.
Alternatively, you can also check your active subscriptions through your iPhone’s Settings menu. To do this, navigate to the “Settings” app on your home screen and scroll down until you see the “Subscriptions” option. Tap on it, and you’ll be presented with a list of all your active subscriptions.
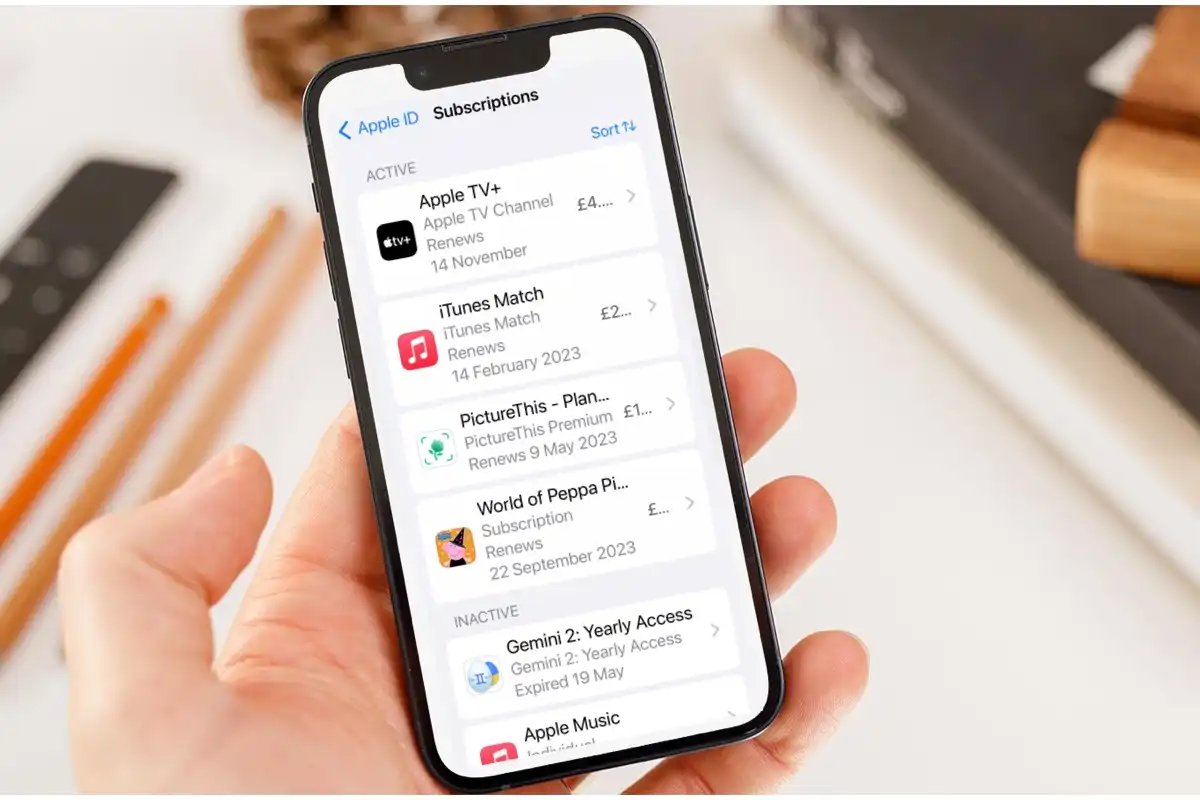
In both the App Store and Settings menu, you’ll see your active subscriptions listed, along with relevant details such as the subscription name, the renewal date, and the subscription price. This information allows you to easily keep track of your subscriptions and make informed decisions regarding cancellation or renewal.
By regularly checking your active subscriptions, you can avoid being charged for services you no longer need or use. It’s also a good practice to review your subscriptions periodically to ensure they still align with your current needs and preferences.
Canceling Subscriptions through App Store
If you have subscribed to various services through the App Store on your iPhone, you might find it necessary to cancel some of those subscriptions at some point. Fortunately, canceling subscriptions through the App Store is a straightforward process. Here’s how you can do it:
1. Open the App Store on your iPhone. You can find the App Store icon on your home screen.
2. Tap on your profile picture, which is located in the top right corner of the screen. This will open your account settings.
3. Scroll down and tap on the “Subscriptions” option. This will show you a list of all the active subscriptions linked to your Apple ID.
4. Select the subscription that you want to cancel. You will be presented with the details of that subscription, including its duration and price.
5. Tap on the “Cancel Subscription” option. Confirm your choice when prompted.
6. Once canceled, the subscription will remain active until the end of the current billing period. After that, you will no longer be charged for it, and your access to the subscription’s content or features will be revoked.
Please note that canceling a subscription through the App Store only stops future charges. It does not provide a refund for any previously paid subscription fees. If you have any issues or concerns regarding refunds, it is best to contact the app developer or the platform’s customer support.
By following these simple steps, you can easily cancel subscriptions through the App Store on your iPhone. It’s important to regularly review your subscriptions to ensure you are only paying for those services that you actively use or need.
Managing Subscriptions in Settings
If you have ever signed up for a subscription service on your iPhone, you might find yourself wanting to manage or cancel those subscriptions at some point. Thankfully, the iOS Settings app provides a convenient way to review and manage your subscriptions without having to go through the App Store. Here’s how you can do it:
1. Open the Settings app on your iPhone.
2. Scroll down and tap on your Apple ID banner at the top of the screen.
3. Tap “Subscriptions.” You will see a list of all your active subscriptions.
4. Tap on the subscription that you want to manage.
5. To cancel the subscription, tap “Cancel Subscription” at the bottom of the screen.
6. Follow the prompts to confirm the cancellation.
By following these simple steps, you can easily manage your subscriptions directly from the Settings app on your iPhone. It’s a quick and hassle-free way to stay in control of your subscriptions and avoid any unwanted charges.
It’s important to note that canceling a subscription through the Settings app does not delete the app associated with the subscription from your device. If you want to remove the app completely, you’ll need to do so separately.
Additionally, if you cancel a subscription and later decide that you want to reactivate it, you can always go back to the “Subscriptions” section in the Settings app and choose to resubscribe to the service.
Now that you know how to manage your subscriptions through the Settings app, you can easily keep track of your recurring payments and ensure that you’re only paying for the services you actually want and use.
Restoring Cancelled Subscriptions
If you have previously cancelled a subscription but have now changed your mind and want to restore it, the process is quite straightforward. Here’s how you can do it:
1. Open the App Store on your iPhone and tap on your profile picture in the top right corner.
2. Scroll down until you find the “Subscriptions” option and tap on it.
3. You will see a list of all the subscriptions you have previously cancelled. Locate the one you want to restore and tap on it.
4. On the subscription page, you will find a “Restore” button. Tap on it to initiate the restoration process.
5. Depending on the app, you may need to enter your Apple ID password or use Touch ID/Face ID to confirm the restoration.
6. Once confirmed, the subscription will be restored, and you will regain access to all the features and content associated with it.
Keep in mind that not all subscriptions can be restored, especially if the app or service has discontinued it or if it was a limited-time offer. In such cases, you may need to subscribe again from scratch if you wish to continue using the service.
By understanding how to restore previously cancelled subscriptions, you have more control over managing your recurring payments and accessing the content and services you enjoy.
Conclusion
Canceling subscriptions on your iPhone has never been easier. With just a few simple steps, you can say goodbye to unwanted subscriptions and regain control over your finances. Whether you’re looking to cancel a streaming service, a magazine subscription, or a fitness app, the process is quick and straightforward.
Remember, it’s important to regularly review your subscriptions and assess whether you’re getting value for your money. By staying on top of your subscriptions and canceling those that no longer serve you, you can save a significant amount of money in the long run.
So, don’t let unwanted subscriptions drain your bank account. Take charge of your iPhone’s subscription settings and enjoy a clutter-free digital experience. Happy canceling!
FAQs
1. How do I cancel a subscription on my iPhone?
To cancel a subscription on your iPhone, follow these steps:
– Open the App Store on your iPhone.
– Tap on your profile picture or the silhouette icon in the top right corner.
– Scroll down and tap on “Subscriptions.”
– You will see a list of your active subscriptions. Tap on the one you want to cancel.
– Tap on “Cancel Subscription” and confirm your cancellation.
2. What happens when I cancel a subscription on my iPhone?
When you cancel a subscription on your iPhone, you will no longer be billed for it, and access to any premium features or content associated with the subscription will be revoked. However, you will still be able to use the subscription until the current billing period ends.
3. Can I get a refund if I cancel a subscription on my iPhone?
Refunds for subscription cancellations are determined by the app developer or service provider. Some may offer a refund for unused portions of the subscription, while others may not. It’s best to check the terms and conditions or contact the app developer or service provider directly to inquire about refund policies.
4. How can I see a list of all my active subscriptions on my iPhone?
To view a list of all your active subscriptions on your iPhone, follow these steps:
– Open the Settings app.
– Tap on your Apple ID at the top of the screen.
– Tap on “Subscriptions.”
– You will see a list of all your active subscriptions with options to manage or cancel them.
5. Can I still use a subscription after I cancel it on my iPhone?
Yes, you can continue to use a subscription after canceling it on your iPhone until the current billing period ends. Once the billing period is over, your access to any premium features or content associated with the subscription will be revoked.