
Welcome to our comprehensive guide on how to put an iPhone 13 into recovery mode. Whether you are troubleshooting software issues, preparing for a firmware update, or need to restore your device, putting your iPhone 13 into recovery mode can be a vital step. Recovery mode allows you to connect your device to a computer and perform various essential functions, such as restoring the device’s software or updating to the latest iOS version. In this article, we will walk you through the step-by-step process of entering recovery mode on your iPhone 13. We will also address common questions and provide useful tips to ensure a smooth experience. So, let’s dive into the world of iPhone 13 recovery mode and empower you to tackle any software-related challenges with confidence!
Inside This Article
- What is Recovery Mode?
- Why would you need to put your iPhone 13 into Recovery Mode?
- Step-by-Step Guide to Putting iPhone 13 into Recovery Mode
- Tips and Troubleshooting for putting iPhone 13 into Recovery Mode
- Conclusion
- FAQs
What is Recovery Mode?
Recovery Mode is a special troubleshooting mode that can be accessed on an iPhone 13 (and other iPhone models) when there is a software issue or when the device needs to be restored or updated. It is a powerful tool that allows users to fix problems with their iPhones that cannot be resolved through regular methods.
When your iPhone 13 is in Recovery Mode, it bypasses the normal iOS startup process and allows you to restore or update the device using iTunes or Finder on your computer. This mode is particularly useful when your iPhone is stuck on the Apple logo, experiencing constant crashes, or encountering other software-related issues.
To enter Recovery Mode, you need to connect your iPhone 13 to a computer with iTunes or Finder installed. Once in Recovery Mode, you can choose to restore your iPhone to its factory settings, update the iOS software, or even reinstall the operating system if necessary.
It’s important to note that entering Recovery Mode will erase all the data on your iPhone, so it is crucial to have a recent backup before proceeding. Once the device is restored or updated, you can restore your data from the backup.
Overall, Recovery Mode is an essential tool for troubleshooting and resolving software issues on your iPhone 13. It provides a way to fix problems that cannot be solved through regular methods, giving you the ability to restore your device to its normal functionality.
Why would you need to put your iPhone 13 into Recovery Mode?
Despite the advanced technology packed into the iPhone 13, there may come a time when you encounter software issues or face unresponsive behavior. In such situations, putting your iPhone 13 into Recovery Mode can be a useful troubleshooting step. Recovery Mode allows you to restore your device to its factory settings, reinstall the operating system, or resolve major software glitches that may be causing issues.
Here are a few common scenarios where putting your iPhone 13 into Recovery Mode can be beneficial:
- Software Update Failure: If an iOS update fails to install properly on your device and your iPhone 13 is stuck on the Apple logo or in a continuous restart loop, Recovery Mode can help you restore your device and complete the update successfully.
- Unresponsive Screen: If your iPhone 13’s screen becomes unresponsive or frozen and you’re unable to access any features or perform any actions, entering Recovery Mode can help resolve the issue by resetting the device.
- Apps not working: In some cases, certain apps may stop working properly or crash frequently, affecting the overall performance of your iPhone 13. Putting your device into Recovery Mode and performing a restore can help fix app-related issues.
- Forgotten Passcode: If you forget your iPhone 13 passcode and are locked out of your device, entering Recovery Mode allows you to restore your device and set it up as new, bypassing the passcode.
It’s important to note that putting your iPhone 13 into Recovery Mode will erase all data on the device, so it’s crucial to have a backup of your data before proceeding. However, if you have synced your device with iCloud or iTunes, you can easily restore your data after the Recovery Mode process is completed.
Now that you understand when Recovery Mode can be useful, let’s dive into the step-by-step guide on how to put your iPhone 13 into Recovery Mode.
Step-by-Step Guide to Putting iPhone 13 into Recovery Mode
If your iPhone 13 is experiencing issues and you’re unable to resolve them through regular troubleshooting methods, putting your device into recovery mode might be necessary. Recovery mode allows you to restore your iPhone’s operating system to its original state. Here’s a step-by-step guide on how to put your iPhone 13 into recovery mode:
- Ensure that your iPhone is charged
- Connect your iPhone to your computer
- Launch iTunes or Finder
- Put your iPhone into recovery mode
- Follow the on-screen instructions on your computer
- Wait for the restore process to complete
Before putting your iPhone 13 into recovery mode, make sure that it has enough battery power. Connect it to a power source or charge it for a few minutes to ensure it doesn’t run out of battery during the process.
Using a Lightning to USB cable, connect your iPhone 13 to your computer. Make sure that you’re using a trusted and functioning cable to ensure a stable connection.
Open iTunes (if you’re using a Windows computer) or Finder (if you’re using a Mac) on your computer. These applications are essential for the recovery mode process.
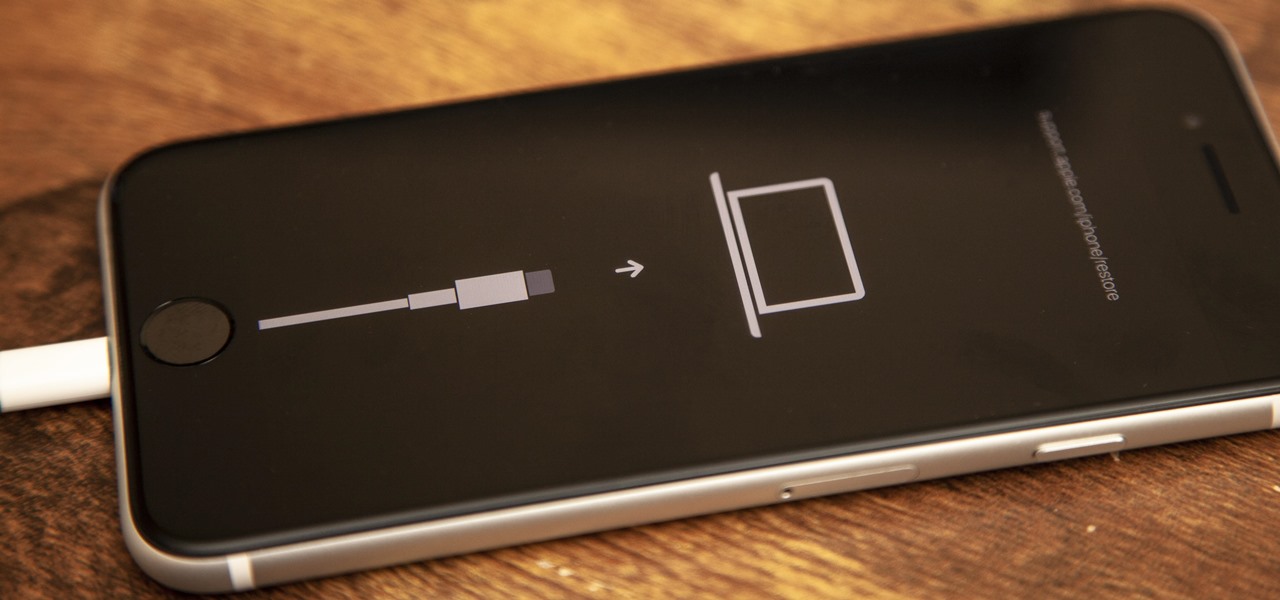
Press and quickly release the volume up button. Then, press and quickly release the volume down button. Finally, press and hold the side button until the recovery mode screen appears on your iPhone 13. The screen will display the “Connect to iTunes” or a computer icon.
Once your iPhone 13 is in recovery mode, iTunes or Finder will detect it and display a pop-up window with instructions. Follow the on-screen prompts to proceed with the recovery process. You will have the option to restore or update your iPhone’s software. Choose the appropriate option based on your situation.
The restore process may take some time, so be patient and do not disconnect your iPhone 13 from your computer. Ensure that both your computer and iPhone remain powered on throughout the process. Once the restore is complete, your iPhone will restart, and you can set it up as new or restore it from a backup.
Putting your iPhone 13 into recovery mode can be a helpful method for resolving certain software-related issues. However, keep in mind that this process will erase all data on your device. Therefore, it’s crucial to have a recent backup of your iPhone’s data to restore afterward.
Remember to only use recovery mode if regular troubleshooting methods fail to resolve your iPhone’s issues. If you’re unsure or uncomfortable with this process, it’s always recommended to seek assistance from an authorized service center or contact Apple support for further guidance.
Tips and Troubleshooting for putting iPhone 13 into Recovery Mode
Putting your iPhone 13 into recovery mode can be a useful troubleshooting step when you encounter certain software issues. However, it is essential to follow the correct process to avoid any complications. Here are some tips and troubleshooting steps to ensure a smooth experience:
1. Update iTunes: Before attempting to put your iPhone 13 into recovery mode, make sure you have the latest version of iTunes installed on your computer. This will ensure compatibility and a seamless connection between your iPhone and the computer.
2. Use a genuine Apple cable: Ensure that you are using a genuine Apple lightning cable to connect your iPhone to the computer. Using counterfeit cables or third-party cables may result in connection issues or unreliable data transfer, which can affect the recovery mode process.
3. Check your USB port: If you encounter any difficulties in establishing a connection between your iPhone and the computer, try using a different USB port. Sometimes, a faulty or damaged USB port can cause connectivity issues, preventing your iPhone from entering recovery mode.
4. Restart your iPhone: If your iPhone is unresponsive or encountering minor software glitches, try restarting it before attempting to put it into recovery mode. This simple step may resolve the issue without having to resort to recovery mode.
5. Follow the step-by-step guide: Refer to our previous article titled “How To Put An iPhone 13 Into Recovery Mode” for a detailed step-by-step guide on entering recovery mode. Following the correct sequence of actions is crucial to prevent any errors or complications during the process.
6. Don’t interrupt the process: Once you have initiated the recovery mode process, it is important not to interrupt it until the process is completed. Interrupting the process midway can lead to incomplete data recovery or even cause further software issues on your iPhone.
7. Seek assistance if needed: If you are unsure or encounter any difficulties while putting your iPhone 13 into recovery mode, it is always a good idea to seek assistance from an Apple Support representative or visit an Apple Store. They can provide expert guidance and troubleshooting solutions to ensure a successful recovery mode experience.
By following these tips and troubleshooting steps, you can confidently put your iPhone 13 into recovery mode when necessary and resolve any software issues that may arise. Remember, it is always important to backup your iPhone regularly to prevent data loss and ensure a smooth recovery process.
Conclusion
Putting an iPhone 13 into recovery mode can be a useful troubleshooting technique when dealing with software issues or preparing for a software update. It allows you to restore your device to its factory settings or update the iOS, potentially resolving any persistent glitches or errors.
By following the steps outlined in this article, you can easily and safely enter recovery mode on your iPhone 13. Remember to back up your data before performing any major changes to safeguard your important files and documents.
Whether you’re an iPhone newbie or a seasoned user, having a basic understanding of recovery mode is essential. It empowers you to take control of your device and address any software-related issues that may arise. So, the next time your iPhone 13 acts up, don’t panic, just put it into recovery mode and watch as it springs back to life.
FAQs
-
What is recovery mode on an iPhone?
Recovery mode is a troubleshooting tool built into iPhones that allows you to fix various software issues, such as a stuck or unresponsive device, failed software update, or even a forgotten passcode. It enables you to restore your device to its factory settings or update the iOS version.
-
When should I put my iPhone into recovery mode?
You should put your iPhone into recovery mode when you’re facing issues such as an unresponsive screen, continuous restart loops, unable to update or restore your device using iTunes, or if you’re prompted to connect your iPhone to a computer with iTunes.
-
How do I put my iPhone into recovery mode?
To put your iPhone into recovery mode, follow these steps:
- Connect your iPhone to your computer using a lightning cable.
- Press and release the volume up button.
- Press and release the volume down button.
- Press and hold the side button until you see the recovery mode screen.
- On your computer, you will see a prompt to update or restore your iPhone using iTunes.
-
How do I exit recovery mode on my iPhone?
If you’ve successfully resolved the issue or completed the necessary steps in recovery mode, you can exit it by performing a force restart. To force restart your iPhone, follow these steps:
- Press and quickly release the volume up button.
- Press and quickly release the volume down button.
- Press and hold the side button until you see the Apple logo.
After the Apple logo appears, your iPhone will exit recovery mode and boot up normally.
-
Will putting my iPhone into recovery mode erase my data?
Putting your iPhone into recovery mode alone will not erase your data. However, if you choose to restore your device or update the iOS version while in recovery mode, it will erase all data and settings on your iPhone, reverting it back to factory settings.