
If you’re an iPhone user and you’ve encountered a software issue or your device is not responding properly, entering Recovery Mode can be a helpful troubleshooting step. Recovery Mode allows you to restore your iPhone’s software to its original state, resolving various problems such as software glitches, update failures, or even a completely unresponsive device.
In this article, we will guide you on how to put your iPhone 14 into Recovery Mode. Whether you’re a new iPhone owner or a seasoned user, understanding the steps to enter Recovery Mode can be extremely valuable in resolving any software-related issues.
So, if you’re ready to learn how to put your iPhone 14 into Recovery Mode, let’s dive in and get started!
Inside This Article
- What is Recovery Mode?
- Why Put iPhone 14 in Recovery Mode?
- Steps to Put iPhone 14 into Recovery Mode
- Conclusion
- FAQs
What is Recovery Mode?
Recovery Mode is a built-in feature in iOS devices like the iPhone 14 that allows users to troubleshoot and restore their devices in case of software issues or difficulties. It provides a way to restore the device to its factory settings, update the firmware, or recover from a system crash.
Entering Recovery Mode temporarily suspends the normal iOS operating system and provides a direct line of communication between the device and a computer running iTunes or Finder. This allows users to perform various tasks, such as reinstalling or updating the iOS software, fixing software glitches, or even jailbreaking the device.
Recovery Mode can be a useful tool for troubleshooting common issues like a frozen screen, unresponsiveness, software glitches, or when the device is stuck in a boot loop. It is also used when upgrading or downgrading the iOS software, as it ensures a clean installation process.
It is important to note that entering Recovery Mode will erase all data on the device. Therefore, it is crucial to back up your iPhone 14 before attempting to put it into Recovery Mode.
In the following sections, we will discuss the different methods to put your iPhone 14 into Recovery Mode, whether you are using a Mac or a Windows computer.
Why Put iPhone 14 in Recovery Mode?
When it comes to troubleshooting issues with your iPhone 14, putting it into recovery mode can be a valuable tool. Recovery mode allows you to restore or update your device, effectively fixing any software-related problems you may be experiencing. Whether your iPhone is stuck on the Apple logo, displaying a white screen, or not responding at all, entering recovery mode can often be the key to resolving these issues.
Recovery mode is also highly useful if you want to jailbreak your iPhone 14. Jailbreaking allows you to customize your device, install unauthorized applications, and unlock additional features. By putting your iPhone into recovery mode, you create a favorable environment to initiate the jailbreak process.
Another reason to put your iPhone 14 in recovery mode is to troubleshoot issues with the iOS system. If you’re experiencing persistent crashes, frequent app freezes, or unusual battery drain, recovery mode can help diagnose and resolve these problems. It allows you to restore your device to its original factory settings, effectively eliminating any software conflicts or glitches that may be causing the issues.
Steps to Put iPhone 14 into Recovery Mode
Putting your iPhone 14 into recovery mode can be a useful troubleshooting step when you’re facing issues with your device. It allows you to restore your iPhone to its factory settings or update its software. Here is a step-by-step guide on how to put your iPhone 14 into recovery mode.
Step 1: Install the Latest Version of iTunes
Before putting your iPhone 14 into recovery mode, make sure you have the latest version of iTunes installed on your computer. If you are using a Mac with macOS Catalina or later, you will need to use Finder instead of iTunes.
Step 2: Connect Your iPhone 14 to Your Computer
Connect your iPhone 14 to your computer using a Lightning to USB cable. Make sure your computer is turned on and not in sleep mode.
Step 3: Put your iPhone 14 into Recovery Mode
- On the iPhone 14, press and quickly release the volume up button.
- Press and quickly release the volume down button.
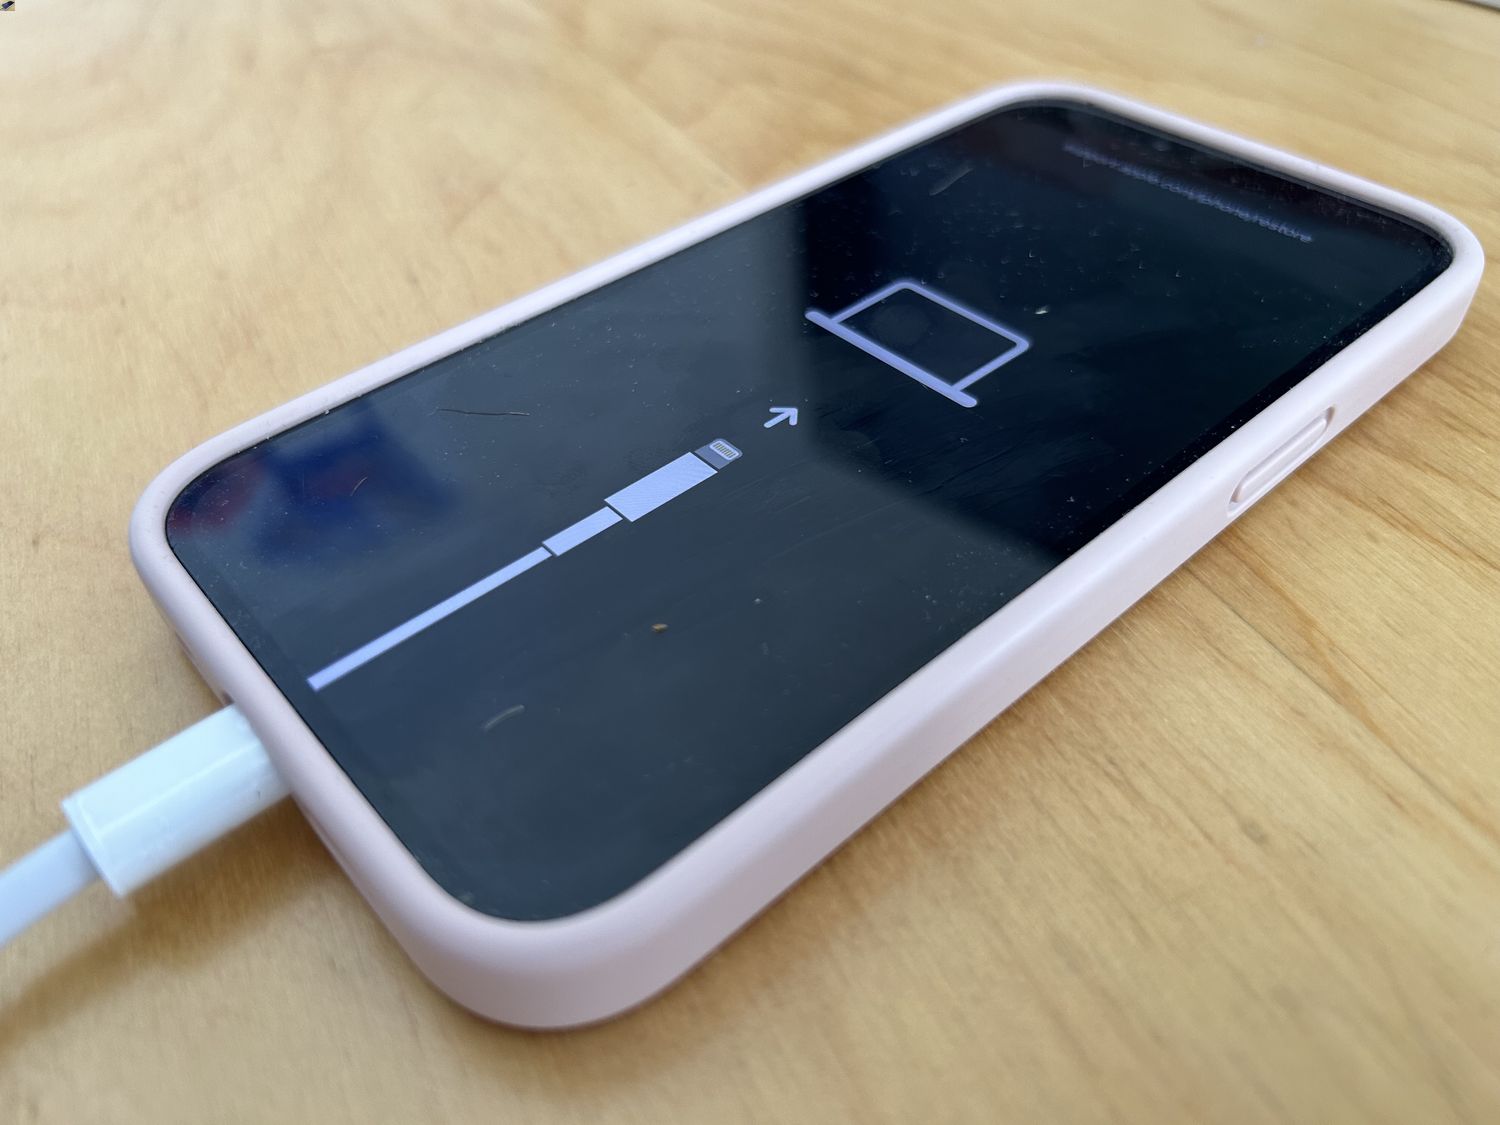
- Press and hold the side button until you see the recovery mode screen.
Step 4: Update or Restore Your iPhone 14
Once your iPhone 14 is in recovery mode, iTunes or Finder will detect the device and display an option to Update or Restore your iPhone. You can choose to update your iPhone software or restore it to its factory settings.
Step 5: Follow the On-Screen Instructions
Follow the on-screen instructions in iTunes or Finder to complete the update or restoration process. It may take some time for the process to finish, so be patient and do not disconnect your iPhone until it is done.
Putting your iPhone 14 into recovery mode can help resolve various software-related issues, but it is important to note that it will erase all the data on your device. Make sure you have a recent backup of your iPhone before proceeding with the recovery mode.
Now that you know how to put your iPhone 14 into recovery mode, you can troubleshoot any software issues or restore your device if needed. Remember, always follow the on-screen instructions and ensure that you have a reliable backup to avoid data loss.
Conclusion
In conclusion, knowing how to put your iPhone 14 into Recovery Mode can be extremely helpful in troubleshooting various issues that may arise. Whether you are dealing with a software glitch, a frozen screen, or a failed iOS update, entering Recovery Mode can often resolve these problems and restore your device to working order.
By following the steps outlined in this guide, you can easily put your iPhone 14 into Recovery Mode and take control of the situation. Remember to always back up your data before performing any troubleshooting steps, as Recovery Mode may require you to erase your device and start fresh.
With this knowledge in hand, you have the power to handle common iPhone issues with confidence. Don’t let technical difficulties stand in your way—put your iPhone 14 into Recovery Mode and get back to using your device seamlessly.
FAQs
1. What is recovery mode on an iPhone?
Recovery mode is a troubleshooting mode on iPhones that allows you to resolve issues with your device when it is experiencing problems such as software glitches, freezes, or being stuck on the Apple logo.
2. Why would I need to put my iPhone into recovery mode?
You may need to put your iPhone into recovery mode if it is not responding, unable to boot up, or experiencing persistent software issues that cannot be resolved through normal troubleshooting methods.
3. How do I put my iPhone 14 into recovery mode?
To put your iPhone 14 into recovery mode, follow these steps:
a. Connect your iPhone to your computer using a Lightning cable.
b. Open iTunes on your computer (or Finder on a Mac with macOS Catalina or later).
c. Press and quickly release the Volume Up button.
d. Press and quickly release the Volume Down button.
e. Press and hold the Side button until you see the recovery mode screen on your iPhone.
f. You will then see options in iTunes or Finder to either update or restore your iPhone.
4. Will putting my iPhone into recovery mode erase my data?
Putting your iPhone into recovery mode itself does not erase your data. However, if you choose to restore your iPhone while in recovery mode, it will delete all of your data and restore your device to its factory settings.
5. What should I do if I accidentally put my iPhone into recovery mode?
If you accidentally put your iPhone into recovery mode, you can exit recovery mode without losing any data by following these steps:
a. Disconnect your iPhone from your computer.
b. Press and hold the Side button until the “Slide to power off” slider appears.
c. Slide the power off slider to turn off your iPhone.
d. Press and hold the Side button again until the Apple logo appears, indicating the device is powering back on.
Your iPhone should now start up normally and be out of recovery mode.