
Are you wondering how to register your mobile number with iMessage? Whether you're new to the iPhone ecosystem or looking to ensure seamless messaging across your devices, understanding the process of registering your mobile number with iMessage is essential. This feature allows you to send and receive messages, photos, and more using your cellular data or Wi-Fi connection, providing a convenient and versatile communication experience. In this article, we'll delve into the steps required to register your mobile number with iMessage, ensuring that you can harness the full potential of this popular messaging platform. Let's explore the process and unlock the benefits of iMessage registration. Now, let's dive into the details of how to achieve this seamlessly.
Inside This Article
Setting up iMessage
Setting up iMessage on your iPhone is a simple process that allows you to send text messages, photos, videos, and more to other Apple users. iMessage is a convenient and secure messaging platform that comes pre-installed on all Apple devices, including iPhones, iPads, and Mac computers. By following a few easy steps, you can quickly set up iMessage and start enjoying its benefits.
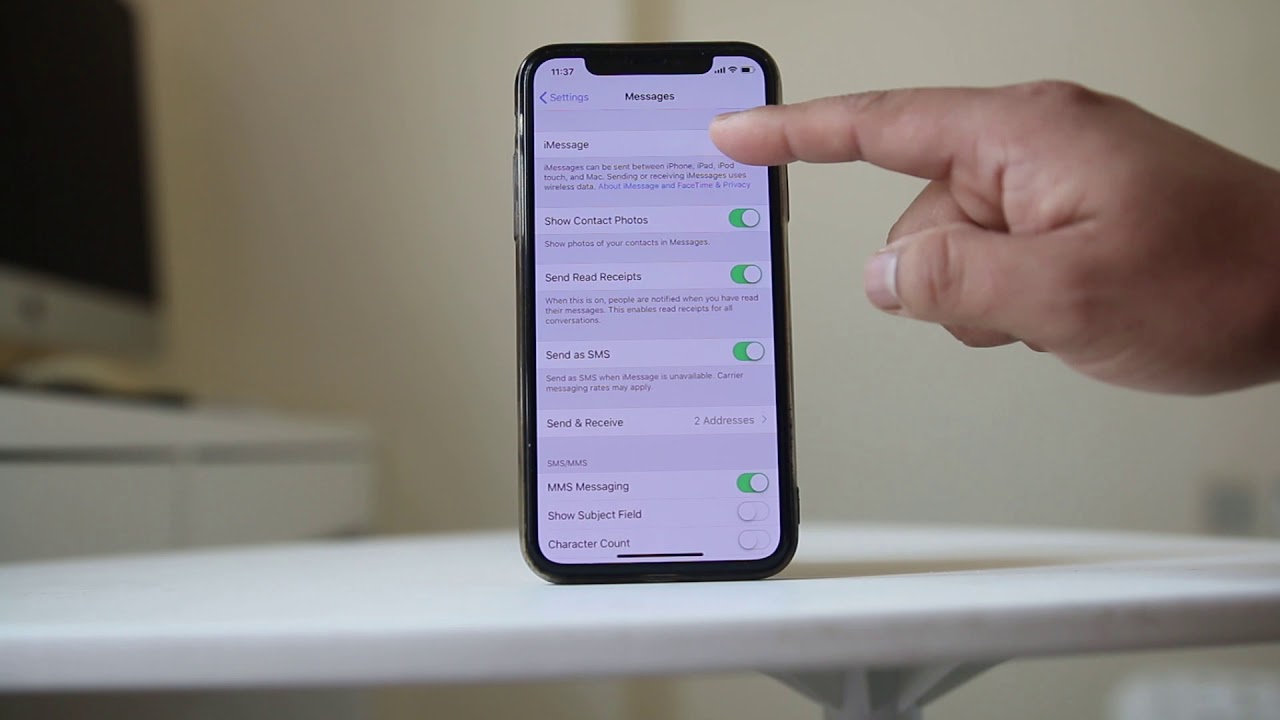
To begin, ensure that your iPhone is connected to a stable Wi-Fi network or has cellular data enabled. Open the “Settings” app on your device and scroll down until you find “Messages.” Tap on “Messages” to access the settings related to your messaging app.
Next, toggle the switch next to “iMessage” to enable the feature. Once enabled, your iPhone will attempt to activate iMessage using your Apple ID. If prompted, enter your Apple ID and password to proceed with the activation process. This step ensures that iMessage is linked to your Apple ID, allowing you to send and receive messages across all your Apple devices seamlessly.
After activating iMessage, you can customize your preferences by selecting the “Send & Receive” option within the iMessage settings. Here, you can choose which email addresses and phone numbers are associated with your iMessage account. This enables you to send and receive iMessages using multiple contact points, providing flexibility and convenience.
Once you have completed these steps, iMessage is ready to use on your iPhone. You can now enjoy the benefits of iMessage, such as seamless communication with other Apple users, end-to-end encryption for enhanced privacy, and the ability to send multimedia content effortlessly.
Registering your mobile number
Once you’ve set up iMessage on your iPhone, the next step is to register your mobile number with the service. This ensures that your contacts can easily identify and reach you through iMessage using your phone number.
To register your mobile number, open the “Settings” app on your iPhone and scroll down to find “Messages.” Tap on “Messages” to access the settings for the messaging app.
Within the “Messages” settings, you’ll see an option labeled “Send & Receive.” Tap on this option to view the available contact points for iMessage, including your phone number and any associated email addresses.
Next, ensure that your mobile number is selected under the “You can be reached by iMessage at” section. If it’s not already selected, tap on your mobile number to enable it for iMessage.
After selecting your mobile number, you may be prompted to verify it to complete the registration process. This verification step helps ensure the security and accuracy of the contact information associated with your iMessage account.
Once your mobile number is registered and verified, you can start using iMessage to communicate with other iPhone users using your phone number as the sender identification.
Verifying your mobile number
Once you’ve entered your mobile number in iMessage, you’ll need to verify it to ensure seamless communication with other iMessage users. The verification process is simple and typically involves receiving a verification code via SMS or through an automated phone call.
After entering your mobile number, iMessage will prompt you to verify it by sending a unique code to the provided number. Once you receive the code, simply enter it into the designated field within the iMessage app to complete the verification process.
It’s important to ensure that you have access to the mobile device associated with the provided number during the verification process. This ensures that you can promptly receive the verification code and complete the necessary steps to verify your mobile number with iMessage.
Upon successful verification, your mobile number will be linked to iMessage, allowing you to send and receive messages, photos, videos, and more using your mobile number as the identifier within the iMessage platform.
Registering your mobile number with iMessage is a straightforward process that enhances your communication experience on Apple devices. By following the simple steps outlined in this guide, you can seamlessly integrate your phone number with iMessage, enabling you to send and receive messages with ease. Whether you’re connecting with friends, family, or colleagues, iMessage offers a convenient platform for staying in touch. Embracing the features of iMessage, including its encryption and multimedia capabilities, can elevate your messaging experience. By taking advantage of this intuitive service, you can enjoy seamless communication across your Apple devices, enriching your digital interactions and fostering stronger connections with those who matter most.
FAQs
Q: How do I register my mobile number with iMessage?
A: To register your mobile number with iMessage, simply go to "Settings" on your iPhone, tap on "Messages," and then turn on the "iMessage" option. Your mobile number will be automatically registered with iMessage.
Q: Can I use iMessage with a non-Apple device?
A: No, iMessage is exclusive to Apple devices and cannot be used with non-Apple devices.
Q: Do I need a data plan to use iMessage?
A: Yes, iMessage requires an active data plan or Wi-Fi connection to send and receive messages.
Q: Is there a cost associated with using iMessage?
A: iMessage uses your data plan or Wi-Fi connection, so there are no additional charges for sending messages through iMessage.
Q: Can I use iMessage internationally?
A: Yes, as long as you have a data plan or access to Wi-Fi, you can use iMessage to send and receive messages internationally without incurring additional charges.