
Screen recording has become an essential feature for many iPhone users, allowing them to capture and share important moments on their devices. Whether you want to record a tutorial, capture gameplay, or save a video call, knowing how to screen record on your iPhone can be incredibly useful. In this article, we will explore four different methods that will enable you to easily record your iPhone screen, no matter which model or version of iOS you are using. From built-in screen recording options to third-party apps, we’ll cover all the bases to ensure you can record your screen effortlessly. So, grab your iPhone and let’s dive into the various methods of screen recording available to you.
Inside This Article
- How to Screen Record on iPhone (4 Methods)
- Method 1: Using the Control Center
- Method 2: Using the Screen Recording shortcut in Settings
- Method 3: Using QuickTime Player on Mac
- Method 4: Using Third-Party Screen Recording Apps
- Conclusion
- FAQs
How to Screen Record on iPhone (4 Methods)
Screen recording on your iPhone can be incredibly useful in a variety of situations, whether you’re showcasing an app, capturing gameplay footage, or creating a tutorial. Fortunately, Apple has made it easy to record your iPhone’s screen with just a few simple steps. In this article, we will explore four different methods to screen record on an iPhone. Let’s dive in!
Method 1: Using the Control Center
The Control Center is a convenient hub for accessing various functions on your iPhone, including screen recording. To enable the Screen Recording feature and start recording, follow these steps:
- Open the Control Center by swiping down from the top right corner (iPhone X and newer) or swiping up from the bottom (iPhone 8 and older).
- Tap on the Screen Recording button, which looks like a circle within a circle.
- A countdown will appear, indicating the start of the recording. You can now navigate to the screen you want to record.
- To stop the recording, tap on the red status bar at the top of the screen and select “Stop Recording.” The video will be saved to your Photos app.
Method 2: Using the Screen Recording shortcut in Settings
If you prefer quick access to the screen recording feature directly from the Control Center, you can add a shortcut in your iPhone’s Settings. Here’s how:
- Go to Settings on your iPhone.
- Scroll down and tap on Control Center.
- Under the “More Controls” section, find the Screen Recording option and tap the green “+” button next to it to add it to your Control Center.
- Now, you can access the screen recording feature by opening the Control Center and tapping the Screen Recording button.
- To stop recording, follow the same process as in Method 1.
Method 3: Using QuickTime Player on Mac
If you have a Mac computer, you can use QuickTime Player to record your iPhone’s screen. Here’s how:
- Connect your iPhone to your Mac using a Lightning cable.
- Open QuickTime Player on your Mac.
- In QuickTime Player, click on “File” in the menu bar and select “New Movie Recording.”
- In the drop-down menu next to the record button, select your iPhone as the camera and microphone source.
- Click on the record button to start recording your iPhone’s screen.
- When you’re finished recording, click on the stop button in QuickTime Player.
- Save and edit the recorded screen video using QuickTime Player or any other video editing software.
Method 4: Using third-party screen recording apps
If you prefer more customization options and advanced features, you can consider using third-party screen recording apps available on the App Store. Here’s how:
- Explore the App Store and search for screen recording apps.
- Choose a preferred app with good reviews and ratings, and install it on your iPhone.
- Launch the app and follow any on-screen instructions to set up the recording settings.
- Start recording your iPhone’s screen using the options provided by the third-party app.
- Manage and share your recorded screen videos using the features available within the app.
With these four methods at your disposal, you can easily screen record on your iPhone and capture important moments or create engaging content. Choose the method that suits your needs best and start recording today!
Method 1: Using the Control Center
Enabling the Screen Recording feature on your iPhone can be done through the Control Center. Once enabled, you can easily activate the screen recording button whenever you want to capture your screen activities. Here’s how you can do it:
1. Swipe down from the top-right (or bottom) of your iPhone’s screen to open the Control Center.
2. Look for the Screen Recording button, which looks like a circle inside a circle. If you don’t see it, you may need to add it to the Control Center by going to Settings > Control Center > Customize Controls.
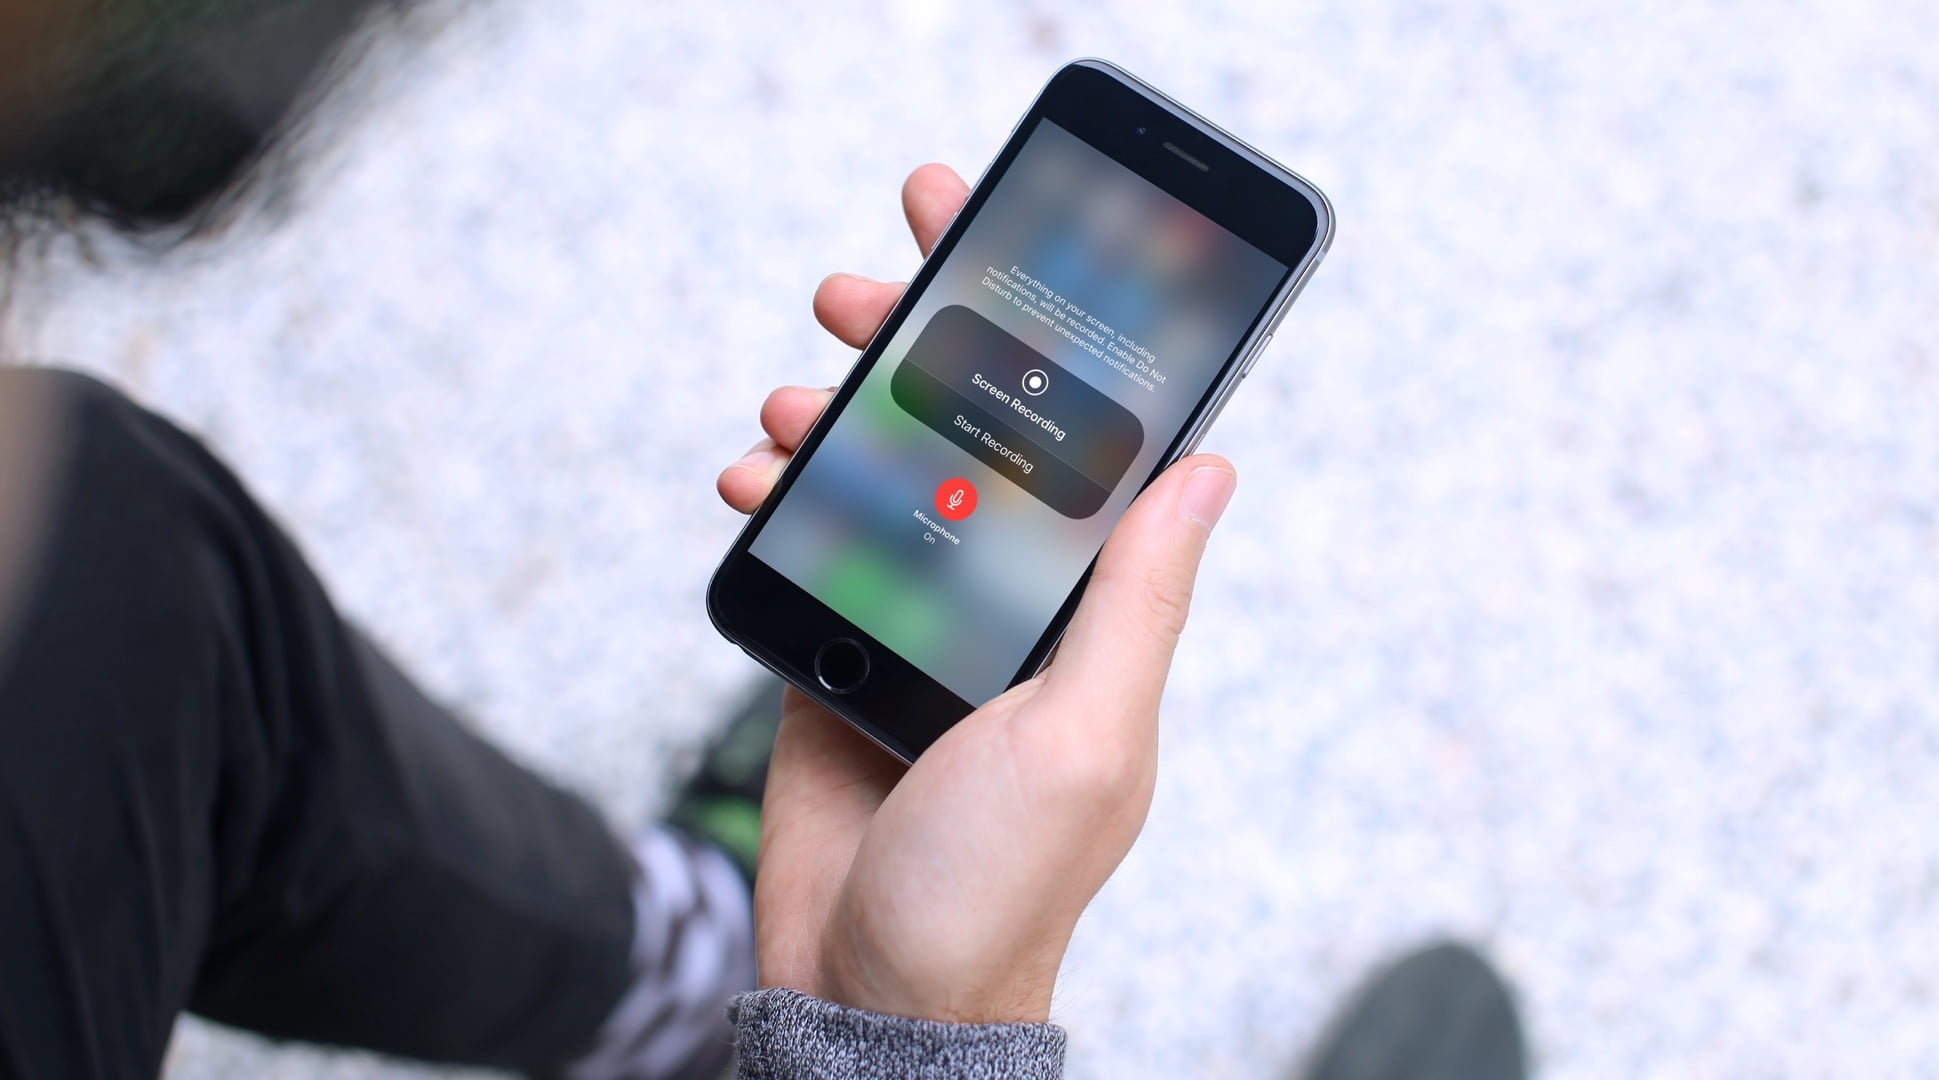
3. Tap and hold the Screen Recording button.
4. A pop-up will appear, giving you the option to turn on the microphone for audio recording. You can tap the microphone icon to enable or disable it according to your preferences.
5. Once you’ve made your selection, tap Start Recording. You will see a three-second countdown, indicating that the screen recording has begun.
6. To stop the recording, tap the red status bar at the top of your screen and then select Stop. Alternatively, you can go to the Control Center and tap the Screen Recording button again.
Once you’ve stopped the recording, your screen video will be automatically saved to the Photos app on your iPhone. To access the recorded video, open the Photos app and navigate to the “Recents” or “Albums” tab. From there, you can view, edit, and share the screen recording just like any other video.
Method 2: Using the Screen Recording shortcut in Settings
One of the easiest ways to record your iPhone screen is by using the built-in Screen Recording feature. Follow these simple steps to enable and utilize this convenient feature:
Adding the Screen Recording option to the Control Center
The first step is to ensure that the Screen Recording option is added to your Control Center. To do this:
- Open the Settings app on your iPhone.
- Scroll down and tap on “Control Center”.
- Under “More Controls”, locate “Screen Recording” and tap the green ‘+’ button to add it to the Control Center.
Initiating the Screen Recording using the Control Center or Settings
Once you have added the Screen Recording option to your Control Center, you can now easily start a screen recording:
- Swipe down from the top right corner of your iPhone screen to open the Control Center.
- Tap on the Screen Recording icon, which looks like a solid circle inside a circle. If the Recording button is not visible, you may need to force touch or long-press the Screen Recording icon and select the Microphone icon from the menu to enable audio recording.
- A countdown timer will appear on the top-right corner of your screen to give you a few seconds to prepare. Tap the red “Start Recording” button to begin.
- To stop the recording, either tap the red status bar at the top of your screen and select “Stop” or return to the Control Center and tap the Screen Recording icon. A pop-up prompt will ask you to confirm if you want to stop the recording.
Managing and sharing the recorded screen videos
After you have finished recording your iPhone screen, you can manage and share the recorded videos:
- The recorded video will be saved in your Photos app under the “Recents” album.
- To edit the video, open it in the Photos app and tap the “Edit” button. You can trim the video, add filters, or make other adjustments.
- To share the video, tap the “Share” button and choose the desired sharing method, such as sending it via messaging apps, uploading it to social media platforms, or saving it to cloud storage.
With the Screen Recording option conveniently accessible in your Control Center, recording and managing screen videos on your iPhone has never been easier.
Method 3: Using QuickTime Player on Mac
To screen record on your iPhone using QuickTime Player on your Mac, you will need to connect your iPhone to your Mac using a Lightning cable. This method allows you to take advantage of the powerful screen recording capabilities of QuickTime Player.
First, connect your iPhone to your Mac using the Lightning cable. Ensure that the cable is securely connected to both your iPhone and your Mac.
Next, launch QuickTime Player on your Mac. This can be done by searching for QuickTime Player in your Applications folder or by using the Spotlight search.
Once QuickTime Player is open, go to the File menu and select “New Movie Recording” or use the keyboard shortcut Command + Option + N. This will open a new window with the camera activated.
Click on the arrow next to the record button in the QuickTime Player window. In the drop-down menu, select your iPhone as the source for both the camera and the microphone.
Now, on your iPhone, swipe up from the bottom of the screen to open the Control Center. Tap on the Screen Recording button, which looks like a circle inside a circle. This will start the screen recording on your iPhone.
Once the screen recording is started on your iPhone, you will see the recording happening in the QuickTime Player window on your Mac. You can monitor the recording and adjust the recording settings as needed.
To stop the screen recording on your iPhone, simply tap on the red recording indicator on the top left corner of your screen and select “Stop”. The recorded video will automatically be saved on your Mac in a format compatible with QuickTime Player.
After the screen recording is completed, you can edit the recorded video using QuickTime Player or any other video editing software of your choice. QuickTime Player provides basic editing functionalities such as trimming, splitting, and merging videos. You can also export the edited video in different formats or share it directly from QuickTime Player.
Using QuickTime Player on your Mac to screen record your iPhone gives you a seamless and efficient method with various editing options. It is especially useful when you need to capture high-quality screen recordings and want to have more control over the editing process.
Method 4: Using Third-Party Screen Recording Apps
When it comes to screen recording on your iPhone, you’re not limited to the built-in options. The App Store offers a wide range of third-party screen recording apps that can enhance your recording experience with additional features and customization. Here’s how you can use third-party apps to record and manage your screen videos:
1. Exploring Different Screen Recording Apps Available on the App Store: Start by browsing the App Store for screen recording apps. There are plenty of options to choose from, each with its own unique set of features. Look for apps that have positive reviews and high ratings to ensure a quality experience.
2. Installing and Launching a Preferred Screen Recording App: Once you’ve found the perfect app for your needs, simply download and install it on your iPhone. After installation, locate the app icon on your home screen and tap on it to launch the application.
3. Configuring Recording Settings and Options Within the App: Most screen recording apps offer various settings and options to customize your recording. Take some time to explore the app’s settings menu and adjust settings such as video quality, frame rate, audio sources, and more. This allows you to tailor the recording experience to your liking.
4. Recording and Managing Screen Videos Using the Third-Party App: To start recording, open the app and follow the on-screen instructions. Typically, you’ll find a record button or a dedicated recording interface within the app. Tap the record button to begin capturing your screen. Once you’re done recording, use the app’s interface to manage, edit, and share your screen videos as desired.
Using a third-party screen recording app can provide you with more flexibility and control over your screen recording experience. It allows you to choose an app that aligns with your specific needs and preferences while enjoying additional features that may not be available in the built-in options.
Conclusion
Screen recording on your iPhone is a powerful tool that allows you to capture and share important moments from your device’s screen. With the four methods explained in this article, you have a range of options to choose from based on your preferences and needs.
Whether you prefer using the built-in screen recording feature, leveraging third-party apps, connecting your iPhone to a computer, or using cloud-based services, you can easily record and save videos of your screen activity.
Remember to consider your specific requirements, such as audio recording, editing features, or storage space, when selecting the best method for you. Additionally, make sure to follow any legal and ethical guidelines when recording content from apps or websites.
Now that you have the knowledge and tools at your disposal, feel free to explore the world of screen recording on your iPhone and unlock new possibilities for sharing, teaching, and documenting your mobile experiences.
FAQs
1. Can I screen record on my iPhone?
Yes, you can screen record on your iPhone using several methods. Apple offers built-in screen recording functionality that allows you to capture your iPhone’s screen. Additionally, there are third-party apps available in the App Store that offer advanced screen recording features.
2. How do I activate the screen recording feature on my iPhone?
To activate the screen recording feature on your iPhone, follow these steps:
- Go to the Control Center by swiping down from the top-right corner (iPhone X and newer) or up from the bottom of the screen (iPhone 8 and older).
- Tap on the screen recording icon, which looks like a circle inside a circle.
- A countdown timer will appear, and after it reaches zero, your screen recording will begin.
3. How do I stop the screen recording on my iPhone?
To stop the screen recording on your iPhone, you can either tap on the red recording indicator on the top-left corner of your screen and confirm the action, or you can go back to the Control Center and tap on the screen recording icon again.
4. Can I screen record without sound on my iPhone?
Yes, you can screen record without sound on your iPhone. By default, screen recording captures both the video and audio of your device. However, you have the option to mute the audio before starting the screen recording by swiping up the Control Center and tapping on the sound icon to disable it.
5. Where can I find my screen recordings on my iPhone?
After you finish recording your screen on the iPhone, the video will be saved to your Photos app. You can access your screen recordings by opening the Photos app and navigating to the “Screenshots” or “Albums” tab. From there, you can view, edit, or share your screen recordings.