
Have you ever wanted to capture a fantastic moment on your iPhone 14 and share it with others? Well, you’re in luck! In this article, we will explore how to screen record on the iPhone 14, step-by-step. Screen recording is a fantastic feature that allows you to capture everything that happens on your device’s screen, whether it’s a hilarious video, a high score in a game, or a step-by-step tutorial. With the iPhone 14, Apple has made screen recording even easier and more convenient, giving you the power to share your screen with just a few taps. So, if you’re ready to learn how to screen record on your iPhone 14, let’s dive in!
Inside This Article
- Prerequisites for Screen Recording on iPhone 14
- Method 1: Using the Built-in Screen Recording Feature
- Method 2: Using Third-Party Screen Recording Apps
- Method 3: Using QuickTime Player on Mac
- Troubleshooting Tips for Screen Recording Issues on iPhone 14
- Conclusion
- FAQs
Prerequisites for Screen Recording on iPhone 14
To begin screen recording on your iPhone 14, there are a few prerequisites that you need to meet. These requirements ensure that you have all the necessary tools and settings in place to successfully record your screen. Here are the key prerequisites for screen recording on iPhone 14:
- Operating System: Make sure your iPhone 14 is running on the latest version of iOS. This ensures that you have access to all the latest features and improvements, including the screen recording functionality.
- Enable Screen Recording: Go to your iPhone 14’s settings and enable the screen recording feature. To do this, navigate to the Control Center settings and add the screen recording option to your Control Center. This will allow you to easily access the screen recording feature from your device’s Control Center.
- Enough Storage Space: Before you start screen recording on your iPhone 14, ensure that you have sufficient storage space available. Screen recordings can take up a significant amount of storage, especially if you plan on recording lengthy videos. Delete any unnecessary files or apps to free up storage space if needed.
- Clear Display: Clean your iPhone 14’s display to ensure that there are no smudges, fingerprints, or dust particles that may affect the clarity of your screen recording. A clean display will result in better visibility and improved video quality.
- Screen Recording Purpose: Determine the purpose of your screen recording. Whether you need it for a tutorial, demonstration, troubleshooting, or any other reason, having a clear objective will help you plan and prepare for the recording process.
- External Microphone (Optional): If you’re looking to record audio along with your screen recording, consider using an external microphone for better sound quality. This is particularly useful if you’re recording voiceovers, interviews, or any other audio that requires clarity and minimal background noise.
- Familiarity with Screen Recording Controls: Familiarize yourself with the different controls and options available during screen recording. This includes pausing and resuming the recording, enabling or disabling microphone audio, adjusting the video quality, and more. Understanding these controls will help you capture your screen accurately and efficiently.
By ensuring that you meet these prerequisites, you’ll be ready to confidently and effectively screen record on your iPhone 14. Now that you have all the necessary preparations in place, let’s explore the different methods you can use to screen record on your device.
Method 1: Using the Built-in Screen Recording Feature
If you own an iPhone 14, you’re in luck! The latest iPhone models come equipped with a powerful built-in screen recording feature, making it incredibly easy to capture and share your phone’s screen. Here’s how you can use this handy feature:
1. Open the Control Center by swiping down from the top-right corner of your iPhone’s screen. If you have an iPhone with a Home button, swipe up from the bottom of the screen to access the Control Center.
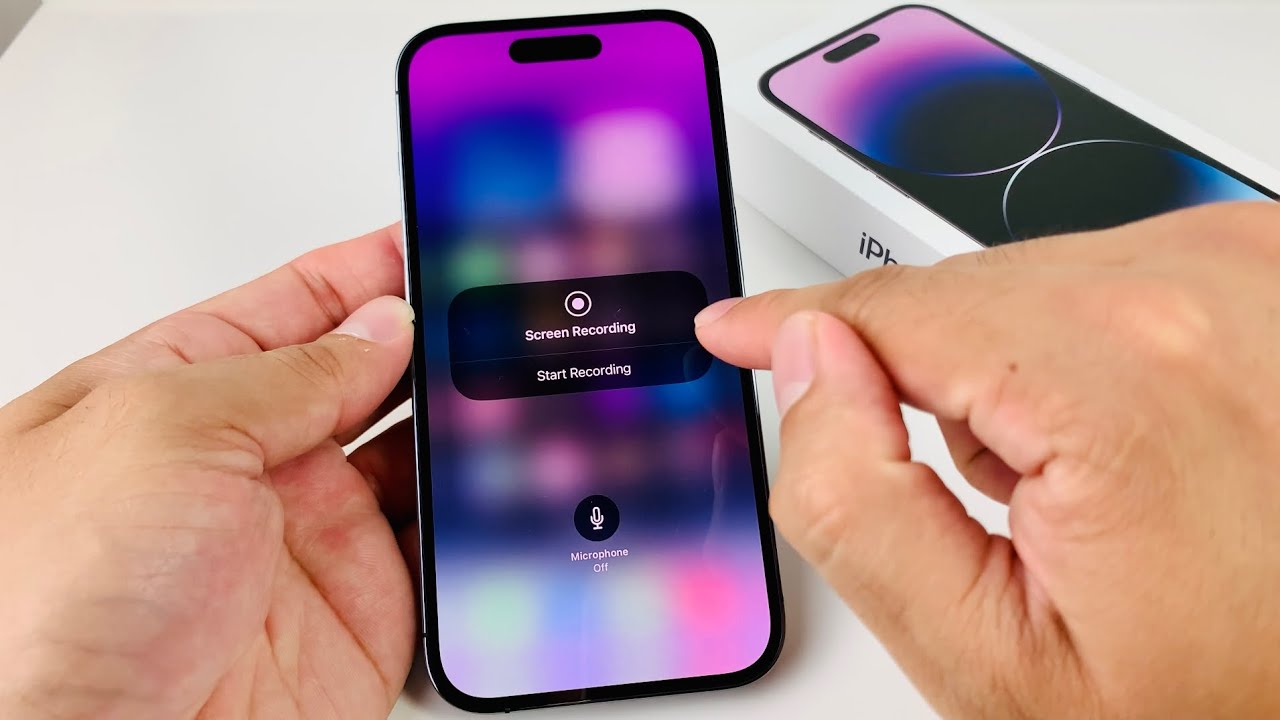
2. In the Control Center, look for the “Screen Recording” button. It’s represented by a white circle within a larger circle. If you don’t see it initially, you may need to customize your Control Center settings to add it.
3. Tap the “Screen Recording” button, and you’ll see a countdown of three seconds. This gives you a brief window to navigate to the app or screen you want to record.
4. While the screen recording is active, a red bar will be displayed at the top of your screen, indicating that the recording is in progress. You can freely use your iPhone as you normally would, and everything will be captured in real-time.
5. To stop the screen recording, simply tap the red bar at the top of your screen and select “Stop.” Alternatively, you can swipe up on the Control Center and tap the “Screen Recording” button to end the recording.
6. Once you’ve stopped the recording, a notification will appear, indicating that the video has been saved to your Photos app. From there, you can edit, share, or delete the recording as desired.
The built-in screen recording feature on iPhone 14 is a powerful tool that allows you to capture important moments, create tutorials, or simply share your screen with friends and family. It’s incredibly easy to use and provides high-quality recordings, making it a valuable addition to your iPhone’s functionality.
Method 2: Using Third-Party Screen Recording Apps
If you’re looking for more advanced screen recording features and customization options, you can turn to third-party apps available on the App Store. These apps offer a wide range of functionalities that go beyond the built-in screen recording feature on your iPhone 14. Let’s explore how you can utilize these apps for effortless screen recording.
The first step is to visit the App Store on your iPhone 14 and search for screen recording apps. Popular options include QuickTime Player, Camtasia, and ScreenFlow. Once you find the app that suits your needs, simply download and install it onto your device.
After installation, open the screen recording app on your iPhone 14. The interface may vary depending on the app you choose, but the general process remains similar. Look for a prominent record button or a screen recording option within the app.
Tap on the record button to initiate the screen recording session. You might be prompted to grant the app necessary permissions, such as access to the microphone or camera, depending on your recording requirements. Make sure to follow the on-screen instructions and allow the app the necessary access.
Once the screen recording session begins, you will see an overlay or a floating widget indicating that the recording is in progress. This provides you with the ability to control various recording options, such as pausing, stopping, or adding annotations to your recording.
During the recording session, you can freely navigate through different apps, websites, or any other content you wish to capture. This flexibility enables you to create comprehensive video tutorials, share gaming sessions, or demonstrate app usage to your colleagues or friends.
Once you’ve finished recording, simply tap on the stop button within the app. The screen recording will be saved to your iPhone 14’s gallery or to a specified location within the app itself, depending on the app’s settings. You can then view, edit, and share the recorded video as desired.
Remember to explore the features provided by the third-party screen recording app you choose. Depending on the app, you may have the option to edit recorded videos, add captions or annotations, adjust video quality settings, and even livestream your recording to platforms like YouTube or Twitch.
Using third-party screen recording apps gives you more control and flexibility over your screen recording sessions on the iPhone 14. However, keep in mind that some of these apps may be paid or offer in-app purchases for accessing advanced features or removing watermarks from recordings. Consider your requirements and budget when selecting the most suitable app for your needs.
Now that you’re aware of the method of using third-party screen recording apps, you have multiple options to choose from when it comes to capturing the screen of your iPhone 14. Whether you need basic recording capabilities or advanced editing features, these apps provide a convenient solution to meet your screen recording needs.
Method 3: Using QuickTime Player on Mac
If you own a Mac computer, you can use QuickTime Player to screen record your iPhone 14. QuickTime Player is a versatile multimedia player that also offers screen recording capabilities. Here’s how you can use it:
- Connect your iPhone 14 to your Mac using a Lightning cable.
- On your Mac, open the QuickTime Player application. You can find it in the Applications folder or by using the Spotlight search.
- In the QuickTime Player menu bar, click on “File” and then select “New Movie Recording”.
- A new window will appear with the QuickTime Player’s recording interface.
- Next to the record button, you will see a small arrow pointing downwards. Click on it to open a drop-down menu.
- In the drop-down menu, under the “Camera” section, select your connected iPhone 14 as the recording source.
- By default, QuickTime Player will also record audio from your iPhone 14. If you want to include audio in your screen recording, ensure that your iPhone’s volume is turned up.
- Click on the record button to start the screen recording.
- Perform the actions on your iPhone 14 that you want to capture in the screen recording.
- When you are done, click on the stop button in the QuickTime Player’s recording interface.
- Save the screen recording file by selecting “File” and then “Save” from the menu bar.
Using QuickTime Player on a Mac provides a convenient way to screen record your iPhone 14. It allows you to capture high-quality videos with both video and audio sources. Whether you want to record a tutorial, showcase a gaming session, or capture a memorable moment on your iPhone, QuickTime Player has you covered.
Troubleshooting Tips for Screen Recording Issues on iPhone 14
Screen recording on your iPhone 14 can be a useful feature, allowing you to capture moments, create tutorials, or troubleshoot issues. However, there may be occasions where you experience difficulties in using the screen recording function. To help you overcome any issues that may arise, we have compiled a list of troubleshooting tips.
1. Check for Sufficient Storage Space: Before starting a screen recording, ensure that your iPhone 14 has enough available storage space. Screen recordings can take up a significant amount of storage, so freeing up storage by deleting unnecessary files or apps can resolve recording issues.
2. Restart Your iPhone: Sometimes, a simple restart can fix any glitches or software conflicts affecting your screen recording feature. Try restarting your iPhone 14 and then attempt to record your screen again.
3. Update iOS: It’s important to keep your iPhone’s operating system updated. New software updates often include bug fixes and improvements, which can help resolve screen recording issues. Check for any available updates by going to Settings > General > Software Update.
4. Reset All Settings: If none of the above steps work, you can try resetting all settings on your iPhone. This will not erase your data, but it will reset your personalized settings to default. Go to Settings > General > Reset > Reset All Settings. After the reset, try recording your screen again.
5. Disable Low Power Mode: Low Power Mode can restrict certain features on your iPhone, including screen recording. Make sure that Low Power Mode is turned off before attempting to record your screen. You can do this by going to Settings > Battery > Low Power Mode.
6. Reinstall Third-Party Apps: If you are using a third-party screen recording app and experiencing issues, try uninstalling and reinstalling the app from the App Store. This can help resolve any app-specific conflicts that may be affecting the screen recording functionality.
7. Check Restrictions: If screen recording is not working, ensure that it is not restricted on your iPhone. Go to Settings > Screen Time > Content & Privacy Restrictions > Allowed Apps and make sure that the toggle next to Screen Recording is enabled.
8. Contact Apple Support: If you have tried all the troubleshooting tips and screen recording still doesn’t work on your iPhone 14, it may be worth reaching out to Apple Support for further assistance. They can provide personalized guidance to help resolve the issue.
By following these troubleshooting tips, you should be able to overcome any screen recording issues you encounter on your iPhone 14. Remember to regularly update your device’s software and free up storage space to ensure smooth and uninterrupted screen recordings.
Conclusion
In conclusion, screen recording on the iPhone 14 is a convenient and powerful feature that allows users to capture and share their device’s screen effortlessly. Whether you want to demonstrate a problem to customer support, create a tutorial video, or capture a memorable gaming moment, the screen recording functionality has got you covered.
The iPhone 14 offers a seamless and user-friendly screen recording experience with its built-in tools. By simply adjusting your device’s settings and accessing the Control Center, you can enable and start recording your screen in no time.
With the ability to record both internal and external audio, customize recording preferences, and easily edit and share your recordings, screen recording on the iPhone 14 opens up a world of possibilities for content creators, businesses, and everyday users alike.
So why wait? Grab your iPhone 14 and start exploring the endless opportunities that screen recording has to offer!
FAQs
Q: Can I screen record on iPhone 14?
A: Yes, you can screen record on iPhone 14. The latest iOS version includes a built-in screen recording feature that allows you to capture videos of your device’s screen.
Q: How do I enable screen recording on iPhone 14?
A: To enable screen recording on iPhone 14, swipe up from the bottom of the screen to access the Control Center. Then, tap on the screen recording icon, which looks like a filled-in circle surrounded by another circle. You can customize the settings for screen recording in the Control Center settings.
Q: Can I record audio while screen recording on iPhone 14?
A: Yes, you can record audio while screen recording on iPhone 14. When you start a screen recording, you have the option to turn on the microphone to capture audio from your device or external sources.
Q: Where are my screen-recorded videos saved on iPhone 14?
A: Screen-recorded videos on iPhone 14 are saved in the Photos app. After recording, you can find them in the “Recents” or “Videos” album, depending on your iOS version. From there, you can edit, share, or delete the recorded videos.
Q: Is there a time limit for screen recording on iPhone 14?
A: By default, there is no time limit for screen recording on iPhone 14. You can record as long as there is enough storage space available on your device. However, keep in mind that longer recordings may result in larger file sizes, which could consume more storage.