
Are you looking to unlock the full potential of your Android device? If so, then turning on Developer Mode is the way to go. Developer Mode, also known as Developer Options, is a hidden setting on Android devices that provides users with advanced customization and debugging features. Enabling Developer Mode grants you access to a wide range of options that can enhance your device’s performance, tweak system settings, and even enable advanced debugging tools.
In this article, we will guide you through the step-by-step process of how to turn on Developer Mode on your Android device. Whether you want to experiment with custom ROMs, optimize system performance, or explore hidden features, enabling Developer Mode will give you the power and flexibility to do so. So, let’s dive in and unlock the true potential of your Android device!
Inside This Article
- Enabling Developer Options
- Enabling USB Debugging
- Enabling OEM Unlocking
- Enabling Stay Awake Mode
- Conclusion
- FAQs
Enabling Developer Options
Developer options on Android phones are a set of advanced settings that are hidden by default. These options provide developers and tech-savvy users with additional tools and features to test apps, optimize performance, and customize their devices. Enabling developer options is a simple process that can be done by following a few steps.
To enable developer options on your Android phone, follow these steps:
- Open the Settings app on your Android phone. You can usually find it in the app drawer or by swiping down on the notification panel and tapping the gear icon.
- Scroll down and tap on the About phone or About device option. It may be located under different submenus depending on your phone’s manufacturer and Android version.
- In the About phone menu, scroll down to find the Build number or Software information section.
- Tap on the Build number or Software information option multiple times. Keep tapping until you see a message that says “You are now a developer!” or something similar.
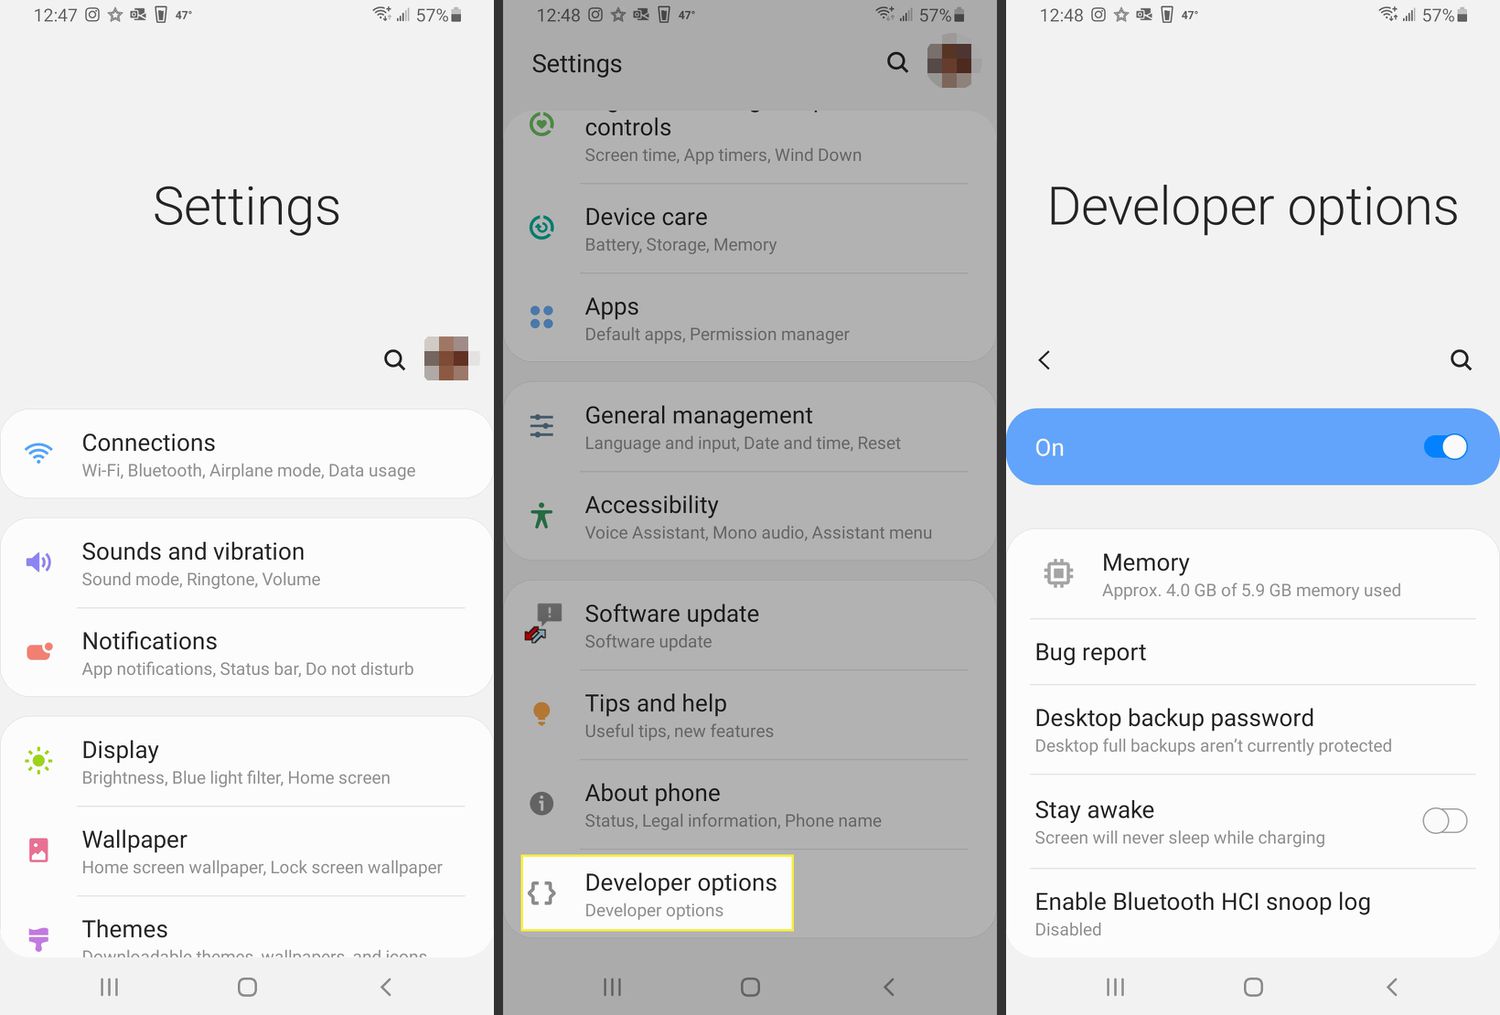
Once you have performed these steps, the Developer options menu will be unlocked and available in the main settings menu of your Android phone. You can access it by going back to the main settings and scrolling down to find the Developer options entry.
It’s worth noting that enabling developer options does not have any immediate impact on your device’s performance or functionality. However, it opens up a new set of options and features that are intended for advanced users and developers. It’s important to tread carefully and only modify settings if you understand their implications.
In the next sections, we will explore some of the useful features and options that can be found in the Developer options menu, including USB debugging, OEM unlocking, and stay awake mode.
Enabling USB Debugging
USB debugging is a feature in Android that allows the device to communicate with a computer over a USB connection. It is primarily used by developers to test and debug applications, but it can also be useful for advanced users who want to customize their Android device. Enabling USB debugging is a straightforward process that requires a few simple steps.
To enable USB debugging on your Android device, follow these steps:
- Go to the “Settings” menu on your Android device. You can access the “Settings” menu by swiping down from the top of your screen and tapping on the gear icon, or by finding the “Settings” app in your app drawer.
- Scroll down and tap on “About phone” or “About device”, depending on the manufacturer of your device.
- In the “About phone” or “About device” menu, look for the “Build number” or “Build version” option. This option may be located at the bottom of the menu, so you may need to scroll down to find it.
- Tap on the “Build number” or “Build version” option seven times. After tapping it seven times, you should see a message that says “You are now a developer!” or something similar.
- Go back to the main “Settings” menu and scroll down to find the newly enabled “Developer options” menu. It should be located above or below the “About phone” or “About device” menu.
- Tap on the “Developer options” menu to open it.
- In the “Developer options” menu, scroll down and look for the “USB debugging” option. It may be located under the “Debugging” section.
- Toggle the switch next to the “USB debugging” option to enable it. You may see a warning message informing you about the potential risks of enabling USB debugging. Read the message carefully and tap “OK” or “Enable” to proceed.
- Once USB debugging is enabled, you can connect your Android device to your computer using a USB cable. Your computer should recognize the device, and you will be able to use tools like Android Debug Bridge (ADB) and Android Studio to interact with your device.
Enabling USB debugging opens up a range of possibilities for developers and advanced users. It allows for easier app testing, debugging, and customization. However, it’s important to note that USB debugging should be used with caution. Make sure to disable USB debugging when it’s not needed to prevent any potential security risks.
Enabling OEM Unlocking
Enabling OEM unlocking on your Android device is a necessary step if you want to take advantage of advanced customization options, such as flashing custom ROMs or rooting your device. By default, the OEM unlocking option is hidden in the Developer Options menu to prevent unauthorized device modifications. However, if you follow the steps outlined below, you can easily enable OEM unlocking on your Android phone or tablet.
Step 1: Start by opening the Settings app on your Android device. You can do this by swiping down from the top of your screen and tapping on the gear-shaped icon, or by finding the Settings app in your app drawer.
Step 2: Scroll down and tap on the “About phone” or “About tablet” option. This is usually located towards the bottom of the Settings menu.
Step 3: In the “About phone” or “About tablet” menu, look for the “Build number” or “Build version” entry. Tap on it repeatedly, around 7 times, until you see a message saying “You are now a developer!” or “Developer mode has been enabled.”
Step 4: With developer options unlocked, go back to the main Settings menu and scroll down again. This time, you will see a new menu called “Developer options” near the bottom of the list. Tap on it to open the Developer Options menu.
Step 5: In the Developer Options menu, scroll down until you find the “OEM unlocking” option. It might be labeled differently on some devices, such as “Unlock bootloader.” Once you find it, tap on the toggle switch next to it to enable OEM unlocking.
Step 6: After enabling OEM unlocking, you may be prompted with a warning message about the potential risks of unlocking your device’s bootloader. Read the warning carefully and, if you agree to proceed, tap on “Enable” or “Allow” to confirm your decision.
That’s it! You have successfully enabled OEM unlocking on your Android device. Keep in mind that enabling OEM unlocking can void your device’s warranty and may expose your device to potential security risks. Therefore, it is important to exercise caution and research thoroughly before proceeding with any modifications to your device’s software.
Once OEM unlocking is enabled, you can now explore a whole new world of customization options for your Android device. Whether you want to install a custom recovery, flash a custom ROM, or unlock advanced features, OEM unlocking opens up a wealth of possibilities and freedom to make your device truly your own.
Enabling Stay Awake Mode
Stay Awake Mode is a useful feature in Android’s Developer Options that prevents your device from going to sleep while it is charging. This can be particularly handy when you are performing tasks that require your device to stay awake for extended periods, such as downloading large files, running tests, or debugging applications.
To enable Stay Awake Mode, follow these simple steps:
- Open the Settings app on your Android device.
- Scroll down and tap on “About phone” or “About device”.
- Locate the “Build number” or “Build version” option. It may be located under “Software information” or a similar sub-menu.
- Tap on the “Build number” or “Build version” option seven times. After the third tap, you will see a message indicating that you are “N steps away from being a developer”. Keep tapping until the confirmation message appears.
- Return to the main Settings menu and scroll down to find the new “Developer options” entry.
- Tap on “Developer options” to open the menu.
- In the Developer options menu, scroll down and locate the “Stay awake” option.
- Toggle the switch next to “Stay awake” to enable the feature.
Once enabled, your Android device will no longer go to sleep while it is charging. Remember to disable Stay Awake Mode when you no longer need it to conserve battery power.
Note: The location of Build number and Developer options may vary slightly depending on the Android device and version you are using. If you are unable to locate these options, consult your device’s user manual or perform a quick online search for specific instructions tailored to your device.
Conclusion
In conclusion, turning on Developer Mode on your Android device can greatly enhance your smartphone experience and provide you with the ability to customize and optimize your device to suit your needs. From accessing advanced settings to enabling USB debugging mode, Developer Mode offers a wide range of options for tech-savvy users and developers.
By following the simple steps outlined in this guide, you can easily enable Developer Mode on your Android device, unlock its full potential, and take advantage of the advanced features it has to offer. Whether you want to test your applications, tweak system settings, or explore hidden features, Developer Mode gives you the power to fully control your device.
Remember, while Developer Mode provides valuable functionality, it’s important to exercise caution when making any changes to your device’s settings. Always ensure that you have a good understanding of the changes you are making and the potential implications they may have on your device’s performance or security.
So go ahead, dive into Developer Mode, and unleash the true power of your Android device!
FAQs
1. What is Developer Mode in Android?
Developer Mode, also known as Developer Options, is a hidden setting in Android devices that provides advanced tools and features for developers to test and debug applications. It allows users to access additional settings and options that are not normally available in the standard device settings menu.
2. How do I activate Developer Mode on my Android device?
To activate Developer Mode on your Android device, follow these steps:
- Go to the “Settings” menu on your device.
- Scroll down and tap on “About phone” or “About device”.
- Look for the “Build number” or “Software information” option.
- Tap on the “Build number” or “Software information” option several times (typically around 7 times) until a message appears indicating that Developer Mode has been enabled.
Once you have enabled Developer Mode, it will appear as a separate option in the Settings menu.
3. What can I do with Developer Mode on my Android device?
Developer Mode provides access to a variety of advanced features and settings, including:
- USB debugging: Allows you to connect your device to a computer and debug applications.
- Stay awake: Keeps your device screen on while charging or connected to a computer.
- Mock location: Simulates GPS location for testing purposes.
- Animation scale: Adjusts the speed of system animations.
- Background process limit: Controls the number of background processes running on your device.
These are just a few examples, and there are many more options available in Developer Mode depending on your Android device and software version.
4. Is it safe to enable Developer Mode on my Android device?
Enabling Developer Mode on your Android device is generally safe. However, it is important to use caution when making changes to advanced settings and options, as they can potentially affect the performance and stability of your device. It is recommended to only make changes in Developer Mode if you are familiar with the settings and their implications. Additionally, be aware that some options, such as USB debugging, can pose security risks if not used responsibly.
5. Can I disable Developer Mode on my Android device?
Yes, you can disable Developer Mode on your Android device at any time. Simply go to the “Settings” menu, scroll down to Developer Options, and toggle the switch to turn it off. This will hide the Developer Options from the Settings menu and revert your device to the standard settings configuration.