
iPhones have become an integral part of our lives, serving as a means of communication, a source of entertainment, and a personal assistant all in one. With their extensive capabilities, it’s no surprise that our iPhones generate an abundance of notifications on a daily basis.
From text messages and social media updates to emails and app notifications, our iPhone screens can quickly become cluttered with alerts and distractions. However, clearing these notifications can be a simple and effective way to regain control and declutter your iPhone’s interface.
In this article, we will explore the various methods and techniques to clear notifications on an iPhone effortlessly. Whether you’re a seasoned iPhone user or a newcomer to the world of iOS, we’ve got you covered. So, let’s dive in and discover how to keep your iPhone notifications under control!
Inside This Article
- Why Clearing Notifications is important
- Methods to Clear Notifications
- Clearing Individual Notifications
- Clearing Notifications from Notification Center
- Clearing All Notifications at Once
- Using Do Not Disturb Mode to Temporarily Silence Notifications
- Conclusion
- FAQs
Why Clearing Notifications is important
Notifications on your iPhone can quickly pile up, filling your lock screen and notification center with a cluttered mess. It’s easy to ignore them or put off clearing them, but taking the time to regularly clear your notifications is important for several reasons.
First and foremost, clearing notifications helps you stay organized and focused. When notifications accumulate, it can be overwhelming to see a long list of unread messages, missed calls, and app notifications. By clearing them, you can prioritize what needs your attention and reduce distractions.
Furthermore, clearing notifications can help improve your device’s performance. The iPhone’s notification center runs in the background, consuming system resources. If your notification center is filled with countless notifications, it can slow down your device and drain its battery. Clearing notifications regularly ensures that your iPhone runs smoothly and efficiently.
Another important reason to clear notifications is to protect your privacy. Some notifications may contain sensitive information, such as personal messages or confidential emails. By leaving these notifications visible for too long, there is a risk of prying eyes accidentally or intentionally accessing your device and viewing your private information. Clearing notifications promptly minimizes this risk and helps keep your personal data secure.
Moreover, clearing notifications can help you maintain a clutter-free digital environment. A clean and organized notification center allows you to find important notifications quickly and easily. It also provides a sense of relief and visual tidiness, contributing to a more enjoyable and stress-free iPhone experience.
Methods to Clear Notifications
Notifications on your iPhone can sometimes pile up and clutter your lock screen or notification center. Clearing them out not only helps declutter your device but also ensures that you don’t miss any important alerts. In this article, we’ll explore different methods to clear notifications on your iPhone quickly and efficiently.
Method 1: Clearing Individual Notifications
If you have specific notifications that you want to dismiss, you can do so easily in just a few steps.
- Swipe down from the top of your iPhone screen to access the notification center.
- Locate the individual notification that you want to clear.
- Swipe the notification to the left and tap on the “Clear” button that appears or swipe it to the right to dismiss it instantly.
By following these steps, you can clear out individual notifications and keep your lock screen or notification center clean and organized.
Method 2: Clearing All Notifications at Once
Clearing all notifications on your iPhone can be a time-saving method if you have a large number of notifications cluttering your device.
- Swipe down from the top of your iPhone screen to access the notification center.
- Tap on the “X” button located at the top-right corner of the “Notification Center” to clear all notifications at once.
This method is especially useful when you want to start fresh and remove all the notifications from your lock screen or notification center in one go.
Method 3: Managing Notification Settings for Specific Apps
If you find yourself constantly receiving notifications from specific apps that you don’t want to see, you can manage the notification settings for those apps.
- Open the “Settings” app on your iPhone.
- Scroll down and tap on “Notifications”.
- Here, you’ll see a list of all the apps installed on your iPhone. Tap on the app for which you want to manage the notifications.
- You can customize the notification settings for that app, such as turning off alerts, sounds, or badges.
By managing the notification settings for specific apps, you have control over which app notifications you receive, helping to prioritize and streamline your notifications.
Clearing Individual Notifications
One of the great features of the iPhone is the ability to receive notifications from various apps. However, over time, these notifications can build up and clutter your notification center. If you want to clear individual notifications on your iPhone, follow these simple steps:
- Unlock your iPhone by either using Face ID, Touch ID, or your passcode.
- Swipe down from the top-right corner of your iPhone display to open the Control Center.
- Tap on the notification icon, represented by a bell-shaped icon, to access the notification center.
- Scroll through the list of notifications and locate the one you want to clear.
- Swipe left on the notification to reveal the “Clear” button.
- Tap on the “Clear” button to remove the notification from your notification center.
By following these steps, you can easily clear individual notifications from your iPhone without affecting other notifications or settings. This allows you to keep your notification center organized and clutter-free.
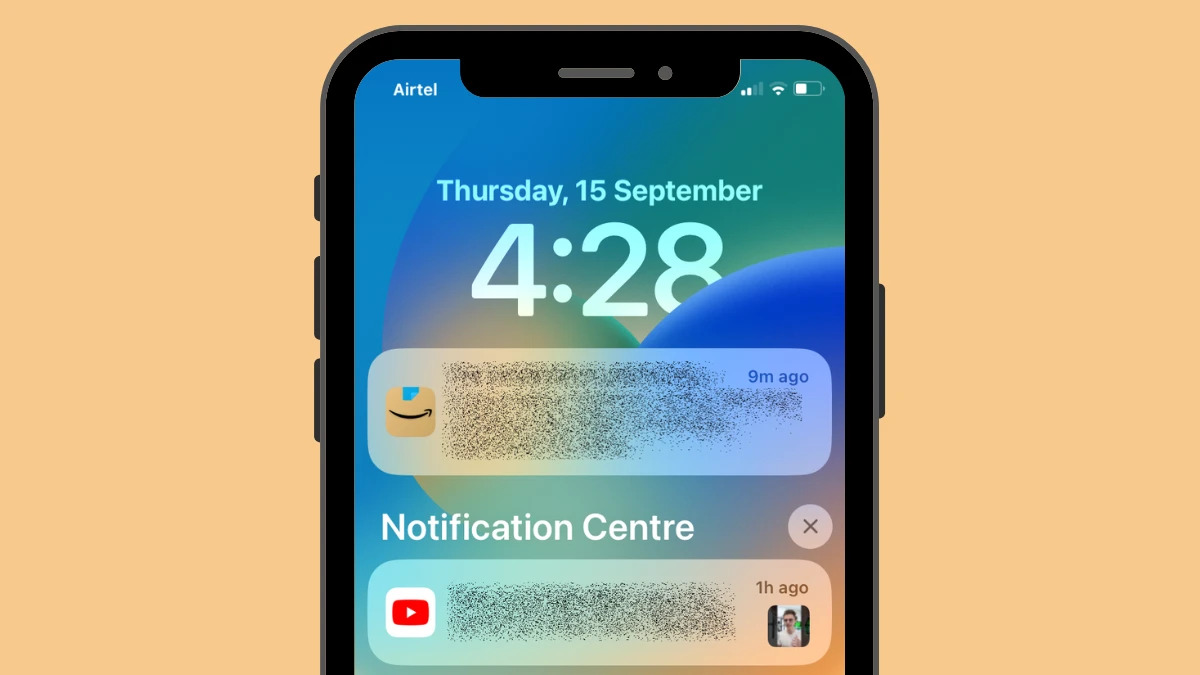
Clearing Notifications from Notification Center
Notification Center is a centralized hub on your iPhone where you can view and manage all your incoming notifications. If you want to clear notifications from the Notification Center, here are the steps to follow:
- Start by accessing the Notification Center. Swipe down from the top of your iPhone screen to reveal the Notification Center.
- Once in the Notification Center, you’ll see a list of all your recent notifications grouped by app and order of receipt. Scroll through the notifications to find the ones you want to clear.
- To dismiss individual notifications, swipe left on the specific notification and tap on the “Clear” or “X” button that appears. This will remove the notification from the list.
- If you have multiple notifications from the same app, you can clear them all at once. To do this, swipe left on one notification, then tap on the “Clear All” button that appears on the right side of the app group. This will remove all notifications from that app.
- If you prefer to clear all notifications at once, you can do so by tapping on the “X” button located at the top right corner of the Notification Center. This will remove all notifications from the list.
Clearing notifications from the Notification Center can help declutter your iPhone and ensure you don’t miss any important alerts. It allows you to prioritize the notifications that require your attention and dismiss the ones that are no longer relevant.
Clearing All Notifications at Once
Dealing with a cluttered notification center on your iPhone can be a hassle. Fortunately, iOS offers a simple and efficient way to clear all notifications with just a few taps. Here’s how:
- Start by unlocking your iPhone and navigating to the home or lock screen.
- Swipe down from the top of the screen to access the Notification Center.
- Once you are in the Notification Center, you will see a list of all your notifications grouped by app.
- Scroll to the top of the list, where you will find the “X” button labeled “Clear All.”
- Tap on the “Clear All” button, and all your notifications will be instantly cleared.
It is important to note that clearing all notifications will remove them from the Notification Center, but it will not delete them from the respective apps or mark them as read. If you want to read or respond to any of the notifications later, make sure to do so before clearing them.
Clearing all notifications at once is an incredibly useful feature when you want to start with a fresh slate and keep your notification center organized and clutter-free. It saves you time and allows you to prioritize the notifications that require your attention.
Now that you know how to clear all notifications on your iPhone, you can keep your device tidy and ensure you never miss out on important alerts or messages.
Using Do Not Disturb Mode to Temporarily Silence Notifications
Do Not Disturb mode is a handy feature on the iPhone that allows you to silence notifications temporarily. Whether you’re in an important meeting, enjoying some quiet time, or simply don’t want to be interrupted, activating Do Not Disturb mode will prevent any incoming calls, messages, or notifications from alerting you.
To enable Do Not Disturb mode, simply follow these steps:
- Swipe up from the bottom of your iPhone screen to access the Control Center.
- Tap on the crescent moon icon to activate Do Not Disturb mode.
When Do Not Disturb mode is active, you will see a crescent moon icon in the top right corner of your iPhone’s screen. This indicates that notifications will be silenced until you manually turn off Do Not Disturb mode.
It’s worth noting that you have the option to customize Do Not Disturb mode to suit your preferences. You can set it to automatically activate during certain hours, allow calls from specific contacts, or even allow repeated calls to come through in case of emergencies.
To access and adjust these settings, follow these steps:
- Go to the Settings app on your iPhone.
- Scroll down and tap on the “Do Not Disturb” option.
- Here, you can enable or disable Do Not Disturb mode, set a schedule, and customize other options such as allowing calls from certain contacts.
Using Do Not Disturb mode is a practical way to temporarily silence notifications without having to manually dismiss them one by one. It provides a convenient solution for those moments when you need uninterrupted focus or simply want some peace and quiet.
Clearing notifications on an iPhone is a simple yet vital task that helps to keep your device organized and clutter-free. By following the steps outlined in this article, you can easily manage and clear your notifications, ensuring that you never miss any important updates or messages.
Remember, notifications play a key role in keeping you informed and connected to the world around you, but they can quickly pile up and overwhelm your device if left unattended. By taking a few minutes each day to clear your notifications, you can maintain a clean and efficient iPhone experience.
So, the next time your lock screen is overflowing with notifications, don’t panic. Just follow the steps mentioned, and you’ll have a clean slate in no time. Enjoy the peace of mind that comes with a decluttered iPhone and keep yourself up to date with the notifications that matter most to you.
FAQs
1. How do I clear notifications on my iPhone?
To clear notifications on your iPhone, simply swipe down from the top of the screen to open the Notification Center. From there, you can either tap on “Clear All” to remove all notifications, or swipe left on individual notifications and tap “Clear” to remove them one by one.
2. Can I clear notifications from a specific app?
Yes, you can clear notifications from a specific app on your iPhone. Open the Notification Center by swiping down from the top of the screen, and then swipe left on the notification from that app. Tap on “Clear” to remove the notification for that particular app.
3. Will clearing notifications delete the corresponding messages or emails?
No, clearing notifications will not delete the corresponding messages or emails. It only removes the alert or notification for that message or email. The actual content will still be available in the respective app.
4. Is there a way to clear notifications automatically?
Yes, you can set up your iPhone to clear notifications automatically. Go to Settings, tap on Notifications, and then select the app for which you want to enable automatic clearing. Toggle on the “Allow Notifications” option, and then scroll down to find the “Notification Grouping” section. Choose “By App” or “Automatic” depending on your preference.
5. Can I clear notifications on my iPhone from another device?
Yes, if you have multiple Apple devices linked with the same Apple ID, you can clear notifications on your iPhone from another device. Simply open the Notification Center on the other device, and any changes made to the notifications (such as clearing them) will be reflected on your iPhone as well.