
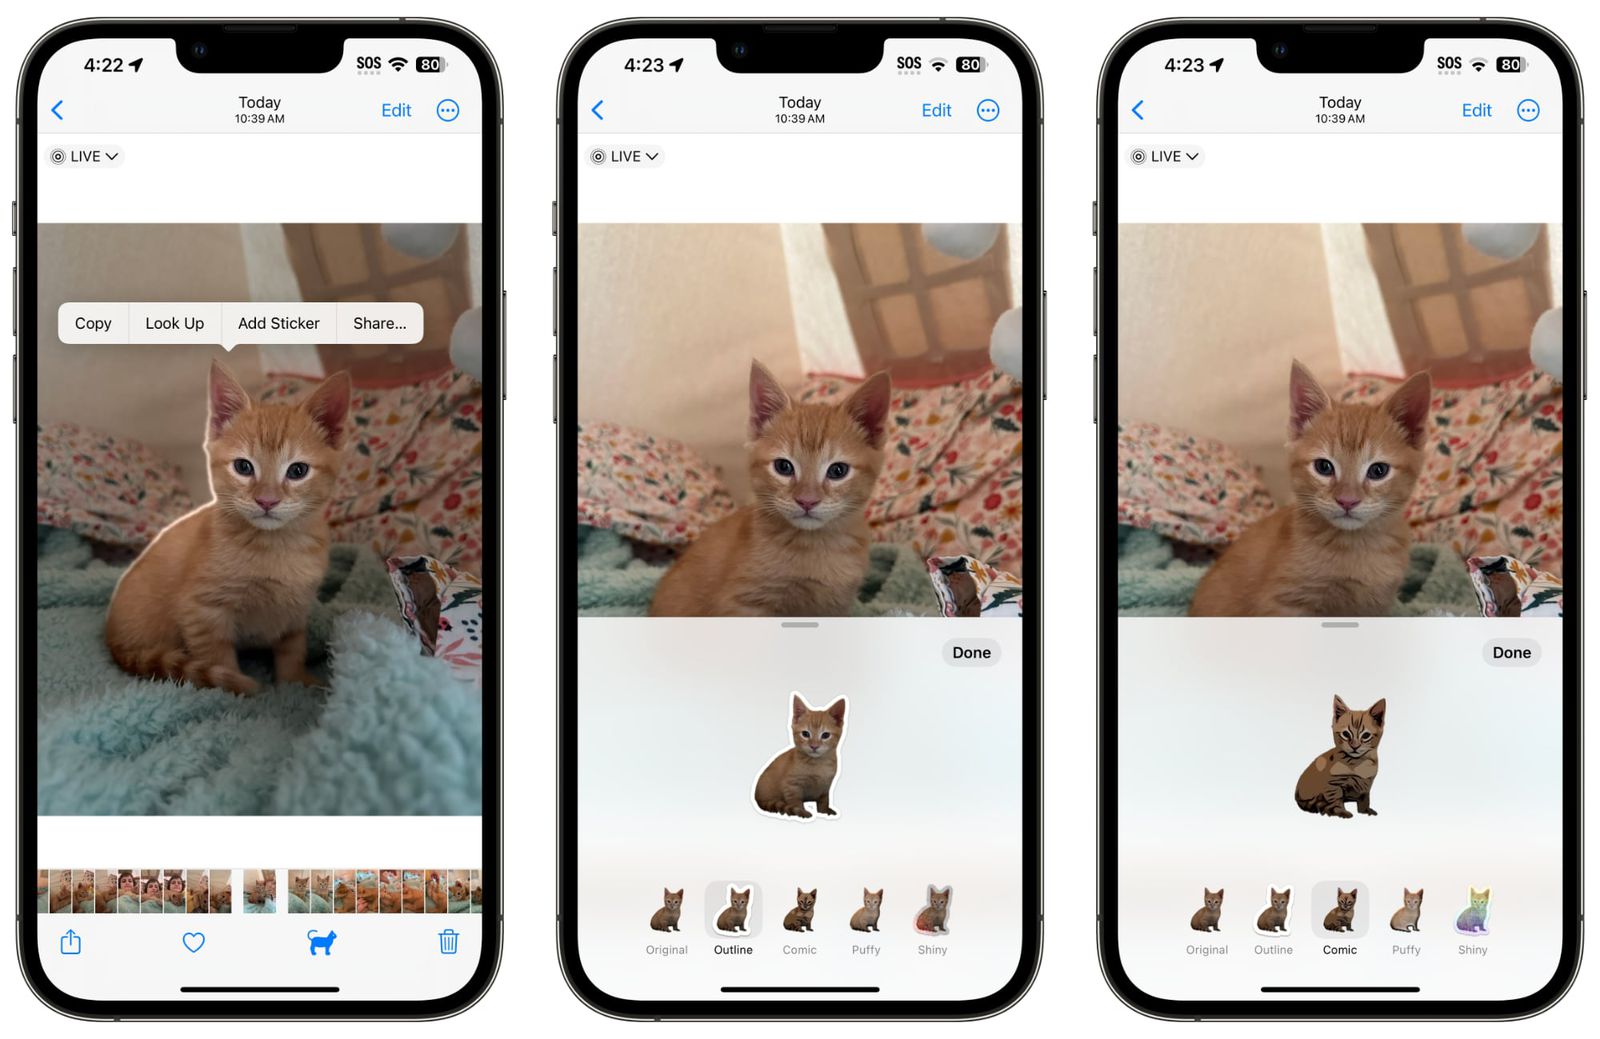
Welcome to the exciting world of iMessage stickers in iOS 17! With the latest version of iOS, Apple has made it easier than ever for users to express themselves with custom stickers in their iMessage conversations. Gone are the days of searching through a limited selection of pre-made stickers – now, you can create your own personalized stickers to share with friends and family.
In this comprehensive guide, we will walk you through the step-by-step process of creating your own iMessage stickers from scratch. Whether you have a knack for design or simply want to add a personal touch to your messages, this tutorial will help you unleash your creativity and bring your sticker ideas to life.
So, if you’re ready to dive into the wonderful world of iMessage stickers, let’s get started!
Inside This Article
- Overview of iMessage Stickers
- Getting Started with Xcode
- Creating Custom Sticker Assets
- Setting up Sticker Pack in Xcode
- Configuring Sticker Pack Properties
- Adding Stickers to the Pack
- Testing and Debugging the Sticker Pack
- Exporting and Sharing the Sticker Pack
- Conclusion
- FAQs
Overview of iMessage Stickers
iMessage stickers are a fun and interactive way to express yourself in conversations on iOS devices. With the release of iOS 10, Apple introduced the ability for users to download and use custom sticker packs within the iMessage app. These stickers can range from simple emojis and icons to animated characters and personalized designs.
Unlike traditional emojis, iMessage stickers are larger in size and can be placed on top of messages, photos, and even other stickers. They are a creative way to add personality and flair to your conversations, and they can be a great way for businesses and developers to engage with their audience.
Creating your own sticker pack for iMessage is a fantastic opportunity to showcase your creativity and share your unique designs with others. Whether you want to create a set of stickers featuring your favorite pets, your favorite movie characters, or even your own artwork, the possibilities are endless.
By following a few simple steps, you can bring your sticker pack to life and make it available for download on the App Store. In the next sections, we will guide you through the process of creating your own iMessage stickers and share some tips and best practices along the way.
Getting Started with Xcode
When it comes to creating your own iMessage stickers in iOS 17, Xcode is a vital tool to have in your arsenal. Xcode is Apple’s integrated development environment (IDE) that provides a robust set of features for building and testing iOS applications, including sticker packs for iMessage.
To begin, you’ll need to download and install Xcode from the Mac App Store. Once installed, launch Xcode and you’ll be greeted with a welcome screen. From here, you can either create a new project or open an existing one.
Creating a new project is straightforward. Click on “Create a new Xcode project” and select the template for “Sticker Pack Application.” Give your project a name and choose a location to save it. Xcode will generate all the necessary files and folders for your sticker pack.
Now that you have a new project set up, you’ll see a “Sticker Pack Extension” folder in the project navigator on the left-hand side of the Xcode window. This is where you’ll add and manage your sticker assets.
Xcode provides a visual editor for designing and organizing your sticker pack. To add a new sticker to your pack, simply right-click on the folder and select “New File.” Choose the “Sticker” template, and Xcode will create a new sticker file for you to work with.
With your sticker file open, you can design your sticker using various tools provided by Xcode. You can import images, add text, adjust the size and position of elements, and even incorporate animations if desired. Get creative and bring your stickers to life!
Once you’ve completed designing your first sticker, you can repeat the process to create additional stickers for your pack. Xcode allows you to create as many stickers as you like, giving you the freedom to express your creativity.
Remember to save your changes as you work on each sticker. Xcode automatically updates the sticker assets in the Sticker Pack Extension folder, making it easy to manage and organize your entire pack.
Once you have finished designing your sticker pack, it’s time to test it on a device or simulator. Connect your iOS device to your Mac, select it as the build target, and click the “Run” button in Xcode’s toolbar. This will install and launch the sticker pack in iMessage, allowing you to see how it looks and functions in a real-world setting.
If everything looks good during testing, you can proceed to export and share your sticker pack with others. Xcode provides options to generate an App Store package or a standalone sticker pack file, depending on your distribution preferences.
With Xcode’s powerful tools and intuitive interface, creating your own iMessage sticker pack in iOS 17 is a breeze. Let your creativity shine and bring a personalized touch to your conversations with custom stickers.
Creating Custom Sticker Assets
When it comes to creating your own iMessage stickers in iOS 17, one of the most important aspects is creating custom sticker assets. These assets are the visual elements that will make up your stickers and give them their unique look. Here’s a step-by-step guide on how to create custom sticker assets:
1. Choose the Right Design Software: To create high-quality sticker assets, you will need to use a design software such as Adobe Illustrator or Sketch. These tools provide powerful features that will help you create crisp and eye-catching sticker designs.
2. Determine Sticker Size and Format: Before you start designing, decide on the size and format of your stickers. The recommended size for iMessage stickers is 300×300 pixels, and they should be saved in PNG format with a transparent background.
3. Unleash Your Creativity: Let your imagination run wild and create sticker designs that reflect your personal style or align with the theme of your sticker pack. Experiment with different colors, shapes, and typography to make your stickers visually appealing.
4. Pay Attention to Detail: Since stickers are small in size, it’s crucial to pay attention to details. Make sure your designs are clear and easily recognizable at small sizes. Avoid using complex patterns or intricate details that may get lost when the sticker is scaled down.
5. Use Layers and Transparency: Take advantage of the layering capabilities of your design software to create dynamic and interactive stickers. Use transparency to add depth and make your stickers blend seamlessly with the iMessage interface.
6. Incorporate Animation (Optional): If you want to take your stickers to the next level, consider adding subtle animations to bring them to life. Use animation tools like Adobe After Effects or Keynote to create simple yet captivating sticker animations.
7. Test Your Stickers: Once you have created your sticker assets, it’s important to test them before integrating them into your sticker pack. Make sure they look great and work well in different messaging scenarios.
By following these steps and putting your creativity to work, you can create stunning custom sticker assets that will make your iMessage stickers stand out from the crowd. Don’t be afraid to experiment and have fun with the design process!
Setting up Sticker Pack in Xcode
Once you have created your custom sticker assets for iMessage, the next step is to set up your sticker pack in Xcode. Xcode is the integrated development environment (IDE) provided by Apple for iOS app development. Follow the steps below to set up your sticker pack in Xcode:
- Open Xcode and create a new project by selecting “File” from the menu bar, then “New” and choosing the “Sticker Pack App” template.
- Give your project a name and choose a location to save it on your computer.
- Xcode will generate the basic structure for your sticker pack, including the necessary files and folders.
- Locate the “Assets.xcassets” folder in the project navigator panel. This is where you will add your sticker assets.
- Select the “Assets.xcassets” folder, then click on the “+” button at the bottom of the panel and choose “New Sticker Pack”.
- Give your sticker pack a unique name.
- Inside the sticker pack folder, you will find a file called “Contents.json”. This file contains information about your sticker pack, such as the order of the stickers and their names.
- Open the “Contents.json” file and modify it to match the names and order of your sticker assets.
- Drag and drop your sticker assets into the sticker pack folder. Each sticker asset should be in PNG format and have dimensions of 300×300 pixels.
- Make sure to provide a visually appealing sticker pack icon by adding a 1024×1024-pixel PNG image named “AppIcon.png” to the “Assets.xcassets” folder.
- Once you have added all your sticker assets, you can build and run your sticker pack in the iOS simulator to test it.
- To build your sticker pack, select the target device (e.g., iPhone or iPad) and click on the “Run” button in Xcode.
- If everything is set up correctly, the iOS simulator will launch and display your sticker pack in the iMessage app drawer.
- You can now test your stickers by selecting them in the iMessage app drawer and sending them in a conversation.
Setting up your sticker pack in Xcode is an essential step to bring your custom stickers to life in iMessage. Follow the above steps carefully, and you will be on your way to sharing your creative stickers with friends and family.
Configuring Sticker Pack Properties
Once you have created your custom sticker assets and added them to your sticker pack, the next step is to configure the properties of your sticker pack in Xcode. By configuring these properties, you can enhance the user experience and make your sticker pack more engaging and interactive. Here, we will explore the key properties that you can configure for your sticker pack.
The first property to configure is the display name of your sticker pack. This is the name that will be shown to users when they browse for stickers in the iMessage app store. It’s important to choose a catchy and descriptive name that reflects the theme or content of your stickers. To configure the display name, go to the “Info.plist” file in Xcode and locate the “CFBundleDisplayName” key. Replace the default value with your desired display name.
Next, you can configure the sticker pack icon. The icon is a visual representation of your sticker pack and will be displayed in the iMessage app drawer. It should be a square image with a size of 1024×1024 pixels. To configure the sticker pack icon, go to the “Sticker Pack Configurations” section in Xcode and select the “App Icon” option. You can either choose an existing image file or create a new one using graphic design software.
In addition to the display name and icon, you can also configure the privacy settings of your sticker pack. By default, stickers can be accessed and shared by anyone using the iMessage app. However, if you want to restrict the usage of your stickers to specific contacts or prevent them from being shared, you can enable the privacy settings. To configure the privacy settings, go to the “Sticker Pack Configurations” section in Xcode and select the “Privacy” option. From there, you can choose the desired privacy settings based on your preferences.
Last but not least, you can configure the promotional text for your sticker pack. The promotional text is a short description that appears in the iMessage app store to entice users to download your stickers. It should be concise, catchy, and highlight the unique features or themes of your stickers. To configure the promotional text, go to the “Info.plist” file in Xcode and locate the “IMMessageExtensionPromotionalDescription” key. Replace the default value with your desired promotional text.
Once you have configured the properties of your sticker pack, make sure to test and preview your stickers in the iMessage app to ensure they are displayed correctly and provide a seamless user experience. With carefully configured properties, your sticker pack will stand out in the iMessage app store and capture the attention of users.
Adding Stickers to the Pack
Now that you have set up the sticker pack in Xcode and configured its properties, it’s time to add some stickers to your pack. This is where the real fun begins! Here’s how you can add stickers to your pack:
1. Open the sticker assets folder in the Xcode project navigator. You will see a set of sticker images ready for you to use.
2. Drag and drop your own custom sticker images into the sticker assets folder. These images should be in the PNG format and have a transparent background.
3. Once you have added your sticker images, you can arrange them in the desired order by clicking and dragging them within the sticker assets folder.
4. It’s important to note that each sticker image should be square and have a resolution of 300×300 pixels. This ensures optimal display quality on various iOS devices.
5. To add a sticker to your sticker pack, simply select the desired image from the sticker assets folder and drag it onto the Sticker Pack folder within the Xcode project navigator.
6. You can add multiple stickers to the pack by repeating the previous step with different sticker images.
7. Once you have added all the stickers to your pack, make sure to test them by running the sticker pack in the iOS Simulator or on a physical device. This will allow you to preview how the stickers will appear to your users.
8. During testing, ensure that the stickers are properly displayed and that they maintain their quality and transparency. If any issues arise, you can make adjustments to the sticker images and re-add them to the sticker pack.
9. To customize the order in which the stickers appear to users, you can rearrange them within the Sticker Pack folder in the Xcode project navigator.
10. Once you are satisfied with the stickers and their order, you are ready to proceed to the next step: testing and debugging the sticker pack.
By following these steps, you can easily add your own custom stickers to your sticker pack in iOS 17. This will allow you to personalize your iMessage experience and share your creativity with friends and family.
Testing and Debugging the Sticker Pack
Once you have created your custom sticker pack in Xcode, it’s time to test and debug it to ensure everything is working as expected. This step is crucial to identify and fix any issues or bugs that may arise during the sticker pack’s functionality.
Here are some key steps to follow for testing and debugging your sticker pack:
- Run the Sticker Pack in Simulator: Use the Xcode simulator to run your sticker pack on various virtual devices with different iOS versions. This will help you identify any compatibility issues and ensure that the stickers are displaying correctly.
- Check for Functionality: Make sure that all the stickers in the pack are working as intended. Test each sticker to ensure that it can be sent, received, and displayed properly in iMessage conversations.
- Verify Interactions: Test the interactive elements of your stickers, such as animated stickers or stickers with touch functionality. Ensure that they behave as expected and respond correctly to user interactions.
- Test Performance: Pay attention to the performance of your sticker pack. Check for any noticeable lag or slowdowns when scrolling through the sticker options or sending the stickers in a conversation. Optimize any performance issues that you encounter.
- Handle Errors: Test how your sticker pack handles errors and exceptions. Try to simulate scenarios such as sending a sticker to a device that doesn’t support stickers or sending a sticker that exceeds the maximum file size limit. Ensure that your sticker pack handles these situations gracefully.
- Test Localization: If your sticker pack supports multiple languages, test the localization to ensure that the stickers and any accompanying text are correctly translated and displayed in different languages.
During the testing process, keep an eye out for any unexpected behavior or issues that may arise. Use Xcode’s debugging capabilities to identify and address any errors or warnings that appear in the console. Utilize breakpoints and step through your code to track down and fix any logical or functional issues.
Once you are confident that your sticker pack is working properly, it’s time to move on to the next step: exporting and sharing your sticker pack with others.
Exporting and Sharing the Sticker Pack
Once you have created and tested your sticker pack in Xcode, it’s time to export and share it with your friends and the wider iMessage community. Here’s how you can export and share your sticker pack:
- Archive Your Sticker Pack: In Xcode, go to the Product menu and select Archive. This will generate an archive of your sticker pack.
- Validate Your Sticker Pack: After archiving, you have the option to validate your sticker pack before exporting it. This step is optional, but it can help identify any potential issues that might cause your sticker pack to be rejected when submitted to the App Store.
- Distribute Your Sticker Pack: Now it’s time to distribute your sticker pack. There are a few different ways you can do this:
- App Store: If you want to distribute your sticker pack through the App Store, you will need to follow the submission process outlined by Apple. This involves creating a developer account, preparing your sticker pack for submission, and submitting it for review. Once approved, your sticker pack will be available for download on the App Store.
- Direct Sharing: If you only want to share your sticker pack with a select group of people, you can do so by exporting the sticker pack as a file and sharing it directly with them. You can export your sticker pack by selecting the archive in Xcode and choosing the “Export…” option. This will generate a file that you can share via email, messaging apps, or any other file-sharing platform.
- Third-Party Sticker Pack Platforms: Alternatively, you can explore third-party sticker pack platforms that allow you to share and distribute your sticker pack without going through the App Store submission process. These platforms often have their own submission guidelines and requirements, so be sure to research and choose a platform that aligns with your goals.
- Promote Your Sticker Pack: Once your sticker pack is available for download or direct sharing, it’s time to promote it! Spread the word on social media, create engaging visuals or demonstrations of your stickers, and encourage users to share their experiences with your sticker pack. The more exposure and positive feedback your sticker pack receives, the more successful it is likely to be.
By following these steps, you can export and share your sticker pack with ease. Whether you choose to distribute it through the App Store or share it directly with your chosen audience, creating and sharing your own iMessage stickers can be a fun and rewarding experience.
Conclusion
Creating your own iMessage stickers in iOS 17 is an exciting and creative way to personalize your conversations and express yourself. With the user-friendly Sticker Pack app and the endless possibilities for customization, you can unleash your creativity and bring your sticker ideas to life.
By following the step-by-step process outlined in this article, you can easily design, publish, and share your stickers with friends and family. Whether you choose to create simple illustrations, animated stickers, or even collaborate with others, the iMessage platform allows you to showcase your artistry and add a unique touch to your messages.
As the popularity of stickers continues to rise, now is the perfect time to dive into sticker creation and make your mark in the iMessage ecosystem. So, have fun, let your imagination run wild, and enjoy the pleasure of seeing your creations brighten up conversations all across the iOS universe!
FAQs
1. Can I create iMessage stickers on my iPhone?
Yes, you can create your own iMessage stickers directly on your iPhone using the iOS 17 update. The latest iOS version allows users to design and customize their own stickers to share with friends and family.
2. Do I need any programming knowledge to create iMessage stickers?
No, you do not need any programming knowledge to create iMessage stickers. Apple has designed easy-to-use tools and templates that allow anyone to make their own stickers effortlessly. All you need is a bit of creativity and a sense of fun!
3. What tools do I need to create iMessage stickers?
To create iMessage stickers, you will need an iPhone running iOS 17 or later and the latest version of Xcode, which is a software development tool provided by Apple. Xcode is available for free on the Mac App Store.
4. Can I use my own artwork for iMessage stickers?
Yes, you can use your own artwork for iMessage stickers. Apple provides templates and guidelines to help you create stickers that meet their specifications. You can draw your own designs, use existing artwork, or even take photos to be turned into stickers.
5. How can I distribute my iMessage stickers?
There are several ways to distribute your iMessage stickers. Once you have created them, you can submit them to the App Store for approval and distribution to a wider audience. Alternatively, you can send them directly to friends and family through iMessage or even share them on social media platforms.