
Have you ever wanted to keep your confidential information secure in the Apple Notes app on your Mac or iPhone? Well, you’re in luck! Apple provides a handy feature that allows you to lock your notes with a password or Touch ID, ensuring that only authorized users can access your sensitive data. Whether it’s personal thoughts, financial information, or any other private details, locking notes adds an extra layer of protection to keep prying eyes at bay. In this article, we will guide you through the step-by-step process of locking notes on both your Mac and iPhone devices. So, let’s dive in and learn how to secure your important notes with ease!
Inside This Article
- Overview
- Locking Notes on Mac
- Locking Notes on iPhone
- Unlocking Locked Notes
- Troubleshooting and Tips
- Conclusion
- FAQs
Overview
Locking your notes in Apple Notes is a great way to ensure your sensitive information stays private and secure. Whether you’re using a Mac or an iPhone, Apple Notes offers a simple method to protect your notes from prying eyes. In this article, we’ll guide you through the steps to lock notes on both platforms and provide troubleshooting tips to help you along the way.
With the ability to lock notes, you can confidently store your passwords, financial details, or any other confidential information within the Apple Notes app. By setting up a passcode or using Face ID or Touch ID, you can rest easy knowing that only you can access your locked notes, even if someone gains access to your device.
Locking notes on both your Mac and iPhone follows a similar process, making it easy to secure your information across all your Apple devices. By using these simple steps, you can add an extra layer of security and keep your personal data safe from prying eyes.
In the next sections, we’ll break down the process of locking notes on both the Mac and iPhone, allowing you to choose the method that suits you best. So let’s dive in and learn how to lock your notes on Apple Notes!
Locking Notes on Mac
Apple Notes is a versatile and convenient tool that allows you to keep track of your ideas, thoughts, and important information. To ensure the privacy and security of your notes, Apple provides the option to lock them on your Mac. This feature adds an extra layer of protection, ensuring that only you can access the locked notes. Follow the simple steps below to lock your notes on Mac:
- Launch the Notes app on your Mac.
- Select the note that you want to lock.
- Click on the “File” tab in the menu bar.
- From the dropdown menu, select “Lock Note” or use the shortcut CMD + Shift + L.
- A lock icon will appear on the top right corner of the note, indicating that it is now locked.
- Set a password for the locked note. Choose a strong password that is not easily guessable.
- Click “OK” to save the password.
Once you have locked a note, it will require a password every time you want to view or edit it. This provides an additional level of security, particularly if you share your Mac with others or want to protect sensitive information.
If you ever need to unlock a note, follow these steps:
- Open the Notes app on your Mac.
- Select the locked note.
- You will be prompted to enter the password for the note.
- Enter the correct password and click “OK”.
Unlocking the note will grant you full access to view and edit its contents.
It’s important to remember that if you forget the password for a locked note, there is no way to recover it. The only option is to delete the note and create a new one. Therefore, it is advisable to choose a password that you can easily remember while maintaining its strength and security.
With the ability to lock notes on your Mac, you can confidently store personal information, sensitive data, or any notes that you want to keep private. Plus, it’s a simple and effective way to add an extra layer of security to your digital life.
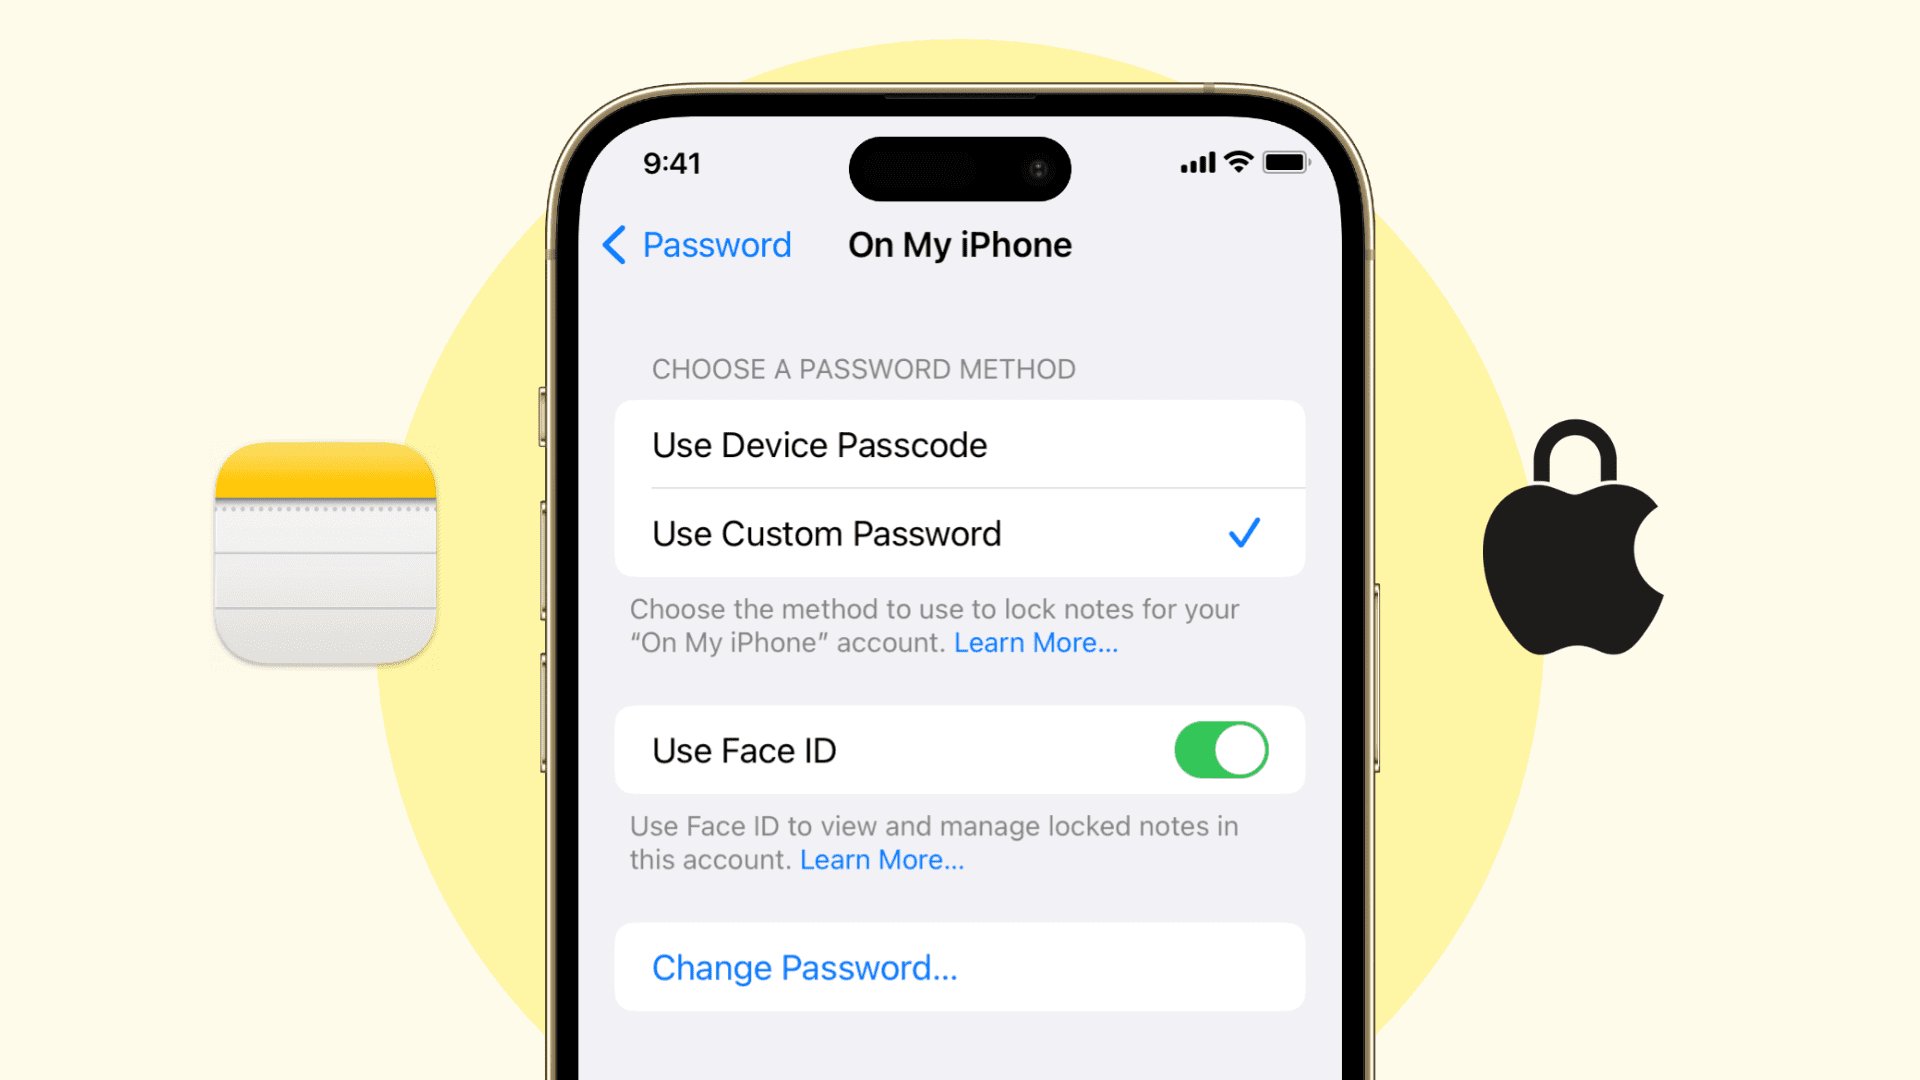
Locking Notes on iPhone
Keeping your notes secure and private is essential, especially with confidential information that you may store in Apple Notes on your iPhone. Fortunately, Apple provides a built-in feature that allows you to lock your notes with a password or using biometric authentication such as Touch ID or Face ID.
To begin locking your notes on iPhone, follow these simple steps:
- Open the Apple Notes app on your iPhone.
- Select the note you want to lock by tapping on it.
- Tap on the More Options (three dots) button at the top-right corner of the screen.
- From the popup menu, tap on Lock Note.
- You will be prompted to set a password for the note. Enter a unique password that you can easily remember.
- Optionally, you can enable Use Touch ID or Use Face ID if your device supports it, allowing you to quickly unlock the note with your fingerprint or face scan.
- Once you have set the password and enabled the biometric authentication, tap on Done to lock the note.
Now, your note is locked and only accessible by entering the password or authenticating with your fingerprint or face. This adds an extra layer of security to protect your sensitive information from prying eyes in case your iPhone falls into the wrong hands.
Please note that the password you set for a locked note will be used for all other locked notes as well. Therefore, it is crucial to choose a strong and memorable password to maintain the security of all your locked notes.
If you want to lock multiple notes, repeat the above steps for each note you want to secure. It’s a simple yet effective way to keep your private information safe and out of reach from unauthorized access.
Now that you know how to lock your notes on iPhone, you can rest assured that your confidential information remains protected, even if someone gains access to your device. This feature provides peace of mind and ensures your privacy in the digital world.
Unlocking Locked Notes
So, you’ve locked a note on your Mac or iPhone, but now you need to unlock it. Don’t worry, it’s a simple process. Follow these steps to unlock your locked notes:
Step 1: Open the Notes App
Launch the Notes app on your Mac or iPhone. Navigate to the locked note that you want to unlock.
Step 2: Access the Lock Settings
On your Mac, right-click on the locked note, and select “Unlock Note” from the context menu. On your iPhone, tap on the locked note, and you will be prompted to enter your passcode or use Touch or Face ID to unlock the note.
Step 3: Enter the Passcode or Use Touch/Face ID
If you have set a passcode for your locked notes, enter the passcode when prompted. Alternatively, if your device supports Touch ID or Face ID, you can use your registered fingerprint or face to unlock the note.
Step 4: Unlocking Successful
Once you have entered the correct passcode or authenticated with Touch/Face ID, the locked note will be unlocked, and you will have full access to view and edit the contents.
Step 5: Re-lock the Note (Optional)
If you want to re-lock the note after making changes, simply follow the steps to lock the note again. This ensures that your sensitive information remains protected.
That’s it! You have successfully unlocked the locked note on your Mac or iPhone. Now you can access and edit the note without any restrictions.
It’s important to remember that locking notes provides an additional layer of security for your sensitive information. Make sure to use a strong passcode and keep it confidential to maintain the privacy of your locked notes.
Troubleshooting and Tips
Locking notes in Apple Notes can provide an added layer of security for your sensitive information. However, occasionally you may encounter some issues or have questions about the process. Here are some troubleshooting tips to help you resolve any issues and make the most out of the locking feature in Apple Notes:
- Cannot find the lock icon: If you cannot locate the lock icon in Apple Notes, ensure that you have the latest version of iOS or macOS installed on your device. If you still cannot find it, try closing and reopening the app or restarting your device.
- Forgotten password: If you have forgotten the password for a locked note, unfortunately, there is no way to recover it. Your best option is to create a new note and transfer the contents from the locked note to the new one.
- Locked note not appearing on other devices: If you have locked a note on one device but it is not appearing as locked on another, make sure that you are signed in with the same Apple ID on both devices. Additionally, check if the “Notes” sync is enabled in your iCloud settings.
- Unlocking all locked notes: If you want to unlock all the locked notes at once, go to Settings > Notes > Password and select “Reset Password.” This will remove the password for all the locked notes, allowing you to access them without entering a password.
- Backing up your locked notes: It is essential to regularly back up your device to prevent potential data loss. When you perform a device backup, your locked notes will also be included in the backup, ensuring that they can be restored if needed.
- Consider using a strong password: To enhance the security of your locked notes, choose a strong and unique password. Avoid using common passwords or easily guessable information. Consider using a password manager to generate and store secure passwords.
- Customizing lock preferences: You can customize your lock preferences in Apple Notes by going to Settings > Notes > Password. Here, you can adjust the auto-lock time, change the password, or even disable the password requirement altogether.
By following these troubleshooting tips and implementing the suggested measures, you can ensure a smooth and secure experience while locking your notes in Apple Notes. Remember to always keep your device updated and maintain a backup of your data to prevent any potential issues or data loss.
Conclusion
Locking notes in Apple Notes is a valuable feature that provides an extra layer of security and privacy for your important information. Whether you’re using a Mac or an iPhone, the process is straightforward and easy to implement.
By setting up a password, using Face ID or Touch ID, you can ensure that only authorized individuals have access to your confidential notes. This feature is especially useful for storing sensitive information such as passwords, financial details, or personal thoughts.
With the ability to securely lock notes, you can have peace of mind knowing that your private information remains protected, even if your device is lost or stolen.
So, why wait? Start leveraging the locking feature in Apple Notes today and take control of your digital privacy.
FAQs
1. Can I lock my notes in the Apple Notes app?
Yes, you can lock your notes in the Apple Notes app on both your Mac and iPhone. This feature provides an extra layer of security for your confidential and sensitive information.
2. How can I lock a note on my Mac?
To lock a note on your Mac, follow these steps:
- Open the Apple Notes app.
- Select the note you want to lock.
- Click on the “Lock” icon in the toolbar.
- Set a password for the note and confirm it.
- Click “Lock” to secure the note with the newly set password.
3. How do I unlock a locked note on my Mac?
If you want to unlock a locked note on your Mac, here’s what you need to do:
- Open the Apple Notes app.
- Select the locked note.
- Click on the “Lock” icon in the toolbar.
- Enter the password you set for the note.
- Click “Unlock” to access the contents of the note.
4. Can I lock notes on my iPhone?
Absolutely! You can lock notes on your iPhone as well. Here’s how:
- Launch the Apple Notes app on your iPhone.
- Open the note you want to lock.
- Tap on the share icon (square with an upward arrow) at the top right corner of the screen.
- Tap “Lock Note” in the share sheet.
- Set a password for the note and confirm it.
- Tap “Lock Note” to secure it with the password.
5. How do I unlock a locked note on my iPhone?
If you wish to unlock a locked note on your iPhone, follow these steps:
- Open the Apple Notes app.
- Go to the list of notes and find the locked note.
- Tap on the locked note to open it.
- Tap the lock icon at the top of the screen.
- Enter the password for the note.
- Tap “Unlock” to access the contents of the note.