
Are you looking for a reliable way to backup your iPhone to a hard drive? In this digital age, it’s essential to have a backup of your precious data to ensure its safety and security. A hard drive provides an efficient and convenient solution for storing your iPhone’s files, photos, videos, contacts, and more.
Backing up your iPhone to a hard drive not only safeguards your data from potential loss or damage but also frees up valuable space on your device. Plus, it offers an extra layer of protection in case of unforeseen circumstances like accidental data deletion, device failure, or theft.
But how exactly can you backup your iPhone to a hard drive? In this comprehensive guide, we will walk you through the step-by-step process, highlighting different methods and tools available to make the backup process as smooth and hassle-free as possible.
Inside This Article
- Why Backup iPhone to Hard Drive?
- Methods to Backup iPhone to Hard Drive
- Using iTunes
- Using Finder (for macOS Catalina and later)
- Using iCloud
- Using Third-Party Backup Tools
- Conclusion
- FAQs
Why Backup iPhone to Hard Drive?
Backing up your iPhone is essential to ensure the safety and security of your precious data, such as photos, videos, contacts, messages, and more. While cloud-based backups like iCloud offer convenience, there are several compelling reasons to consider backing up your iPhone to a hard drive:
- Extra Layer of Security: Storing your iPhone backups on a hard drive provides an additional layer of security. Hard drives are not connected to the internet, reducing the risk of unauthorized access or data breaches.
- Greater Control: By backing up your iPhone to a hard drive, you have complete control over your data. You can choose when and where to store your backups, giving you peace of mind and flexibility.
- No Storage Limitations: While cloud-based backups often come with limited storage capacity, hard drives offer ample space for multiple backups. This ensures that you can retain all your important data without worrying about running out of storage.
- Offline Access: Having your iPhone backup stored on a hard drive allows you to access your data even when you don’t have an internet connection. This can be especially useful in situations where you need to restore your iPhone or transfer data to a new device.
- Faster Restores: When it comes to restoring your iPhone from a backup, the process is generally faster when using a hard drive. Retrieving data from a local storage device is often quicker than downloading it from the internet.
- Redundancy: Backing up your iPhone to multiple destinations is always a good practice, and using a hard drive as one of those destinations adds redundancy. In the event of any issues with cloud-based backups, you’ll still have a local copy of your data.
Considering these advantages, backing up your iPhone to a hard drive is a wise choice, providing an additional layer of security and control over your valuable data.
Methods to Backup iPhone to Hard Drive
Backing up your iPhone is essential to protect your valuable data and ensure that you don’t lose important information. While iCloud and iTunes are popular methods for backing up your iPhone, using a hard drive offers an additional layer of security and flexibility. In this article, we will explore the different methods you can use to backup your iPhone to a hard drive.
Method 1: Using iTunes to Backup iPhone to Hard Drive
iTunes is a software developed by Apple that allows you to manage and sync your iOS devices. It also provides an option to backup your iPhone to your computer’s hard drive. Follow these steps to backup your iPhone using iTunes:
- Connect your iPhone to your computer using the USB cable.
- Open iTunes and select your iPhone from the device menu.
- Click on the “Summary” tab and scroll down to the “Backups” section.
- Under “Automatically Back Up,” choose the option “This computer.”
- Click on the “Back Up Now” button to start the backup process.
- Wait for the backup to complete, and make sure to keep your hard drive connected until the process is finished.
Method 2: Using iCloud to Backup iPhone to Hard Drive
iCloud is a cloud storage service provided by Apple, designed specifically for Apple devices. It allows you to backup your iPhone wirelessly and securely. Follow these steps to backup your iPhone to iCloud:
- Connect your iPhone to a Wi-Fi network.
- Go to “Settings” on your iPhone and tap on your name at the top of the screen.
- Tap on “iCloud” and then select “iCloud Backup”.
- Toggle on the “iCloud Backup” option.
- Tap on “Back Up Now” to start the backup process.
- Wait for the backup to complete, and make sure you have enough iCloud storage available.
Method 3: Using Third-Party Software to Backup iPhone to Hard Drive
Aside from iTunes and iCloud, there are third-party software options available that provide more advanced features and flexibility for backing up your iPhone to a hard drive. These software programs often offer additional options such as selective backups, faster transfer speeds, and compatibility with multiple devices. Some popular third-party software options include iMazing, AnyTrans, and Dr.Fone.
Before choosing a third-party software, make sure to do thorough research and read reviews to find the one that best meets your needs.
Benefits of Backing Up iPhone to Hard Drive
Backing up your iPhone to a hard drive has several advantages. Firstly, it provides an extra layer of security as your data will be stored on a physical device that you have control over. Secondly, it allows for offline access to your backups, making it convenient when you don’t have an internet connection. Additionally, using a hard drive gives you more storage options and flexibility, allowing you to choose the storage capacity that suits your needs.
Using iTunes
Backing up your iPhone to a hard drive is an essential step to ensure the safety of your data. iTunes, the native software developed by Apple, offers a seamless and convenient way to backup your iPhone to a hard drive. Here’s how:
1. Launch iTunes on your computer and connect your iPhone to it using a USB cable.
2. Once your iPhone is detected, click on the device icon in the iTunes window to access the device summary page.
3. From the Summary tab, scroll down to the “Backups” section. Here, you can choose to backup your iPhone data either locally or to iCloud. To backup to a hard drive, select the option “This computer”.
4. You also have the option to encrypt your backup by selecting the checkbox “Encrypt iPhone backup” and setting a password. Encrypting your backup ensures that your sensitive data, such as passwords and Health app data, are securely stored.
5. Click on the “Back Up Now” button to start the backup process. Ensure that your iPhone remains connected to the computer until the backup is complete.
6. Once the backup is finished, you can verify its completion by going to iTunes preferences. On a Mac, go to iTunes > Preferences > Devices. On a Windows computer, go to Edit > Preferences > Devices. Here, you will see a list of backups you have made, including the date and time of each backup.
7. To locate the backup file on your hard drive, follow these steps:
– On a Mac, the backup files are stored in the following directory: ~/Library/Application Support/MobileSync/Backup/
– On a Windows computer, the backup files are located in the following directory: C:\Users\Your Username\AppData\Roaming\Apple Computer\MobileSync\Backup\
That’s it! You have successfully backed up your iPhone using iTunes to a hard drive. Remember to regularly perform backups to ensure that your data is protected.
Using Finder (for macOS Catalina and later)
If you are using macOS Catalina or later versions, Apple has replaced iTunes with the Finder app for managing your iPhone. With Finder, you can easily backup your iPhone to a hard drive. Here’s how:
1. Connect your iPhone to your Mac using a Lightning cable.
2. Open a new Finder window. You can do this by clicking on the Finder icon in the dock or by selecting Finder from the Applications folder.
3. In the sidebar of the Finder window, under the “Locations” section, click on your iPhone’s name to view its contents.
4. Look for the “Backups” section in the iPhone’s Summary tab. Here, you will see options for backing up your iPhone to your Mac or to iCloud.
5. To backup your iPhone to a hard drive, select the “Back up all of the data on your iPhone to this Mac” option. This will create a full backup of your iPhone on your Mac’s hard drive.
6. Optionally, you can encrypt your backup by enabling the “Encrypt local backup” option. This will secure your backup with a password, adding an extra layer of protection to your data.
7. Once you have chosen your backup options, click on the “Back Up Now” button to start the backup process. Depending on the size of your iPhone’s data and the speed of your connection, the backup may take some time to complete.
8. Once the backup is finished, you can verify its completion by checking the “Latest Backup” date and time in the Summary tab.
By using Finder to backup your iPhone to a hard drive, you have full control over your backup process and can easily access and restore your data when needed.
Using iCloud
Another method to backup your iPhone to a hard drive is by utilizing iCloud, Apple’s cloud-based storage service. iCloud provides a convenient way to backup your iPhone wirelessly, ensuring that your data is safely stored in the cloud.
To backup your iPhone to iCloud, follow these steps:
- Connect your iPhone to a stable Wi-Fi network.
- Go to “Settings” on your iPhone and tap on your Apple ID at the top of the screen.
- Select “iCloud” from the menu.
- Scroll down and tap on “iCloud Backup”.
- Toggle on the “iCloud Backup” option.
- Tap on “Back Up Now” to initiate an immediate backup.
It’s worth noting that iCloud backups can take some time to complete, depending on the size of your data and the speed of your internet connection. It’s recommended to ensure that your iPhone is connected to Wi-Fi and plugged into a power source during the backup process.
Once the backup is complete, your iPhone data, including photos, videos, contacts, messages, and more, will be stored securely in your iCloud account. This backup can be accessed anytime by signing in to iCloud on any Apple device.
Keep in mind that iCloud provides 5GB of free storage, which might not be sufficient for users with large amounts of data. In such cases, you can consider purchasing additional iCloud storage plans directly from Apple.
Using iCloud to backup your iPhone to a hard drive offers the advantage of automatic and wireless backups. It eliminates the need for physical connections and allows you to access your data from anywhere with an internet connection.
However, it’s important to note that iCloud backups are stored in the cloud, and not on a physical hard drive. This means that if you prefer having a physical copy of your backup, you may still want to consider alternative methods like using iTunes or third-party software.
Overall, using iCloud for iPhone backups provides a convenient and efficient way to safeguard your data. Whether you choose to use iCloud, iTunes, or third-party software, regular backups are essential to ensure that your valuable information is protected.
Using Third-Party Backup Tools
While iTunes and iCloud are the default options for backing up your iPhone to a hard drive, there are also third-party backup tools available that offer additional features and flexibility. These tools are designed to simplify the backup process and provide more control over your data.
One popular third-party backup tool is iMazing. It allows you to backup your iPhone data to an external hard drive with just a few clicks. With iMazing, you can choose which data to backup, including photos, videos, contacts, messages, and more. You can also schedule automatic backups and restore your data to a new iPhone seamlessly.
Another reliable option is Dr.Fone – Phone Backup (iOS). This tool not only enables you to backup your iPhone to a hard drive but also offers additional features like data recovery, transfer, and management. It supports various types of data, including photos, videos, contacts, messages, notes, and more. Plus, it ensures the safety and security of your backups.
One more noteworthy option is AnyTrans. Aside from backup and restore capabilities, AnyTrans allows you to manage your iPhone data, transfer files between iOS devices, and even transfer data from Android to iPhone. It also offers selective backup options, giving you the freedom to choose the specific data you want to backup.
When using third-party backup tools, it is essential to choose a reputable and trusted software vendor. Read reviews, check user ratings, and ensure that the tool is compatible with your iPhone model and operating system version.
By opting for third-party backup tools, you can enjoy a more user-friendly interface, advanced features, and greater flexibility in managing your iPhone backups.
In conclusion, backing up your iPhone to a hard drive is a crucial step to protect your valuable data and ensure peace of mind. With the increasing reliance on our smartphones for important tasks and storing precious memories, having a backup is essential in case of accidental loss, theft, or device failure.
By following the steps outlined in this article, you can easily backup your iPhone to a hard drive and safeguard your contacts, photos, videos, messages, and more. Whether you prefer using iTunes or third-party software, the process is relatively straightforward and can be done in a few simple clicks.
Remember to regularly update your backups to ensure your most recent data is protected. Additionally, consider using cloud storage as an additional backup solution to increase redundancy and accessibility of your files.
By taking the time to backup your iPhone to a hard drive, you are taking a proactive approach to protect your valuable information and minimize the risk of data loss. Don’t wait until it’s too late – start backing up your iPhone today!
FAQs
1. Can I backup my iPhone directly to a hard drive?
Yes, you can back up your iPhone directly to a hard drive using the iTunes application on your computer. Simply connect your iPhone to your computer, open iTunes, select your device, and choose the option to back up to your hard drive.
2. What are the benefits of backing up my iPhone to a hard drive?
Backing up your iPhone to a hard drive offers several benefits. Firstly, it provides an additional layer of security for your data in case your iPhone gets lost, stolen, or damaged. Secondly, it allows you to free up space on your iPhone by storing your data on an external storage device. Lastly, it enables you to easily transfer your data to a new iPhone or restore your data in case of a software update or reset.
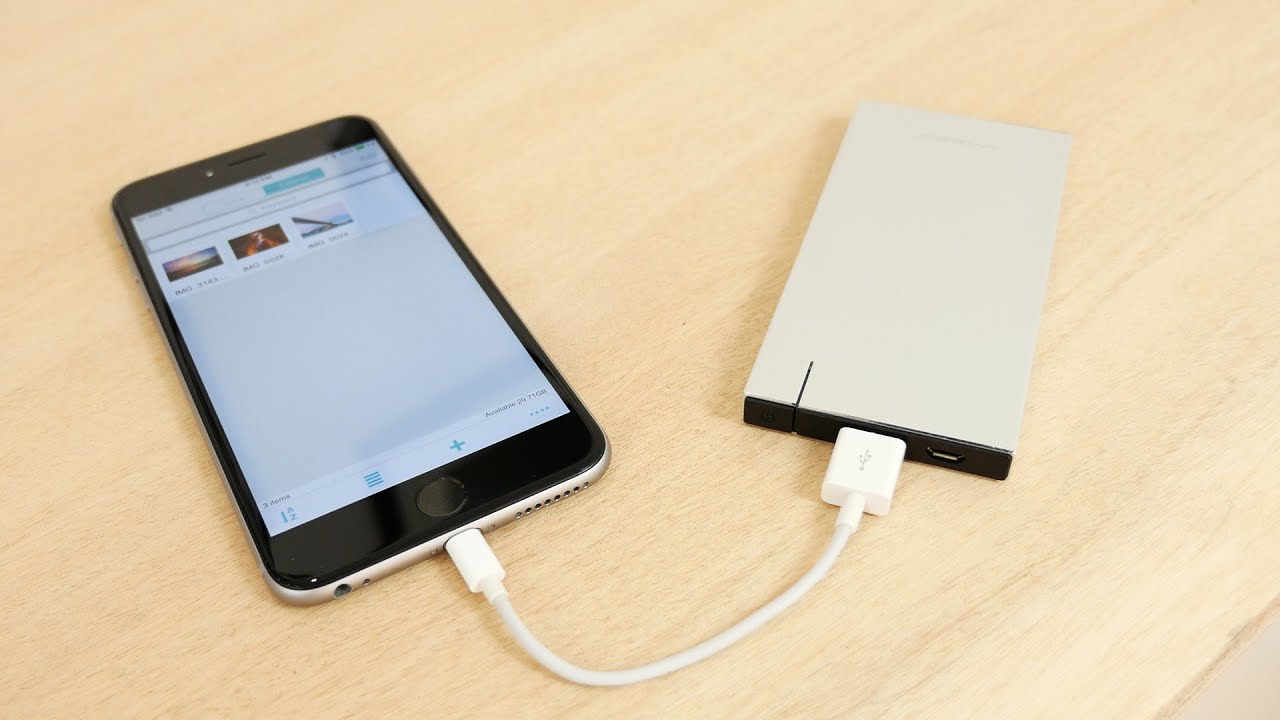
3. Can I use any type of hard drive to back up my iPhone?
Yes, you can use any type of external hard drive as long as it is compatible with your computer’s operating system. Hard drives that use USB or Thunderbolt connections are commonly used for iPhone backups.
4. Is it possible to back up specific files or data from my iPhone to a hard drive?
Yes, when backing up your iPhone to a hard drive using iTunes, you have the option to back up your entire device or choose specific files and data to include in the backup. This allows you to customize your backup based on your specific needs and preferences.
5. How often should I back up my iPhone to a hard drive?
It is recommended to regularly back up your iPhone to a hard drive to ensure the safety and security of your data. Ideally, you should back up your iPhone at least once a week or before performing any major updates or changes to your device. This will help ensure that you have the most up-to-date backup of your iPhone’s data.