
Are you looking for a simple and convenient way to convert your photos to JPEG format on your iPhone? Look no further! In this article, we will guide you through the process of converting your photos to JPEG right from your iPhone’s photo library. Whether you need to compress your image files for faster sharing or compatibility purposes, this step-by-step guide will help you achieve the desired results. With the help of easy-to-use apps and built-in features on your iPhone, you’ll be able to convert your photos to the widely supported JPEG format in no time. So, let’s dive in and explore the methods to convert photo to JPEG on iPhone!
Inside This Article
- Method 1: Using the Photos App
- Method 2: Using a Third-Party App
- Method 3: Using the Files App
- Method 4: Using a Cloud Storage Service
- Conclusion
- FAQs
Method 1: Using the Photos App
The Photos app on your iPhone provides a simple and convenient way to convert photos to JPEG format. Follow these steps to convert your photos:
- Open the Photos app on your iPhone.
- Navigate to the photo you want to convert and tap on it to open it.
- Tap on the Share button, which is represented by a square with an arrow pointing upwards.
- Scroll down and tap on “Save Image”.
- The photo will now be saved as a JPEG file in your Photos library.
It’s important to note that the Photos app automatically saves photos in the HEIC format, which is a more efficient file format that retains the quality of the image while reducing file size. However, if you need to convert the photo to JPEG format for compatibility or other purposes, the Photos app allows you to easily make the conversion.
Using the Photos app is a straightforward and reliable method for converting photos to JPEG format without the need for any additional apps or tools. This method is ideal for users who simply want to convert a few photos on their iPhone quickly.
Method 2: Using a Third-Party App
If you’re looking to convert a photo to JPEG on your iPhone, using a third-party app is another option worth considering. These apps offer additional functionality and customization options compared to the built-in Photos app. Here’s how you can convert your photos to JPEG using a third-party app:
- Start by opening the App Store on your iPhone and search for a reliable third-party photo editing or conversion app. Some popular options include Snapseed, Lightroom, and VSCO.
- Once you’ve found the app you prefer, download and install it on your device.
- Launch the third-party app and navigate to the option or feature that allows you to import or open photos.
- Select the photo you want to convert to JPEG from your Camera Roll or Albums. Some apps may also give you the option to import photos directly from cloud storage services like Google Drive or Dropbox.
- Once the photo is imported, look for an option or setting that allows you to export or save the photo in a different format.
- Choose JPEG as the desired format for the output file. Some apps may also provide additional options for adjusting quality settings or file size.
- After selecting the necessary options, tap on the “Save” or “Export” button to convert and save the photo as a JPEG file.
Using a third-party app can provide you with more control over the conversion process and allow you to make additional edits or enhancements to your photos before saving them as JPEG files. However, keep in mind that some apps may require in-app purchases or subscription fees to access all features and functionality.
With a third-party app, you can conveniently convert your photos to JPEG format on your iPhone, giving you more flexibility in storing, sharing, or printing them in various contexts that may require this particular file format.
Method 3: Using the Files App
If you’re an iPhone user and want to convert a photo to JPEG format, you’ll be glad to know that the Files app comes to your rescue. With this app, you can easily manage and organize your files, including your photos. Follow the steps below to convert your photo to JPEG using the Files app:
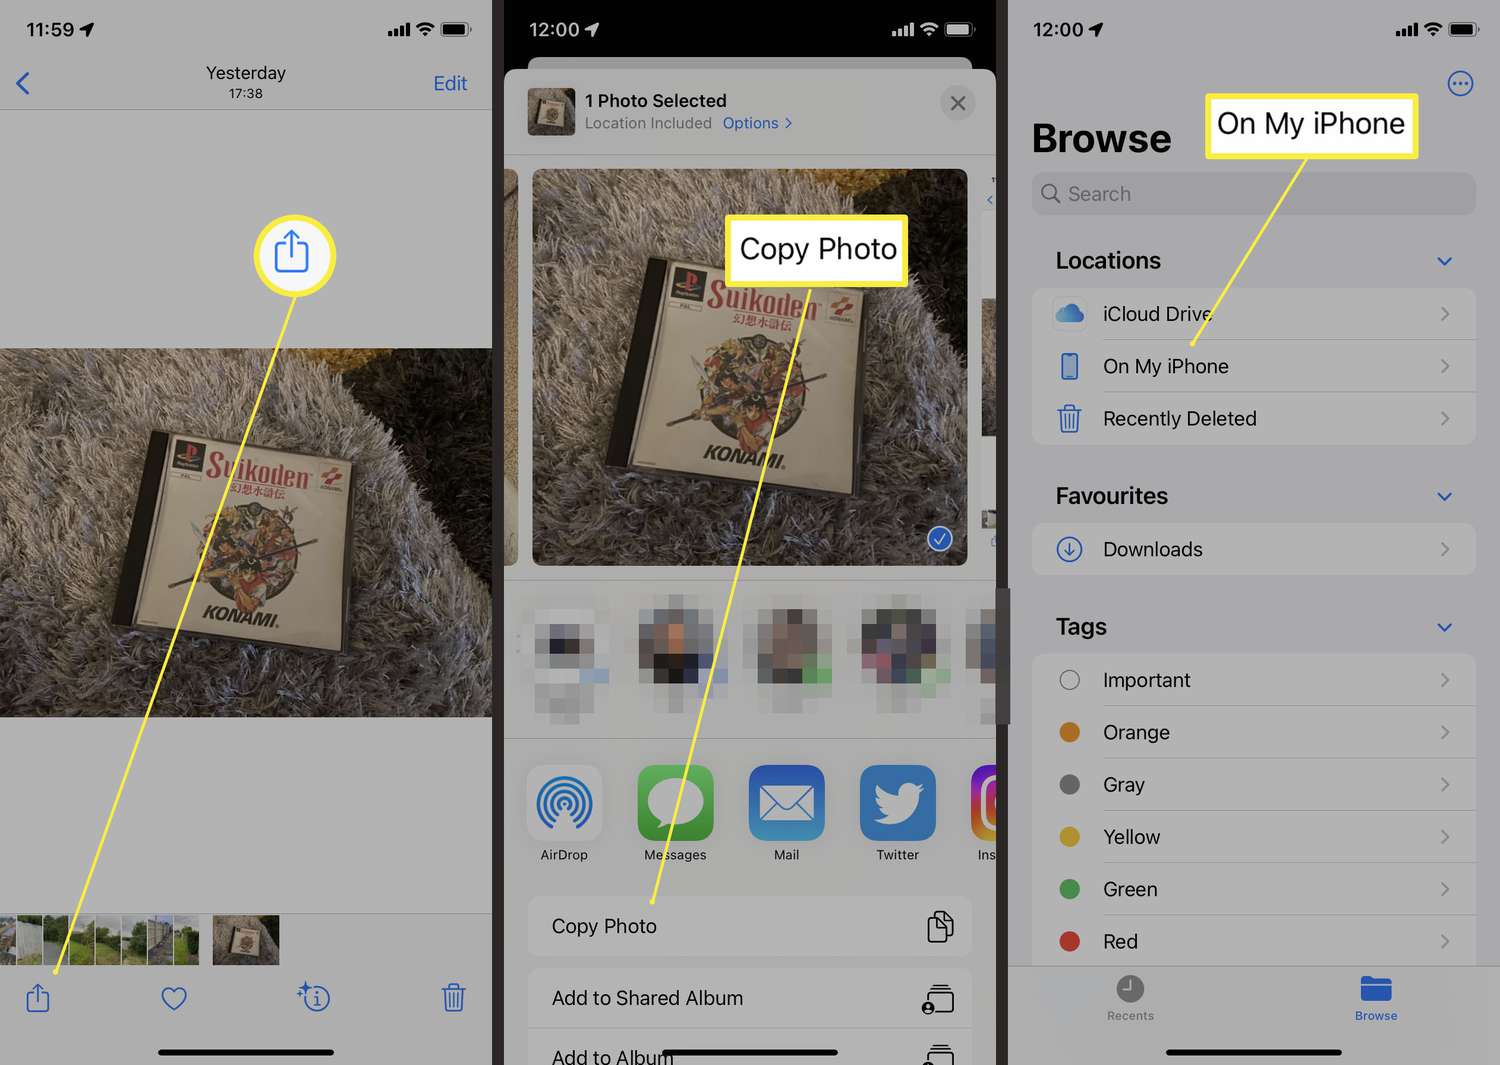
- Open the Files app on your iPhone. You can find it on your home screen or by swiping down and typing “Files” in the search bar.
- Navigate to the folder where the photo you want to convert is located. You can browse through your iCloud Drive, On My iPhone, or any other cloud storage services you have connected to your device.
- Locate the photo you want to convert and tap on it to open it.
- Once the photo is open, tap on the share icon at the bottom-left corner of the screen. The share icon looks like a square with an upward arrow.
- In the share sheet that appears, scroll down until you see the “Save Image” option. Tap on it.
- A new menu will pop up, allowing you to choose the format in which you want to save the image. Select “JPEG” from the available options.
- Choose the desired location to save the JPEG image. You can save it to your iCloud Drive, On My iPhone, or any other connected cloud storage service.
- Tap on “Save” to convert and save the photo as a JPEG file.
And voila! Your photo has been successfully converted to JPEG format using the Files app. You can now use it in any way you like, whether it’s sharing it with friends and family or printing it out.
This method is particularly useful if you want to retain the original quality of your photo while converting it to JPEG. The Files app provides a simple and straightforward way to perform this conversion without the need for any additional third-party apps.
Note that the Files app is available for iOS 11 and later versions. If you’re using an older version of iOS, you may need to update your device to access this feature.
Method 4: Using a Cloud Storage Service
If you’re looking to convert your photos to JPEG format on your iPhone, another convenient option is to use a cloud storage service. Cloud storage services, such as Google Drive, Dropbox, or iCloud, offer seamless ways to store, access, and manage your files, including your photos.
Here’s how you can use a cloud storage service to convert your photos to JPEG:
- First, make sure you have a cloud storage app installed on your iPhone. Popular options include Google Drive, Dropbox, and iCloud Drive.
- Open the cloud storage app and sign in to your account. If you don’t have an account, create one by following the on-screen instructions.
- Once you’re signed in, locate the folder where your photos are stored.
- Select the photos you want to convert to JPEG. You can usually select multiple photos by tapping and holding on one photo, then tapping on the others.
- After selecting the photos, look for an option to export or save the photos. This option might differ depending on the cloud storage service you’re using.
- Choose the JPEG format as the desired output format for the exported photos. Some cloud storage services might have a specific format selection screen, while others might offer the option to select the format during the export process.
- Confirm the export or save action, and wait for the cloud storage service to convert your photos to JPEG. The time it takes to convert the photos may vary depending on the number and size of the selected photos.
- Once the conversion is complete, you’ll have the JPEG versions of your photos within the designated folder in your cloud storage.
Using a cloud storage service to convert your photos to JPEG is a convenient option, especially if you already have the app installed on your iPhone. It allows you to easily manage and access your files while ensuring that your photos are saved in the desired format.
Remember to always keep a backup of your original photos before converting them, just in case you need to recover the original files.
Conclusion
Converting photos to JPEG format on your iPhone is a simple and efficient way to ensure compatibility and ease of sharing. With the built-in capabilities of the Photos app and the availability of third-party apps, you have several options to choose from. Whether you prefer using the Photos app, exploring external apps, or utilizing cloud services, the process is straightforward and user-friendly.
By following the steps outlined in this article, you can convert your photos to JPEG format in no time, allowing you to share your memories with friends, family, or on social media platforms with ease. Remember to consider the image quality and file size when choosing your preferred method for conversion. With a diverse range of options available, you have the flexibility to select the approach that best suits your needs.
So go ahead and convert your photos to JPEG on your iPhone today, and unlock a world of sharing possibilities!
FAQs
1. How can I convert a photo to JPEG on my iPhone?
2. Can I convert multiple photos to JPEG at once on my iPhone?
3. Do I need to use a third-party app to convert a photo to JPEG on my iPhone?
4. Will converting a photo to JPEG affect its quality?
5. Can I convert a screenshot to JPEG on my iPhone?