
Are you tired of hearing the same old ringtone on your iPhone? Do you want to delete it and choose a new one that suits your style better? Well, you’ve come to the right place! In this article, we will guide you through the process of deleting the unwanted ringtone from your iPhone. Whether you have the latest iPhone model or an older version, the steps to delete a ringtone are quite straightforward. By following our easy-to-understand instructions, you’ll be able to remove the unwanted tones in no time. Say goodbye to that annoying sound and make way for a fresh, new ringtone that reflects your personality. Let’s get started!
Inside This Article
- Methods to Delete iPhone Ringtone
- Method 1: Deleting Custom Ringtones
- Method 2: Removing Pre-installed Ringtones
- Method 3: Deleting Purchased Ringtones
- Method 4: Clearing Deleted Ringtones from iCloud
- Conclusion
- FAQs
Methods to Delete iPhone Ringtone
If you’re tired of hearing the same old ringtone on your iPhone and want to make room for something new, deleting unwanted ringtones is a simple process. In this article, we’ll walk you through several methods to help you delete iPhone ringtones with ease.
Method 1: Deleting Custom Ringtones
If you have created custom ringtones on your iPhone, you can easily delete them. Here’s how:
- Open the “Settings” app on your iPhone.
- Scroll down and tap on “Sounds & Haptics”.
- Under the “Sounds and Vibration Patterns” section, tap on “Ringtone.
- A list of available ringtones will be displayed. Scroll through the list and find the custom ringtone that you want to delete.
- Tap on the ringtone to select it, and then tap on “Delete from My Music”.
- A confirmation pop-up will appear. Tap on “Delete” to confirm the deletion of the custom ringtone.
Method 2: Removing Pre-installed Ringtones
iPhones come with a selection of pre-installed ringtones. If you no longer want these ringtones on your device, follow these steps to delete them:
- Open the “Settings” app on your iPhone.
- Scroll down and tap on “Sounds & Haptics”.
- Under the “Sounds and Vibration Patterns” section, tap on “Ringtone”.
- Scroll through the list of ringtones and find the pre-installed ringtone that you want to delete.
- Tap on the ringtone to select it, and then tap on “Delete from My Music”.
- A confirmation pop-up will appear. Tap on “Delete” to confirm the deletion of the pre-installed ringtone.
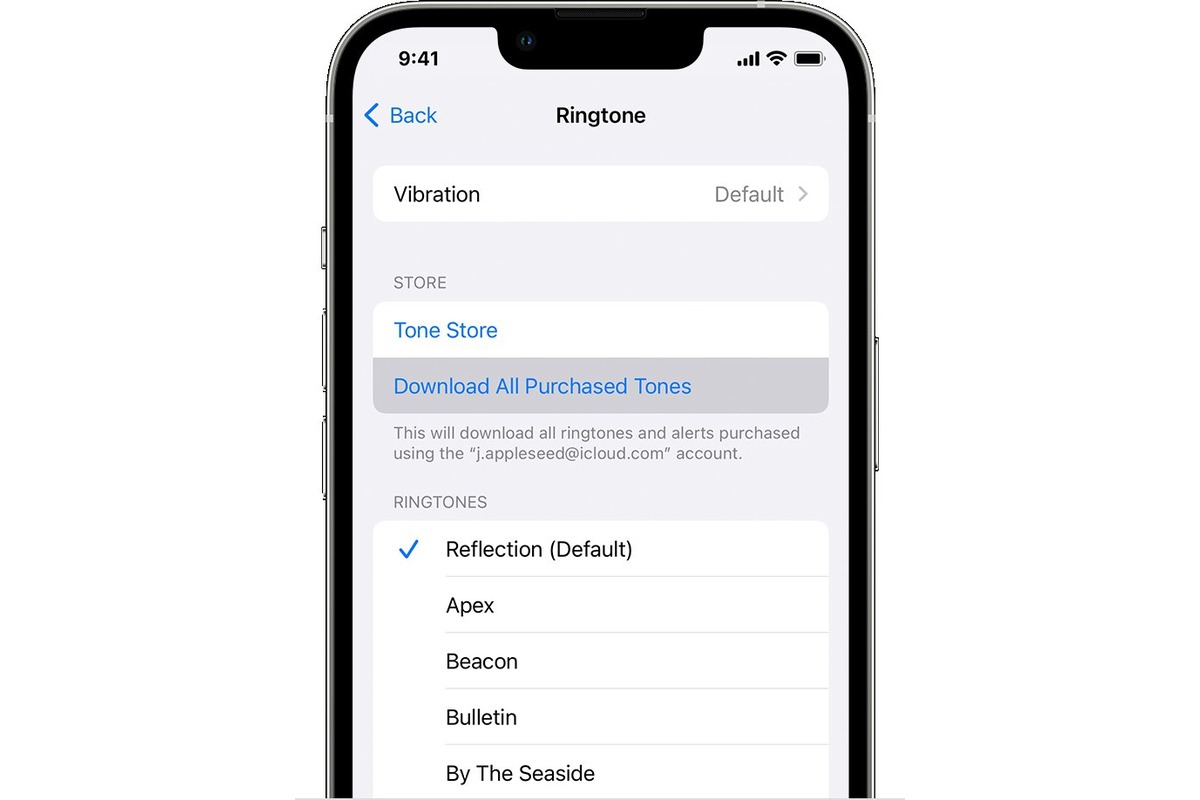
Method 3: Deleting Purchased Ringtones
If you have purchased ringtones from the iTunes Store and no longer want them on your device, follow these steps to delete them:
- Open the “Settings” app on your iPhone.
- Scroll down and tap on “Sounds & Haptics”.
- Under the “Sounds and Vibration Patterns” section, tap on “Ringtone”.
- Tap on “Download All Purchased Tones”.
- Find the purchased ringtone that you want to delete, and swipe left on it.
- Tap on the “Delete” button that appears to the right of the ringtone.
Method 4: Clearing Deleted Ringtones from iCloud
If you have deleted ringtones from your iPhone but they still appear in your iCloud storage, follow these steps to clear them:
- Open the “Settings” app on your iPhone.
- Tap on your Apple ID at the top of the screen.
- Tap on “iCloud”.
- Scroll down and tap on “Manage Storage”.
- Tap on “Backups”.
- Under the “Backup Options” section, tap on your iPhone under “This iPhone”.
- Toggle off the switch for “Ringtone” to exclude deleted ringtones from future backups.
That’s it! By following these methods, you can easily delete unwanted ringtones from your iPhone and make room for new ones. Enjoy customizing your device with your favorite tunes!
Method 1: Deleting Custom Ringtones
Deleting custom ringtones on your iPhone is a fairly straightforward process. Follow these steps to remove any unwanted custom ringtones from your device:
Step 1: Open the Settings app on your iPhone and tap on “Sounds & Haptics.”
Step 2: Scroll down and tap on “Ringtone.”
Step 3: You will see a list of all the available ringtones on your iPhone. Scroll through the list and find the custom ringtone you want to delete.
Step 4: Tap on the ringtone you wish to remove. This will open the ringtone details page.
Step 5: At the top-right corner of the screen, you will see a button with three dots. Tap on it to reveal the options menu.
Step 6: From the options menu, select “Delete from Library.” This will permanently remove the custom ringtone from your iPhone.
Step 7: A confirmation prompt will appear asking if you want to delete the ringtone. Tap on “Delete” to confirm the deletion.
That’s it! The custom ringtone has been successfully deleted from your iPhone. Repeat these steps for any other custom ringtones you wish to remove from your device.
Now, you can enjoy a clutter-free ringtone list on your iPhone without any unwanted custom ringtones taking up space.
Method 2: Removing Pre-installed Ringtones
If you want to declutter your iPhone and get rid of the pre-installed ringtones that you no longer use or find annoying, you can easily remove them. Follow these steps to remove pre-installed ringtones from your iPhone:
Step 1: Open the Settings app
Unlock your iPhone and tap on the “Settings” app icon on your home screen. It is represented by a gear-shaped icon.
Step 2: Tap on “Sounds & Haptics”
In the Settings menu, scroll down and tap on “Sounds & Haptics.” This option allows you to customize your iPhone’s sound settings.
Step 3: Tap on “Ringtone”
Under the “Sounds and Vibration Patterns” section, you will find the “Ringtone” option. Tap on it to access the list of available ringtones.
Step 4: Select the pre-installed ringtone
In the Ringtone menu, you will see a list of pre-installed ringtones. Browse through the options and select the one you want to remove.
Step 5: Tap on “Delete”
Once you have selected the pre-installed ringtone you want to delete, tap on the “Delete” option next to it. A confirmation pop-up will appear.
Step 6: Confirm the deletion
In the confirmation pop-up, tap on “Delete from My iPhone” to confirm the deletion of the pre-installed ringtone. The ringtone will be removed from your device.
Step 7: Repeat for other pre-installed ringtones
If you want to remove multiple pre-installed ringtones, you can repeat steps 4 to 6 for each one. Remove all the pre-installed ringtones you no longer want on your iPhone.
Note: Custom ringtones are not affected
It’s important to note that removing pre-installed ringtones will not affect any custom ringtones you have added to your iPhone. Only the default pre-loaded ringtones will be deleted.
By following these simple steps, you can easily remove unwanted pre-installed ringtones from your iPhone and free up space for more personalized ringtones. Customize your iPhone and make it truly your own!
Method 3: Deleting Purchased Ringtones
If you have purchased ringtones from the iTunes Store and want to clean up your iPhone by getting rid of some of them, you can easily delete them using the following steps:
1. Open the “Settings” app on your iPhone.
2. Scroll down and tap on “Sounds & Haptics” or “Sounds & Vibration Patterns” depending on your iOS version.
3. Under the “Sounds and Vibration Patterns” section, tap on “Ringtone.”
4. You will now see a list of all the ringtones available on your iPhone. Scroll down until you find the section titled “Purchased.”
5. Tap on “Purchased” to view all the ringtones you have bought from the iTunes Store.
6. Browse through the list and find the specific ringtone you want to delete. Swipe left on the ringtone to reveal the “Delete” option.
7. Tap on “Delete” to remove the selected ringtone from your iPhone.
8. A confirmation dialog will appear asking if you want to delete the ringtone. Tap on “Delete” again to confirm the deletion.
9. Repeat steps 6-8 for any other purchased ringtones you wish to remove.
By following these steps, you can easily delete any purchased ringtones that you no longer want on your iPhone. This frees up space and allows you to customize your ringtone collection according to your preferences.
Remember, deleting a purchased ringtone will not remove it from the iTunes Store. If you change your mind in the future, you can always download the ringtone again.
Method 4: Clearing Deleted Ringtones from iCloud
If you have deleted a ringtone from your iPhone but it’s still showing up on your other Apple devices, it might be because the deleted ringtone is still stored in your iCloud account. To fully remove the deleted ringtone from all your devices, you’ll need to clear it from iCloud. Follow the steps below to clear deleted ringtones from iCloud:
- On your iPhone, open the “Settings” app.
- Tap on your Apple ID at the top of the screen.
- Scroll down and select “iCloud”.
- Under the “Apps Using iCloud” section, look for “Settings” and tap on it.
- Toggle off the switch next to “Settings”. This will disable iCloud backup for the “Settings” app.
- A pop-up will appear asking if you want to keep or delete the data from your iPhone. Select “Delete from My iPhone”. This will remove all the data associated with the “Settings” app from iCloud.
- Wait for a few moments for the iCloud data to be cleared.
- Go back to the main “iCloud” screen and scroll down to the “Apps Using iCloud” section again.
- Toggle on the switch next to “Settings” to enable iCloud backup for the “Settings” app.
By following these steps, you have successfully cleared the deleted ringtones from your iCloud account. This will ensure that they are no longer available on any of your Apple devices.
It’s important to note that clearing deleted ringtones from iCloud will also remove any other data associated with the “Settings” app from iCloud. Therefore, make sure you take necessary precautions before initiating this process.
Conclusion
In conclusion, deleting an iPhone ringtone is a simple and straightforward process. Whether you have a default ringtone that you no longer like or a custom ringtone that you want to remove, the steps are easy to follow. By going into the settings of your iPhone, you can easily manage and delete your ringtone collection.
Remember, deleting a ringtone will permanently remove it from your device, so make sure to double-check before proceeding. It’s also worth noting that you can always add new ringtones to your iPhone using various methods such as purchasing from the iTunes Store, creating your own using GarageBand, or downloading from third-party websites.
With the knowledge and steps provided in this article, you can now confidently delete unwanted ringtones from your iPhone and customize your device to your liking. Enjoy exploring new ringtone options and personalizing your phone to match your style and preference.
FAQs
1. How do I delete a ringtone on my iPhone?
To delete a ringtone on your iPhone, follow these steps:
- Open the Settings app on your iPhone.
- Scroll down and tap on “Sounds & Haptics” or “Sounds & Vibration Patterns”.
- Tap on “Ringtone” or “Phone Ringtone”.
- You’ll see a list of all the available ringtones. Find the one you want to delete.
- Swipe left on the ringtone you want to delete.
- Tap on the “Delete” button.
- A confirmation message will appear. Tap on “Delete” to confirm the deletion.
2. Can I delete the pre-installed ringtones on my iPhone?
No, you cannot delete the pre-installed ringtones that come with your iPhone. These are system ringtones that are an integral part of the operating system. However, you can disable them and choose a different default ringtone or create custom ringtones of your own.
3. Will deleting a ringtone from my iPhone remove it from my iCloud account?
No, deleting a ringtone from your iPhone will not remove it from your iCloud account. iCloud synchronization does not include ringtones, so deleting a ringtone from one device will not affect other devices linked to the same iCloud account.
4. How do I delete custom ringtones that I created?
To delete custom ringtones that you created and added to your iPhone, follow these steps:
- Open the “Settings” app on your iPhone.
- Scroll down and tap on “Sounds & Haptics” or “Sounds & Vibration Patterns”.
- Tap on “Ringtone” or “Phone Ringtone”.
- Under the “RINGTONES” section, you’ll see a list of your custom ringtones. Find the one you want to delete.
- Swipe left on the ringtone you want to delete.
- Tap on the “Delete” button.
- A confirmation message will appear. Tap on “Delete” to confirm the deletion.
5. Can I recover a deleted ringtone on my iPhone?
Unfortunately, once you delete a ringtone from your iPhone, it cannot be recovered. Make sure to double-check before deleting any ringtones to avoid accidental deletion.