
Do you struggle with managing your reminders on your iPhone? With so many tasks, appointments, and to-dos to keep track of, it’s easy to feel overwhelmed. Thankfully, you can make your life easier by using tags to organize your reminders on your iPhone.
Tags are a handy feature that allows you to categorize and label your reminders, making it simple to find and prioritize them. Whether you want to separate work-related tasks from personal errands or organize your reminders by project, tags offer a flexible and efficient solution.
In this article, we will explore how to organize reminders on your iPhone using tags. We’ll guide you through the process of creating and managing tags, as well as provide tips on how to utilize them effectively. By the end, you’ll have a streamlined reminder system that helps you stay on top of your tasks and schedules effortlessly.
Inside This Article
- How to Organize Reminders on iPhone with Tags
- Understanding Tags in Reminders
- Creating Tags in Reminders
- Using Tags to Organize Reminders
- Searching and Filtering Reminders by Tags
- Managing and Editing Tags in Reminders
- Conclusion
- FAQs
How to Organize Reminders on iPhone with Tags
Are you someone who relies heavily on the Reminders app on your iPhone to keep track of tasks and appointments? Do you find yourself struggling to locate specific reminders amidst a growing list? Don’t worry, organizing your reminders has never been easier with the help of tags. In this article, we will guide you through the process of organizing your reminders on iPhone using tags.
Tags in the Reminders app serve as labels or categories that you can assign to your reminders. By assigning tags, you can group together related reminders, making it easier to find and manage them. Tags can be customized to suit your needs, allowing for a personalized and efficient organization system.
To create tags in the Reminders app, follow these simple steps:
- Open the Reminders app on your iPhone.
- Tap on the “+” icon to create a new reminder, or select an existing reminder to edit.
- In the reminder details screen, scroll down and tap on “Tags”.
- Tap on “Create New Tag” and enter a name for your tag.
- Tap on “Done” to save the tag.
Once you have created tags, you can start using them to organize your reminders. Here are a few ways you can use tags to stay organized:
- Categorize tasks: Assign specific tags to your reminders based on categories such as work, personal, shopping, or health. This allows you to easily view and prioritize tasks based on their respective categories.
- Prioritize reminders: Use tags to indicate the priority level of your reminders. For example, you can create tags like “Urgent”, “Important”, or “Low Priority” to help you focus on the most critical tasks first.
- Set location-based reminders: Tags can also be used to assign specific locations to your reminders. This way, you will receive a notification when you reach or leave a particular location, ensuring that you never miss an important task.
Searching for specific reminders using tags is a breeze on the iPhone. To do this, follow these steps:
- Open the Reminders app on your iPhone.
- Tap on the search bar at the top of the screen.
- Enter the tag name in the search bar.
- The app will display all the reminders associated with that tag.
If you want to filter reminders by multiple tags, simply enter the tag names separated by commas in the search bar.
Managing and editing tags in the Reminders app is a straightforward process. To edit or delete a tag, follow these steps:
- Open the Reminders app on your iPhone.
- Tap on the “…” button next to the tag you want to edit or delete.
- Select “Edit” to modify the tag’s name or color, or choose “Delete Tag” to remove it completely.
With the ability to organize reminders using tags, you can now keep track of your tasks and appointments more efficiently. Customizing and utilizing tags in the Reminders app will undoubtedly declutter your to-do lists and improve overall productivity. Stay organized and stay ahead!
Understanding Tags in Reminders
Tags in reminders are a powerful way to categorize and organize your tasks on your iPhone. These tags act as labels that you can assign to your reminders, making it easier to find and manage them later.
By using tags, you can create custom categories for your reminders, such as work, personal, shopping, or any other system that suits your needs. This helps to declutter your reminders list and enables you to focus on specific tasks or areas of your life.
Tags provide a flexible and versatile way to identify and group related reminders. Unlike folders or lists, which often have strict hierarchical structures, tags allow for multiple associations. This means that a single reminder can be assigned multiple tags, enabling it to appear in different contexts and categories.
For example, if you have a reminder to buy groceries and you want to categorize it under both “Personal” and “Shopping,” you can simply assign both tags to the reminder. This way, when you view your reminders by tags, it will appear under both categories.
Understanding how tags work in reminders is essential to harnessing the full potential of this organization tool on your iPhone. By utilizing tags effectively, you can streamline your task management process and stay on top of your commitments.
Creating Tags in Reminders
Tags are a powerful tool in the Reminders app that allows you to categorize and organize your tasks with ease. Creating tags in Reminders is a simple process that can be done within the app itself. Here’s how you can create tags to streamline your task management:
Step 1: Open the Reminders App
To begin creating tags, open the Reminders app on your iPhone. The app has a distinctive icon with a white checkbox on a blue background.
Step 2: Create a New Reminder
In order to create a tag, you must first create a new reminder. Tap the “+” button at the bottom right corner of the app to add a new reminder.
Step 3: Tap on the Tag Field
Once you’ve created a new reminder, you’ll see a field labeled “Tag” at the bottom. Tap on this field to proceed with creating a new tag.
Step 4: Add a New Tag
In the tag field, you’ll be able to see a list of existing tags or create a new one. To create a new tag, tap on the “Add Tag” option.
Step 5: Name Your Tag
A pop-up window will appear, allowing you to enter a name for your new tag. Choose a name that best represents the category or theme you want to assign to your reminders.
Step 6: Save Your Tag
Once you’ve named your tag, tap the “Save” button. Your new tag will be created and ready to be assigned to reminders.
Repeat the above steps to create multiple tags based on your organizational needs. You can create tags for different projects, priorities, or any other criteria you prefer.
When creating tags, keep in mind that they are not case-sensitive, which means “Work” and “work” will be treated as the same tag. However, it’s a good practice to use consistent naming conventions for better organization.
With your tags created, you’re now ready to use them in organizing your reminders effectively. As you continue using the Reminders app, you’ll find that tags can greatly enhance your task management experience.
Using Tags to Organize Reminders
Tags are a powerful tool in the Reminders app that can help you stay organized and efficiently manage your tasks on your iPhone. By assigning tags to your reminders, you can easily group them together based on categories, projects, or any other criteria that suits your needs. Here are some tips on how to use tags effectively to organize your reminders:
1. Assign Relevant Tags: When creating a new reminder, make sure to assign relevant tags to it. Think about the category or project it belongs to and choose tags accordingly. For example, if you have a reminder for a work-related task, you can assign tags like “work,” “project X,” or “deadline.”
2. Use Multiple Tags: Don’t limit yourself to just one tag per reminder. You can assign multiple tags to a single reminder to make it easier to find and filter later on. For instance, if you have a reminder that involves both work and personal tasks, you can assign the tags “work” and “personal” to it.
3. Create Hierarchies with Tags: You can create hierarchies within your tags to further organize your reminders. For example, you can have a parent tag called “Personal” and create child tags like “Groceries,” “Fitness,” or “Appointments.” This way, you can quickly filter your reminders based on specific areas of your personal life.
4. Color-Code Your Tags: To visually distinguish between different tags, you can assign colors to them. This makes it easier to identify and differentiate tasks at a glance. Simply go to the Reminders app, tap on a tag, and select a color to assign to it.
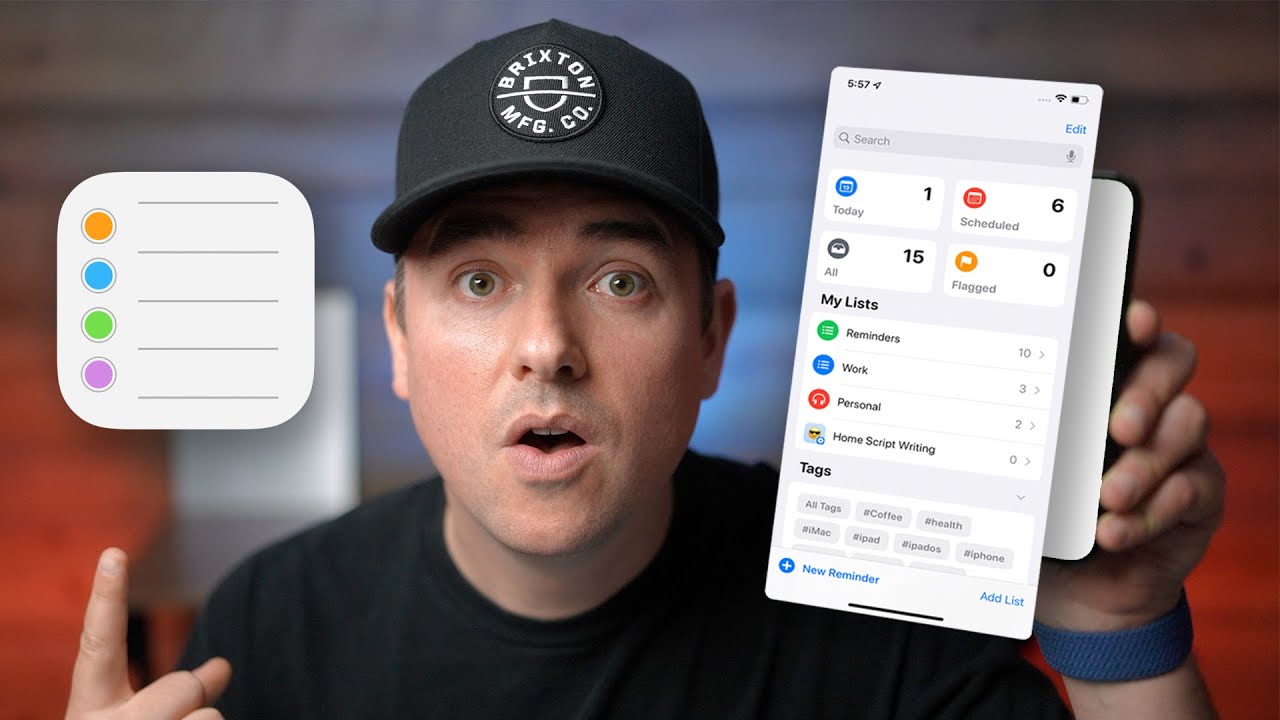
5. Sort and Group Reminders by Tags: Once you have assigned tags to your reminders, you can use the “Tags” view in the Reminders app to see all your tags and the corresponding reminders grouped together. This gives you a clear overview of your tasks based on different categories or projects.
6. Filter Reminders using Tags: To narrow down your focus and view only specific types of tasks, you can filter reminders by tags. Tap on the “Filter” button in the Reminders app, and select the tags you want to filter by. This helps in decluttering your task list and focusing on what matters most at any given time.
7. Customize Your Tags: You can customize your tags by renaming them, changing their colors, or deleting them if they are no longer needed. This flexibility allows you to adapt your tagging system as your needs evolve and ensure that your reminders remain organized and relevant.
By utilizing tags effectively in the Reminders app, you can streamline your task management process and stay on top of your priorities. Whether it’s for work, personal projects, or any other aspect of your life, tags provide a flexible and intuitive way to organize and access your reminders with ease.
Searching and Filtering Reminders by Tags
When you have a large number of reminders saved on your iPhone, finding a specific one can be a challenge. However, with the help of tags, you can easily search for and filter your reminders based on specific categories or keywords. Let’s explore how you can effectively search and filter reminders by tags.
To begin, open the Reminders app on your iPhone and tap on the search bar at the top of the screen. Enter the tag you want to search for in the search field. As you type, the app will display a list of suggested tags based on the ones you have created. Tap on the desired tag from the list to filter your reminders.
Once you have filtered your reminders using a specific tag, only the reminders associated with that tag will be displayed on your screen. This makes it easier to focus on the relevant reminders and disregard the rest.
If you want to filter your reminders by multiple tags, you can do so by entering the tags one by one in the search field. The app will display the reminders that have all the specified tags, helping you narrow down your search further.
Another way to search and filter reminders by tags is by using the “Show All” option in the app’s sidebar. To access this option, tap on the three horizontal lines located at the top-left corner of the Reminders app. From the sidebar that appears, tap on “Show All.” This will display all your tags in a list format.
To filter your reminders using this method, simply tap on the desired tag from the list. The app will instantly filter your reminders and display only the ones associated with that tag.
If you can’t find a specific tag or want to create a new one, you can do so by tapping on the “+” icon located next to the search bar. This will open the tag list, and you can either select an existing tag or create a new one by tapping on “Add New Tag.”
By effectively utilizing tags in the Reminders app, you can easily search for and filter your reminders, making it simpler to stay organized and on top of your tasks and schedule.
Managing and Editing Tags in Reminders
Once you have created tags in your Reminders app on iPhone, you may need to manage and edit them from time to time. Here are some important tips to help you effectively manage and edit your tags:
1. Deleting Tags: If you no longer need a specific tag, you can easily delete it. To do so, open the Reminders app on your iPhone and go to the “Tags” section. Swipe left on the tag you want to delete and tap on the “Delete” button that appears. Confirm the deletion when prompted, and the tag will be removed from your Reminders app.
2. Renaming Tags: If you want to change the name of a tag, you can easily do it in the Reminders app. Simply go to the “Tags” section, tap on the tag you want to rename, and then tap on the “Edit” button. Update the name of the tag, and tap on “Done” to save your changes. The tag will now have the new name you provided.
3. Changing Tag Colors: By default, tags in the Reminders app have different colors assigned to them. However, if you want to change the color of a specific tag to make it more visually appealing or distinguishable, you can do that too. Tap on the tag in the “Tags” section, tap on the “Edit” button, and then choose a new color from the available options. The tag will now appear in the selected color throughout the Reminders app.
4. Assigning Tags to Multiple Reminders: If you have several reminders that you want to assign to the same tag, you don’t have to do it individually. Simply go to the “Reminders” section, select the reminders you want to assign the tag to by tapping on their checkboxes, and then tap on the “Tag” button at the bottom of the screen. Choose the desired tag from the list, and all the selected reminders will be tagged accordingly.
5. Removing Tags from Reminders: If you want to remove a tag from a specific reminder, open the reminder and tap on the “Tag” button. In the tag list that appears, find the tag you want to remove and tap on it to deselect it. The tag will be removed from that particular reminder, but it will still be available in the “Tags” section for other reminders.
6. Changing Tag Order: To change the order in which your tags appear in the Reminders app, go to the “Tags” section and tap on the “Edit” button. Then, use the drag handle on the right side of each tag to rearrange their order. Once you are satisfied with the new order, tap on “Done” to save the changes. The tags will now be displayed in the updated order throughout the app.
By effectively managing and editing your tags in the Reminders app on iPhone, you can stay organized and make it easier to find and filter your reminders based on specific categories or themes. Experiment with different colors and names for your tags to further personalize your Reminders app and enhance your productivity.
Conclusion
In conclusion, organizing reminders on your iPhone using tags is a powerful and efficient way to stay on top of your tasks and commitments. By assigning relevant tags to your reminders, you can easily categorize and filter them based on different criteria. Whether you need to prioritize work-related tasks, keep track of personal errands, or manage your hobbies and interests, using tags allows you to customize your reminder system to fit your unique needs.
With the help of the Reminders app on your iPhone, you can create, edit, and organize your reminders with ease. By utilizing the tags feature, you can bring further structure and organization to your reminders, helping you better manage your time and stay organized.
So next time you find yourself overwhelmed with a growing to-do list, remember to harness the power of tags to keep your reminders neatly organized and easily accessible. Embrace the efficiency and convenience of tagging and take your iPhone reminder system to the next level.
FAQs
1. Can I organize reminders on my iPhone using tags?
Yes, you can. The latest versions of iOS allow you to organize reminders by adding tags to them. This feature allows you to easily categorize and sort your reminders, making it simpler to manage your tasks and stay organized.
2. How do I add tags to my reminders on iPhone?
To add tags to your reminders on iPhone, follow these steps:
– Open the Reminders app on your iPhone.
– Tap on the reminder you want to add a tag to.
– Tap on the “i” icon next to the reminder.
– Scroll down and tap on the “Add Tag” option.
– Select the tag you want to assign to the reminder or tap on the “+” icon to create a new tag.
– Tap on “Done” to save the changes.
Now, your reminder will be tagged accordingly.
3. Can I create custom tags for my reminders?
Yes, you can create custom tags for your reminders. When you tap on the “Add Tag” option in the Reminders app, you can select the “+” icon to create a new tag. You can then enter the name of the tag and choose a color to distinguish it. Custom tags allow you to personalize your organization system and better manage your tasks.
4. How can I search for reminders by tags?
To search for reminders by tags on iPhone, you can follow these steps:
– Open the Reminders app on your iPhone.
– Tap on the search bar at the top of the screen.
– Type the name of the tag you want to search for.
– Reminders with the matching tag will be displayed, making it easier to find and manage them.
This feature is particularly useful when you have multiple reminders and need to quickly locate specific ones based on their tags.
5. Can I view all my reminders grouped by tags?
Yes, you can view all your reminders grouped by tags in the Reminders app on your iPhone. To do this, follow these steps:
– Open the Reminders app on your iPhone.
– Tap on “All” in the top-left corner to view your reminders.
– Tap on the “Options” icon (three dots) in the top-right corner.
– Select “Sort By” and choose “Tags”.
– Your reminders will now be grouped by tags, allowing you to easily visualize and manage them based on their categories.
This feature is helpful when you want to have a comprehensive overview of your reminders and prioritize your tasks effectively.