
Are you tired of scrolling through endless albums in your iPad or iPhone Photos app? Do you wish there was an easier way to rearrange and organize your photos? Well, you’re in luck! In this article, we’ll show you how to effectively rearrange and organize albums in the Photos app on your iPad and iPhone. With a few simple steps, you’ll be able to easily find and access your favorite memories without the hassle of searching through a jumbled mess of albums. Whether you want to create new albums, rename existing ones, or rearrange the order of your albums, we’ve got you covered. So, let’s get started and take control of your photo organization like a pro!
Inside This Article
- Rearranging Albums in the Photos App
- Organizing Albums in the Photos App
- Creating New Albums in the Photos App
- Conclusion
- FAQs
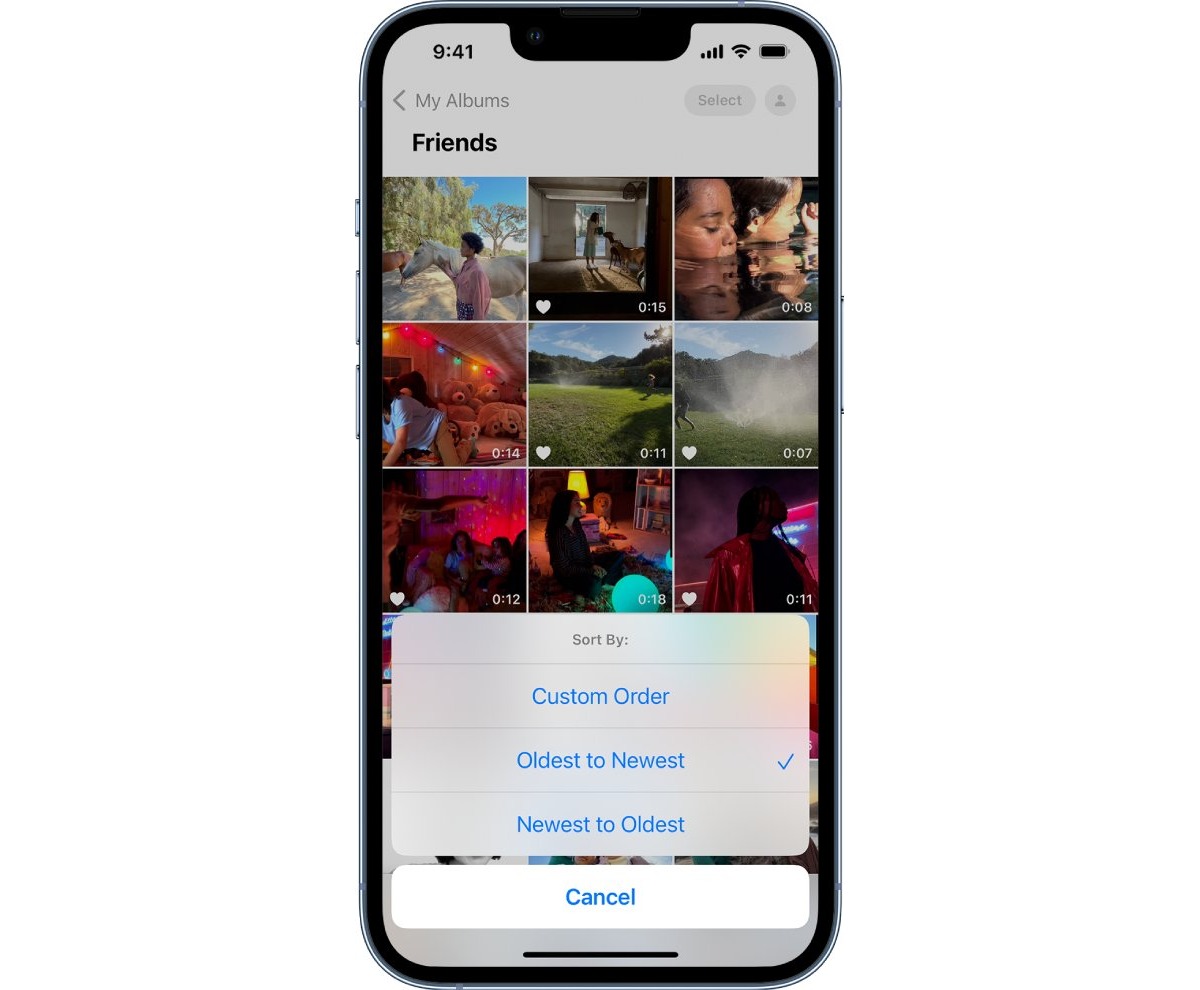
Rearranging Albums in the Photos App
The Photos app on your iPad or iPhone allows you to easily organize and rearrange your albums to suit your preferences. Whether you want to group your photos by event, location, or theme, the Photos app provides a user-friendly interface to help you keep your albums in order.
To rearrange albums in the Photos app, simply follow these steps:
- Open the Photos app on your iPad or iPhone.
- Tap on the “Albums” tab at the bottom of the screen.
- Find the album you want to rearrange and tap on it to open it.
- Once inside the album, tap on the “Select” button at the top right corner of the screen.
- You will now see all the photos in the album with a selection circle on each one.
- Tap and hold on a photo, then drag it to the desired position within the album.
- Continue dragging and rearranging the photos until you are satisfied with the new order.
- Tap on the “Done” button to save your changes.
It’s as simple as that! You can now easily rearrange your albums in the Photos app to keep them organized in a way that makes sense to you.
Organizing Albums in the Photos App
The Photos app on your iPad and iPhone offers a convenient way to keep your photo library organized by allowing you to create and organize albums. With just a few simple steps, you can manage your albums and find specific photos easily. Here are some helpful tips to effectively organize your albums in the Photos app:
1. Create Folders: To keep your albums well-organized, you can create folders to group similar albums together. To create a folder, tap on the “Albums” tab at the bottom of the Photos app, then tap the “Add” button at the upper-right corner. Select “New Folder” and give it a name. You can then drag and drop existing albums into the folder.
2. Rearrange Albums: You have the flexibility to rearrange the order of your albums to suit your preferences. Simply tap on the “Edit” button in the top-right corner of the Albums tab. Drag the albums up or down to rearrange them. Once you’re satisfied with the order, tap “Done” to save the changes.
3. Rename Albums: If you want to give your albums more descriptive names or modify existing ones, you can easily do so. Tap on the “Albums” tab, then enter the “Edit” mode. Tap on the album you want to rename, and a text field will appear. Type in the new name, and tap “Done” to save the changes.
4. Add or Remove Photos: You can add or remove photos from an album to keep it up to date. Tap on the album you want to modify, then tap the “Select” button in the top-right corner. To add photos, tap on them, and you will see a blue checkmark appear. To remove photos, tap on the selected photos, and the checkmark will disappear. Tap “Done” to save your changes.
5. Hide or Unhide Albums: If you want to hide certain albums from the main view, you can do so by tapping on the “Albums” tab, entering the “Edit” mode, and toggling the switch next to the album you want to hide. The hidden albums will remain accessible but won’t be displayed in the main view.
6. Delete Albums: To remove albums that you no longer need, tap on the “Albums” tab, enter the “Edit” mode, and tap the red minus icon next to the album you want to delete. Confirm the deletion by tapping the “Delete” button that appears. Note that deleting an album will not delete the photos inside it.
7. Search for Specific Photos: The Photos app allows you to search for specific photos within your albums. Simply tap on the “Search” tab at the bottom of the app, enter a keyword or person’s name, and the app will display relevant photos from your collection.
By taking advantage of these organizing features in the Photos app, you can easily manage and access your albums on your iPad and iPhone. Whether you want to rearrange albums, create folders, or add and remove photos, the Photos app provides you with the tools you need to keep your photo library well-organized and easily accessible.
Creating New Albums in the Photos App
One of the great features of the iPad and iPhone Photos app is the ability to create new albums. Whether you want to organize your photos by event, location, or theme, creating albums can help you keep your photos neatly sorted and easily accessible. Here’s how you can do it:
1. Open the Photos app on your iPad or iPhone.
2. Tap on the “Albums” tab at the bottom of the screen. This will bring up a list of all your existing albums.
3. Tap on the “Edit” button in the top-right corner of the screen.
4. Now, tap on the “Add” button, which looks like a plus sign (+).
5. You will be prompted to enter a name for your new album. Type in a descriptive name that will help you easily identify its content.
6. Once you’ve entered the name, tap on the “Save” button.
7. Now, you can start adding photos to your new album. Tap on the “Albums” tab to go back to the list of albums.
8. Find the photo you want to add to your new album and tap on it to open it.
9. Tap on the share button, which looks like a square with an arrow pointing up.
10. From the share menu, tap on the “Add to Album” option.
11. A list of your albums will appear. Tap on the new album you just created.
12. The photo will now be added to your new album.
13. Repeat steps 8-12 to add more photos to your new album.
Creating new albums in the Photos app is a quick and easy way to keep your photos organized. Whether you want to create albums for special occasions, travel destinations, or specific subjects, the Photos app provides a seamless and convenient way to do so.
Conclusion
In conclusion, rearranging and organizing albums in the iPad and iPhone Photos app is a simple yet powerful way to keep your photo collection neat and easily accessible. Whether you want to group photos by theme, event, or any other criteria, the Photos app offers a user-friendly interface and intuitive tools to help you achieve your desired organization.
By following the step-by-step guide outlined in this article, you can effortlessly create, rename, delete, and rearrange albums to suit your personal preferences. Take advantage of the powerful features offered by the Photos app to effectively manage and enjoy your digital memories.
No more scrolling through endless lists or spending hours searching for a specific photo. With the ability to organize and customize your albums, you can now effortlessly navigate through your collection and quickly find the images you’re looking for.
Embrace the power of organization and leverage your iPad or iPhone with the Photos app to create a well-structured and visually pleasing photo library that you can proudly share with others.
FAQs
1. Can I rearrange and organize my photo albums in the iPad and iPhone Photos app?
Yes, you can rearrange and organize your photo albums in the iPad and iPhone Photos app. The app allows you to rearrange the order of your albums and even create new ones to keep your photos organized and easily accessible.
2. How can I rearrange the order of my photo albums?
To rearrange the order of your photo albums, you can follow these steps:
1. Open the Photos app on your iPad or iPhone.
2. Tap on the “Albums” tab at the bottom of the screen.
3. Scroll down and find the album you want to move.
4. Long-press on the album until it becomes draggable.
5. Drag the album to the desired position among your albums.
6. Release your finger to drop the album in its new position.
7. Repeat these steps for any other albums you want to rearrange.
3. Can I create new photo albums in the iPad and iPhone Photos app?
Absolutely! Creating new photo albums is a great way to further organize your photos. To create a new album, simply follow these steps:
1. Open the Photos app on your iPad or iPhone.
2. Tap on the “Albums” tab.
3. Scroll down and tap on the “Edit” button in the top right corner of the screen.
4. Tap on “Add Album” to create a new album.
5. Enter a name for your new album and tap on “Save” or “Done”.
6. You can then add photos to your newly created album by selecting them and tapping on the “Add” button.
4. Is it possible to delete photo albums in the iPad and iPhone Photos app?
Yes, you can delete photo albums in the iPad and iPhone Photos app. To do so, follow these steps:
1. Open the Photos app on your iPad or iPhone.
2. Tap on the “Albums” tab.
3. Scroll down and find the album you want to delete.
4. Swipe left on the album name to reveal the “Delete” button.
5. Tap on “Delete” to confirm the deletion of the album.
Note: Deleting an album will not delete the photos contained within it. The photos will still be accessible in the “Photos” tab.
5. Can I rearrange and organize my photos within a specific album?
Unfortunately, the iPad and iPhone Photos app does not currently offer the capability to rearrange and organize photos within a specific album. However, you can sort the photos within an album by tapping on the “Photos” tab, selecting the album, and then tapping on the “All Photos” or “Recently Added” option at the top of the screen. This will arrange the photos in chronological order, making it easier to navigate and find specific images.