
Are you looking to record high-quality audio on your iPhone? Whether you’re a podcaster, musician, journalist, or simply want to capture crystal-clear sound for personal use, the iPhone offers a plethora of options for recording audio. With its powerful internal microphones and an array of apps available, your iPhone can be transformed into a portable recording studio. In this article, we will explore the various methods and tools that can help you record audio on your iPhone with ease. From the built-in Voice Memos app to third-party recording apps, we will cover everything you need to know to start capturing professional-grade audio on your iPhone. So, grab your iPhone and let’s dive into the world of audio recording!
Inside This Article
- Setting up the iPhone’s built-in Voice Memos app
- Using third-party recording apps from the App Store
- Adjusting audio settings for optimal recording quality
- Tips and tricks for recording high-quality audio on iPhone
- Conclusion
- FAQs
Setting up the iPhone’s built-in Voice Memos app
Recording audio on your iPhone can be incredibly convenient, whether you need to capture a lecture, interview, or even just a quick voice note. Luckily, Apple has made it simple with the built-in Voice Memos app. Here’s how to set it up and start recording:
- Locate the Voice Memos app: The Voice Memos app comes pre-installed on all iPhones. It typically appears on the Home screen, but if you can’t find it, swipe down on the Home screen and use the Search bar to locate it.
- Open the app: Tap on the Voice Memos icon to launch the app.
- Allow access to microphone: When you open the app for the first time, you may be prompted to grant permissions for the app to access your device’s microphone. Tap “OK” to allow access.
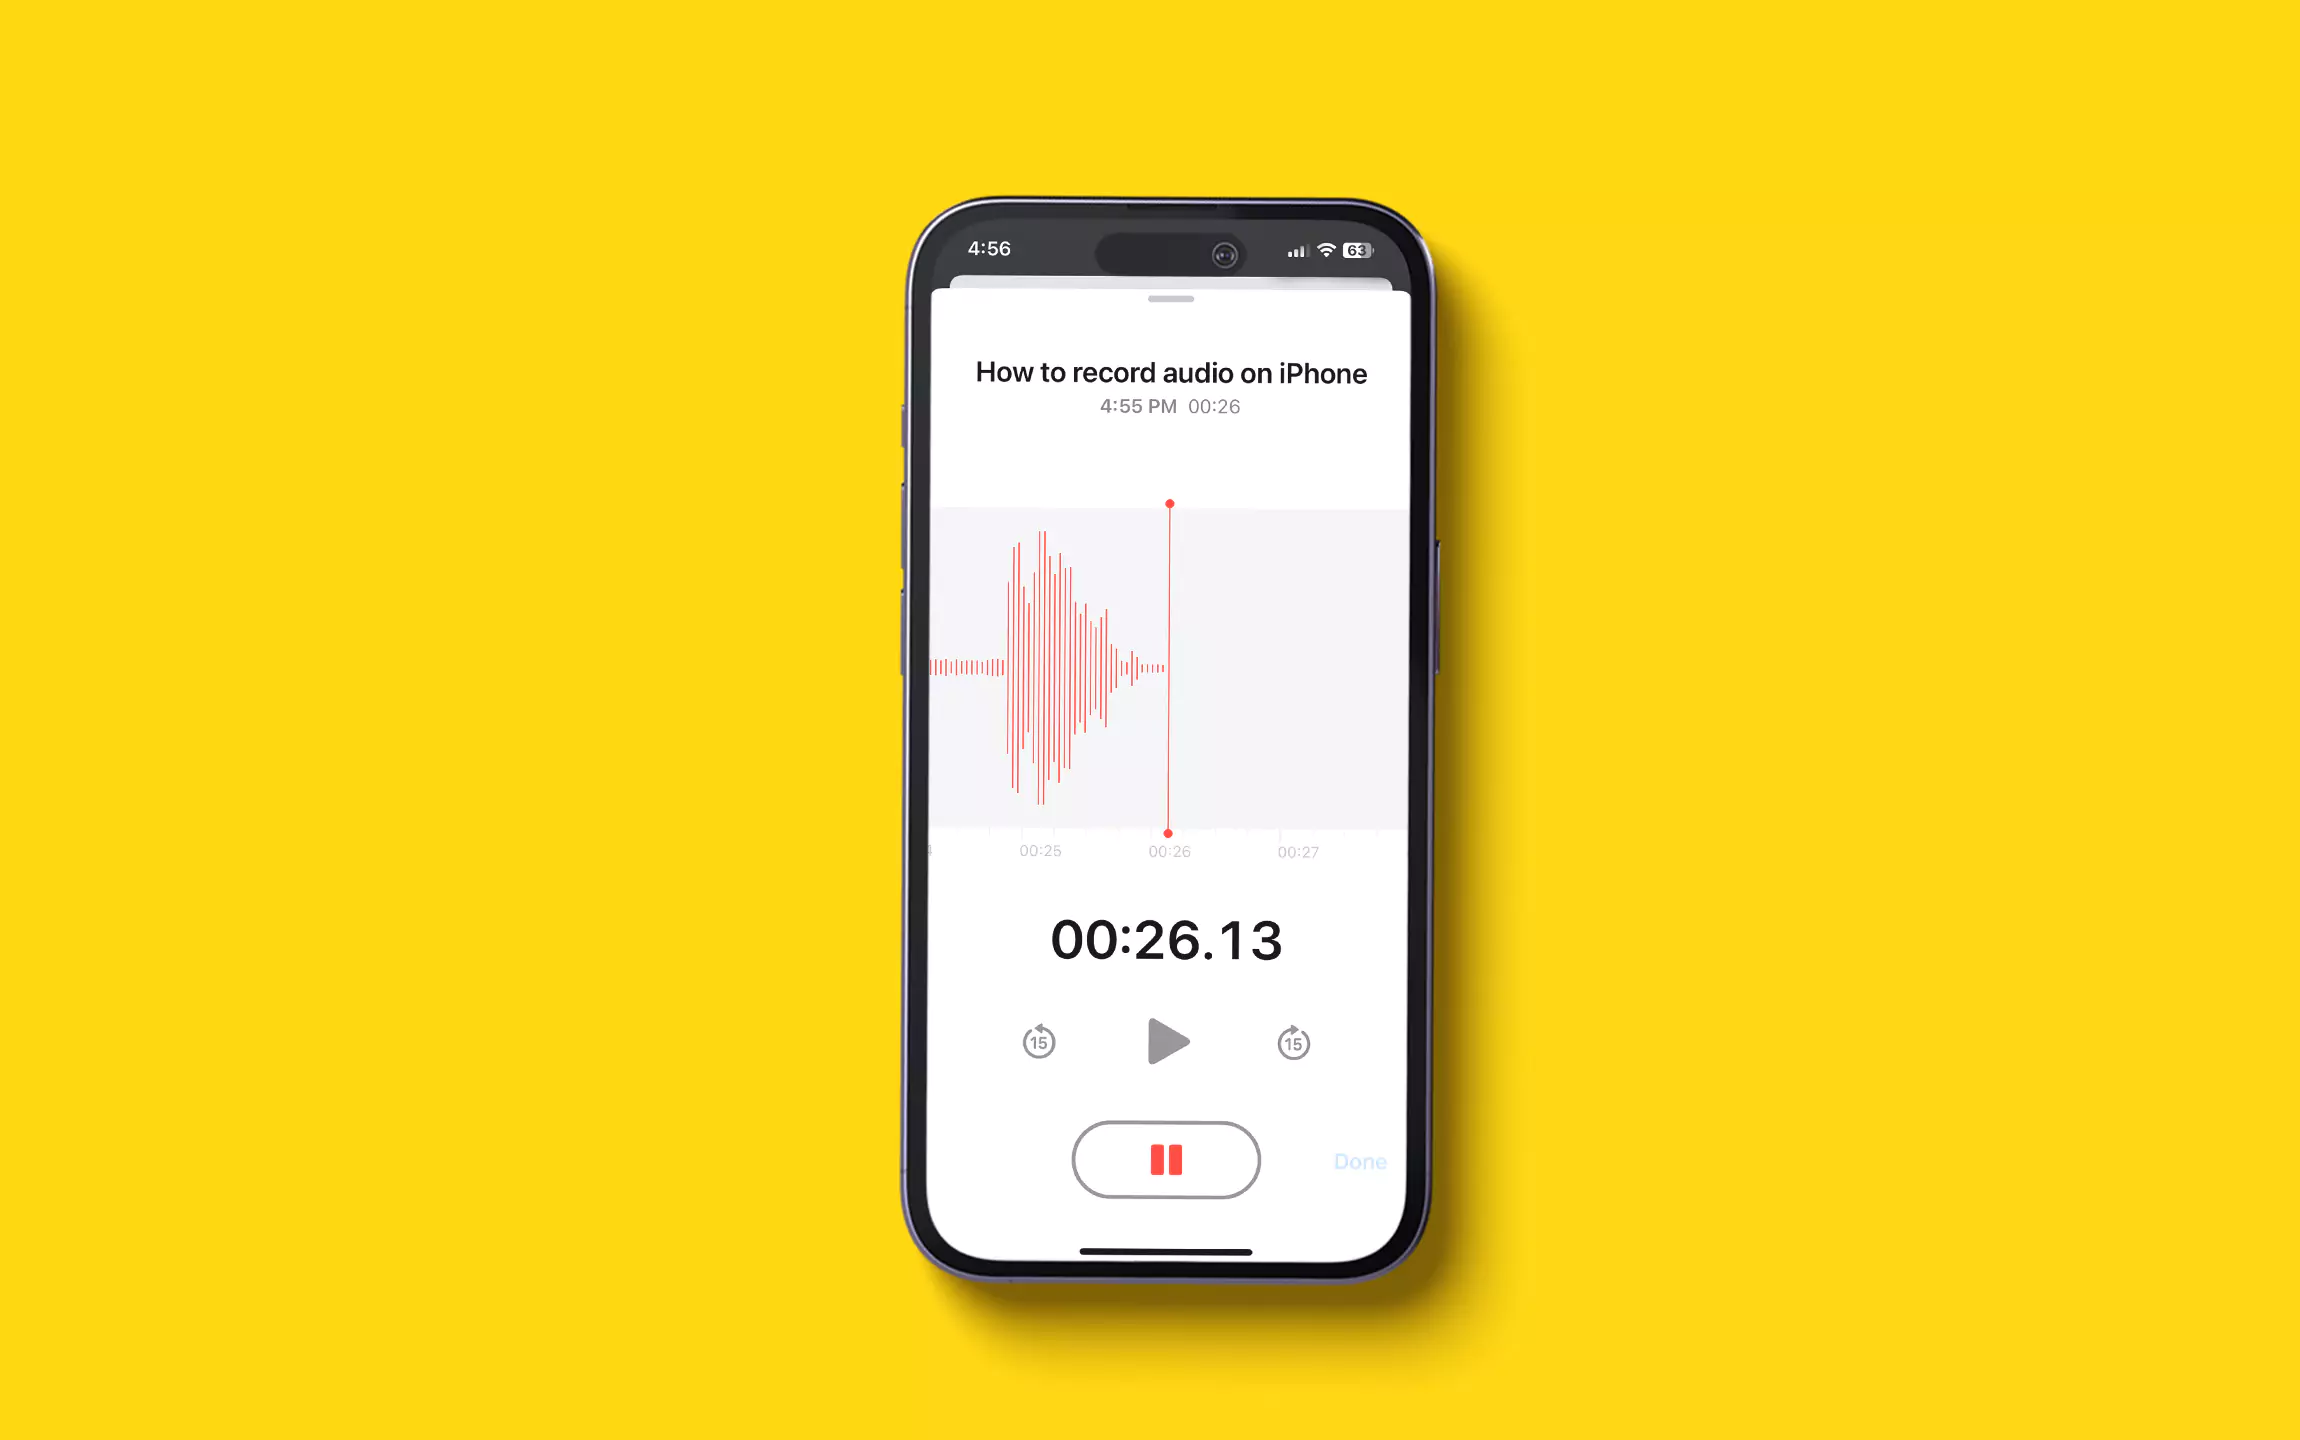
- Explore the app interface: Once inside the Voice Memos app, you’ll notice a simple interface with a big red button at the bottom. This is the button you will use to start and stop your recordings.
- Start recording: To begin recording, simply tap the red button. The app will start recording your audio. You will see a waveform representation on the screen to indicate that the recording is in progress. You can also use the volume buttons on the side of your iPhone to adjust the recording volume.
- Pause or stop recording: To pause the recording, tap the pause button (which appears as two vertical lines). To stop the recording completely, tap the red button again. The app will then automatically save your recording.
- Access your recordings: All your recordings will be saved within the Voice Memos app. To access them, simply open the app again, and you will see a list of all your recorded audio files. Tap on a recording to play it back.
- Share or manage recordings: You can easily share your recordings by tapping the share icon next to each file. This allows you to send the recording via text message, email, or any other compatible app on your iPhone. If you want to delete a recording, swipe left on the file and tap “Delete”.
- Organize your recordings: To keep your recordings organized, you can create folders within the Voice Memos app. Simply tap the folder icon in the top-right corner and choose “New Folder”. Give the folder a name and drag and drop recordings into it.
- Sync your recordings: If you have multiple Apple devices, you can sync your Voice Memos recordings across all of them using iCloud. Simply enable “Voice Memos” in your iCloud settings, and your recordings will be accessible on all your devices with the Voice Memos app.
With the iPhone’s built-in Voice Memos app, recording audio has never been easier. Whether you’re a student, journalist, or simply someone who likes to capture important moments, this app is a handy tool to have. Start recording and let your voice be heard!
Using third-party recording apps from the App Store
While the built-in Voice Memos app on the iPhone is a convenient option for recording audio, there are also several third-party recording apps available on the App Store that offer additional features and functionalities. These apps can provide more advanced recording options and editing capabilities, allowing you to customize and enhance your audio recordings. Here are some steps to help you get started with using third-party recording apps on your iPhone:
- Choose the right app: There are numerous recording apps available on the App Store, so it’s important to find one that suits your specific needs. Look for apps with high ratings and positive reviews, as well as features that align with your recording requirements.
- Download and install the app: Once you find the recording app you want to use, simply tap the “Get” or “Download” button on the App Store to install it on your iPhone. Make sure you have a stable internet connection to ensure a smooth download and installation process.
- Grant necessary permissions: After installing the app, you may need to grant it certain permissions to access your microphone, storage, or other features on your iPhone. These permissions are typically requested upon launching the app for the first time. Grant the necessary permissions to ensure the app functions properly.
- Explore the app’s features: Once you launch the recording app, take some time to familiarize yourself with its various features and settings. Many apps offer different recording modes, such as stereo or mono, as well as the ability to adjust the audio quality and format. Experiment with different settings to find what works best for your recording needs.
- Start recording: To begin recording audio, locate the “Record” or “Start” button within the app’s interface. Tap the button to initiate the recording. Some apps may also offer options to pause, resume, or stop the recording as needed.
- Save and manage recordings: Once you have finished recording, the app will typically prompt you to save the audio file. Choose a suitable name and location to save your recording. Most recording apps also provide options to rename, delete, or organize your recordings for easy access in the future.
- Additional editing and sharing: Depending on the app you are using, you may have access to additional editing tools to enhance your recordings. This can include features such as trimming, adjusting volume levels, adding effects, or even merging multiple recordings. Once you are satisfied with the edits, you can choose to share your recordings via email, messaging apps, or social media platforms.
Exploring third-party recording apps from the App Store can open up a world of possibilities when it comes to recording audio on your iPhone. Whether you are a musician, journalist, podcaster, or simply someone who enjoys capturing moments in high-quality audio, these apps can help you achieve professional-grade recordings with ease.
Adjusting audio settings for optimal recording quality
When it comes to recording audio on your iPhone, achieving optimal sound quality is crucial. Thankfully, there are a few settings you can adjust to ensure the best recording experience.
1. Adjust the microphone sensitivity: Your iPhone’s microphone sensitivity can greatly impact the quality of your recordings. To adjust this setting, go to Settings > Control Center > Customize Controls. From there, add the “Microphone” option to your Control Center. Now, when you open Control Center, you’ll see a microphone icon. Tap on it and adjust the microphone sensitivity slider to your preference.
2. Enable background noise reduction: Background noise can be a nuisance when recording audio. Fortunately, many iPhone models come equipped with background noise reduction capabilities. To enable this feature, navigate to Settings > Accessibility > Audio/Visual > Phone Noise Cancellation. Toggle the switch to the “On” position to reduce background noise during your recordings.
3. Ensure proper microphone placement: The placement of your iPhone’s microphone can significantly affect the audio quality. When recording, position the microphone close to the sound source, ensuring that it’s clear of obstructions. If you’re using an external microphone, follow the manufacturer’s instructions for optimal positioning.
4. Use headphones as a microphone: In situations where you don’t have access to an external microphone, you can use your iPhone’s headphones as a makeshift microphone. Simply plug in your headphones and use the inline microphone to record your audio. This can help improve the sound quality, especially in noisy environments.
5. Avoid tapping or covering the microphone: During recording, it’s crucial to avoid tapping or covering the microphone area. Tapping can cause unwanted distortion, and covering the microphone can muffle the sound. So, be mindful of your hand placement and handle the device with care to ensure clear and undistorted recordings.
By following these tips and adjusting your iPhone’s audio settings, you can significantly enhance the quality of your recorded audio. Whether you’re capturing interviews, lectures, or musical performances, these optimizations will help you achieve professional-grade recordings.
Wrap ‘Tips and tricks for recording high-quality audio on iPhone’ by
.
Tips and tricks for recording high-quality audio on iPhone
Recording high-quality audio on your iPhone can make a significant difference in the clarity and professionalism of your recordings. Whether you’re capturing a lecture, conducting interviews, or recording a podcast, implementing these tips and tricks will help you achieve the best audio quality possible.
- Choose a quiet location: Before you start recording, find a quiet environment with minimal background noise. This will ensure that unwanted sounds do not interfere with the main audio you want to capture.
- Position the microphone correctly: The iPhone has multiple built-in microphones located at different locations. When recording audio, make sure to position the device appropriately to optimize the microphone’s pick-up capabilities. If possible, point the bottom microphone towards the sound source for clearer audio.
- Reduce external noise: To eliminate or minimize external noise, consider using headphones with a built-in microphone or an external microphone specifically designed for iPhones. These accessories can help you block out unwanted noise and capture clearer audio.
- Monitor audio levels: Keeping an eye on the audio levels while recording can help you avoid distortion or clipping. The Voice Memos app and many third-party recording apps provide visual indicators showing the volume levels. Aim for a healthy balance between capturing a strong signal without overloading the recording.
- Experiment with different recording apps: While the built-in Voice Memos app is sufficient for most recording needs, there are numerous third-party recording apps available on the App Store. These apps often provide additional features and customization options, allowing you to fine-tune your recordings for optimal audio quality.
- Consider using an external microphone: For professional-grade recordings, investing in an external microphone can significantly enhance the audio quality. There are various options available, including clip-on lavalier microphones, portable USB microphones, and wireless microphone systems specifically designed for iPhones.
- Use a pop filter: When recording vocals or spoken word, a pop filter can be a valuable addition to your setup. This accessory helps reduce plosive sounds caused by bursts of air hitting the microphone. By minimizing these unwanted sounds, your recording will sound more polished and professional.
- Edit and enhance your recordings: After capturing your audio on the iPhone, take advantage of editing apps or software to further enhance the quality. You can remove background noise, adjust levels, and add effects to make your recordings sound more polished and professional.
With these tips and tricks in mind, you can now confidently record high-quality audio on your iPhone. Whether you’re capturing important moments or creating content, these techniques will help you achieve the best possible sound.
Conclusion
Recording audio on your iPhone is a convenient and versatile feature that can be used for a variety of purposes. Whether you want to capture a memorable moment, conduct interviews, create podcasts, or simply take voice notes, the built-in audio recording capabilities of the iPhone make it effortless.
By following the steps outlined in this article, you can easily record high-quality audio on your iPhone using either the Voice Memos app or third-party recording apps from the App Store. Additionally, you can enhance your recordings by using external microphones and making use of various settings, such as adjusting input gain and minimizing background noise.
Remember to always respect privacy and obtain consent when recording audio of others. Furthermore, be mindful of the storage capacity of your iPhone and regularly back up your recordings to prevent data loss.
With the ability to record audio at your fingertips, the iPhone becomes a powerful tool for capturing and preserving important moments. So go ahead and unleash your creativity with audio recording on your iPhone!
FAQs
Q: Can I record audio on my iPhone?
A: Yes, iPhones come with a built-in Voice Memos app that allows you to record audio directly on your device.
Q: How do I access the Voice Memos app on my iPhone?
A: To access the Voice Memos app, simply tap on the app icon on your device’s home screen. It usually has a white icon with a soundwave symbol on it.
Q: Can I record audio during a phone call on my iPhone?
A: No, it is not possible to record audio during a phone call using the built-in Voice Memos app. However, third-party apps are available on the App Store that offer call recording functionality.
Q: How do I start recording audio on my iPhone?
A: To start recording audio on your iPhone using the Voice Memos app, open the app and tap on the red record button. Speak or capture the desired audio, then tap on the stop button to end the recording.
Q: Where can I find my recorded audio files on my iPhone?
A: After you have finished recording audio, the file will be saved within the Voice Memos app. To access your recorded audio files, open the app and look for the specific recording you want to listen to or share.