
Are you tired of dealing with messy wires and cables to connect your Samsung TV to other devices? If so, you’ve come to the right place. In this article, we will guide you on how to make your Samsung TV wireless, providing you with the freedom and convenience to stream your favorite shows, movies, and music without the hassle of cords. Say goodbye to tangled cables and hello to a sleek and clutter-free entertainment setup. Whether you want to connect your TV to a sound system, gaming console, or streaming device, we’ve got you covered. Follow our step-by-step instructions and transform your Samsung TV into a wireless wonderland.
Inside This Article
- Setting Up the Wireless Connection
- Connecting Samsung TV to the Wi-Fi Network
- Configuring Wireless Display Options on Samsung TV
- Conclusion
- FAQs
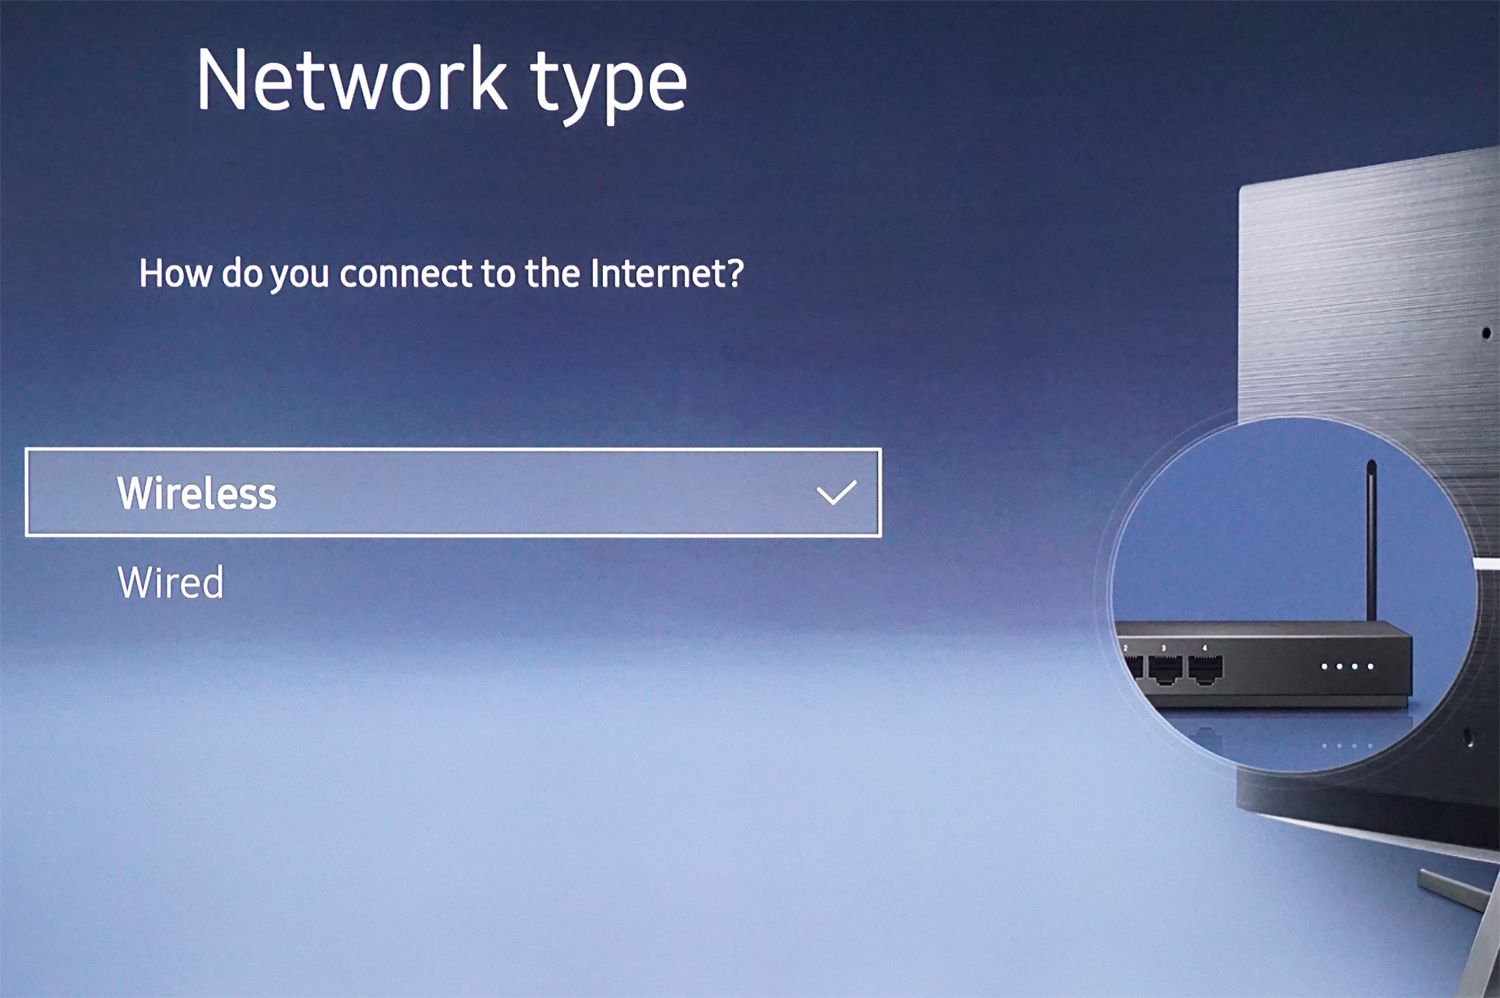
Setting Up the Wireless Connection
Setting up a wireless connection for your Samsung TV can offer you the convenience of streaming your favorite movies, shows, and music without the need for messy cables. Here’s a step-by-step guide to help you get started:
1. Check your Wi-Fi network: Make sure you have a stable Wi-Fi network available. Check the Wi-Fi settings on your TV to see a list of available networks. If your network is not listed, make sure your router is working properly.
2. Connect the TV to the Wi-Fi network: Navigate to the settings menu on your Samsung TV. Select “Network” and then “Network Settings.” Choose the option to connect to a wireless network. You will be prompted to enter the password for your Wi-Fi network. Once entered, the TV will connect to the network.
3. Test the connection: After connecting to the Wi-Fi network, it’s important to test the connection to ensure it’s working properly. Navigate to the network settings menu again and choose the option to test the network connection. If everything is working fine, you should see a confirmation message.
4. Update the software: To ensure your Samsung TV is running smoothly and to access the latest features, it’s recommended to check for software updates. Go to the settings menu, select “Support,” and then “Software Update.” Choose the option to update the software if a newer version is available.
5. Fine-tune the settings: Once your Samsung TV is connected to the Wi-Fi network, you can personalize the settings to suit your preferences. Adjust the picture quality, sound settings, and any other features to optimize your viewing experience.
By following these steps, you can easily set up a wireless connection for your Samsung TV and enjoy seamless streaming of your favorite content without the hassle of cords and cables. Happy binge-watching!
Connecting Samsung TV to the Wi-Fi Network
Setting up a wireless connection for your Samsung TV is essential to enjoy features such as streaming online content, accessing smart features, and even performing software updates. By connecting your TV to your Wi-Fi network, you can unlock a world of entertainment right from the comfort of your living room. Here’s a step-by-step guide on how to connect your Samsung TV to the Wi-Fi network.
1. Turn on your Samsung TV and navigate to the Menu or Settings option using your remote control. The exact location of the settings may vary based on your TV model.
2. In the Settings menu, scroll down to find the Network or Wireless option and select it. This is where you can manage your network connections.
3. Select the Wi-Fi option to initiate the wireless connectivity setup. Your TV will start scanning for available Wi-Fi networks in the vicinity.
4. Once the available networks are displayed on the screen, select your Wi-Fi network from the list. If your network is password-protected, you will be prompted to enter the password. Use the remote control or the on-screen keyboard to enter the correct password.
5. After entering the password, select “Connect” or “OK” to establish a connection between your Samsung TV and the Wi-Fi network. The TV will attempt to connect to the network, and once successful, you will see a confirmation message.
6. Once connected, you can customize additional network settings, such as configuring IP settings or updating the firmware of your TV. These settings can be found within the Network or Wireless section in the TV’s settings menu.
That’s it! Your Samsung TV is now connected to the Wi-Fi network, and you can start enjoying a wide range of online content and smart features that your TV has to offer. Make sure to test the connection by streaming your favorite movies, shows, or apps to ensure a smooth and uninterrupted viewing experience.
Keep in mind that the steps mentioned above may vary slightly depending on your specific Samsung TV model and the version of the TV’s operating system. However, the overall process of connecting to a Wi-Fi network remains relatively similar across different Samsung TV models.
If you encounter any difficulties in connecting your Samsung TV to the Wi-Fi network, you can refer to the user manual or contact Samsung customer support for further assistance. They will be able to guide you through the troubleshooting process and resolve any connectivity issues.
Configuring Wireless Display Options on Samsung TV
When it comes to enjoying the full potential of your Samsung TV, having a wireless display is a game-changer. With the ability to wirelessly connect your TV to your smartphone, tablet, or computer, you can stream your favorite content, mirror your device’s screen, or even browse the internet on the big screen. Configuring these wireless display options on your Samsung TV is easier than you might think.
The first step to configuring wireless display options on your Samsung TV is to ensure that both your TV and your device are connected to the same Wi-Fi network. This is crucial for establishing a stable and seamless connection. Once you have confirmed the Wi-Fi connection, you can proceed with the following steps.
1. On your Samsung TV remote, press the “Home” button to access the main menu. Use the arrow keys to navigate and select “Settings.”
2. Within the “Settings” menu, scroll down and select “General.” From there, locate and select “Network” to access the network settings.
3. Once in the network settings, locate and select “Screen Mirroring” or “Wireless Display.” This may vary depending on the model of your Samsung TV.
4. Next, on your device, access the wireless display settings. This can usually be found in the notification panel or within the settings menu. Select the option to “Cast,” “Mirror,” or “Connect to a wireless display.
5. Your device will now scan for available devices to connect to. Look for your Samsung TV in the list of available devices and select it.
6. After selecting your Samsung TV, a connection will be established, and your device’s screen will be mirrored on the TV. You can now enjoy streaming, gaming, or browsing on the big screen.
It’s important to note that the specific steps for configuring wireless display options may vary slightly depending on the model of your Samsung TV and the device you are connecting. However, the general process remains the same.
Conclusion
In conclusion, making your Samsung TV wireless can greatly enhance your entertainment experience by eliminating the need for messy cables and allowing you to enjoy seamless connectivity. Whether you choose to use a wireless adapter, a wireless HDMI kit, or a streaming device, the process is relatively straightforward and can be completed by following a few simple steps. By going wireless, you gain the flexibility to position your TV anywhere in the room without being limited by the location of your router or cable outlets. Additionally, you can enjoy the convenience of streaming content from various online platforms directly to your TV, opening up a world of entertainment options. So, say goodbye to tangled cords and embrace the wireless revolution to take your Samsung TV setup to the next level.
FAQs
1. Can I make my Samsung TV wireless?
Yes, you can make your Samsung TV wireless. By connecting your TV to a wireless network, you can easily stream content, access online apps, and enjoy a seamless entertainment experience without the hassle of cables.
2. How do I connect my Samsung TV to a wireless network?
To connect your Samsung TV to a wireless network, follow these steps:
- Turn on your Samsung TV and navigate to the settings menu.
- Select the “Network” option and choose “Wireless.”
- Scan for available wireless networks and select your preferred network.
- Enter the network password, if required.
- Once connected, your Samsung TV will have wireless capabilities.
This will allow you to enjoy the benefits of a wireless connection, such as streaming content from various apps and devices.
3. Can I connect my Samsung TV wirelessly to my smartphone?
Yes, you can connect your Samsung TV wirelessly to your smartphone. Most Samsung Smart TVs have built-in features that allow for seamless connectivity with smartphones. By using the appropriate app or screen mirroring function, you can cast or share content from your smartphone directly onto your TV screen wirelessly.
4. Do I need any additional equipment to make my Samsung TV wireless?
In most cases, you don’t need any additional equipment to make your Samsung TV wireless. Samsung Smart TVs come with built-in Wi-Fi capabilities, allowing you to connect them to your home network wirelessly. However, if you have an older Samsung TV model without built-in Wi-Fi, you may need to purchase an external wireless adapter to enable wireless connectivity.
5. Can I connect multiple Samsung TVs to the same wireless network?
Yes, you can connect multiple Samsung TVs to the same wireless network. As long as your wireless router has sufficient bandwidth and your TVs are within range of the network, you can easily connect multiple TVs simultaneously. Just follow the same steps mentioned earlier to connect each TV to the wireless network, and they will be able to access the internet and other network-connected devices.