
Welcome to our comprehensive guide on how to make PDFs on the iPhone 13. As technology continues to advance, smartphones have become our go-to devices for all sorts of tasks, including creating and managing documents. The iPhone 13, with its powerful capabilities and user-friendly interface, makes it incredibly convenient to generate PDFs right from your device. Whether you need to save a webpage, convert an image or document, or even combine multiple files into a single PDF, the iPhone 13 offers a range of features to simplify the process. In this article, we will walk you through the steps to create PDFs on your iPhone 13, providing you with all the information you need to become a pro at document management on your device. Let’s dive in!
Inside This Article
- Overview of PDF Creation in iPhone 13
- Step 1: Installing a PDF Creation App
- Step 2: Converting Files to PDF Format
- Step 3: Customizing PDF Settings
- Step 4: Saving and Sharing PDF Files
- Conclusion
- FAQs
Overview of PDF Creation in iPhone 13
The iPhone 13 boasts powerful capabilities that go beyond its stunning design and advanced features. One such capability is the ability to create PDF files directly on your device. With just a few simple steps, you can convert documents, photos, and even web pages into PDF format, making it easier to share, save, and store important information.
Whether you need to convert a Word document into a PDF, capture a webpage for offline reading, or save an image as a PDF, the iPhone 13 provides a convenient and seamless way to accomplish these tasks. By making use of the built-in Markup feature in the Files app, you have everything you need at your fingertips.
Enabling Markup in the Files app is the first step towards PDF creation on your iPhone 13. Once enabled, you can easily annotate documents, add signatures, and convert files into PDF format. This powerful tool allows you to make professional edits to your files before saving them as PDFs, ensuring that your documents look polished and refined.
Converting documents into PDF format with your iPhone 13 is a breeze. Simply open the document you wish to convert, tap the Share icon, and select the “Create PDF” option. Your document will instantly be transformed into a PDF file, and you can choose to save it to your device or share it with others via various platforms and messaging apps.
But that’s not all – the iPhone 13 also allows you to easily create PDFs from your favorite photos. Whether it’s a memorable picture you want to save or a screenshot with important information, you can convert it into a PDF file with just a few taps. Open the photo, tap the Share icon, and choose the “Create PDF” option to have your image transformed into a PDF file for effortless sharing and archiving.
Furthermore, saving web pages as PDFs has never been easier. With the Files app on your iPhone 13, you can capture and save web content for offline viewing or reference. Simply visit the webpage you want to save, tap the Share icon, and select “Create PDF”. In an instant, the webpage will be converted into a PDF file, complete with its formatting and graphics, ready for you to access anytime, anywhere.
The ability to create PDFs directly on your iPhone 13 provides a convenient and efficient way to manage and share information on the go. Whether you need to convert documents, images, or web pages, the iPhone 13’s PDF creation capabilities make it a valuable tool for productivity and organization. Take advantage of these features and unlock the full potential of your iPhone 13 today!
Step 1: Installing a PDF Creation App
One of the easiest ways to make PDFs on your iPhone 13 is by installing a PDF creation app. These apps are designed to help you easily convert various file types into PDF format, allowing you to capture and share information in a professional and convenient manner. Here are a few simple steps to get started:
1. Open the App Store: Launch the App Store on your iPhone 13 by tapping on the App Store icon on your home screen.
2. Search for a PDF creation app: In the search bar at the bottom of the screen, type in “PDF creator” or “PDF converter” and browse through the search results to find a suitable app.
3. Read reviews and choose an app: Take a look at the ratings and reviews of different PDF creation apps to determine which one best fits your needs. Look for apps that have a user-friendly interface, positive reviews, and a wide range of features.
4. Install the app: Once you’ve decided on an app, tap on the “Get” or “Install” button next to the app’s name. You may need to enter your Apple ID password or use Face ID or Touch ID to confirm the installation.
5. Launch the app: Once the installation is complete, tap on the app’s icon on your home screen to launch it.
By following these steps, you can easily install a PDF creation app on your iPhone 13 and start converting files into PDF format with just a few taps. Having a dedicated PDF creation app can significantly streamline your document management process and improve your productivity on the go.
Step 2: Converting Files to PDF Format
Converting files to PDF format on your iPhone 13 is a breeze. Whether you have a Word document, an Excel spreadsheet, or a PowerPoint presentation that you want to convert to PDF, follow these simple steps:
1. Open the Files app on your iPhone 13. If you can’t find it on your home screen, swipe down and use the search bar to locate it.
2. Navigate to the location where the file you want to convert is stored. It could be in the “On My iPhone” section or in a cloud storage service like iCloud Drive, Google Drive, or Dropbox.
3. Once you’ve located the file, tap on it to open it. If it’s a supported file format, you’ll be able to view its contents.
4. Next, tap on the share button, which looks like a square with an arrow pointing up. It is usually located at the top right or bottom center of the screen.
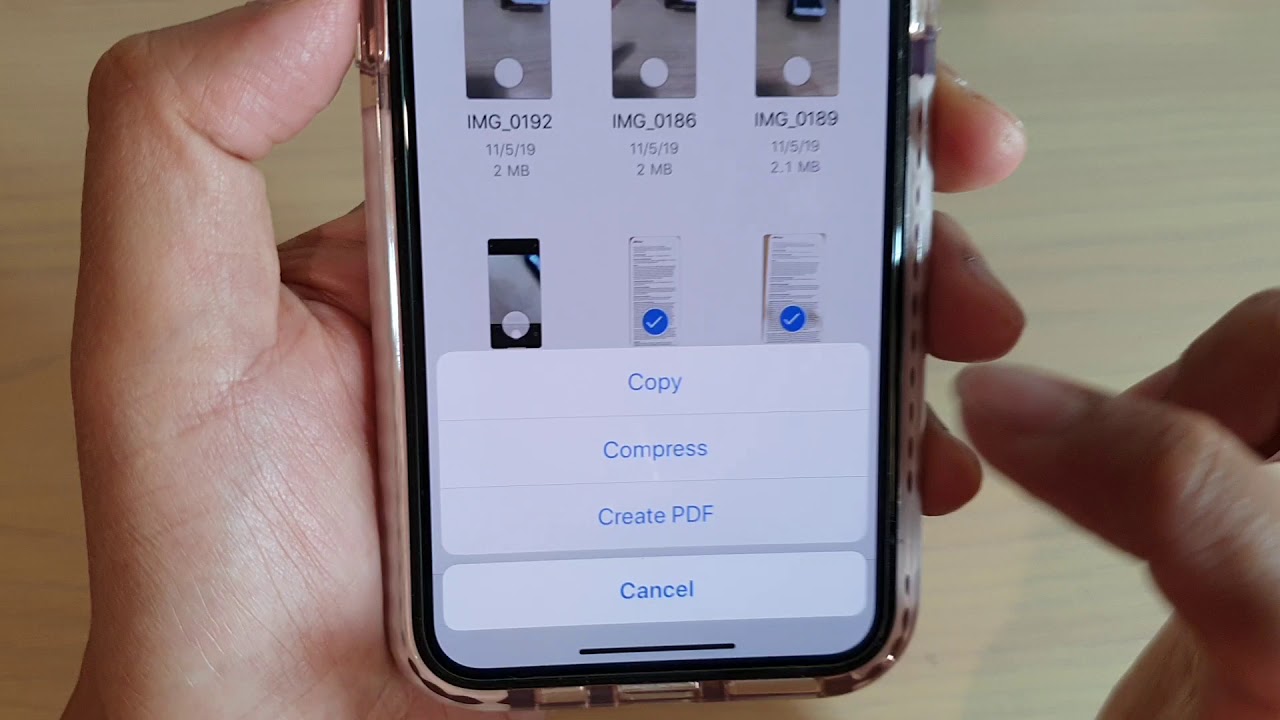
5. In the Share Sheet that appears, scroll down until you see the “Create PDF” option. Tap on it.
6. The file will now be converted to a PDF format. You can preview the PDF by swiping left or right. If you’re satisfied with the conversion, tap on the “Done” button.
7. Finally, choose where you want to save the PDF file. You can save it locally on your iPhone 13 or select a cloud storage service to store it.
And there you have it! You’ve successfully converted your file to PDF format on your iPhone 13. This makes it easy to share and distribute the file without worrying about compatibility issues.
Step 3: Customizing PDF Settings
Once you have converted your document or photo into a PDF format on your iPhone 13, you can further customize the settings to suit your preferences. Here are a few options you can explore:
1. Rename the PDF: By default, your PDF will be named based on the document or photo it was created from. However, if you want to give it a more specific or descriptive name, you can do so. Simply tap on the filename and edit it according to your preference.
2. Reorder the Pages: If your PDF consists of multiple pages, you can rearrange the order. Tap on the “Thumbnails” button at the bottom center of the screen to view all the pages. From there, you can drag and drop the pages to rearrange them in the desired sequence.
3. Delete Pages: If there are any pages that you no longer need in your PDF, you can easily delete them. Tap and hold on the page you wish to remove until a pop-up menu appears. Then, select the “Delete” option to remove the selected page from the PDF.
4. Markup and Annotation: iPhone 13 offers built-in markup tools that allow you to annotate your PDFs. Tap on the markup icon (looks like a pencil tip) at the top right corner of the screen. You can use the various tools to highlight, underline, draw, or add text to your PDF. This is particularly useful for adding notes or making important points stand out.
5. Share or Save the PDF: Once you have finished customizing your PDF, you can either share it with others or save it for later use. To share, tap on the share icon (looks like a square with an arrow pointing up) and choose the desired method like email, messaging apps, or cloud storage. To save it, simply tap on the “Save to Files” option and choose the location where you want to store the PDF.
By exploring these customization options, you can make your PDFs more personalized and tailored to your needs. Whether you want to rename, reorder, delete pages, or add annotations, the iPhone 13 provides a user-friendly and intuitive interface for managing your PDF files.
Step 4: Saving and Sharing PDF Files
Once you have successfully created a PDF file on your iPhone 13, the next step is to save and share it. Here’s how you can easily manage your PDF files:
1. Save PDF Files: To save the PDF file, tap on the share icon located at the top right corner of the screen. From the share sheet that appears, choose the “Save to Files” option. This will allow you to select the folder where you want to save the PDF file on your iPhone.
2. Organize PDF Files: If you want to keep your PDF files organized, you can create folders in the Files app. Simply tap on the “New Folder” option, give it a name, and move your PDF files into the respective folders. This will help you to easily find and access your PDF files whenever you need them.
3. Share PDF Files: Sharing PDF files from your iPhone 13 is a breeze. Simply tap on the share icon again, and this time choose the app or contact you want to share the PDF file with. You can share it via AirDrop, Messages, Mail, or any other compatible app on your device. Select the desired method and follow the prompts to send the PDF file to the recipient.
4. Print PDF Files: If you need a hard copy of your PDF file, you can easily print it directly from your iPhone 13. Open the PDF file, tap on the share icon, and select the “Print” option. Make sure your iPhone is connected to a compatible printer, choose the printer and the desired settings, and tap on the print button to get a physical copy of your PDF file.
By following these simple steps, you can efficiently save, organize, share, and even print your PDF files using your iPhone 13. Whether you need to send important documents or create a portable version of a web page, the PDF creation feature on your iPhone 13 makes it a convenient tool for all your PDF needs.
Conclusion
In conclusion, the iPhone 13 offers users a seamless and efficient way to create PDFs right from their device. With the built-in options available in the Files app and other third-party applications, users can easily convert various file formats into PDFs and share them with others.
The convenience of creating PDFs on the iPhone 13 eliminates the need for external software or devices, making it a handy tool for both personal and professional use. Whether you want to save a webpage, capture a document, or send important information, the iPhone 13 provides a user-friendly experience and a range of features to customize and optimize your PDFs.
With its powerful hardware and intuitive software, the iPhone 13 continues to be a leader in the mobile industry, offering users unparalleled functionality and productivity. So, go ahead and try out the options available on your iPhone 13 to effortlessly create and manage PDFs.
Explore the possibilities and experience the world of PDF creation with your iPhone 13 today!
FAQs
1. Can I create a PDF on my iPhone 13?
Yes, absolutely! The iPhone 13 comes with a built-in feature that allows you to create PDF files directly from various apps, such as Notes, Safari, and Mail. You can easily convert text files, web pages, and emails into PDF format without the need for any third-party applications.
2. How can I convert a file to PDF on my iPhone 13?
To convert a file to PDF on your iPhone 13, follow these simple steps:
– Open the file you want to convert, whether it’s a Note, a web page in Safari, or an email in the Mail app.
– Tap the share icon, usually indicated by a square with an arrow pointing upward.
– Scroll down to find the “Create PDF” option. Tap on it.
– A preview of the PDF file will appear. You can make any necessary edits or additions.
– Finally, tap “Done” and choose where you want to save the PDF.
3. Can I combine multiple files into a single PDF on my iPhone 13?
Yes, you can combine multiple files into a single PDF on your iPhone 13. Here’s how:
– Open the first file you want to include in the PDF.
– Tap the share icon and select “Create PDF.”
– Instead of tapping “Done,” tap the “+” icon to add more files.
– Repeat the process for each file you want to include in the PDF.
– Once you have added all the files, tap “Done” and save the combined PDF.
4. Are there any third-party apps for creating PDFs on my iPhone 13?
While the iPhone 13 offers a built-in PDF creation feature, there are also third-party apps available that provide additional functionalities and customization options. Some popular options include Adobe Acrobat Reader, Microsoft Office Suite, and PDF Expert. These apps offer advanced editing features, form filling options, and the ability to annotate PDF documents.
5. How can I share a PDF file on my iPhone 13?
Sharing a PDF file on your iPhone 13 is straightforward:
– Open the PDF file you want to share.
– Tap the share icon and select the method you prefer, such as AirDrop, Messages, Mail, or other sharing options available on your device.
– Choose the recipient or select the desired platform for sharing.
– Add any additional message or description if needed.
– Finally, tap “Send” to share the PDF file with others.