
Are you interested in learning how to make PDFs on your iPhone? Look no further, as we’ve got you covered! In this article, we will guide you through the step-by-step process of creating PDFs directly from your iPhone, without the need for any additional software or complicated procedures.
PDFs are a convenient and widely used file format that allows you to preserve the formatting and integrity of documents across different devices and platforms. Whether you need to save a webpage, an email, or any other type of document as a PDF, your iPhone provides the tools to easily accomplish this task.
By the end of this article, you will have a comprehensive understanding of how to make PDFs on your iPhone, enabling you to effortlessly convert various types of content into a versatile and shareable format. Let’s dive in and explore the various methods and techniques you can use to create PDFs on your iPhone!
Inside This Article
- Step 1: Saving the PDF to your iPhone
- Step 2: Locating the PDF on your iPhone
- Step 3: Opening the PDF in the Books app
- Step 4: Selecting and opening the desired PDF
- Creating a PDF File from an Existing Document
- Converting Image to PDF Format on iPhone
- Exporting a Document as PDF on iPhone
- Conclusion
- FAQs
Opening a PDF file on your iPhone is a straightforward process that allows you to access and view important documents on the go. Whether it’s a work-related report, a digital book, or just a personal document, having the ability to open PDFs directly on your iPhone can save you time and make your life more convenient.
The iPhone has a built-in feature that allows you to open PDFs without the need for any additional apps or software. Here is a step-by-step guide on how to open a PDF file on your iPhone:
Step 1: Saving the PDF to your iPhone
The first step is to make sure the PDF is saved on your iPhone. You can do this by downloading the PDF directly from an email attachment, a cloud storage service like iCloud or Dropbox, or by transferring it from your computer using iTunes.
Step 2: Locating the PDF on your iPhone
Once the PDF is saved on your iPhone, you can open it using the pre-installed app called “Books”. This app is generally located on the home screen and has a book icon. If you can’t find it, you can swipe down on your home screen and use the search bar to type in “Books” to locate the app.
Step 3: Opening the PDF in the Books app
Once you have located the Books app, tap on it to open it. Inside the app, you will see a “Library” tab at the bottom of the screen. Tap on the “Library” tab, and you will be presented with a list of your saved PDFs.
Step 4: Selecting and opening the desired PDF
Scroll through the list of PDFs and tap on the one you want to open. The PDF will automatically load and open in the Books app. You can now read, scroll, zoom in or out, and navigate through the PDF using the tools provided by the app.
It’s important to note that if you have multiple PDFs saved in the Books app, you can use the search bar at the top of the screen to quickly find a specific PDF by typing in keywords related to the document.
Opening a PDF file on your iPhone has never been easier. With just a few simple steps, you can access and view your important documents wherever you are. Whether it’s for work or personal use, the ability to open PDFs on your iPhone adds convenience and flexibility to your digital life.
So the next time you receive an important PDF attachment or need to access a digital document on your iPhone, remember that you can easily do so using the built-in Books app. Enjoy the convenience of having all your PDFs accessible with just a few taps on your iPhone screen.
Creating a PDF File from an Existing Document
Creating a PDF file from an existing document on your iPhone can be incredibly useful, especially when you want to share or preserve the content in a universal format. Thankfully, there are several methods you can use to accomplish this task.
Method 1: Using the built-in iOS Share Sheet
One of the easiest ways to create a PDF file from an existing document on your iPhone is by using the built-in iOS Share Sheet. This method works for a variety of file types, including Word documents, Excel spreadsheets, PowerPoint presentations, and more.
Here’s how to do it:
- Open the document you want to convert into a PDF.
- Tap the “Share” button, usually represented by a square with an arrow pointing upwards.
- Scroll through the options in the Share Sheet and locate the “Create PDF” option.
- Tap “Create PDF,” and a preview of the PDF file will appear.
- From here, you can adjust the page order, add annotations, or choose to share the PDF file via various methods.
Method 2: Using a third-party app like Adobe Acrobat Reader
If you prefer more advanced features and customization options, you can use a dedicated PDF app like Adobe Acrobat Reader. This app allows you to create PDF files from different types of documents and offers advanced editing tools.
Here’s how to create a PDF using Adobe Acrobat Reader:
- Install the Adobe Acrobat Reader app from the App Store if you haven’t already.
- Launch the app and tap the “+” button at the bottom center of the screen.
- Select the document you want to convert into a PDF from the available options.
- Wait for the app to process the document and convert it into a PDF.
- Once the conversion is complete, you can access and manage the PDF file within the Adobe Acrobat Reader app.
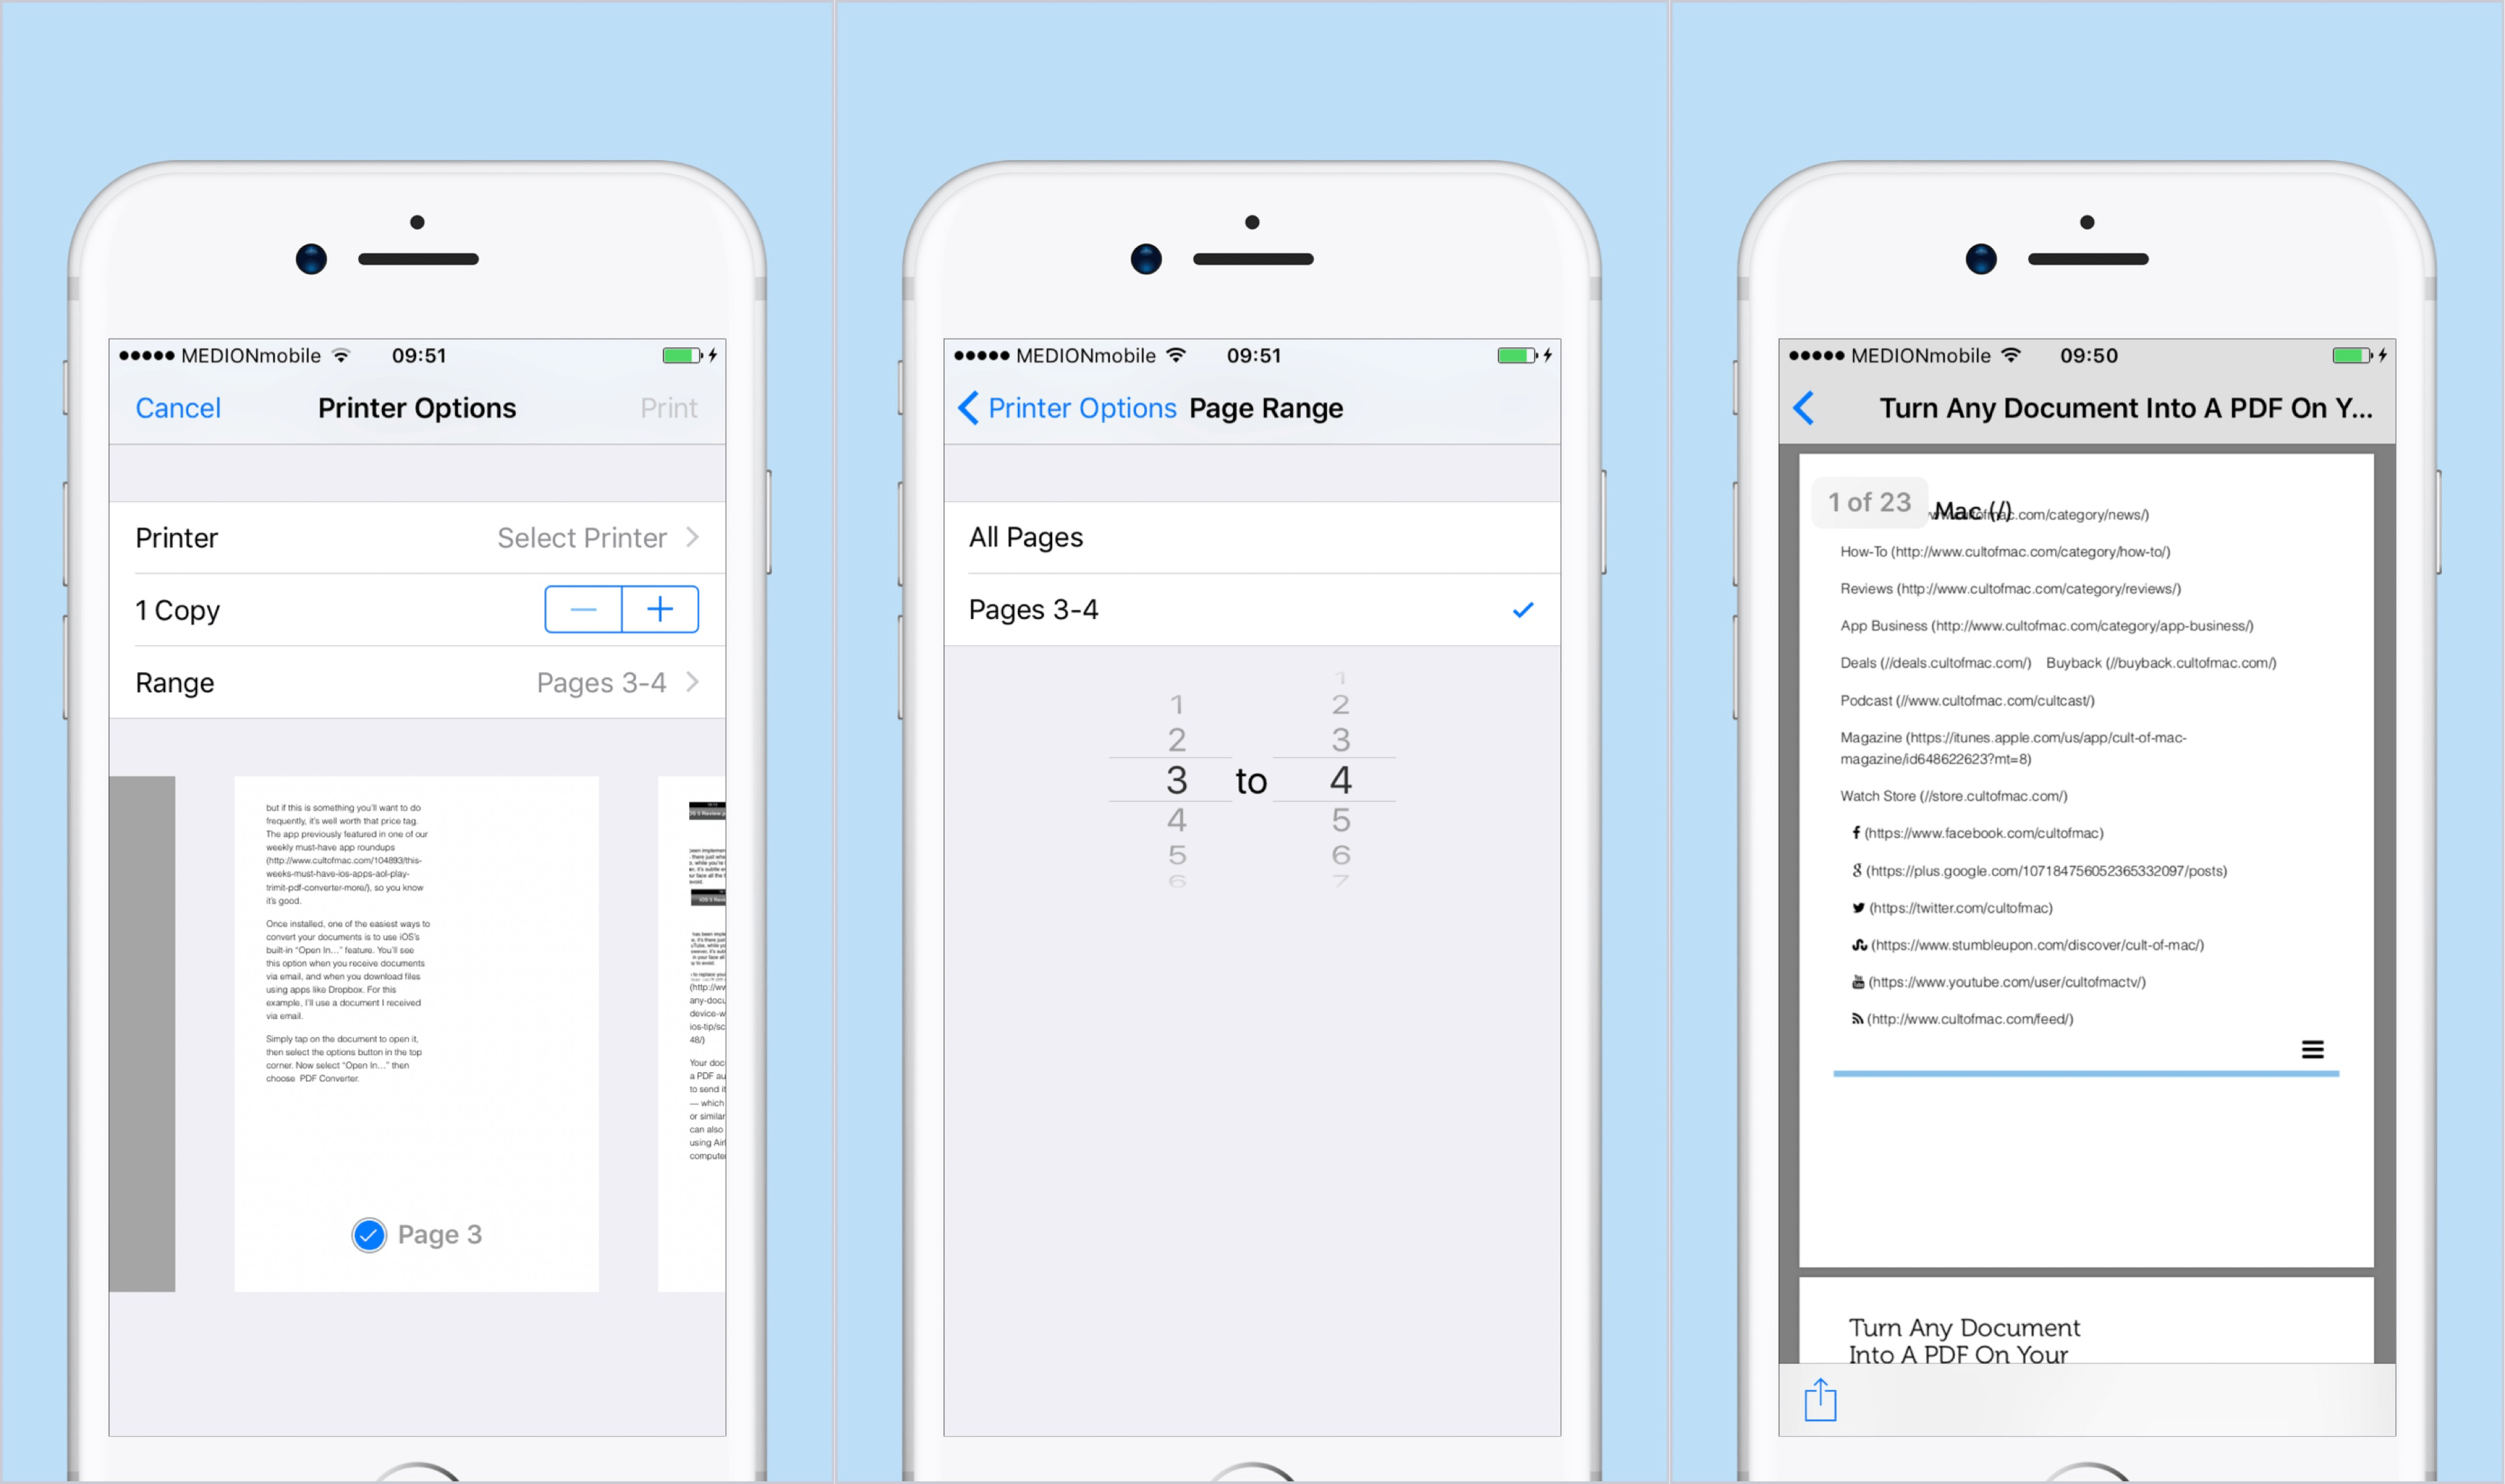
Method 3: Printing to PDF
If you’re working with a document that doesn’t have a built-in “Share” option, you can still create a PDF by using the “Print” feature on your iPhone.
Here’s how to do it:
- Open the document you want to convert into a PDF.
- Tap the share button and scroll down until you see the “Print” option.
- In the print preview screen, use your fingers to pinch outwards on the document preview to expand it.
- In the upper right corner, tap the “Share” button.
- In the Share Sheet, you’ll find various options to save or share the PDF file.
Now that you know these methods, you can easily create PDF files from existing documents on your iPhone. Whether you choose to use the built-in iOS Share Sheet, a dedicated PDF app like Adobe Acrobat Reader, or the printing method, converting documents into PDF format will allow you to share and preserve content across different platforms efficiently.
Converting Image to PDF Format on iPhone
Converting an image to a PDF format on your iPhone can be incredibly useful, whether you need to share a scanned document, create a portfolio, or simply want to save an image in a more versatile format. Thankfully, there are several methods available to accomplish this task with ease.
Method 1: Using a Third-Party App
One of the simplest ways to convert an image to a PDF format on your iPhone is by using a third-party app from the App Store. There are several apps available, such as Adobe Scan, CamScanner, and Scanner Pro, which offer powerful scanning and conversion features.
To get started, download and install the app of your choice from the App Store. Open the app and follow the on-screen instructions to grant necessary permissions. Once ready, follow these steps:
- Tap on the camera icon within the app to take a photo of the document or select an image from your camera roll.
- Use the built-in editing tools to crop, adjust the brightness, and enhance the image quality, if needed.
- Next, look for an option that allows you to save or export the image as a PDF. This may vary depending on the app you’re using, but it’s usually represented by an icon or a menu option.
- Choose the PDF format and select the desired location to save the PDF.
- Once the conversion is complete, you can open the PDF file using any PDF viewer or share it with others via various platforms.
Method 2: Using the Markup Tool
If you don’t want to rely on third-party apps, you can also convert an image to PDF format using the Markup tool built into the iPhone’s Photos app. Here’s how:
- Open the Photos app and locate the image you want to convert.
- Tap on the image to open it, then tap on the “Edit” button.
- At the bottom of the screen, you’ll find a set of markup tools. Tap on the “More” icon (represented by three dots) to reveal additional options, and select “Create PDF”.
- Drag the corners of the frame to adjust the boundaries of the PDF, and tap “Done” when you’re satisfied with the result.
- Tap on the “Share” button and choose how you want to save or share the PDF file.
Method 3: Using Siri Shortcuts
If you frequently convert images to PDF format, you can streamline the process using Siri Shortcuts. Here’s how to create a shortcut for image to PDF conversion:
- Download the “Shortcuts” app from the App Store if you don’t already have it installed.
- Open the app and tap on the “+” button to create a new shortcut.
- In the search bar, type “convert image to PDF” and select the relevant action from the search results.
- Tap on “Add Action” to add additional steps, such as saving the PDF to a specific location or sharing it via email.
- Tap on “Next” and give your shortcut a name.
- Finally, tap on “Done” to save your shortcut.
Once the shortcut is created, you can access it from the Shortcuts app or add it to your home screen for quick and easy access.
Converting an image to a PDF format on your iPhone has never been easier. By using third-party apps, the built-in Markup tool, or Siri Shortcuts, you can quickly and effortlessly convert images to PDFs, making them more suitable for various professional and personal purposes.
Exporting a Document as PDF on iPhone
Your iPhone provides a quick and convenient way to export documents as PDF files. This feature comes in handy when you need to share a document with others, guaranteeing that the formatting remains intact. Here’s how you can export a document as a PDF on your iPhone.
- Open the document that you want to export as a PDF on your iPhone. This can be a Word document, Pages file, or any other compatible file format.
- Once the document is open, tap on the “Share” button, usually represented by a square with an arrow pointing upwards. This will bring up the sharing options menu.
- In the sharing options menu, scroll through the available app icons until you find the “Create PDF” option. It is usually located towards the right side of the menu.
- Tap on “Create PDF” to initiate the PDF creation process. Your iPhone will generate a PDF version of the document, maintaining the layout and formatting.
- Once the PDF creation is complete, a preview of the PDF file will appear on your screen. From here, you can perform various actions, such as adding annotations, highlighting text, or signing the document if needed.
- To save the PDF file, tap on the “Share” button once again, located in the top right corner of the screen. This will bring up the sharing options menu.
- Choose the desired destination to save the PDF file. You can save it locally on your iPhone, upload it to a cloud storage service like iCloud or Dropbox, or share it directly with others via email, messaging apps, or social media platforms.
By exporting documents as PDF files on your iPhone, you can ensure that they can be accessed and viewed accurately by recipients, regardless of their device or operating system. Whether you’re sharing important reports, contracts, or other professional documents, the PDF format is a versatile choice that maintains the integrity of your content.
With just a few taps, you can transform any document into a PDF on your iPhone and seamlessly share it with others. Take advantage of this convenient feature to streamline your document sharing and collaboration process.
Conclusion
Creating PDFs on your iPhone is a simple and convenient process that can be done using various built-in features and third-party apps. Whether you need to convert documents, images, or webpages into PDF format, your iPhone provides you with the necessary tools to do so.
By utilizing the “Print” function and choosing the “Save as PDF” option, you can easily convert any file into a PDF format. Additionally, there are several reliable third-party apps available in the App Store that offer advanced features and customization options for creating PDFs on your iPhone.
Remember to always prioritize the security and privacy of your documents when creating PDFs. Make sure to use trusted apps and consider password protecting sensitive files to ensure that your information remains safe.
With the ability to create PDFs on your iPhone, you can now easily share and collaborate on documents with others, regardless of the platform they are using. This feature enhances productivity and simplifies the process of handling digital documents on the go.
So, whether you need to convert important files for work, capture relevant information from websites, or simply organize your digital documents, your iPhone is the perfect tool to create PDFs efficiently and effectively.
FAQs
1. Can I create a PDF on my iPhone?
2. What apps can I use to create PDFs on my iPhone?
3. How do I convert a file to PDF on my iPhone?
4. Is it possible to merge multiple PDFs on my iPhone?
5. Can I annotate and edit PDFs on my iPhone?