
Are you the proud owner of the new iPhone 13 and looking to add some personalized flair to your device? One way to do that is by setting custom ringtones for your incoming calls. Having a unique ringtone can help you stand out from the crowd and add a touch of personality to your iPhone experience. But how exactly do you put ringtones on the iPhone 13? In this article, we will guide you through the process step-by-step, ensuring that you can easily and seamlessly add your favorite tunes as ringtones on your shiny new device. Whether you want to use a song from your music library or a downloaded ringtone, we’ve got you covered with all the information you need. So, let’s dive in and find out how you can personalize your iPhone 13 with the perfect ringtone.
Inside This Article
- Method 1: Using iTunes
- Method 2: Using GarageBand
- Method 3: Using third-party apps
- Method 4: Using online ringtone converters
- Conclusion
- FAQs
Method 1: Using iTunes
One of the easiest and traditional ways to put ringtones on your iPhone 13 is by using iTunes. iTunes allows you to customize your device’s ringtone by adding your favorite songs or audio files. While this method may require a computer, it offers a reliable and straightforward approach to personalizing your iPhone’s ringtone.
To begin, make sure you have the latest version of iTunes installed on your computer. Connect your iPhone 13 to the computer using a USB cable and launch iTunes. Once your device is connected, follow these steps:
- Select your iPhone icon from the top left corner of the iTunes window. This will bring up the Summary page.
- Click on the “Tones” tab located on the left-hand side of the screen.
- Choose the “Sync Tones” option and then select whether you want to sync all tones or specific ones from your iTunes library.
- If you only want to sync specific tones, go to the “Tones” section in your iTunes library and check the box next to the ringtones you want.
- Click on the “Apply” button to start syncing the selected tones to your iPhone 13.
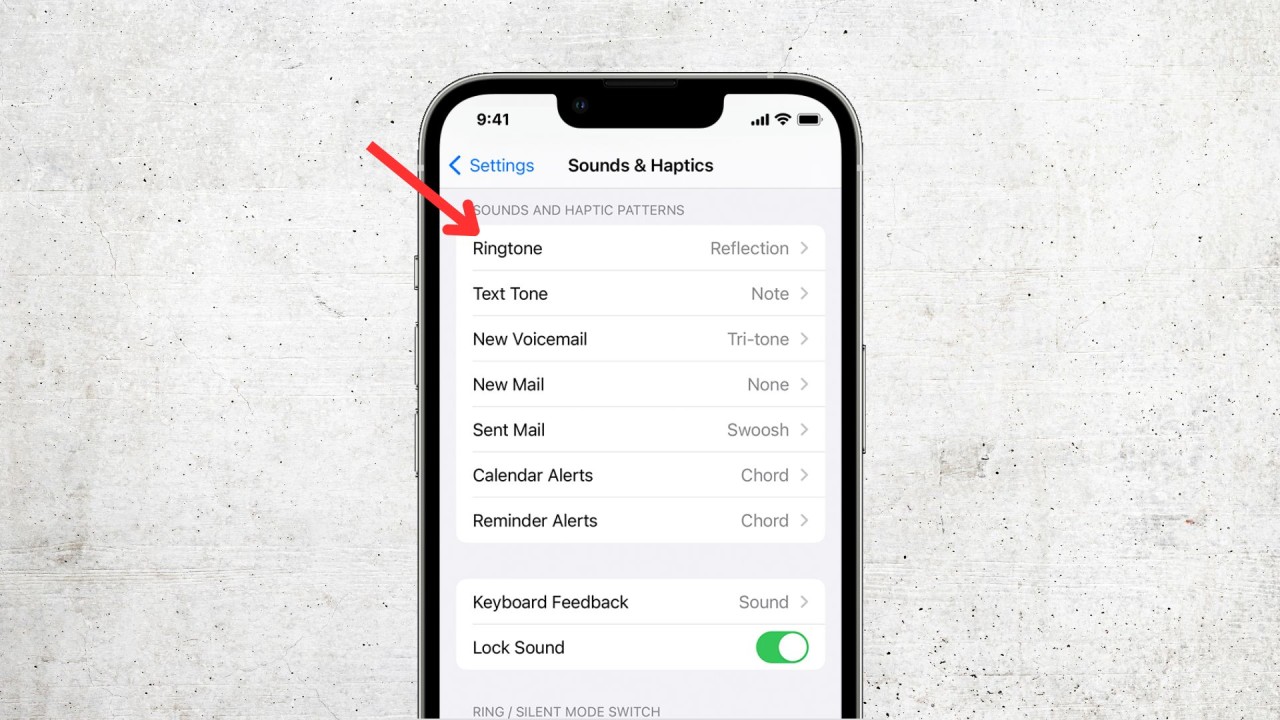
Once the syncing process is complete, you can disconnect your iPhone from the computer. Go to your iPhone’s Settings, then Sounds & Haptics, and finally Ringtones. Here, you will find the newly added ringtones in the list. Simply select the desired ringtone, and it will be set as your default or assigned to specific contacts.
Using iTunes to put ringtones on your iPhone 13 is a reliable and straightforward method that offers a wide range of customization options. Just ensure that the audio files you want to use as ringtones are supported by iTunes and are in the proper format.
Method 2: Using GarageBand
If you’re looking for a more hands-on approach to creating and adding ringtones to your iPhone 13, then GarageBand is the perfect tool for you. This powerful music production app, available for free on the App Store, allows you to not only create your own music but also customize your iPhone’s ringtone.
Here’s a step-by-step guide on how to use GarageBand to add personalized ringtones to your iPhone 13:
- Begin by downloading GarageBand from the App Store if you haven’t already.
- Open GarageBand and tap on the “+” button to create a new project.
- Choose the “Audio Recorder” option and click “Create”.
- On the next screen, you will see a number of options. Select the “Microphone” icon.
- Tap on the red circle button to start recording your desired sound or music.
- Once you’re done recording, tap the triangle button to stop.
- Now, you can use the tools in GarageBand to edit your audio if needed. Trim the track, adjust the volume, or add effects to enhance the ringtone.
- Once you’re satisfied with the edits, tap on the arrow icon in the top left corner.
- Select the “My Songs” option to save your customized ringtone.
- In the pop-up menu, tap on “Share” and choose “Ringtone.
- Give your ringtone a name, select the desired length, and tap “Export”.
- GarageBand will automatically export the ringtone to iTunes.
- Connect your iPhone 13 to your computer and open iTunes.
- Select your iPhone from the device menu and click on the “Tones” tab.
- Check the “Sync Tones” box and click on the “Sync” button.
- Once the synchronization is complete, you can find your custom ringtone on your iPhone 13 under Settings > Sounds & Haptics > Ringtone.
With GarageBand’s intuitive interface and powerful editing features, creating unique ringtones has never been easier. Whether you want to record your own sound or music or explore the vast library of loops and presets, GarageBand offers endless possibilities for customization. So why settle for the standard iPhone ringtone when you can stand out with a personalized tune?
Method 3: Using third-party apps
If you’re looking for a hassle-free way to put ringtones on your iPhone 13, using third-party apps can be a convenient option. These apps are designed to make the process easier by providing a wide range of ringtone options and offering user-friendly interfaces. Let’s take a look at the steps involved:
1. Begin by downloading a reputable third-party ringtone app from the App Store. There are several options available, such as Zedge, Ringtone Maker, and Ringtones for iPhone.
2. Once the app is installed, open it and browse through the available ringtone catalog. You can choose from a variety of genres, themes, and popular songs.
3. Once you’ve found the desired ringtone, select it and tap on the “Download” or “Save” button. The ringtone will then be saved to your device’s internal storage.
4. Open the “Settings” app on your iPhone 13 and navigate to the “Sounds & Haptics” section.
5. Tap on “Ringtone” and scroll down to the “Custom” section at the top. Here, you should see the list of available third-party ringtones.
6. Select the desired ringtone from the list. You can preview the ringtone by tapping on it.
7. Finally, exit the settings and test the newly set ringtone by calling your own number or receiving a test call.
Using third-party apps gives you access to a vast library of ringtones, ranging from popular tunes to unique and customized options. It allows you to personalize your iPhone 13 and make it stand out from the crowd.
Remember to choose reputable apps from trusted developers to ensure that you’re using a safe and secure method for adding ringtones to your device.
Method 4: Using online ringtone converters
If you’re looking for a quick and easy way to put ringtones on your iPhone 13 without the need for complex software or downloads, using online ringtone converters is a great option. These converters allow you to convert your favorite songs or audio files into iPhone-compatible ringtone formats.
Here’s a step-by-step guide to using online ringtone converters:
- First, choose a reputable online ringtone converter. There are several options available, such as Zamzar, Online Convert, and Aconvert.
- Next, locate the audio file or song you want to convert into a ringtone. It can be a file saved on your computer or a link to an online audio source. Make sure the audio file meets the converter’s supported file formats.
- Upload the audio file to the online converter. Most converters have a simple drag-and-drop interface or a file upload button to add your audio file.
- Choose the appropriate ringtone format for your iPhone. The converter will usually offer options like M4R or AAC, which are compatible with iPhone devices.
- Once you’ve selected the desired format, start the conversion process. The online converter will process the audio file and convert it into a ringtone format compatible with your iPhone.
- After the conversion is complete, the online converter will provide a download link for your newly created ringtone. Click on the link to download the ringtone to your computer.
- Connect your iPhone 13 to your computer using a USB cable. Open iTunes (or Finder, if you’re on macOS Catalina or later).
- Drag and drop the downloaded ringtone file from your computer into iTunes or Finder. This will add the ringtone to your iTunes library (or Finder library).
- Select your iPhone 13 from the device list in iTunes or Finder. Go to the “Tones” section on the left sidebar.
- Check the box next to “Sync Tones” and then select “All tones” or choose specific tones you want to sync.
- Click on the “Apply” button to sync the selected ringtones to your iPhone 13.
And that’s it! You’ve successfully used an online ringtone converter to put a custom ringtone on your iPhone 13. Now you can enjoy personalized ringtones whenever someone calls or messages you.
Keep in mind that online ringtone converters are convenient, but there may be limitations on the file size or length of the ringtone. Additionally, make sure to only use reputable and trusted online converters to ensure the security of your files.
Conclusion
Now that you know how to put ringtones on your iPhone 13, you can personalize your device and add your own touch of creativity. The process is simple and easy to follow, whether you choose to use iTunes, GarageBand, or a third-party app. With a wide variety of options available, you can choose from existing ringtones or create your own custom ones.
Remember to always double-check the compatibility of your ringtones with your iPhone model and iOS version to ensure a smooth experience. Don’t be afraid to experiment with different sounds and styles to find the perfect ringtone that reflects your personality.
By customizing your iPhone 13’s ringtones, you can make your device stand out in a crowd and enjoy a more personalized experience whenever you receive a call or notification. So go ahead, have fun, and start adding some catchy tunes to your iPhone 13 today!
FAQs
1. Can I put custom ringtones on my iPhone 13?
Absolutely! You can easily set custom ringtones on your iPhone 13. Whether it’s your favorite song, a funny sound effect, or a personalized recording, you have the freedom to choose and set your own ringtones.
2. How can I add custom ringtones to my iPhone 13?
To add custom ringtones to your iPhone 13, you have a few different options:
– Using iTunes: Connect your iPhone 13 to your computer and open iTunes. Select your device, navigate to the “Tones” section, and drag and drop your custom ringtone files into it. Finally, sync your iPhone to transfer the ringtones.
– Using a ringtone-making app: There are several apps available on the App Store that allow you to create custom ringtones directly on your iPhone. Simply import the audio file, trim it to your desired length, and save it as a ringtone.
– Using a third-party ringtone website: There are websites where you can download ready-made ringtones to your computer, and then transfer them to your iPhone 13 using iTunes or a cloud storage service.
3. What file format should my custom ringtones be in?
For iPhone 13, custom ringtones should be in the .m4r file format. This format is compatible with iOS devices and ensures that the ringtone works properly.
4. How do I set a custom ringtone on my iPhone 13?
Setting a custom ringtone on your iPhone 13 is a breeze. Here’s how:
– Open the Settings app on your iPhone 13.
– Scroll down and tap on “Sounds & Haptics”.
– Under the “Sounds and Vibration Patterns” section, tap on “Ringtone”.
– You will see a list of available ringtones. Scroll to the top and tap on “Custom” to access your custom ringtones.
– Choose the desired custom ringtone from the list, and it will be set as your new ringtone.
5. Can I use my own music as a custom ringtone on iPhone 13?
Yes, you can use your own music as a custom ringtone on your iPhone 13. By using iTunes, you can create a custom ringtone from any song in your music library. Simply follow the steps mentioned in the second FAQ to add your custom ringtone to your iPhone 13.