
\
Are you ready to capture stunning photos with your iPhone 12? Whether you’re a photography enthusiast or just love taking pictures, the iPhone 12 offers incredible features that can help you snap breathtaking shots. From its advanced camera technology to the user-friendly interface, the iPhone 12 is a powerful tool for unleashing your creativity. In this article, we’ll explore the best tips and tricks for taking amazing pictures with your iPhone 12. From mastering composition to leveraging the latest photography modes, you’ll discover how to elevate your photography game and capture memorable moments with ease. Let’s dive into the world of iPhone 12 photography and unlock the potential of your device’s camera!
Inside This Article
- Choosing the Right Lighting
- Utilizing the Portrait Mode
- Adjusting Exposure and Focus
- Making Use of Night Mode
- Conclusion
- FAQs
Choosing the Right Lighting
When it comes to taking stunning pictures with your iPhone 12, lighting plays a crucial role. Natural light is often the best option, so if you’re outdoors, consider taking advantage of the golden hour – the period shortly after sunrise or before sunset when the light is soft and warm. Indirect sunlight can also work wonders, so look for shaded areas or use a diffuser to soften harsh light.
For indoor photography, seek out areas with ample natural light, such as near windows or glass doors. If natural light is limited, consider using artificial lighting sources, like softbox lights or desk lamps, to illuminate your subject. Experiment with the positioning of the light source to achieve the desired effect, whether it’s creating dramatic shadows or achieving even illumination.
Keep in mind that different lighting conditions can evoke various moods and atmospheres in your photos. Soft, diffused light can convey a sense of tranquility, while harsh, direct light might add an element of drama. By understanding how to work with different lighting scenarios, you can elevate the quality of your iPhone 12 photography and capture truly captivating images.
Utilizing the Portrait Mode
One of the standout features of the iPhone 12’s camera is the Portrait mode, which allows you to capture stunning photos with a beautiful depth-of-field effect. This mode is perfect for taking professional-looking portraits, as it intelligently blurs the background while keeping the subject in sharp focus. To access Portrait mode, simply open the Camera app and swipe to the “Portrait” option at the bottom of the screen.
Once you’ve selected Portrait mode, you can experiment with different lighting effects to add flair to your photos. The iPhone 12 offers various lighting options, including Natural Light, Studio Light, Contour Light, Stage Light, and Stage Light Mono. Each of these settings can dramatically alter the mood and aesthetics of your portraits, allowing you to unleash your creativity and capture captivating images.
Furthermore, Portrait mode on the iPhone 12 enables you to adjust the aperture after taking the photo. This means that you can fine-tune the depth-of-field effect and change the intensity of the background blur to achieve the desired look. By simply accessing the photo in the Photos app and tapping “Edit,” you can refine the depth effect using the intuitive slider.
Utilizing the Portrait mode on the iPhone 12 empowers you to elevate your photography game and capture striking portraits with ease. Whether you’re a seasoned photographer or a casual snap-happy individual, this feature opens up a world of creative possibilities, allowing you to produce professional-quality portraits that stand out from the crowd.
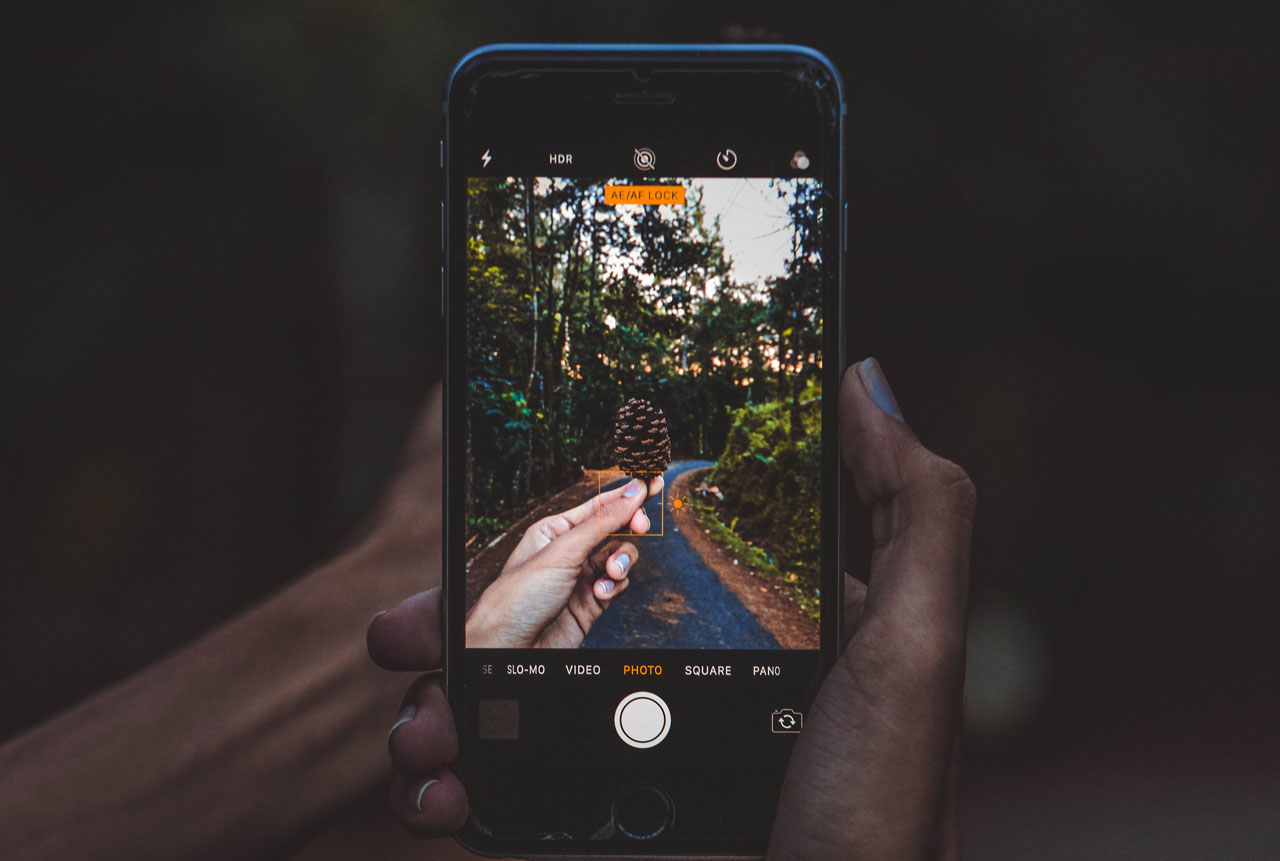
Adjusting Exposure and Focus
When taking photos with your iPhone 12, it’s essential to understand how to adjust the exposure and focus to capture the perfect shot. The exposure determines the brightness of the image, while the focus ensures that the subject is sharp and clear. To adjust the exposure, simply tap on the screen where you want to focus and then slide your finger up or down to adjust the exposure level. This allows you to brighten or darken the image based on your preference.
Moreover, you can also lock the exposure and focus by pressing and holding the screen until the yellow box appears, indicating that the exposure and focus are locked. This is particularly useful when you want to maintain the same exposure and focus settings for multiple shots. Additionally, you can manually adjust the focus by tapping on the subject and using the slider to achieve the desired sharpness.
Understanding how to adjust exposure and focus on your iPhone 12 empowers you to take stunning photos in various lighting conditions and ensures that your subjects are always in focus and well-exposed, resulting in professional-looking images that are sure to impress.
Making Use of Night Mode
When it comes to capturing stunning photos in low-light conditions, the Night Mode feature on the iPhone 12 is a game-changer. Whether you’re photographing cityscapes at dusk or capturing the beauty of a starry night, Night Mode allows you to take clear, vibrant images with impressive detail and minimal noise.
By automatically extending the exposure time, Night Mode enhances the brightness and sharpness of your photos, even in extremely dark settings. This feature is particularly effective in minimizing motion blur, resulting in crisp, well-defined images, regardless of the lighting conditions.
Moreover, Night Mode on the iPhone 12 intelligently analyzes the available light and adjusts the capture settings accordingly, ensuring that your nighttime shots are rich in color and depth. With this innovative feature, you can capture the essence of the night with remarkable clarity, bringing out the intricate details that may have been lost without it.
Whether you’re an amateur photographer or a seasoned pro, Night Mode empowers you to unleash your creativity and capture breathtaking images in low-light environments. With the iPhone 12’s advanced imaging capabilities, you can elevate your nighttime photography to new heights, allowing you to preserve memorable moments with unparalleled clarity and brilliance.
Conclusion
Mastering the art of taking stunning pictures with the iPhone 12 is an attainable goal for anyone willing to explore its powerful features and experiment with different techniques. With its advanced camera capabilities, including Night mode, Deep Fusion, and Smart HDR 3, the iPhone 12 empowers users to capture breathtaking moments with ease. By understanding the principles of composition, lighting, and utilizing the various shooting modes, you can elevate your photography skills to new heights. Whether you’re a casual photographer or a seasoned enthusiast, the iPhone 12 offers a versatile platform to unleash your creativity and capture the world around you in all its splendor.
FAQs
Q: How can I take better pictures with my iPhone 12?
A: To take better pictures with your iPhone 12, you can utilize the advanced camera features, experiment with different angles and lighting, and make use of editing tools to enhance your photos.
Q: What are the key camera features of the iPhone 12?
A: The iPhone 12 boasts impressive camera features, including Night mode, Deep Fusion, Smart HDR 3, and advanced computational photography capabilities, all of which contribute to capturing stunning images in various lighting conditions.
Q: How can I optimize my iPhone 12 camera settings for different scenarios?
A: You can optimize your iPhone 12 camera settings by adjusting exposure, using the grid feature for composition, enabling the HEIC format for higher quality images, and exploring the various shooting modes such as Portrait, Panorama, and Slo-mo.
Q: Are there any recommended third-party camera apps for iPhone 12?
A: Yes, there are several highly regarded third-party camera apps for iPhone 12, such as ProCamera, Halide, and Camera+ 2, which offer advanced manual controls, RAW image capture, and additional creative features to elevate your photography experience.
Q: How can I effectively organize and manage my photos on iPhone 12?
A: You can effectively organize and manage your photos on iPhone 12 by utilizing the built-in Photos app, creating albums, utilizing the search function, and taking advantage of iCloud Photo Library for seamless synchronization and backup of your photo collection.