
If you’re an iPhone or iPad user, you already know that these devices are powerful tools for capturing breathtaking photos and videos. But did you know that you can also edit videos right from your iOS device? Whether you’re a budding filmmaker or simply looking to enhance your social media posts, having the ability to edit videos on your iPhone or iPad can take your content to the next level. In this article, we’ll explore the various ways you can edit videos on your iOS device, from basic edits such as trimming and cropping, to more advanced techniques like adding filters and special effects. So, grab your iPhone or iPad and let’s dive into the exciting world of video editing on iOS.
Inside This Article
- Importing Videos
- Trimming and Splitting Clips
- Applying Filters and Effects
- Adding Transitions and Music
- Conclusion
- FAQs
Importing Videos
Importing videos to your iPhone or iPad is a breeze with the built-in Photos app. Whether you have videos saved on your device or want to transfer them from another source, here’s a step-by-step guide on how to import videos:
- Open the Photos app on your device. It is represented by a multicolored flower icon.
- Navigate to the album or folder where the videos you want to import are located. You can choose from the Camera Roll, Selfies, or other albums.
- Tap on the “Select” button at the top right corner to choose the videos you want to import. You can select multiple videos by tapping on their thumbnails.
- Once you have selected the videos, tap on the “Import” button located at the bottom right corner of the screen.
- You can choose to import all the selected videos or only import specific ones by tapping on the individual thumbnails.
- If you want to delete the imported videos from the source location after importing, you can enable the “Delete” option. However, it is recommended to keep a backup of your videos before deleting them.
- The imported videos will now appear in the “Videos” album in the Photos app. You can access them anytime by navigating to the album and tapping on the video thumbnail.
That’s it! You have successfully imported videos to your iPhone or iPad using the Photos app. Now you can easily access and enjoy your favorite videos on the go.
Trimming and Splitting Clips
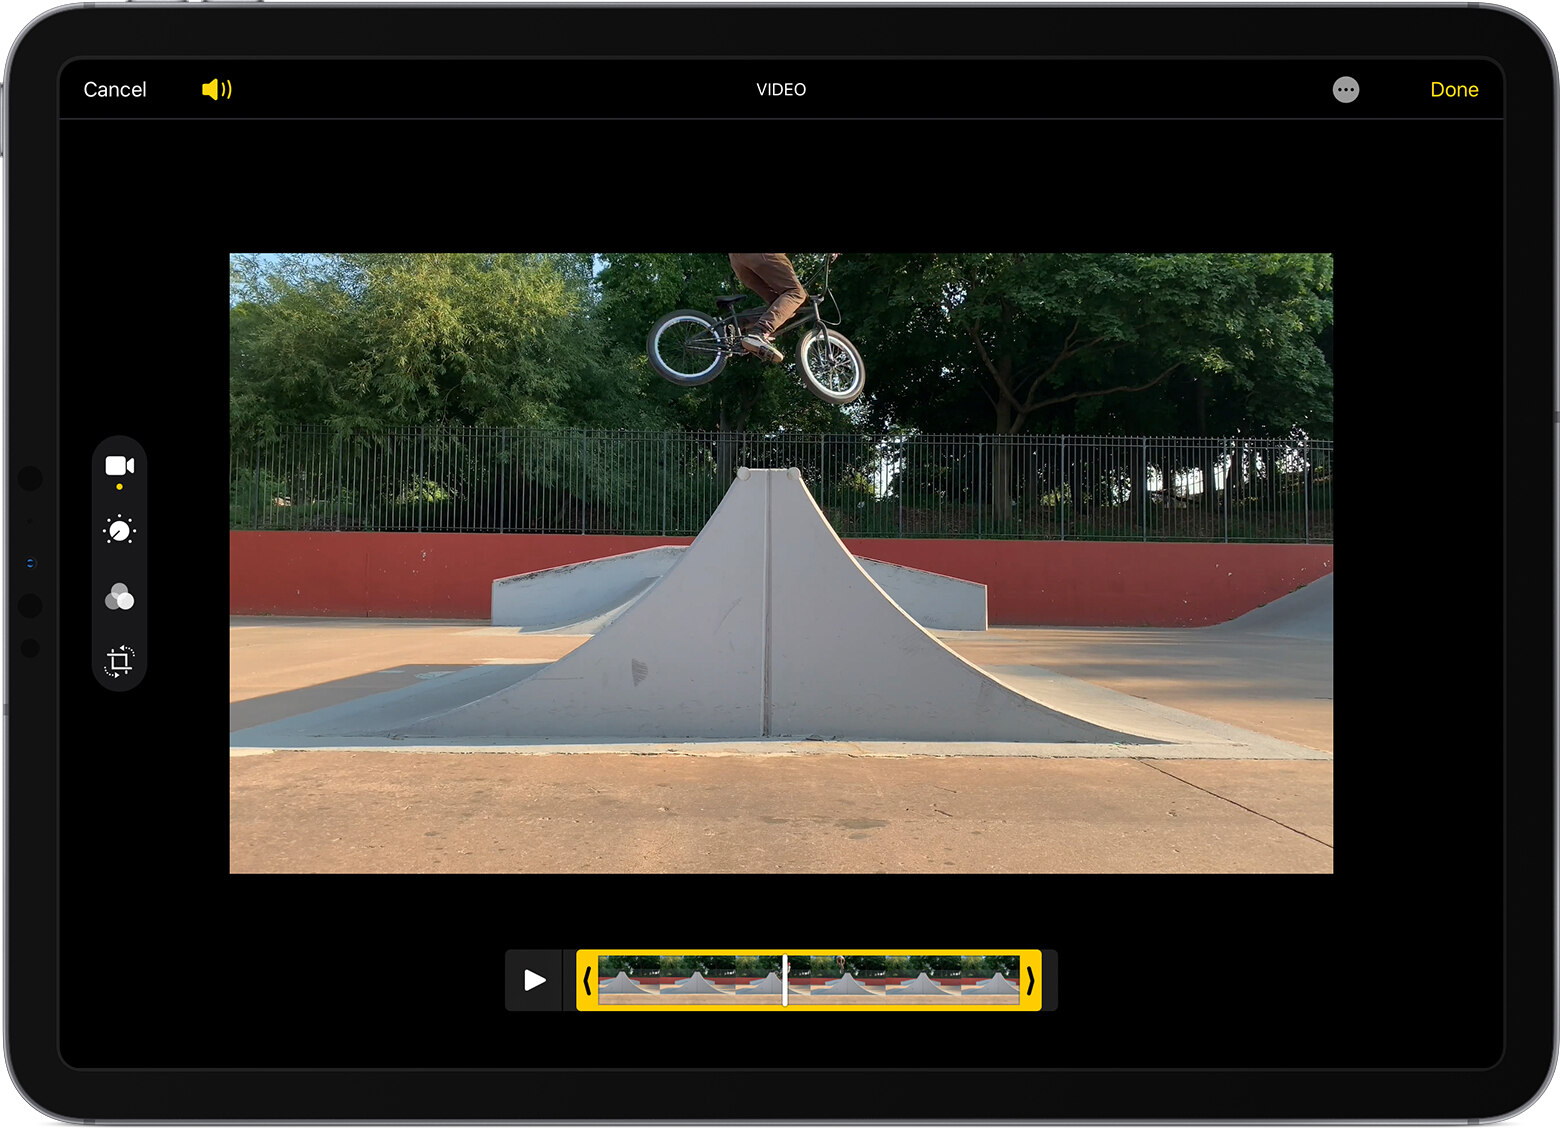
One of the essential features of editing videos on your iPhone or iPad is the ability to trim and split clips. This allows you to remove unwanted sections from your footage and create a more polished and concise final product.
To trim a clip, start by opening the video editor on your device. Select the video you want to edit and tap on the “Trim” option. You will see a timeline representing the duration of your video.
Drag the handles on either side of the timeline to adjust the start and end points of the clip. This allows you to cut out any unnecessary footage from the beginning or end of the video. You can also use the playhead to preview the changes in real-time.
If you want to split a clip into multiple segments, position the playhead at the point where you want to make the split. Then, tap on the “Split” button. This will divide the clip into two separate sections at the chosen point.
You can continue splitting the clip into smaller segments if needed. This is particularly useful when you want to rearrange the order of different scenes or remove specific parts of the video.
Keep in mind that trimming and splitting clips is a non-destructive editing process. This means that the original video file remains untouched, and you can always revert back to the unedited version if needed.
Once you are satisfied with the trim and split changes, you can save the edited clip to your device or share it directly on social media platforms.
Applying Filters and Effects
One of the exciting features of editing videos on your iPhone or iPad is the ability to apply various filters and effects to enhance your footage. Whether you want to add a vintage look, adjust the color balance, or apply a dramatic effect, you can easily do so using the built-in editing tools.
To get started, open the video editing app on your device and select the video you wish to edit. Once the video is loaded, look for the “Filters” or “Effects” option. This feature is usually represented by an icon that resembles a magic wand or a palette.
Next, you’ll be presented with a wide range of filters and effects to choose from. Take a moment to explore the different options and see how they enhance your video. You’ll find filters that can give your video a nostalgic feel, make it look like a black and white movie, or even apply a dreamy or cinematic vibe.
When selecting a filter or effect, keep in mind the mood and aesthetic you want to convey. Some filters work best for specific types of footage, such as landscapes, portraits, or action shots. Experiment with different options to find the one that best suits your video.
Once you’ve chosen a filter or effect, you can adjust its intensity or other parameters to customize the look even further. This allows you to create a unique and personalized style for your video. Simply slide the adjustment controls, such as brightness, contrast, saturation, or vignette, to achieve the desired effect.
After you’ve applied the filter or effect, don’t forget to preview the changes. Play the video back to see how it looks and make any necessary adjustments if needed. This will ensure that your video has the desired visual impact.
In addition to filters, you can also apply other effects to enhance your video. These effects can include adding text overlays, stickers, or animations to specific parts of your footage. Again, explore the options available in your video editing app and experiment with different effects to add a creative touch to your video.
Remember, filters and effects are powerful tools that can transform the look and feel of your videos. However, it’s important to use them judiciously. Avoid overusing filters or effects, as they can sometimes distract from the content of the video. Use them strategically to enhance the story or message you want to convey.
With the ability to easily apply filters and effects on your iPhone or iPad, you can take your video editing skills to the next level. Get creative, experiment with different options, and let your videos shine with unique visual enhancements.
Adding Transitions and Music
When it comes to creating a captivating video, transitions and music play a crucial role in enhancing the overall visual and auditory experience. Luckily, with your iPhone or iPad, you have the power to easily add transitions and music to your videos with just a few taps. Let’s dive into the process:
Transitions help smooth the flow between video clips, creating a seamless and professional-looking final product. To add transitions, open the video editing app on your iOS device and select the video you want to edit. Look for the “Transitions” tab or icon, which will provide you with a variety of transition options to choose from. From fades to swipes to dissolves, experiment with different transitions to find the one that best suits your video’s style and tone.
Once you’ve chosen the desired transition, simply drag and drop it between the two video clips where you want the transition to occur. You can adjust the duration of the transition by dragging its edges. Remember, transitions are not only great for the visual flow but can also help set the mood and emphasize certain moments in your video.
A well-chosen background music track can significantly elevate your video and evoke the desired emotions in your viewers. iOS devices offer a vast library of pre-installed soundtracks to choose from, or you can import your own music from your device’s library or a third-party app.
Once you’ve chosen the perfect music track, go back to the video editing app and look for the “Music” tab or icon. Select the music track you want to use and adjust its volume if necessary. You can also trim the music to fit the desired length of your video. Experiment with different music choices to find the one that complements your visuals and enhances the overall mood of your video.
To ensure a seamless audio experience, it’s important to balance the audio levels between the video clips and the music track. Most video editing apps provide controls to adjust the audio levels, allowing you to fade in or out the music and fine-tune the overall audio balance. Take the time to listen to your video with headphones to ensure the audio is clear and well-balanced.
Once you’ve added the transitions and music, take a moment to preview your video and make any necessary adjustments. Once you’re satisfied with the final result, tap the export button and choose the desired resolution and format for your video. Sit back and let your iOS device work its magic, transforming your raw footage into a beautifully edited video with professional-looking transitions and a captivating soundtrack.
So, whether you’re creating a short film, a vlog, or a montage of memorable moments, adding transitions and music to your iPhone or iPad videos can take them to the next level. Let your creativity flow and experiment with different options to create stunning videos that captivate your audience.
Editing videos on your iPhone or iPad has never been easier. With a wide range of powerful apps available, you have the versatility to unleash your creativity and transform your videos into stunning masterpieces. Whether you’re a professional videographer or simply enjoy capturing memories on your device, the editing capabilities on iOS devices allow you to enhance, trim, add effects, and share your videos with ease.
From basic editing tools like trimming and cropping to advanced features such as adding filters, transitions, and soundtracks, the possibilities are endless. With a user-friendly interface and intuitive controls, you can navigate through the editing process effortlessly. Whether you’re looking to craft a short clip for social media or create a professional-grade video for your business, the editing tools on your iPhone or iPad can cater to your needs.
So, why wait? Dive into the world of video editing on your iOS device and unlock your creative potential. With a few simple taps, you can turn ordinary footage into captivating stories that will leave a lasting impression on your audience. Start exploring the amazing video editing features on your iPhone or iPad today!
FAQs
1. Can I edit videos on my iPhone or iPad?
Yes, you can certainly edit videos on your iPhone or iPad. Apple devices, especially those running iOS, come with a powerful built-in video editing tool called iMovie. With iMovie, you can trim, crop, add transitions, apply filters, and even add music to your videos, all from the comfort of your iOS device.
2. Do I need to download any additional apps to edit videos on my iPhone or iPad?
No, you do not need to download any additional apps to edit videos on your iPhone or iPad. As mentioned earlier, iMovie is a pre-installed app on iOS devices, and it provides all the essential video editing features you need. However, you can also explore other third-party video editing apps available on the App Store for more advanced editing options.
3. Can I edit videos shot with other devices on my iPhone or iPad?
Yes, you can edit videos shot with other devices on your iPhone or iPad. iMovie supports various video file formats, so you can import videos captured by cameras or other smartphones and edit them directly on your iOS device.
4. How do I transfer videos from my device to my iPhone or iPad for editing?
There are several ways to transfer videos from your device to your iPhone or iPad for editing. One common method is to use cloud storage services like iCloud, Google Drive, or Dropbox to upload the videos from your device and then download them onto your iOS device using the respective app. Another option is to connect your device to your computer and transfer the videos via iTunes or third-party software like iMazing.
5. Can I export the edited videos from iMovie to other devices or platforms?
Yes, you can export the edited videos from iMovie to other devices or platforms. iMovie allows you to save the edited videos to your device’s camera roll, where you can easily share them via messaging apps, social media platforms, or email. Additionally, you can also export the videos to cloud storage services or directly upload them to video sharing platforms like YouTube or Vimeo.