
Are you tired of forgetting important tasks and appointments? Look no further than the Reminders app on your smartphone. With its ability to create smart lists, this app can revolutionize the way you manage your daily activities.
Imagine having a personal assistant right at your fingertips, reminding you of important deadlines, upcoming meetings, and even grocery shopping. The Reminders app is here to make your life easier and more organized.
In this article, we will explore how to create a smart list in the Reminders app. Whether you are using an iPhone or an Android device, this step-by-step guide will help you harness the full potential of this incredible app. Say goodbye to forgotten tasks and hello to a more productive and efficient lifestyle.
Inside This Article
- Overview
- Step 1: Open the Reminders App
- Step 2: Create a New List
- Step 3: Name the List
- Step 4: Add Smart Criteria
- Step 5: Customize Notifications
- Step 6: Save and Use Your Smart List
- Conclusion
- FAQs
Overview
In today’s fast-paced world, it’s essential to stay organized and efficient. One way to achieve this is by leveraging the power of smart lists in the Reminders app on your mobile phone. Smart lists allow you to automatically categorize and prioritize your tasks based on predetermined criteria. This feature can be a game-changer for anyone looking to streamline their productivity and stay on top of their to-do list.
By creating a smart list, you can easily filter through your tasks and focus on the most important ones. Whether you want to prioritize deadlines, categorize tasks based on location, or sort them by priority level, the Reminders app has you covered. In this article, we will guide you through the process of creating a smart list and customizing it to suit your specific needs.
With just a few simple steps, you can take control of your tasks and make the most out of your productivity on the go. So, let’s dive in and learn how to create a smart list in the Reminders app!
Step 1: Open the Reminders App
The first step in creating a smart list in the Reminders app is to open the app on your mobile phone. The Reminders app allows you to organize and manage your tasks, deadlines, and reminders in a convenient and efficient way.
To open the Reminders app, simply locate the app icon on your phone’s home screen or app drawer. It is usually represented by a square-shaped icon with checkmark or line drawing. Once you have identified the icon, tap on it to launch the app.
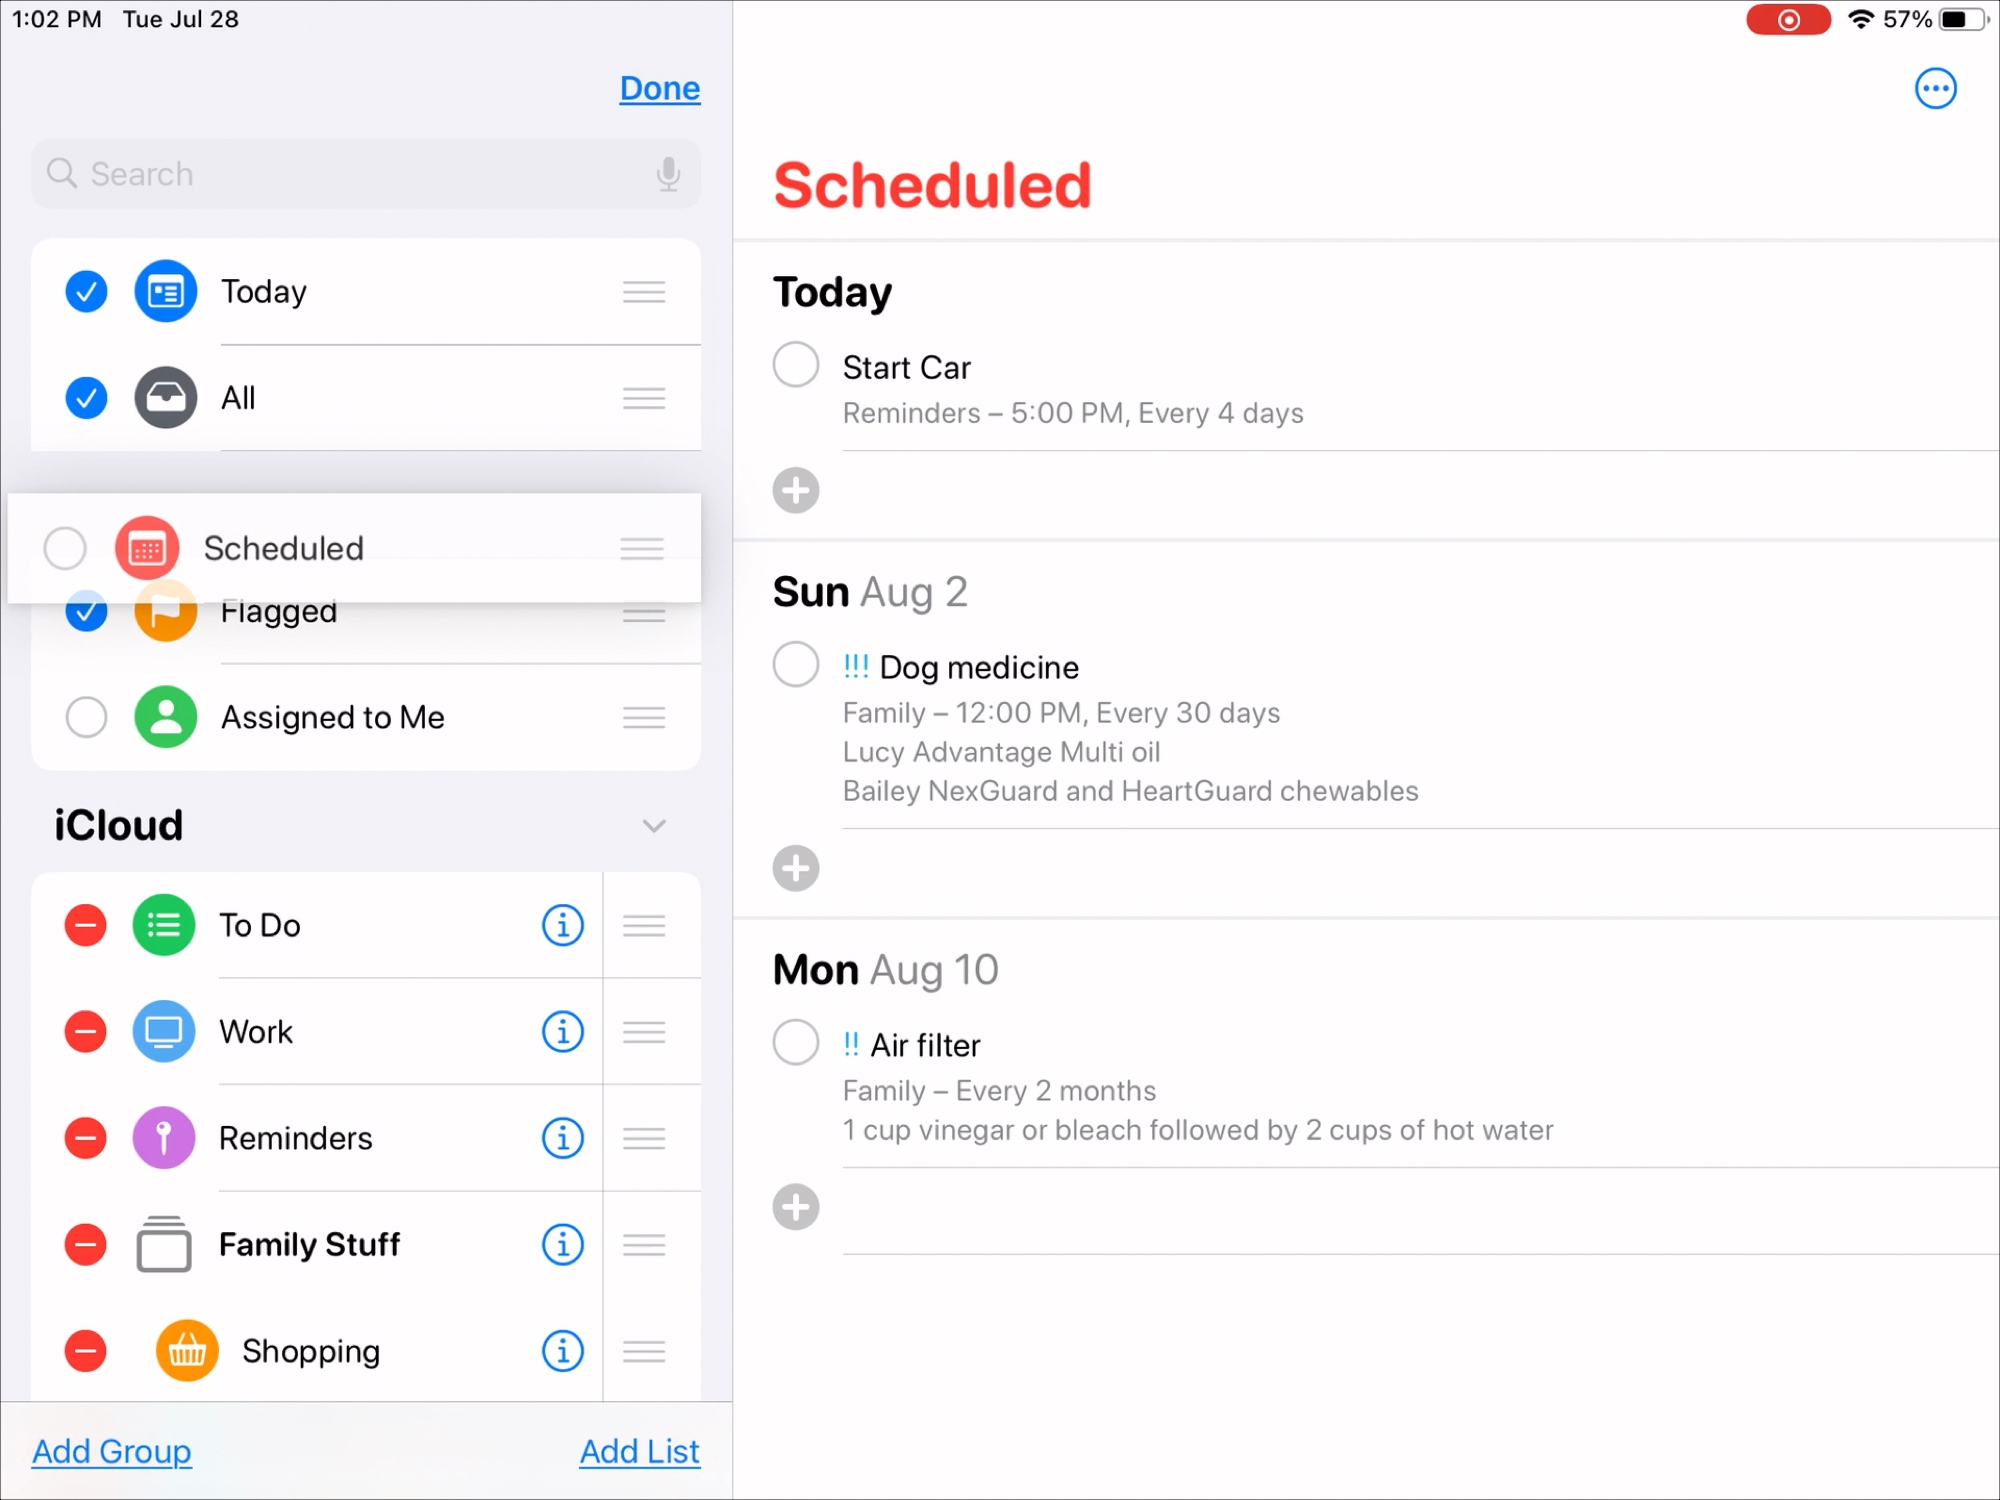
Upon opening the app, you will be greeted with the main interface of the Reminders app. This is where you can view your existing lists, create new lists, and access the various features and functionalities of the app.
Opening the Reminders app is the initial step towards creating a smart list. In the following steps, we will guide you on how to create a new list, name the list, add smart criteria, customize notifications, and ultimately save and use your smart list.
Step 2: Create a New List
Now that you’ve opened the Reminders app, it’s time to create a new list. Creating a list in the Reminders app will allow you to organize and categorize your tasks and reminders effectively.
To create a new list, look for the “+” icon in the bottom right corner of the screen. Tap on it, and a new screen will appear.
On this screen, you will see two options: “New Reminder” and “New List.” Tap on “New List” to proceed with creating your new list.
After tapping on “New List,” you will be prompted to enter a name for your list. Think of a descriptive and memorable name for your list that accurately reflects the type of tasks or reminders you intend to add.
Once you have entered the name, tap on the “Done” button, typically located in the upper right corner of the screen. Your new list will now be created and appear on the main screen of the Reminders app.
It’s important to note that you can create multiple lists within the Reminders app to further organize your tasks. For instance, you can create separate lists for work-related tasks, personal reminders, shopping lists, and more.
Congratulations! You’ve successfully created a new list in the Reminders app. Now, it’s time to add some smart criteria to make your list even more useful and efficient. Let’s move on to the next step.
Step 3: Name the List
Once you have created a new list in the Reminders app, the next step is to give it a name that is easy to remember and identify. Naming your list appropriately helps you stay organized and ensures you can distinguish it from other lists you may have.
To name your list, follow these simple steps:
- Tap on the placeholder text that says “List Name” or “Untitled List”. This will allow you to edit the name.
- Type in a name for your list using the on-screen keyboard. Be sure to choose a clear and descriptive name that reflects the purpose of the list.
- Consider using keywords that can help you quickly identify the type of tasks or reminders you’ll be adding to the list. For example, if your list is for grocery shopping, you may want to include the word “groceries” or “shopping” in the name.
- Review the name to ensure it is accurate and easy to understand. You can also make changes to the name at any time if you decide to rename your list in the future.
Naming your list is an essential step in creating a smart and efficient organization system within the Reminders app. By choosing a name that resonates with you, you’ll be more likely to stay focused and on top of your tasks and reminders.
Step 4: Add Smart Criteria
Once you have created a new list in the Reminders app and named it, the next step is to add smart criteria to make the list more dynamic and personalized to your needs. Smart criteria allow you to filter and organize your reminders based on specific conditions, such as due dates, locations, or even keywords. Here’s how you can add smart criteria to your list:
1. Open the Reminders app and navigate to the list you created.
2. Tap on the list to open it, and then tap on the ellipsis (three dots) icon at the top-right corner of the screen.
3. In the options menu, select “Add Smart List Criteria.”
4. You will now see a list of criteria options that you can choose from. This includes options such as “Due Date,” “Priority,” “Location,” and “Flagged.” Tap on the criteria that you want to add to the list.
5. Depending on the criteria you choose, you will be prompted to provide additional information. For example, if you select “Due Date,” you can specify whether you want to see reminders that are due “Today,” “Tomorrow,” “This Week,” or “Custom” dates.
6. After setting the criteria and any additional details, tap on “Done” to save your changes.
By adding smart criteria to your list, you can streamline your reminders and ensure that they are organized in a way that suits your preferences. For example, if you often have reminders related to specific locations, you can add the “Location” criteria and set it to filter reminders based on nearby places. This way, you will only see relevant reminders when you are in that particular location.
Remember, you can add multiple smart criteria to your list to create a more refined and precise set of reminders. This can help you stay on top of your tasks and ensure that nothing falls through the cracks.
Now that you have added smart criteria to your list, it’s time to move on to the next step of customizing the notifications for your reminders.
Step 5: Customize Notifications
Customizing notifications for your smart list can help ensure that you never miss an important reminder. The Reminders app allows you to set up alerts, sounds, and badges for each list, including your smart list. Here’s how you can customize notifications to suit your preferences:
1. Open the Reminders App: Launch the Reminders app on your mobile device and navigate to the Lists view. Select the smart list for which you want to customize notifications.
2. Access List Settings: Tap on the ellipsis (…) or the three dots next to the smart list name to access the list settings.
3. Choose “Edit List”: In the list settings menu, select the “Edit List” option. This will allow you to modify various settings related to your smart list, including notifications.
4. Enable Notifications: To enable notifications for the smart list, toggle the switch next to “Allow Notifications.” This ensures that you receive timely alerts for your reminders.
5. Set Alert Style: Customize the alert style by selecting “Alert Style.” You can choose between options like banners, alerts, or None. Banners appear briefly at the top of the screen, while alerts stay on the screen until dismissed. Select the option that suits your preferences.
6. Choose Sound: If you want an audible notification for your smart list, select “Sound.” You can then choose from the available sounds in the sound library or use a custom sound of your choice.
7. Set Badges: Badges are small numerical indicators that appear on the app’s icon, indicating the number of pending reminders in your smart list. Toggle the switch next to “Show in App Icon” to enable or disable badges for the smart list.
8. Customize Advanced Options: Some additional customization options may be available, depending on your device and operating system. These options might include features like repeat alerts, critical alerts, or notification grouping. Explore the advanced options and tweak them according to your preferences.
9. Save your Settings: Once you have customized the notifications to your satisfaction, tap on the “Done” or “Save” button to save your settings and apply them to your smart list.
By customizing notifications for your smart list, you can ensure that you never miss an important reminder again. Stay on top of your tasks and stay organized with the Reminders app notifications tailored to your needs!
Step 6: Save and Use Your Smart List
Once you have set up all your desired criteria and notifications for your smart list in the Reminders app, it’s time to save and start using it. Follow these simple steps to save and utilize your smart list:
1. Click on the “Save” button: After you have finished customizing your smart list, look for the “Save” button in the app interface. Click on it to save your list.
2. Access your smart list: To use your smart list, go back to the main screen of the Reminders app. You will see your recently created smart list listed among your other lists.
3. View your smart list: Tap on the name of your smart list to open it. Once opened, you will be able to see all the relevant reminders that fulfill the set criteria.
4. Add new reminders: You can continue to add new reminders to your smart list just as you would with any other list in the app. These new additions will automatically be evaluated against the existing criteria and be included in the smart list if they match.
5. Update or modify the criteria: If you ever want to update or modify the criteria for your smart list, you can do so by going back to the settings of the list. Look for the “Edit” option to make changes to the criteria or notifications as needed.
6. Enjoy the benefits of automation: One of the key advantages of using a smart list is the automation it provides. You no longer have to manually sort or search through your reminders – the smart list will do it for you based on the specified criteria.
7. Stay updated with notifications: As you have customized the notifications for your smart list, you will receive timely alerts or reminders based on the set criteria. This feature ensures that you never miss out on important tasks or events.
With your smart list set up, you can now efficiently manage your reminders and tasks without having to manually organize them. The power of automation will simplify your life and help you stay organized.
Conclusion
Creating a smart list in the Reminders app is a game-changer for staying organized and productive. By utilizing this feature, you can easily manage and prioritize your tasks and reminders based on specific criteria and conditions. Whether you want to group tasks by location, due date, or priority level, the smart list functionality offers a convenient and customizable solution.
With just a few simple steps, you can set up your own smart list and streamline your workflow. By leveraging the power of automation, you can ensure that you never miss an important task or deadline again. Take advantage of the Reminders app’s smart list feature and experience a new level of efficiency and organization in your daily life.
Start harnessing the full potential of the Reminders app today and watch your productivity soar. Say goodbye to missed tasks and hello to a more streamlined and organized approach to managing your to-do list.
FAQs
1. What is a Smart List in the Reminders App?
2. How do I create a Smart List in the Reminders App?
3. Can I customize the settings and preferences for a Smart List?
4. Can I add multiple reminders to a Smart List at once?
5. Can I collaborate and share Smart Lists with others?