
Are you excited about receiving files, photos, or even apps from your friends using Apple’s AirDrop feature? If you own an iPhone and want to learn how to accept an AirDrop, you’ve come to the right place. AirDrop is a convenient and fast way to share content between Apple devices without the need for Wi-Fi or cellular data. Whether you’re in a meeting, at a party, or simply enjoying a day out with friends, accepting an AirDrop can save you time and effort. In this article, we’ll guide you through the step-by-step process of accepting an AirDrop on your iPhone, ensuring you never miss out on any files or memories shared by your loved ones. So, let’s get started and discover how to make the most of this fantastic feature on your iPhone!
Inside This Article
- Enabling Airdrop on iPhone
- Accepting an Airdrop
- Troubleshooting Airdrop Issues
- Enable Airdrop on your iPhone
- Adjust Airdrop settings for receiving
- Accept an Airdrop on iPhone from Contacts
- Accept an Airdrop on iPhone from Unknown Senders
- Conclusion
- FAQs
Airdrop is a convenient feature on your iPhone that allows you to easily transfer files, photos, documents, and more to other nearby Apple devices. Whether you want to share a funny video with your friends or send a presentation to a colleague, Airdrop makes it quick and effortless.
To take advantage of this feature, you need to know how to accept an Airdrop request on your iPhone. In this guide, we will walk you through the steps to enable Airdrop and successfully accept files sent via Airdrop.
Enabling Airdrop on iPhone
The first step is to ensure that Airdrop is enabled on your iPhone:
- Swipe up from the bottom of your iPhone screen to open the Control Center.
- Tap on the Airdrop icon, which looks like a series of concentric circles with a triangle inside.
- You will see three options: “Receiving Off”, “Contacts Only”, and “Everyone”. Select the option that suits your preference. Choosing “Contacts Only” limits who can send you Airdrop requests to people in your contacts list, while “Everyone” allows anyone nearby to send you files.
Once you have enabled Airdrop, you are ready to accept files sent via Airdrop.
Accepting an Airdrop
When someone nearby wants to send you a file using Airdrop, follow these steps to accept the request:
- Ensure that both Bluetooth and Wi-Fi are enabled on your iPhone.
- Keep your iPhone unlocked and awake.
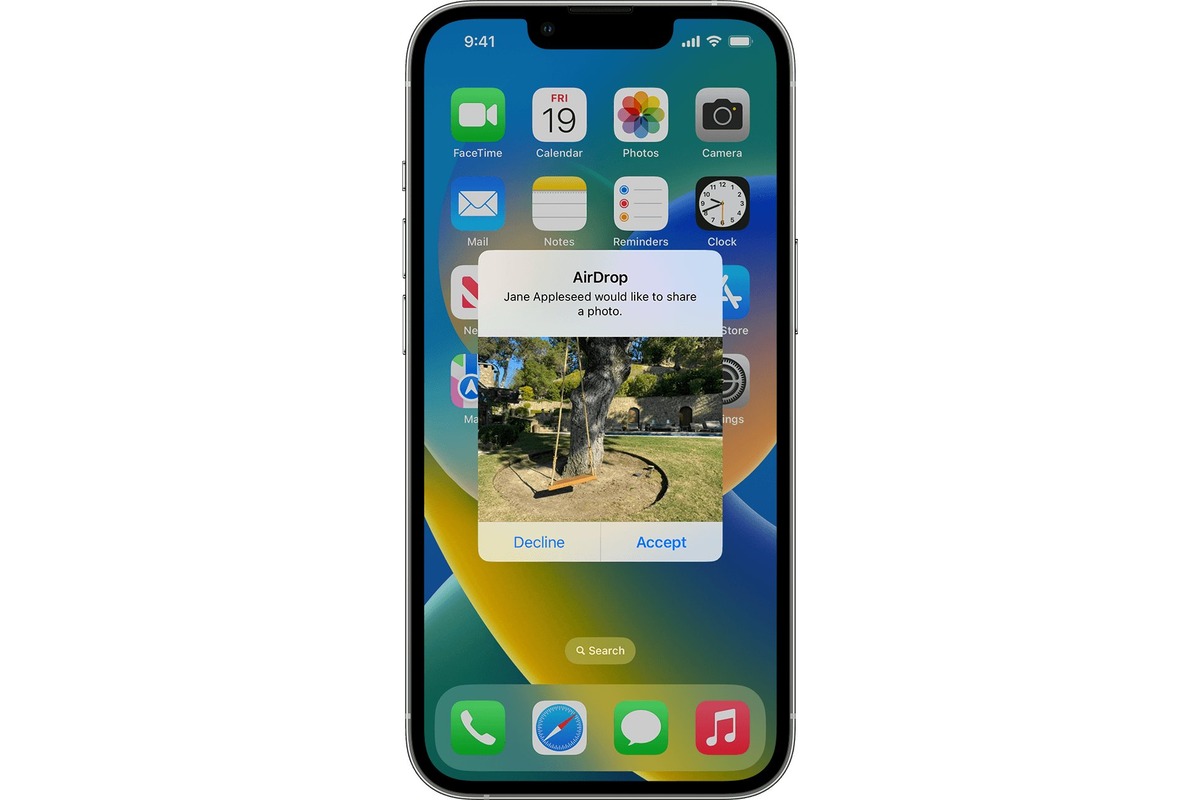
- When you receive an Airdrop request, a notification will appear on your screen. Tap on the notification to open the Airdrop sharing interface.
- You will see the name and photo of the person sending the file. If you recognize the person, simply tap on “Accept” to receive the file. If you don’t recognize the sender, exercise caution before accepting the file.
- Once you accept the file, it will be saved to the designated app depending on the file type. For example, photos will be saved in the Photos app, while documents will be saved in the Files app.
That’s it! You have successfully accepted an Airdrop request on your iPhone.
Troubleshooting Airdrop Issues
If you encounter any issues while accepting Airdrop requests on your iPhone, here are a few troubleshooting tips:
- Make sure that both devices have Airdrop enabled and are within close proximity to each other.
- Restart both devices and try again.
- Ensure that your iPhone is connected to a stable Wi-Fi network or cellular data.
- Check whether your iPhone’s Bluetooth is turned on. Airdrop requires Bluetooth to be enabled.
- If you are still facing issues, try resetting your network settings by going to Settings > General > Reset > Reset Network Settings.
By following these steps and troubleshooting tips, you should now be able to accept Airdrop requests on your iPhone with ease. Enjoy effortless file sharing with Airdrop!
Enable Airdrop on your iPhone
One of the most convenient features on your iPhone is Airdrop, which allows you to quickly and wirelessly share files with other Apple devices. Whether you want to send a photo, a document, or even a contact, Airdrop makes the process effortless.
Before you can start using Airdrop, you need to make sure it’s enabled on your iPhone. Here’s a step-by-step guide to help you enable Airdrop:
- Open the “Settings” app on your iPhone.
- Scroll down and tap on “General”.
- Scroll down again and select “AirDrop”.
- You will see three options: “Receiving Off”, “Contacts Only”, and “Everyone”.
- If you want to receive Airdrop files from anyone, select “Everyone”. If you only want to receive files from your contacts, choose “Contacts Only”.
- That’s it! Airdrop is now enabled on your iPhone.
It’s important to note that both devices must have Airdrop enabled for the transfer to be successful. Additionally, both devices need to be within close proximity to establish a connection.
Now that you’ve enabled Airdrop on your iPhone, you’re ready to start accepting Airdrop requests and sharing files with others. In the next section, we’ll walk you through the process of accepting an Airdrop.
Adjust Airdrop settings for receiving
Airdrop is a handy feature on your iPhone that allows you to quickly and wirelessly share files, documents, photos, and more with other Apple devices nearby. However, before you can start receiving files through Airdrop, you need to ensure that your Airdrop settings are properly adjusted. Here’s a step-by-step guide to help you adjust your Airdrop settings for receiving:
Step 1: Open Control Center
To begin, swipe down from the top-right corner of your iPhone (or swipe up from the bottom of the screen on older iPhone models) to access Control Center. This is where you’ll find various shortcuts and toggles for different functions on your device.
Step 2: Locate Airdrop
Within Control Center, look for the Airdrop icon. It resembles four concentric circles or a series of dots. Tap on the Airdrop icon to open the Airdrop settings.
Step 3: Select Receiving Options
Once you’re in the Airdrop settings, you’ll see three options: “Receiving Off,” “Contacts Only,” and “Everyone.” To adjust your settings for receiving files, tap on the option that suits your preferences.
- Receiving Off: This option means that your device is not currently set up to receive any files through Airdrop. Choose this option if you want to disable Airdrop receiving altogether.
- Contacts Only: Selecting this option enables your device to receive files only from your contacts who are using Airdrop.
- Everyone: If you choose this option, your device will be able to receive files from any nearby Apple device, whether or not they are in your contacts.
Choose the receiving option that best suits your needs and preferences.
Step 4: Close Airdrop Settings
After selecting your preferred receiving option, you can simply swipe up from the bottom (or down from the top-right corner) of your screen again to close Control Center. Your Airdrop settings will be saved automatically.
That’s it! You have successfully adjusted your Airdrop settings for receiving files on your iPhone. Now you can start accepting Airdrop requests and receiving files wirelessly from other Apple devices in your vicinity.
Accept an Airdrop on iPhone from Contacts
Accepting an Airdrop on your iPhone from someone in your contacts is a convenient way to quickly share files and media. Whether it’s a photo, a document, or a video, Airdrop allows you to seamlessly transfer files with just a few taps. Here are the steps to accept an Airdrop from your contacts:
- Ensure Airdrop is enabled on your iPhone. Go to the Control Center by swiping down from the top-right corner of the screen (on iPhone X or later) or swiping up from the bottom of the screen (on older iPhone models). Long-press (or 3D Touch) the network settings card in the top-left corner, then tap on the Airdrop icon. Select “Contacts Only” or “Everyone” depending on your preference.
- Ask your contact to initiate an Airdrop from their iPhone or Mac. They can do this by opening the file they want to send, tapping the share button, and selecting your name from the list of available contacts. They can also go to the Control Center, long-press (or 3D Touch) the network settings card, tap on the Airdrop icon, and select your name.
- You will receive an Airdrop notification on your iPhone. This will appear as a banner notification at the top of the screen and as a notification in your lock screen, depending on your settings. The notification will display the name and the icon of the app from which the Airdrop is being sent.
- To accept the Airdrop, swipe down on the notification or tap on it to open the sharing menu. You will see the sender’s name and the type of file being shared. Tap on “Accept” to initiate the transfer.
- A dialog box will appear asking you to choose where to save the file. You can select “Save to Files” to save the file in the Files app, or choose another compatible app to open and save the file. Tap on your preferred option.
- The file will be transferred from the sender’s device to your iPhone. The progress will be displayed as a circle with a blue outline. Once the transfer is complete, you will see a notification confirming the successful transfer.
That’s it! You have successfully accepted an Airdrop on your iPhone from a contact. The shared file will be accessible in the selected location on your device, ready for you to use, view, or share further.
Accept an Airdrop on iPhone from Unknown Senders
Airdrop is a convenient feature on the iPhone that allows you to quickly share files, photos, and more with other Apple devices nearby. By default, Airdrop is set to accept requests only from your contacts. However, there may be times when you want to accept an Airdrop from unknown senders. In this guide, we’ll show you how to accept an Airdrop on your iPhone from unknown senders.
Before proceeding, keep in mind that accepting Airdrop requests from unknown senders may pose a security risk. It’s important to ensure that you only accept Airdrops from trusted sources to avoid potential malicious files or unwanted content. With that said, here’s how to accept an Airdrop from unknown senders on your iPhone:
- First, make sure that both Wi-Fi and Bluetooth are enabled on your iPhone. Airdrop uses both of these technologies to transfer files.
- Swipe down from the top-right corner of the screen (or up from the bottom on older iPhone models) to open the Control Center.
- Press and hold the network settings card (the one with the Wi-Fi, Bluetooth, and Cellular icons) in the top-left corner of the Control Center.
- This will expand the network card and reveal additional options.
- Tap on the “Airdrop” button to open the Airdrop settings.
- The Airdrop settings menu will provide you with three options: “Receiving Off”, “Contacts Only”, and “Everyone”.
- Tap on the “Everyone” option to enable Airdrop for unknown senders.
- You can now close the Control Center by swiping up from the bottom or tapping outside the Control Center window.
- With Airdrop set to “Everyone”, you’ll be able to accept Airdrops from any nearby device, including unknown senders.
- To accept an Airdrop, simply wait for the Airdrop request notification to appear on your iPhone screen.
- You’ll see a preview of the file being shared and the sender’s name or device.
- If you want to accept the Airdrop, tap on the “Accept” button. If not, you can choose to decline the request by tapping on the “Decline” button.
- If you choose to accept the Airdrop, the file will be saved to the appropriate location on your iPhone (e.g., Photos, Files app, etc.).
It’s important to note that after accepting an Airdrop from an unknown sender, their device will be added to your list of contacts for future Airdrop transfers. If you no longer wish to accept Airdrops from unknown senders, you can simply go back to the “Airdrop” settings and change it to “Contacts Only” or “Receiving Off”.
Remember to exercise caution when accepting Airdrops from unknown sources. Stick to trusted sources to minimize any potential risks. With the right precautions in place, Airdrop can be a valuable tool for quickly sharing files and content with others.
Conclusion
Accepting Airdrop on your iPhone is a convenient and efficient way to share files and information with other Apple devices. By following the steps outlined in this guide, you can easily enable Airdrop, adjust your settings, and ensure a seamless transfer process. Whether you’re transferring photos, documents, or links, Airdrop provides a secure and hassle-free solution.
Remember to keep your Airdrop settings properly configured and your device discoverable to receive files from others. Also, be cautious about accepting Airdrop requests from unknown sources to protect your privacy and security.
With Airdrop’s quick and seamless file transfer capabilities, you can easily share content with friends, collaborate with colleagues, or send files to your other Apple devices. So, why wait? Start accepting Airdrop on your iPhone today and experience the convenience it offers.
FAQs
1. What is Airdrop on iPhone and how does it work?
Airdrop is a feature on iPhone that allows you to wirelessly share files, photos, and other data with other Apple devices nearby. It works by using Bluetooth technology to create a peer-to-peer Wi-Fi connection between the devices, enabling the secure transfer of data.
2. How do I turn on Airdrop on my iPhone?
To turn on Airdrop on your iPhone, follow these steps:
- Swipe up from the bottom of your screen to open the Control Center.
- Long press or force touch on the network settings box.
- You should now see the Airdrop option. Tap on it.
- Choose between “Contacts Only” or “Everyone” to determine who can see and send items to your iPhone using Airdrop.
3. Can I receive an Airdrop from someone I don’t know?
Yes, you can receive an Airdrop from someone you don’t know if your Airdrop settings are set to “Everyone.” However, it is always important to exercise caution when accepting files from unknown sources to protect your device from potential security risks.
4. How do I accept an Airdrop on my iPhone?
To accept an Airdrop on your iPhone, follow these steps:
- Make sure both Wi-Fi and Bluetooth are enabled on your iPhone.
- When an Airdrop notification appears on your screen, swipe up on the notification or tap “Accept” to open the file or content sent to you.
- If the sender is nearby, you will see their name and device appear. Tap on their device name to accept the Airdrop.
- The file will now be saved to the appropriate app or location on your iPhone (e.g., Photos app for photos, Files app for documents).
5. What should I do if I’m not receiving Airdrops on my iPhone?
If you’re experiencing issues with receiving Airdrops on your iPhone, try the following troubleshooting steps:
- Ensure that both Wi-Fi and Bluetooth are enabled on your iPhone.
- Make sure your Airdrop settings are set to “Contacts Only” or “Everyone” depending on your preference.
- Restart your iPhone. Sometimes a simple restart can resolve minor software glitches.
- Check that the sender is within range and that their device supports Airdrop.
- If the problem persists, you can try resetting your network settings or contacting Apple support for further assistance.