
In today’s digital age, our smartphones play a crucial role in keeping us connected. With the ability to store hundreds, even thousands, of contacts, it’s no wonder we sometimes find ourselves with an overflowing contact list. As iPhone users, we’ve all been there: scrolling through a long list of contacts, trying to delete multiple ones at once, only to realize that deleting contacts one by one is a tedious and time-consuming task.
In this article, we will tackle the issue head-on and show you how to delete multiple contacts on your iPhone efficiently and effortlessly. Whether you want to freshen up your contact list, remove duplicates, or simply declutter, we’ve got you covered. So let’s dive in and discover the best methods to clean up your contact list on your iPhone.
Inside This Article
- Method 1: Using the Contacts App
- Method 2: Using iCloud
- Method 3: Using Third-Party Apps
- Method 4: Using iTunes
- Conclusion
- FAQs
Method 1: Using the Contacts App
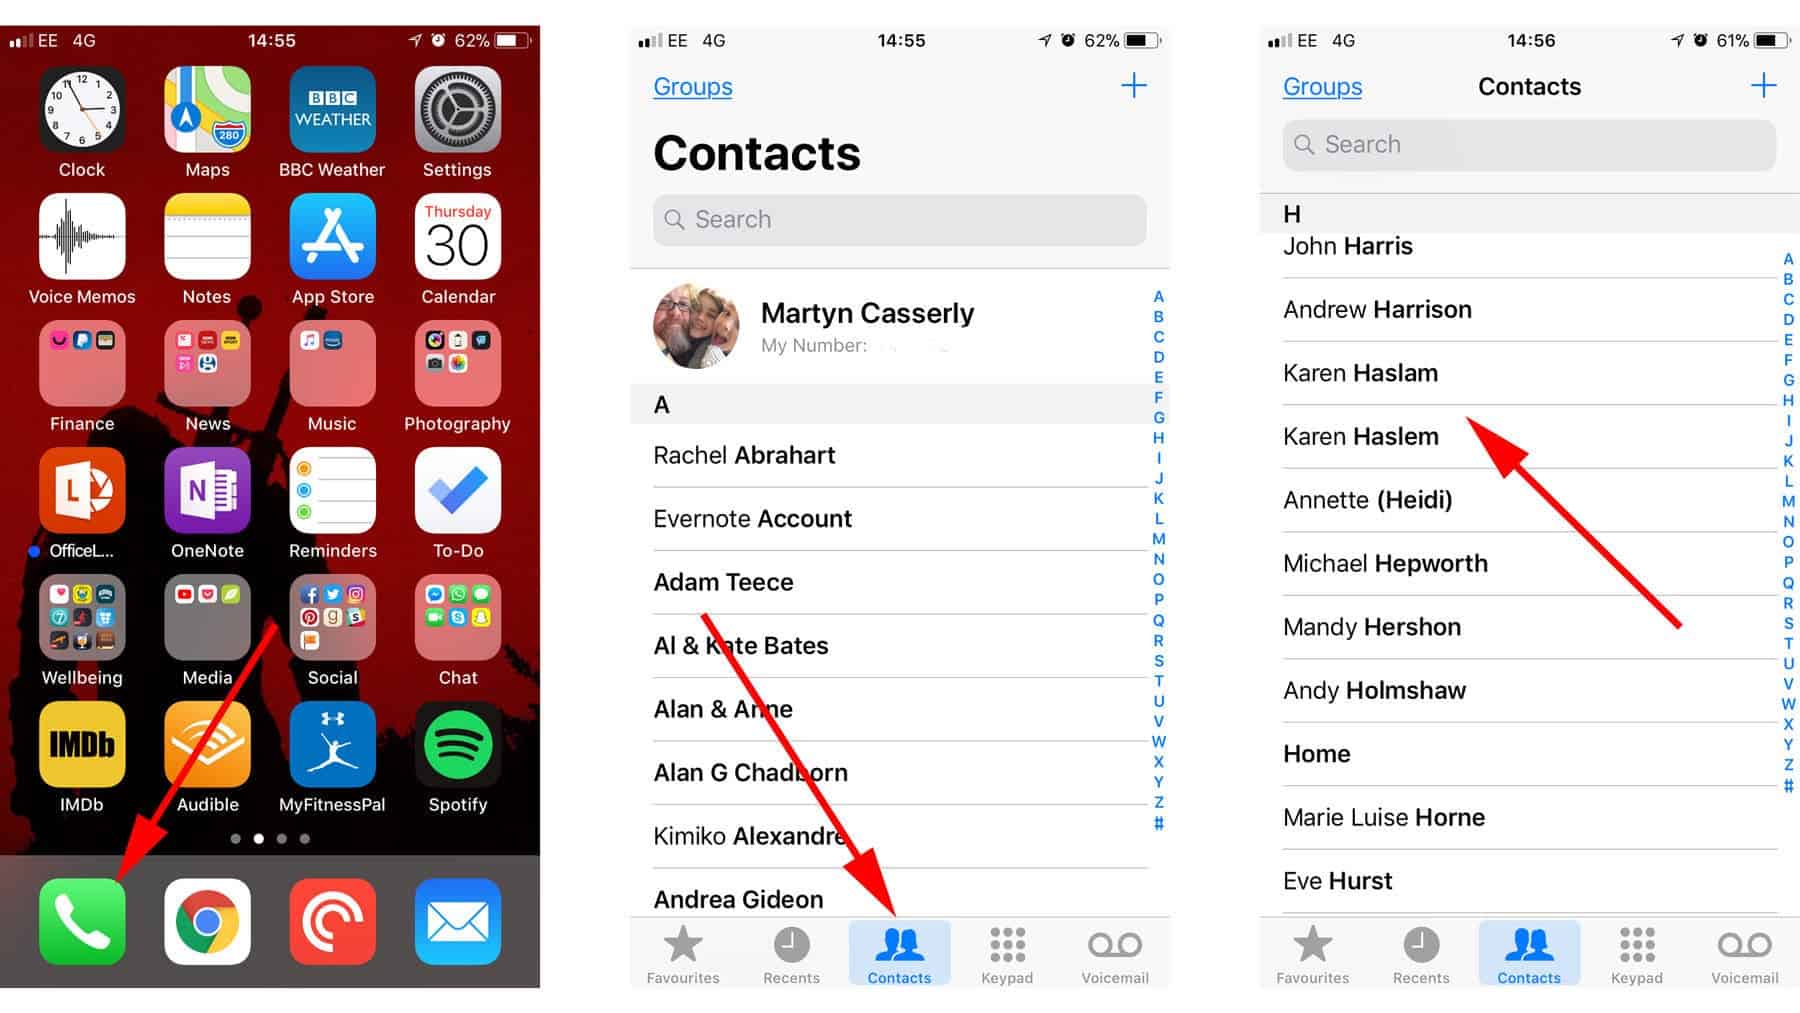
The Contacts app on your iPhone makes it easy to manage your contacts and delete multiple contacts at once. Follow these steps to delete multiple contacts using the Contacts app:
- Open the Contacts app on your iPhone.
- Navigate to the contact list and select the first contact you want to delete.
- Tap on the “Edit” button in the top-right corner of the screen. This will allow you to make changes to the contact details.
- Scroll down to the bottom of the contact page and tap on the “Delete Contact” option.
- A confirmation pop-up will appear. Tap on the “Delete Contact” button to confirm the deletion.
- By default, the app will only delete the selected contact. However, if you want to delete multiple contacts, tap on the “Delete Contact” button again.
- You can now select the additional contacts that you want to delete by tapping on their names.
- After selecting all the contacts you want to delete, tap on the “Delete” button in the top-right corner of the screen.
- Another confirmation pop-up will appear. Tap on the “Delete from My iPhone” button to remove the selected contacts permanently from your device.
Using the Contacts app is a convenient way to delete multiple contacts on your iPhone. However, if you have a large number of contacts to delete, this method may be time-consuming. In that case, you may want to explore other methods, such as using iCloud or third-party apps, which we will discuss in the following sections.
Method 2: Using iCloud
If you have an iCloud account, you can easily delete multiple contacts from your iPhone using iCloud. This method is convenient and effective, particularly if you have a large number of contacts to delete. Follow the steps below to delete multiple contacts using iCloud:
- Open a web browser on your computer and navigate to iCloud.com.
- Sign in to your iCloud account using your Apple ID and password.
- Once you are logged in, click on the “Contacts” icon to access your contacts.
- In the contacts list, select the contacts that you want to delete by holding down the “Ctrl” key (Windows) or the “Command” key (Mac) and clicking on the contacts.
- After selecting the contacts, click on the gear icon in the bottom-left corner of the screen.
- In the pop-up menu that appears, select “Delete” to remove the selected contacts from your iCloud account.
- A confirmation message will appear asking if you want to delete the selected contacts. Click on “Delete” to confirm.
- Once the contacts are deleted, the changes will sync to your iPhone, and the selected contacts will be removed from your device as well.
Using iCloud to delete multiple contacts is a convenient option for iPhone users. It allows you to manage your contacts easily from a computer and have the changes reflected on your iPhone seamlessly. This method is particularly useful when you have a large number of contacts to delete, saving you time and effort.
It’s worth noting that when you delete contacts using iCloud, they will be permanently removed from your iCloud account and all devices connected to it. Therefore, before you delete any contacts, make sure to double-check and ensure that you have selected the correct contacts for deletion.
Method 3: Using Third-Party Apps
If you’re dealing with a large number of contacts that need to be deleted from your iPhone, using a third-party app can be a convenient solution. There are many apps available on the App Store that are specifically designed to help you manage and delete multiple contacts efficiently.
One popular third-party app option is “Groups – Contact Management” by Qbix, which offers advanced contact management features. To start using this app, follow these steps:
- Open the App Store on your iPhone and search for “Groups – Contact Management” by Qbix.
- Download and install the app on your device.
- Launch the app and grant it permission to access your contacts when prompted.
- The app will analyze your contacts and organize them into different groups based on criteria such as name, company, and location.
- Select the group or groups that contain the contacts you want to delete.
- Tap on the “Select” button in the top right corner of the screen.
- Tap on the contacts you want to delete. A checkmark will appear next to each selected contact.
- Once you have selected all the contacts you want to delete, tap on the trash can icon or the “Delete” button at the bottom of the screen.
- Confirm the deletion when prompted.
Using a third-party app like “Groups – Contact Management” can save you a significant amount of time and effort, especially if you have hundreds or even thousands of contacts to delete. These apps often provide additional features such as contact merging, contact export, and advanced contact searching, making them a valuable tool for iPhone users.
Remember to choose a reputable and trustworthy app from the App Store to ensure the security of your contacts and device.
Method 4: Using iTunes
If you prefer to manage your contacts on your computer, iTunes offers a convenient solution for deleting multiple contacts from your iPhone. Follow the steps below to use iTunes to remove unwanted contacts:
1. Connect your iPhone to your computer and open iTunes.
2. Select your iPhone icon from the top-left corner of the iTunes window.
3. Click on the “Info” tab on the left sidebar.
4. Under the “Contacts” section, check the box next to “Sync Contacts.”
5. Choose the option “Selected groups” and ensure that none of the contact groups are selected.
6. Click the “Apply” button at the bottom right corner of the iTunes window to start syncing your iPhone contacts.
7. A confirmation prompt will appear, asking if you want to remove the selected contacts on your iPhone. Click “Remove Contacts” to proceed.
8. Wait for iTunes to complete the syncing process. Once it’s done, disconnect your iPhone from the computer.
9. On your iPhone, go to the “Contacts” app and check if the unwanted contacts have been successfully deleted.
By using iTunes, you can easily delete multiple contacts from your iPhone in bulk. However, it’s important to note that this method will remove all the selected contacts from your iPhone, so make sure to double-check before clicking the “Remove Contacts” option.
Additionally, keep in mind that iTunes may not be available on certain computers or operating systems. In such cases, you can explore alternative methods to manage your contacts, such as using iCloud or third-party apps mentioned earlier.
Conclusion
In conclusion, deleting multiple contacts on your iPhone can be a quick and efficient process thanks to the available methods and apps. Whether you choose to use the built-in Contacts app or opt for a third-party solution, you can easily clean up your contact list and organize it according to your preferences.
By following the step-by-step instructions provided in this article, you can declutter your phonebook and optimize your device’s performance. Deleting multiple contacts not only saves you time but also maximizes the available storage space on your iPhone.
Remember, maintaining a clean and organized contact list is essential for efficient communication and better user experience. So, if you find yourself with a cluttered collection of contacts, take advantage of the methods outlined in this article and enjoy a streamlined contact management experience on your iPhone.
FAQs
1. Can I delete multiple contacts at once on my iPhone?
Yes, you can delete multiple contacts on your iPhone by following a few simple steps. This makes it much easier and quicker to clean up your contact list or remove unwanted entries.
2. How do I select multiple contacts to delete on my iPhone?
To select multiple contacts on your iPhone, go to the Contacts app and tap on the “Groups” option at the top left corner. Select the group that contains the contacts you wish to delete. Tap on the “Edit” button at the top right corner and then tap on each contact you want to delete. Once you have selected all the desired contacts, tap on the “Delete” button at the bottom right corner.
3. Is there a way to undo the deletion of multiple contacts on an iPhone?
Unfortunately, there is no built-in way to undo the deletion of multiple contacts on an iPhone. Therefore, it is important to double-check the contacts you have selected before confirming the deletion.
4. Will deleting contacts from my iPhone also remove them from other synced devices?
If you have other devices, such as Mac or iPad, that are synced with your iPhone through iCloud, deleting contacts from your iPhone will also remove them from these synced devices. However, it is always a good practice to backup your contacts before making any mass deletions.
5. Can I delete contacts from my iPhone using a computer?
Yes, it is possible to delete contacts from your iPhone using a computer. You can do this by connecting your iPhone to a computer and using the Contacts app on your computer to manage your contacts. Any changes you make on the computer will be synced with your iPhone and vice versa.