
Are you looking to create a stunning video montage using your iPhone? The good news is that you don’t need to be a professional videographer or have advanced editing skills to achieve this! With the advancements in technology, your iPhone can serve as a powerful tool for turning your pictures into a captivating video.
In this article, we will guide you through a step-by-step process on how to make a video with pictures on an iPhone. We’ll explore the built-in features and easy-to-use applications that can help you transform your photos into a dynamic video presentation. Whether you want to create a memorable slideshow for a special occasion or showcase your creative flair on social media, this tutorial will equip you with the necessary knowledge and techniques.
So, let’s dive in and discover how you can turn your pictures into an engaging video masterpiece using the convenience of your iPhone!
Inside This Article
- Getting Started
- Selecting Photos
- Choosing a Video Editing App
- Adding Photos to the App
- Arranging the Order of Photos
- Applying Transitions and Effects
- Adding Background Music
- Adjusting Duration and Timing
- Editing and Enhancing Photos
- Saving and Sharing the Video
- Conclusion
- FAQs
Getting Started
Welcome to the world of creating captivating videos with your iPhone! Whether you want to preserve memories or showcase your artistic talents, turning your photos into a video is a great way to share your story. So, let’s get started on the journey of transforming your pictures into a dynamic and engaging video.
The first step is to gather the photos you want to include in your video. This could be a collection from a recent vacation, a special occasion, or simply a series of your favorite moments. Make sure the photos are easily accessible on your iPhone so you can easily import them into a video editing app.
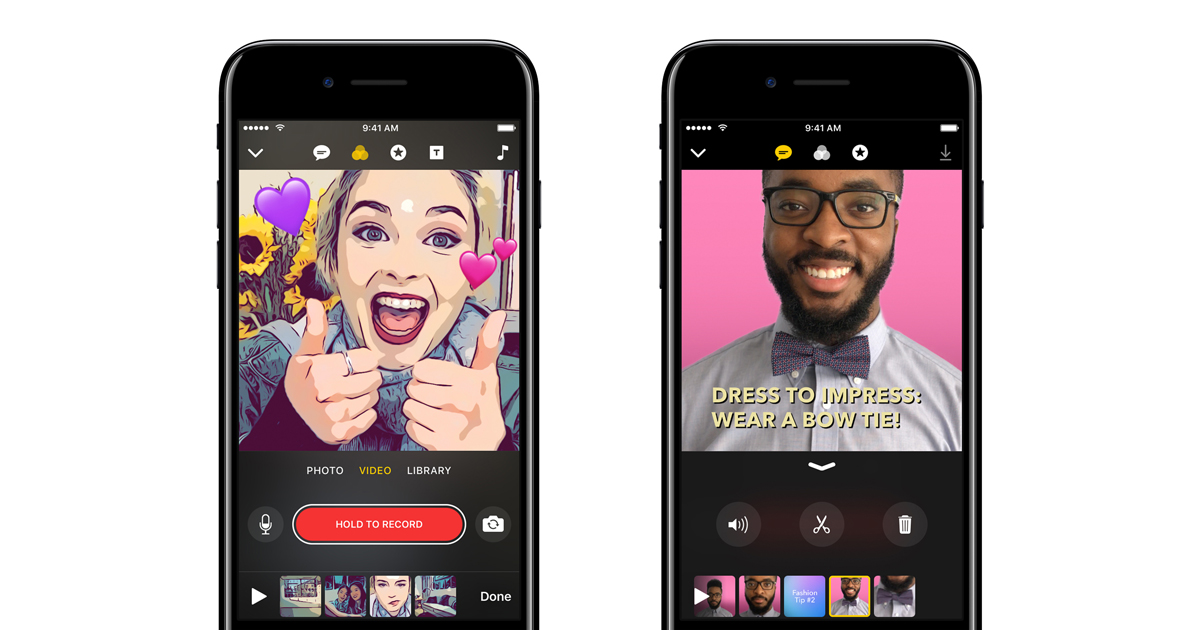
Next, you’ll need to choose a video editing app that suits your needs. There are many fantastic options available on the App Store, each offering various features and user-friendly interfaces. Some popular choices include iMovie, Splice, and InShot. Take some time to explore different apps and read reviews to find the perfect fit for you.
Once you’ve selected an app, it’s time to add your photos to the app’s workspace. Most video editing apps allow you to import photos directly from your iPhone’s camera roll or photo library. Simply select the photos you want to include and import them into the app.
After importing the photos, you may want to rearrange the order in which they appear in your video. This step allows you to tell a cohesive story or create a visually appealing sequence. Drag and drop the photos within the app to arrange them in the desired order.
Next, it’s time to add transitions and effects to your video. Transitions help smooth the visual flow between photos, while effects add artistic touches and enhance the overall look of your video. Experiment with different options provided by the app to find the effects that best complement your photos.
No video is complete without a captivating soundtrack. Many video editing apps allow you to add background music to your videos. You can choose from preloaded tracks or import your own music. Consider selecting music that matches the mood and ambiance you want to create in your video.
Adjusting the duration and timing of each photo is crucial in creating a well-paced video. Some moments may need to be shown for a longer duration, while others require a quicker transition. Take your time to fine-tune these settings to ensure your video flows seamlessly.
Don’t forget to edit and enhance each photo before finalizing your video. Most video editing apps provide basic editing tools such as cropping, applying filters, adjusting brightness, and adding text. Use these features to make your photos look their best in the final video.
Finally, it’s time to save and share your masterpiece! Once you’re satisfied with your video, save it to your iPhone’s camera roll or export it directly to social media platforms. Show off your creation to friends and family and bask in the satisfaction of bringing your photos to life in a stunning video.
Now that you’re familiar with the basics, it’s time to dive into the specifics of each step in creating your video with pictures on your iPhone. Follow along with the upcoming sections to become a pro at transforming your photos into captivating videos.
Selecting Photos
When creating a video with pictures on your iPhone, the first step is to select the photos you want to include. Choosing the right photos is crucial, as they will be the visual elements that tell your story or capture memorable moments.
To start, take some time to go through your photo library and identify the pictures that best represent the theme or concept of your video. Look for images that evoke emotion, showcase important events, or highlight key individuals.
In addition to selecting meaningful photos, consider the overall visual variety. Aim for a mix of close-up shots, wide-angle views, and different perspectives to keep the video engaging. Including a combination of landscapes, portraits, and candid moments can add depth and interest.
It’s important to be selective and avoid overcrowding your video with too many pictures. Limit your selection to the most impactful and meaningful images to maintain a cohesive and focused narrative.
If you have a large collection of photos, consider organizing them into subfolders or albums ahead of time. This way, you can easily access and choose the photos you want to include in your video.
Remember, the selection of photos will set the foundation for your video, so take the time to curate a thoughtful and visually appealing set of images that align with your desired message or story. With the right selection, you can create a captivating video that holds the viewer’s attention and leaves a lasting impact.
Choosing a Video Editing App
When it comes to making a video with pictures on your iPhone, choosing the right video editing app is crucial. With so many options available in the App Store, it can be overwhelming to decide which one to use. However, with a little research and consideration of your specific needs, you can find the perfect app to bring your pictures to life.
First, think about the features you require for your video editing process. Do you want basic editing capabilities like trimming, cropping, and adding transitions? Or do you need more advanced features like filters, text overlays, and special effects? Make a list of the must-have features so that you can narrow down your options.
Next, consider the user-friendliness of the app. Is the interface intuitive and easy to navigate? Look for apps with a user-friendly design, as it will save you time and frustration during the editing process. Reading user reviews can also provide valuable insight into the app’s ease of use.
Another important factor to consider is the availability of video templates and themes. These can add a professional touch to your video by providing pre-designed layouts and styles. If you want to create a polished and visually appealing video, look for apps that offer a wide range of templates and themes to choose from.
Compatibility is another aspect to keep in mind. Ensure that the app you select is compatible with your iPhone model and operating system. Some apps may only work on newer iPhone models or require a specific iOS version.
Budget is also a consideration. While there are free video editing apps available, they may come with limitations or watermarks on the final video. If you’re serious about video editing and want access to premium features, consider investing in a paid app. Many paid apps offer a free trial period, so you can test them out before committing to a subscription or one-time purchase.
Last but not least, don’t forget to read reviews and ratings from other users. Their experiences can give you valuable insights into the app’s performance, reliability, and overall satisfaction level. Look for apps that have consistently positive feedback and a large user base.
By considering the features, user-friendliness, templates, compatibility, budget, and user reviews, you’ll be able to choose a video editing app that best suits your needs. With the right app in your hands, you’ll have the power to transform your pictures into captivating videos that you can share with friends and family!
Adding Photos to the App
Once you have selected a video editing app on your iPhone, it’s time to start adding photos to create your video. Follow these simple steps to seamlessly integrate your chosen photos into the app:
1. Open the video editing app on your iPhone and start a new project. Look for the option to add photos or create a new video.
2. Tap on the “Add Photos” button or a similar option within the app. This will open your iPhone’s photo library, where you can select the photos you want to include in your video.
3. Browse through your photo library and tap on each photo you wish to add. You can select multiple photos at once by tapping on them individually or using the “Select” feature in your photo library.
4. After selecting the desired photos, tap on the “Add” or “Next” button to import them into the video editing app. Depending on the app you are using, there may be a slight loading time as the photos are added.
5. Once imported, the photos will appear in a timeline or storyboard within the app. This is where you can arrange the order of the photos and make any necessary adjustments to their duration and timing.
6. To rearrange the order of the photos, simply drag and drop them within the timeline or storyboard. This allows you to create a cohesive and visually engaging sequence for your video.
7. If you want to remove a photo or add additional photos, most video editing apps provide an option to delete or insert new photos. Look for icons or buttons that allow you to perform these actions.
8. Repeat the process of adding and arranging photos until you have included all the visuals you desire for your video.
By following these steps, you will be able to effortlessly add and organize photos within your chosen video editing app on your iPhone. With your photos successfully integrated, it’s time to enhance your video further by applying transitions, effects, and background music.
Arranging the Order of Photos
Once you have selected the photos you want to include in your video, the next step is to arrange them in the desired order. In most video editing apps for iPhone, arranging the order of photos is a simple and intuitive process. Here’s how you can do it:
1. Open the video editing app on your iPhone and select your project or create a new one.
2. Look for the timeline or storyboard view. This is where you will see all the photos you have imported.
3. To rearrange the photos, simply tap and hold on a photo and then drag it to the desired position in the timeline or storyboard. You can move it before or after other photos to change the sequence.
4. As you move the photos, you will see a visual representation of the order. Make sure to align them in the way you want them to appear in the final video.
5. Some video editing apps also offer a feature called “auto arrange” or “smart arranging.” This feature automatically arranges the photos in a visually appealing order based on factors like color or composition. If this feature is available, you can try it out to see if it enhances the overall look of your video.
6. If you want to remove a photo from the video, simply tap on it and look for the delete or remove option. This will take the photo out of the sequence.
7. Don’t forget to preview your video after arranging the order of photos. This will give you a better idea of how the photos flow and whether any adjustments are needed.
Remember to save your project regularly to avoid losing any progress you’ve made. Once you are satisfied with the arrangement of your photos, you can proceed to the next step of adding transitions and effects to make your video even more captivating.
Applying Transitions and Effects
One of the key elements to make your video with pictures on iPhone visually appealing is applying transitions and effects. Transitions help smooth the transition between photos, creating a seamless flow from one image to another. Effects, on the other hand, add artistic touches and enhance the overall look of your video.
To apply transitions and effects to your photos, launch the video editing app on your iPhone and open your project. Once you have added the photos to the timeline and arranged them in the desired order, follow these steps:
- Select the desired photo you want to apply a transition or effect to.
- Look for the “Transitions” or “Effects” tab in the editing toolbar. Different apps may have varying terms or icons for these options.
- Browse through the available transitions and effects library. Most video editing apps offer a variety of options ranging from simple fades, slides, and dissolves to more creative effects like overlays, filters, and animations.
- Click on the desired transition or effect to apply it to the selected photo. The app will automatically apply the chosen effect to create a smooth transition between the previous and the following photos.
- Adjust the duration or timing of the transition or effect if needed. Some apps allow you to customize the duration of the transition or effect by dragging the edge of the transition in the timeline or by entering the specific duration in the settings.
- Preview the video to see how the transition or effect looks between the photos. Make adjustments or try different options until you are satisfied with the result.
- Repeat the process for each photo where you want to add a transition or effect.
Remember, using transitions and effects judiciously can greatly enhance the visual impact of your video. It’s best to choose transitions and effects that complement the mood and theme of your project rather than using them excessively, which could result in a cluttered or distracting video.
Once you have finished applying transitions and effects to your photos, continue with the next step to add background music to your video.
Adding Background Music
One of the key elements to make your video with pictures on an iPhone more engaging and professional is by adding background music. The right music can enhance the mood, emphasize key moments, and create a memorable viewing experience. Luckily, there are several ways to add background music to your video editing app.
1. Importing Music from Your iPhone: Most video editing apps allow you to import music directly from your iPhone’s music library. You can choose a song that matches the tone and theme of your video. Simply tap on the music icon or import button within the app and select the desired track.
2. Using Royalty-Free Music: If you don’t have the perfect song on your device, you can consider using royalty-free music. These are tracks that you can use without any copyright issues. There are plenty of websites and apps that provide a wide range of royalty-free music options, allowing you to find the perfect one for your video.
3. Customizing Music: Some video editing apps offer options to customize the music to fit your video’s timing and mood. You can trim the music to match the duration of your video, adjust the volume, and even apply fade-in and fade-out effects. These features help you create a seamless blend between the visuals and audio.
4. Syncing Music with the Photos: To make the background music more impactful, you can sync it with the photos and transitions in your video. Aligning key moments in the music with important visuals can evoke emotions and create a more impactful storytelling experience.
5. Composing Original Music: For those looking for a unique touch, some advanced video editing apps allow you to compose original music directly within the app. This feature is perfect for those who want to add a personalized touch or have specific musical requirements for their video.
Remember, when adding background music to your video, make sure to consider the tone, style, and copyright restrictions if applicable. The right choice of music can greatly enhance your video and make it more enjoyable to watch.
Adjusting Duration and Timing
Once you have added your photos to the video editing app and arranged their order, you can now focus on adjusting the duration and timing of each photo. This step allows you to control how long each photo appears on the screen before transitioning to the next one. Here’s how you can make these adjustments on your iPhone:
1. Trimming the Duration: If you feel that a particular photo should be displayed for a shorter or longer duration, you can easily trim its duration. Tap on the photo and look for the option to trim or adjust its duration. Use the trim markers to shorten or extend the photo’s display time as desired. This is useful when you want to emphasize certain photos or synchronize them with the music or transitions.
2. Changing Photo Timing: You may also want to adjust the timing between photos for a smoother and more engaging video experience. Some video editing apps allow you to change the timing between photos with options like duration, delay, or transition time. This gives you even more control over the overall flow and pacing of your video.
3. Syncing with Background Music: To create a well-coordinated video, make sure to synchronize the duration and timing of your photos with the background music. You can align key moments or transitions in the music with specific photos, creating a cohesive and captivating video. Adjusting the duration and timing of your photos helps ensure that they are perfectly timed with the music, creating a harmonious viewing experience.
4. Previewing and Fine-Tuning: After making adjustments to the duration and timing of your photos, take some time to preview the video. Play it back and check if the transitions and timing are smooth and seamless. If needed, make further adjustments until you are satisfied with the final result.
Remember to experiment with different durations and timings to find the perfect balance for your video. The overall effect should be visually engaging and keep viewers hooked from start to finish. With these tools at your disposal, you can create stunning videos on your iPhone that bring your pictures to life.
Editing and Enhancing Photos
Once you have selected the photos for your video, it’s time to edit and enhance them to make your video truly captivating. Here are some tips and techniques to help you get the best results:
1. Crop and Resize: Sometimes, you may want to crop or resize your photos to remove unwanted parts or adjust the composition. Look for the crop and resize tools in your video editing app and make the necessary adjustments.
2. Adjust Brightness and Contrast: If your photos appear too dark or too bright, you can easily adjust the brightness and contrast levels. Experiment with these settings to find the right balance and make your photos visually appealing.
3. Apply Filters: Filters can add a special touch to your photos and give them a unique look and feel. Explore the filter options in your editing app and experiment with different styles to find the one that fits your video’s theme.
4. Add Text and Captions: Sometimes, adding text or captions to your photos can enhance their storytelling. Use your editing app’s text tool to overlay titles, descriptions, or captions on your photos.
5. Remove Red-eye and Blemishes: If your photos have any red-eye or blemishes, you can easily remove them using the retouching tools available in most editing apps. This will ensure that your photos look polished and professional.
6. Adjust Saturation and Vibrance: Saturation and vibrance can make your photos look more lively and vibrant. Experiment with these settings to enhance the colors in your photos and make them pop in your video.
7. Blur Backgrounds: If you want to create a focal point on certain parts of your photos, consider blurring the background. This technique can add depth and visual interest to your video.
8. Correct Color Balance: Sometimes, the color balance in your photos may be off. Use the color correction tools in your editing app to adjust the temperature, tint, and color levels to achieve a more natural and balanced look.
9. Add Frames and Borders: Frames and borders can give your photos a finished and professional touch. Look for options to add borders or frames within your editing app and choose one that complements your video’s style.
10. Preview and Fine-tune: Once you have made all the necessary edits, take the time to preview your photos within the editing app. Make any final adjustments or refinements to ensure that your photos are looking their best before adding them to your video.
By taking the time to edit and enhance your photos, you can transform a simple collection of images into a captivating video that tells a story and engages your audience.
Saving and Sharing the Video
Once you have finished creating your video with pictures on your iPhone, the next step is to save and share it. Fortunately, saving and sharing videos on an iPhone is a straightforward process. Here’s how you can do it:
1. Save the Video – Most video editing apps provide an option to save the video to your camera roll. Look for a “Save” or “Export” button within the app’s interface. Tap on it, and the app will render the video and save it to your iPhone’s Photos app.
2. Choose Video Quality – Some video editing apps allow you to select the video quality before saving it. Higher quality videos will have sharper images but take up more storage space. Consider your preferences and the intended use of the video when selecting the quality.
3. Trim and Cut – Some video editing apps provide the option to trim or cut the video before saving it. If you want to shorten the video or remove any unwanted sections, take advantage of these features to ensure your final video is concise and impactful.
4. Share via Messaging Apps – If you want to quickly share your video with friends or family, you can use popular messaging apps like iMessage, WhatsApp, or Messenger. Open the app of your choice, start a new conversation, and attach the video file from your camera roll.
5. Upload to Social Media – Sharing your video on social media platforms is a fantastic way to reach a broader audience. Apps like Instagram, Facebook, and TikTok allow you to upload videos directly from your camera roll. Simply open the app, create a new post or story, and select the video from your gallery.
6. Send via Email – If you prefer a more private way to share the video, you can send it via email. Open your preferred email app, compose a new email, and attach the video file from your camera roll. This method is particularly useful when sending the video to professional contacts or clients.
7. Use Cloud Storage – If the video file is too large to share via messaging apps or email, you can upload it to a cloud storage service like Google Drive or Dropbox. Once uploaded, you can generate a shareable link and send it to others, allowing them to view or download the video.
8. Save to Video Hosting Platforms – If you want to showcase your video to a wider audience or embed it on a website, you can save it to video hosting platforms like YouTube or Vimeo. These platforms provide tools to upload your video, add titles and descriptions, and customize its privacy settings.
By following these steps, you can easily save and share your video with pictures on your iPhone. Whether it’s sending it to friends, posting it on social media, or storing it in the cloud, there are numerous options to showcase your creation to the world.
Conclusion
Creating videos with pictures on your iPhone can be a fun and creative way to capture and share your memories. With the various apps and features available, you can easily turn your photos into engaging videos that tell a story. Whether you want to make a slideshow, compile a travel diary, or simply share your favorite moments with friends and family, your iPhone is a powerful tool to bring your pictures to life.
Remember to choose the right app that suits your needs, experiment with different effects and transitions, and add music or voiceovers to enhance the overall experience. Additionally, make sure to optimize your videos for social media platforms by considering the recommended size and aspect ratio.
Don’t be afraid to unleash your creativity and experiment with different techniques to make unique and captivating videos. With a little practice, you’ll become proficient in making videos with pictures on your iPhone and amaze others with your storytelling skills. So, grab your iPhone, start creating, and let your imagination run wild!
FAQs
Q: Can I make a video with pictures on my iPhone?
A: Absolutely! iPhones have powerful built-in features that allow you to create stunning videos using your pictures. With the right apps and techniques, you can easily turn your photo collection into a captivating video montage.
Q: Do I need any special apps to create a video with pictures on my iPhone?
A: While the iPhone’s native Photos app allows you to create simple slideshows with music, you may want to explore third-party apps for more advanced features. Apps like iMovie, Splice, and InShot offer a wide range of tools and effects to help you customize and enhance your videos.
Q: How do I select and organize the pictures for my video?
A: Start by selecting the pictures you want to include in your video from your iPhone’s Photos app. You can create a new album and add the chosen photos to keep them organized. Arrange the photos in the desired order to tell a coherent story or create a visual narrative in your video.
Q: Can I add music or audio to my video with pictures?
A: Absolutely! Adding music or audio to your video can greatly enhance the overall experience. You can use royalty-free music from the apps or import your own music library. Simply select the desired audio track and adjust its volume to blend it seamlessly with your visuals.
Q: How can I customize and edit my video with pictures on my iPhone?
A: With third-party apps like iMovie or Splice, you can have more control over your video’s customization. You can add transitions, text overlays, filters, and effects to create a unique and professional-looking video. Additionally, you can trim, crop, and adjust the duration of each photo to create the perfect pacing.