
Apple’s iPhone is renowned for its cutting-edge features and exceptional camera capabilities. Among its many functions, one of the most popular and useful is the ability to record high-quality videos. Whether you want to capture precious moments, create engaging content, or document important events, recording videos on your iPhone is incredibly convenient and simple. In this article, we will guide you through the process of recording videos on your iPhone, exploring different settings and features that can enhance your video recording experience. Whether you’re a beginner or an experienced iPhone user, you’ll find helpful tips and tricks to make the most out of your video recording sessions. So, grab your iPhone and let’s dive into the world of capturing stunning videos that will leave a lasting impression!
Inside This Article
- Choosing the Right Camera Settings
- Choosing the right camera settings
- Adjusting the focus and exposure
- Using the built-in Camera app
- Recording videos with third-party apps
- Conclusion
- FAQs
Choosing the Right Camera Settings
When it comes to recording high-quality videos on your iPhone, choosing the right camera settings is essential. The settings you select can significantly impact the overall look and feel of your videos. Here are some key camera settings to consider when recording videos:
- Resolution: One of the first settings to consider is the resolution of the video. The higher the resolution, the more detailed and sharper the video will appear. The latest iPhones offer options like 1080p, 4K, or even higher resolutions. Keep in mind that higher resolutions may take up more storage space on your device.
- Frame Rate: The frame rate determines how many frames are captured per second. Higher frame rates, such as 30 or 60 frames per second (fps), result in smoother and more motion-intensive videos. However, if you want to slow down your footage later for a slow-motion effect, consider choosing a higher frame rate.
- Format: iPhones offer different video formats, such as H.264 or HEVC (High-Efficiency Video Coding). HEVC is known for its better compression and higher quality at the same file size compared to H.264. However, not all devices and platforms support HEVC playback, so consider your intended audience and compatibility when selecting the format.
- Stabilization: If you want to record steady videos without a tripod, enabling the built-in stabilization feature is crucial. iPhones come with optical image stabilization (OIS) or electronic image stabilization (EIS) to reduce camera shake and produce smoother footage. Consider using the appropriate stabilization mode based on your shooting situation.
These are just a few camera settings to take into account when recording videos on your iPhone. Experimenting with different combinations of settings can help you achieve the desired look and style for your videos.
Choosing the right camera settings
When it comes to recording videos on your iPhone, getting the right camera settings is essential. By understanding and adjusting these settings, you can capture high-quality videos that showcase your moments perfectly. Here are a few key camera settings to consider:
- Resolution: The resolution determines the quality of the video. For crisp, detailed videos, consider selecting the highest available resolution on your iPhone.
- Frame Rate: The frame rate determines the number of frames your video captures per second. Higher frame rates, such as 60 frames per second (fps), result in smoother video playback. However, keep in mind that higher frame rates may require more storage space.
- Video Format: iPhones offer various video formats, such as High Efficiency (HEVC) and Most Compatible. HEVC provides better video quality and smaller file sizes, but it may not be compatible with all devices. Most Compatible is suitable for broader compatibility.
- Stabilization: Enable video stabilization to reduce shakiness in your videos. iPhones have built-in optical and digital image stabilization that can smooth out your footage.
Additionally, consider adjusting other camera settings like white balance, exposure, and focus. These settings can greatly affect the overall look and feel of your videos.
Adjusting the focus and exposure
The focus and exposure settings on your iPhone play a crucial role in capturing well-balanced and sharp videos. Here are some tips to help you adjust these settings effectively:
- Tap to Focus: Simply tap on the subject you want to focus on in the Camera app. This will automatically adjust the focus accordingly and keep it sharp throughout the recording.
- Lock Focus and Exposure: To lock the focus and exposure, long-press on the point of focus until a yellow square appears. This ensures that the focus and exposure remain constant, even if you or the subject moves.
- Manual Exposure Adjustments: For more precise control over exposure, you can slide your finger up or down on the screen to adjust the exposure level manually. This is helpful in situations where the lighting conditions are challenging.
- Exposure Lock: If you need to maintain a constant exposure level, tap and hold on the screen until the AE/AF Lock indicator appears. This locks the exposure value in place.
By mastering these focus and exposure adjustments, you can ensure that your videos are visually stunning with accurate colors and optimal brightness.
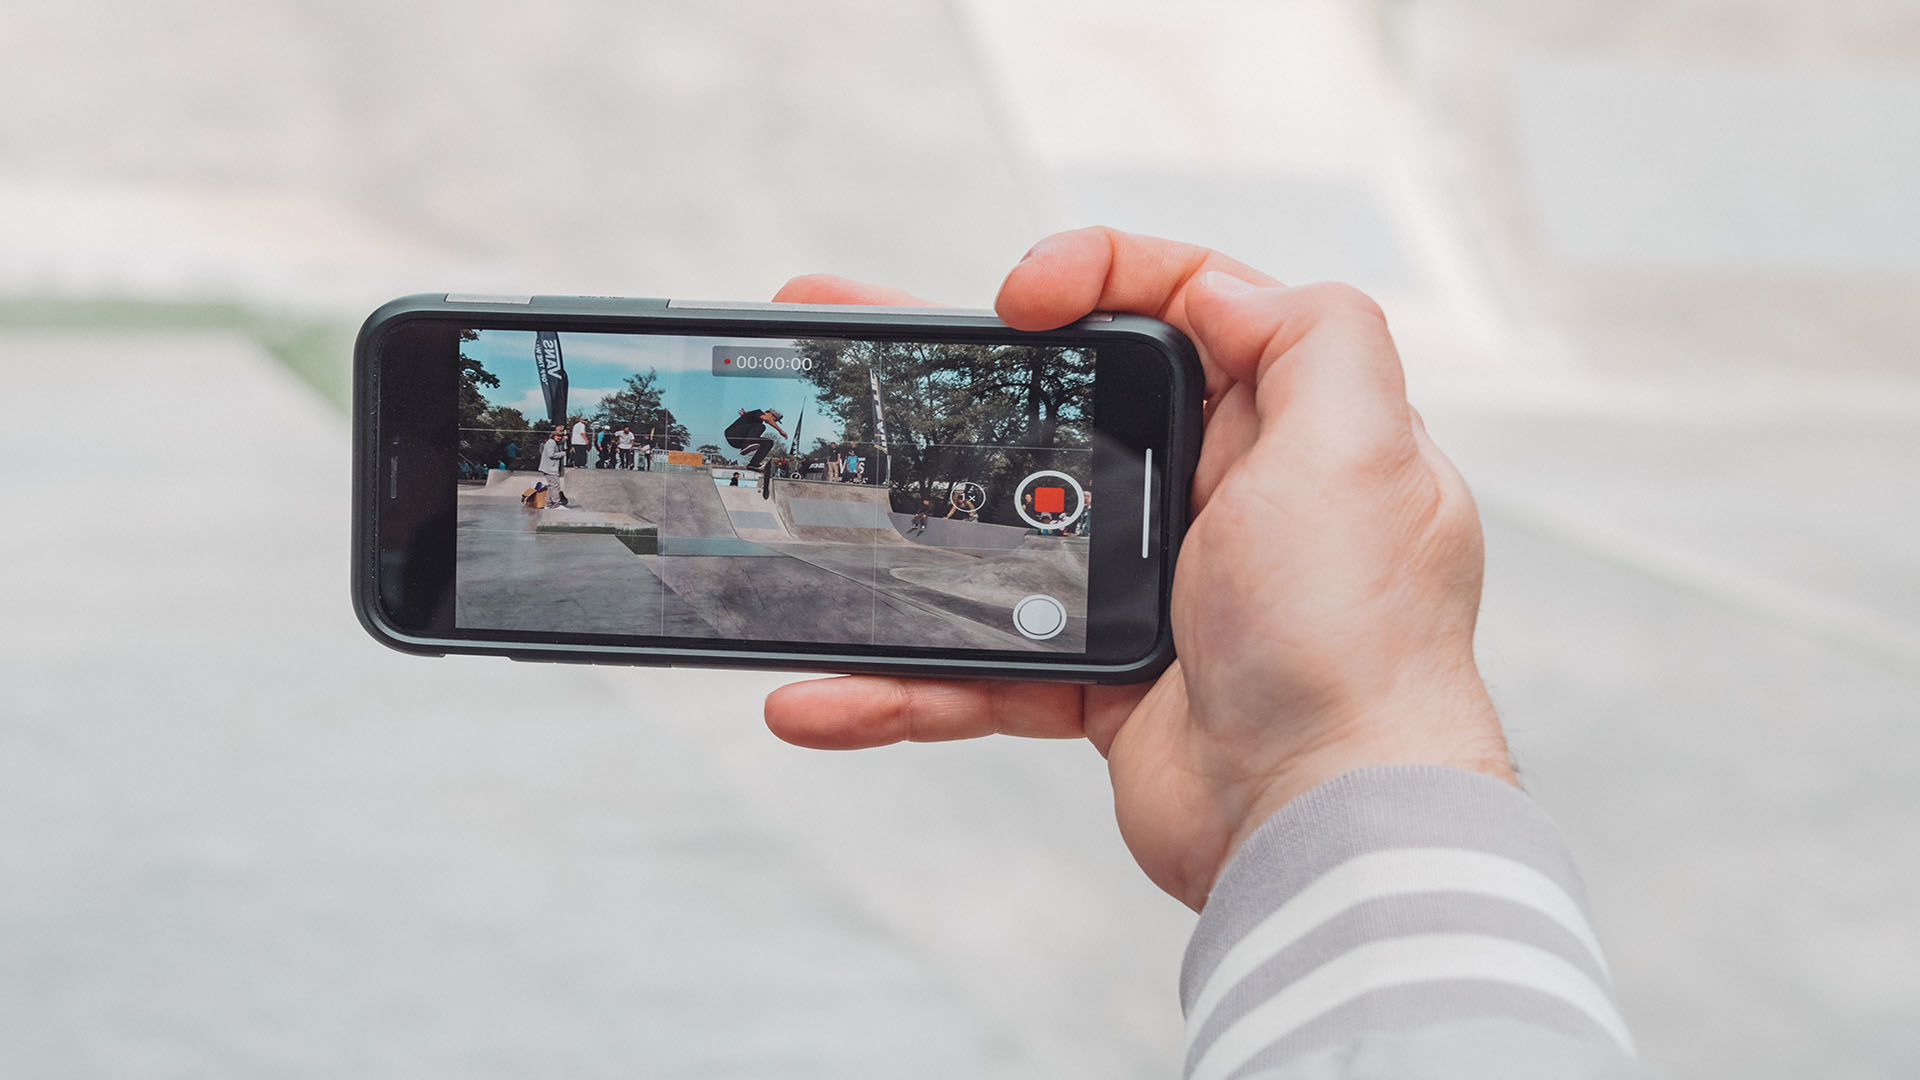
Using the built-in Camera app
One of the easiest and most convenient ways to record video on your iPhone is by using the built-in Camera app. This app comes pre-installed on all iPhones and offers a variety of features to enhance your video recording experience.
To start recording video using the Camera app, simply open the app and switch to video mode. You can do this by swiping the camera mode selector at the bottom of the screen to the right until you see the “Video” option.
Once you’re in video mode, you’ll notice a red record button at the bottom center of the screen. To start recording, simply tap the record button once. The recording will begin, and a timer will appear at the top of the screen to indicate the duration of the video.
To stop recording, tap the record button again. The video will be saved to your Camera Roll automatically. You can access your recorded videos by opening the Photos app and navigating to the “Videos” tab.
While recording, you can also take advantage of various features to enhance your videos. For example, you can switch between the front and rear-facing cameras by tapping the camera swap icon in the top right corner of the screen.
Additionally, you can enable the gridlines feature by going to the Settings app, selecting “Camera”, and toggling on the “Grid” option. This can help you align your shots and create well-composed videos.
The built-in Camera app also offers the Live Photos feature, which allows you to capture a few seconds of video before and after you press the record button. To enable Live Photos, simply tap the yellow circle icon at the top of the screen.
Furthermore, you can use various camera modes, such as Time-Lapse, Slo-mo, and Pano, to add creative effects to your videos. To access these modes, swipe the camera mode selector at the bottom of the screen to the left until you find the desired option.
Overall, the built-in Camera app on your iPhone provides a user-friendly and intuitive interface to record high-quality videos. Take advantage of its features and experiment with different settings to capture stunning videos with your iPhone.
Recording videos with third-party apps
While the built-in Camera app on your iPhone offers various features and functionality for recording videos, you may also consider exploring third-party apps for a more enhanced video recording experience. These apps provide additional flexibility, settings, and editing options to help you capture and create professional-looking videos. Here are some popular third-party video recording apps worth trying:
-
Filmic Pro: Filmic Pro is a highly acclaimed app that offers advanced manual controls for video recording. It allows you to adjust various settings such as focus, exposure, ISO, and frame rate. The app also provides features like image stabilization, audio monitoring, and customizable presets.
-
ProCam: ProCam is another powerful video recording app that offers a wide range of options and settings. It allows you to adjust exposure, white balance, focus, and even offers advanced features like slow-motion recording and intervalometer for time-lapse videos.
-
FiLMiC DoubleTake: This app is designed to maximize the capabilities of dual-lens iPhones. It lets you record videos simultaneously using both the front and rear cameras. With FiLMiC DoubleTake, you can capture different perspectives or even create picture-in-picture videos.
-
Horizon Camera: Horizon Camera app is perfect for recording videos in a horizontal format, no matter how you hold your phone. It ensures that your videos are always level, regardless of whether you rotate your device. This is especially useful when capturing landscapes or videos that need to be viewed in landscape mode.
These are just a few examples of the many third-party video recording apps available in the App Store. Choosing the right app depends on your specific needs and preferences. Make sure to read user reviews, check out the features, and experiment with different apps to find the one that suits your style of videography.
It’s important to note that while third-party apps offer additional features, they may also have their own learning curves. Take the time to familiarize yourself with the app’s interface and settings to make the most out of its capabilities.
Remember, whether you’re using the built-in Camera app or a third-party app, the key to recording great videos is practice and experimentation. Play around with different settings, angles, and compositions to capture moments that truly stand out. With the right tools and techniques, your iPhone can become a powerful video recording device that helps you tell compelling stories.
Conclusion
The ability to record videos on iPhones has revolutionized the way we capture and share moments. With the advanced camera technology and intuitive interface, it has never been easier to create high-quality videos with just a few taps on your screen.
In this article, we have explored the various methods available to record videos on your iPhone. From the built-in Camera app to third-party apps with advanced features, there is a solution for every user’s needs.
Whether you are a professional content creator or simply want to document the precious moments in your life, recording videos on your iPhone offers convenience, versatility, and outstanding quality.
Remember to experiment with different settings and techniques to unleash the full potential of your iPhone’s video recording capabilities. From adjusting exposure and focus to utilizing cinematic features like slow-motion and time-lapse, there are endless possibilities for creating captivating videos.
So, grab your iPhone and start capturing those unforgettable moments in stunning video quality. With the tips and tricks outlined in this article, you’ll be able to record videos like a pro in no time.
FAQs
Q: Can I record videos on my iPhone?
A: Yes, absolutely! iPhone is equipped with a high-quality camera that allows you to record videos with ease. Whether you want to capture memorable moments, create engaging content, or document important events, your iPhone is the perfect tool for video recording.
Q: How do I access the video recording feature on my iPhone?
A: To access the video recording feature on your iPhone, simply open the camera app. Once you are in the camera app, swipe left to switch to video mode. You will see a red button labeled “Record” at the bottom center of the screen. Tap on the record button to start recording your video.
Q: Are there any settings I should adjust before recording a video on my iPhone?
A: While the default settings on your iPhone are usually sufficient for most video recording needs, you can customize certain settings to enhance your video recording experience. For example, you can adjust the resolution and frame rate of the video, enable or disable video stabilization, and switch between different lenses if your iPhone has multiple cameras.
Q: How long can I record a video on my iPhone?
A: The duration of a video you can record on your iPhone depends on various factors such as the available storage space and the selected video resolution. Generally, iPhones have a default limit of recording video clips up to 4K resolution at 60 frames per second (fps) for approximately 5 minutes. However, you can adjust this limit in the settings if needed.
Q: Can I edit the videos I record on my iPhone?
A: Yes, you can easily edit the videos you record on your iPhone using the built-in iMovie app or other third-party video editing apps available on the App Store. These apps allow you to trim, add effects, apply filters, and even combine multiple video clips to create a stunning final product. Editing your videos directly on your iPhone offers convenience and simplicity in the editing process.