
The Sony Xperia Z Ultra C6802 is a powerful mobile phone that offers a range of features and functionalities. However, to fully unlock its potential, many users are interested in rooting their devices. Rooting a phone gives users access to the operating system and allows them to make deep system-level changes, customize their devices, and install applications that require root access. In this article, we’ll guide you on how to root the Sony Xperia Z Ultra C6802, step by step. Whether you want to remove bloatware, install custom ROMs, or increase the performance of your device, rooting can provide endless possibilities. So, let’s dive in and discover how to root your Sony Xperia Z Ultra C6802.
Inside This Article
- Preparation
- Unlocking the Bootloader
- Installing a Custom Recovery
- Rooting the Sony Xperia Z Ultra C6802
- Conclusion
- FAQs
Preparation
Before diving into the process of rooting your Sony Xperia Z Ultra C6802, it’s essential to make a few necessary preparations. Taking the time to complete these steps will help ensure a smooth and successful rooting experience.
- Backup your data: Rooting your device involves making system-level changes, which can potentially lead to data loss. To protect your important files and settings, it’s crucial to back up everything on your Sony Xperia Z Ultra C6802. You can use third-party backup apps or the built-in backup feature of your phone to create a safe copy of your data.
- Charge your phone: Rooting can be a time-consuming process that requires your phone to stay connected and powered on. To avoid any interruptions or potential issues, make sure your Sony Xperia Z Ultra C6802 is fully charged before you begin.
- Enable USB debugging: To establish a connection between your phone and computer during the rooting process, you need to enable USB debugging. Go to Settings > Developer Options and turn on USB debugging. If you can’t find the Developer Options, go to Settings > About phone and tap on the build number several times until you see a message informing you that the Developer Options have been activated.
- Install the necessary drivers: To ensure a smooth connection and communication between your Sony Xperia Z Ultra C6802 and your computer, you may need to install the appropriate drivers. You can usually find the drivers on the official Sony website or through a quick search online. Install the drivers on your computer before proceeding with the rooting process.
By completing these essential preparatory steps, you are ready to move on to the next stages of the rooting process for your Sony Xperia Z Ultra C6802. Taking the time to back up your data, charge your phone, enable USB debugging, and install the necessary drivers will help ensure a successful and hassle-free rooting experience.
Unlocking the Bootloader
Unlocking the bootloader is an essential step if you want to gain full control over your Sony Xperia Z Ultra C6802. By unlocking the bootloader, you can install custom ROMs, root your device, and explore various customization options that are not possible with a locked bootloader.
However, before you proceed with the bootloader unlocking process, it is crucial to note that unlocking the bootloader will void your device’s warranty. It also carries certain risks, such as the potential to brick your device if not done correctly. Therefore, it is important to carefully follow the instructions and understand the implications before proceeding.
To begin the process of unlocking the bootloader on your Sony Xperia Z Ultra C6802, follow the steps outlined below:
- First, make sure that you have enabled the Developer Options on your device. To do this, go to Settings > About phone > Software information, and tap on the Build number 7 times. This will unlock the Developer Options on your device.
- Once the Developer Options are enabled, go back to the Settings menu, and open the Developer Options. Enable the USB debugging option and OEM unlocking option. These options are necessary for unlocking the bootloader.
- Next, connect your Sony Xperia Z Ultra C6802 to your computer using a USB cable.
- Download the official Sony Xperia bootloader unlock tool from the Sony website. Make sure to select the correct model number of your device.
- After downloading the bootloader unlock tool, run the application on your computer.
- Follow the on-screen instructions to unlock the bootloader. This process may take a few minutes, and your device may reboot several times. Make sure not to disconnect your device from the computer during this process.
- Once the bootloader is successfully unlocked, your Sony Xperia Z Ultra C6802 will reboot into the bootloader mode.
- That’s it! You have successfully unlocked the bootloader on your Sony Xperia Z Ultra C6802. Now, you can proceed with installing a custom recovery and rooting your device.
Keep in mind that unlocking the bootloader will erase all the data on your device. Therefore, it is advisable to take a backup of your important files and data before proceeding with the bootloader unlocking process.
It is also important to note that the process of unlocking the bootloader may vary slightly depending on the specific model and firmware version of your Sony Xperia Z Ultra C6802. Make sure to read and follow the instructions provided by Sony or reliable sources to ensure a successful bootloader unlocking process.
With the bootloader unlocked, you are now one step closer to gaining complete control over your Sony Xperia Z Ultra C6802. The next step is to install a custom recovery, which will allow you to flash custom ROMs, mods, and other system modifications. Stay tuned for our next article on how to install a custom recovery on the Sony Xperia Z Ultra C6802.
Installing a Custom Recovery
Installing a custom recovery on your Sony Xperia Z Ultra C6802 is a crucial step towards gaining more control over your device and opening up a world of possibilities. A custom recovery, like TWRP (Team Win Recovery Project), allows you to flash custom ROMs, take complete backups of your system, and perform various other advanced operations.
Here are the steps to install a custom recovery on your Sony Xperia Z Ultra C6802:
- Unlock the Bootloader: Before attempting to install a custom recovery, you need to unlock the bootloader of your Sony Xperia Z Ultra C6802. Unlocking the bootloader allows you to modify your device’s firmware and install custom software. To unlock the bootloader, you will need to visit the Sony Developer website and follow their instructions. Note that unlocking the bootloader will erase all data on your device, so it’s important to back up your data before proceeding.
- Download the Custom Recovery: Once you have unlocked the bootloader, you can proceed to download the custom recovery for your Sony Xperia Z Ultra C6802. The most popular custom recovery for Android devices is TWRP. Visit the TWRP website and search for the custom recovery specifically built for your device. Download the appropriate custom recovery image file to your computer.
- Enable USB Debugging: To proceed with the installation of the custom recovery, you need to enable USB debugging on your Sony Xperia Z Ultra C6802. Go to “Settings” on your device, select “About phone,” and tap on the “Build number” seven times to enable developer options. Then, go back to the main Settings page, open “Developer options,” and enable USB debugging.
- Connect your Device to the Computer: Use a USB cable to connect your Sony Xperia Z Ultra C6802 to your computer. Make sure you have the necessary USB drivers installed on your computer so that it recognizes the device correctly.
- Boot your Device into Fastboot/Bootloader Mode: Once your device is connected to the computer, you need to boot it into fastboot/bootloader mode. To do this, power off your Sony Xperia Z Ultra C6802 and then press and hold the Volume Down button while connecting it to the computer with the USB cable. This will boot your device into fastboot/bootloader mode.
- Flash the Custom Recovery: Once your device is in fastboot/bootloader mode, navigate to the folder where you downloaded the custom recovery image file. Open a command prompt or terminal window in that folder. Type the following command to flash the custom recovery onto your Sony Xperia Z Ultra C6802:
fastboot flash recovery recovery.img
Replace recovery.img with the actual name of the custom recovery image file you downloaded. - Reboot your Device into Recovery Mode: After flashing the custom recovery, you need to reboot your Sony Xperia Z Ultra C6802 into recovery mode. To do this, use the volume keys to navigate to the “Recovery” option in the fastboot/bootloader mode, and then use the power button to select it.
- Verify the Custom Recovery: Once your device boots into the custom recovery, you can verify its installation by checking the recovery screen. The TWRP recovery screen should appear, indicating that you have successfully installed the custom recovery on your Sony Xperia Z Ultra C6802.
With the custom recovery installed, you now have the ability to explore the vast world of custom ROMs, mods, and other tweaks that can enhance the performance and functionality of your Sony Xperia Z Ultra C6802. However, always exercise caution while performing any advanced operations and ensure that you have a backup of your device in case anything goes wrong.
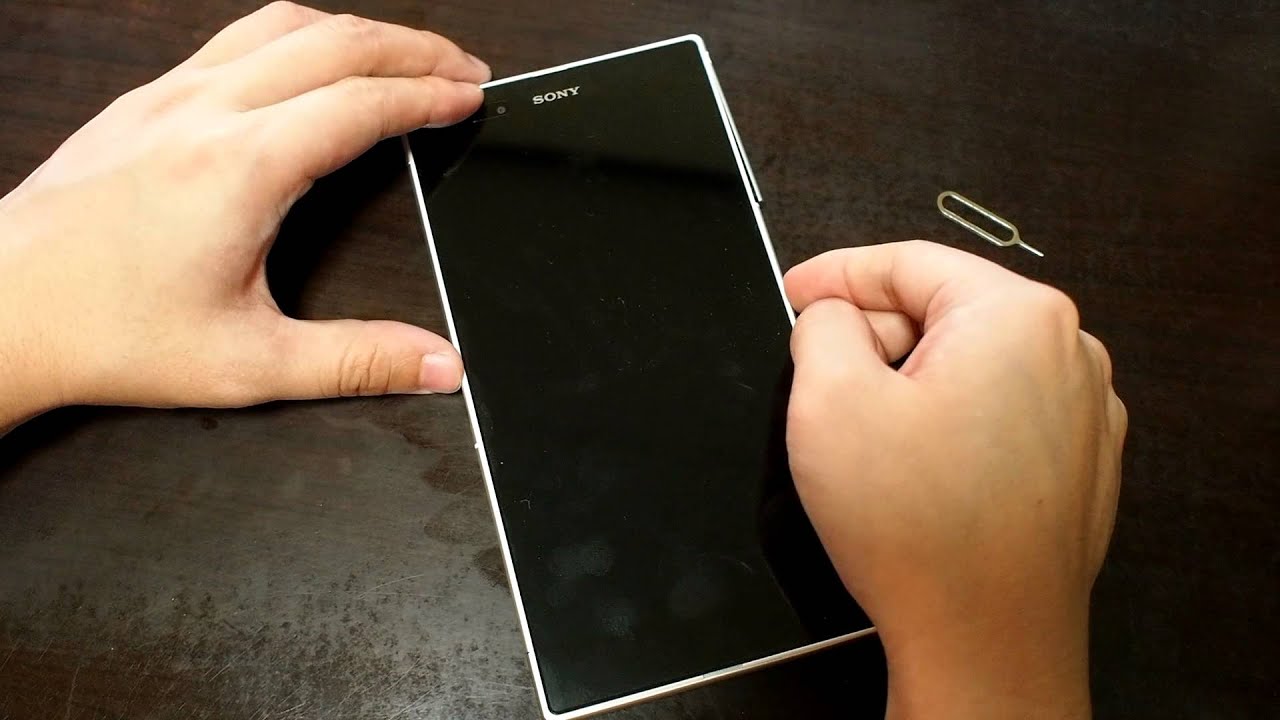
Rooting the Sony Xperia Z Ultra C6802
Rooting your Sony Xperia Z Ultra C6802 can unlock a world of possibilities and give you full control over your device. By gaining root access, you can customize your phone’s settings, install custom ROMs, and even boost its performance. In this article, we will guide you through the process of rooting your Sony Xperia Z Ultra C6802 step by step.
Before you begin, keep in mind that rooting your device voids your warranty and may cause potential risks if not done correctly. Make sure to follow the instructions carefully and proceed at your own risk.
- Backup your data: Before rooting your Sony Xperia Z Ultra C6802, it is crucial to backup all your important data. Rooting involves making changes to your device’s system files, and there is a possibility of data loss during the process. Use a reliable backup app or manually transfer your files to an external storage device.
- Enable USB debugging: To proceed with the rooting process, you need to enable USB debugging on your Sony Xperia Z Ultra C6802. Go to “Settings,” select “Developer options,” and enable the “USB debugging” option.
- Unlock the bootloader: Before rooting, you must unlock the bootloader of your Sony Xperia Z Ultra C6802. Unlocking the bootloader allows you to install custom recoveries and root your device. Visit the official Sony website or search for a trusted guide on how to unlock the bootloader specifically for your device model.
- Install a custom recovery: After unlocking the bootloader, the next step is to install a custom recovery. A custom recovery is necessary to flash the root files onto your device. Popular custom recoveries like TWRP (Team Win Recovery Project) or ClockworkMod can be installed using tools like Fastboot or ADB (Android Debug Bridge).
- Download the root package: Look for a trusted and compatible root package specifically designed for the Sony Xperia Z Ultra C6802. Ensure that the root package is meant for your device model and Android version. Download the root package and transfer it to your device’s internal storage or SD card.
- Boot into the custom recovery: Power off your Sony Xperia Z Ultra C6802 and boot it into the custom recovery mode. The key combination required to access the custom recovery may vary, but it usually involves pressing and holding specific buttons simultaneously. Consult the documentation or search online for the correct key combination for your device.
- Flash the root package: Once you are in the custom recovery mode, navigate to the “Install” or “Install ZIP” option. Choose the root package file you downloaded earlier and confirm the installation. The custom recovery will flash the root files onto your device, granting you root access.
- Reboot your device: After the root package is successfully flashed, reboot your Sony Xperia Z Ultra C6802. It may take slightly longer than usual for your device to boot up as it initializes the newly gained root privileges.
- Verify root access: To confirm that your Sony Xperia Z Ultra C6802 is rooted successfully, download and install a root checker app from the Google Play Store. Open the app and follow the prompts to verify if your device has gained root access.
Congratulations! You have successfully rooted your Sony Xperia Z Ultra C6802. Now you can enjoy the benefits of customization, improved performance, and access to apps and features that require root permissions. Remember, with great power comes great responsibility. Use your root access wisely and explore the endless possibilities your rooted device has to offer.
Frequently Asked Questions
- Is rooting legal?
- Can I unroot my device?
- Will rooting my device cause data loss?
- Are there any risks involved in rooting my device?
- Can I still receive official software updates after rooting my device?
Rooting your device is legal in most jurisdictions. However, it may void your device’s warranty, and certain apps or services may detect root access and prevent their usage.
Yes, you can unroot your device by flashing the stock firmware or using an app designed to remove root access. Keep in mind that unrooting may not always reinstate your device’s warranty.
Rooting itself does not cause data loss. However, it is always recommended to backup your data before proceeding with any modifications to avoid potential data loss or device malfunctions.
Rooting involves making changes to your device’s system files, which can pose certain risks if not done correctly. It is important to follow instructions carefully and use trusted sources to minimize the risks.
Rooting may affect your device’s ability to receive official software updates. However, custom ROMs developed by the rooting community often provide unofficial updates with new features and security patches.
After exploring the process of rooting the Sony Xperia Z Ultra C6802, it is clear that this can be a rewarding endeavor for tech-savvy individuals who want to unlock the full potential of their device. Rooting allows for greater customization, improved performance, and access to a wider range of apps and features. However, it is important to note the potential risks and drawbacks, such as voiding the warranty, compromising security, and the possibility of bricking the device if not done correctly.
Before attempting to root your Sony Xperia Z Ultra C6802, it is crucial to thoroughly research and understand the process, as well as backup all important data. If you are unsure or uncomfortable with the technical aspects of rooting, it is wise to seek the assistance of a professional or a knowledgeable source. While rooting can open up exciting possibilities for your device, it is always important to weigh the pros and cons and make an informed decision.
Ultimately, the decision to root your Sony Xperia Z Ultra C6802 rests with you and your specific needs and preferences. If you are confident in your technical abilities and willing to accept the potential risks, rooting can provide a whole new level of customization and control over your smartphone experience.
FAQs
Here are some frequently asked questions about rooting the Sony Xperia Z Ultra C6802:
1. What is rooting?
Rooting is the process of gaining full administrative control over a device’s operating system. By rooting your Sony Xperia Z Ultra C6802, you can access privileged system files and make modifications that are not normally allowed, such as installing custom ROMs or removing pre-installed bloatware.
2. Why would I want to root my Sony Xperia Z Ultra C6802?
Rooting your Sony Xperia Z Ultra C6802 gives you the freedom to customize your phone to your liking. You can install custom ROMs, improve battery life, uninstall unnecessary pre-installed apps, and even overclock the processor for better performance. Rooting opens up a whole new world of possibilities for advanced users who want to get the most out of their device.
3. Is rooting legal?
Yes, rooting a device is legal. However, it is worth noting that rooting may void your device’s warranty, so it’s essential to understand the consequences before proceeding. Additionally, it’s important to conduct thorough research and follow reputable guides to ensure a safe rooting process.
4. Can I unroot my Sony Xperia Z Ultra C6802?
Yes, it is possible to unroot your Sony Xperia Z Ultra C6802. There are various methods available, such as using an app specifically designed for unrooting or flashing the device with the original firmware. Keep in mind that unrooting may restore your device’s warranty, but it is always recommended to research and follow reliable instructions to avoid any potential issues.
5. Is rooting safe for my Sony Xperia Z Ultra C6802?
Rooting carries certain risks, such as bricking your device or potentially exposing it to malware or security vulnerabilities. However, if you follow reputable guides and take necessary precautions, such as backing up your data and using trusted rooting tools, you can minimize these risks. It’s essential to weigh the benefits against the potential risks and proceed with caution.