
Watching movies on your iPhone isn’t a new thing. One obvious thing about movies, however, is their orientation which might not take up the entire screen of your iPhone. In order to get an immersive screen time when watching movies on Netflix and Disney+, or even on free movie apps, you need to learn how to rotate the screen on your iPhone.
We aren’t saying that knowing how to rotate the screen of your iPhone is only intended for video-watching purposes. Of course, there are other instances where you will be forced to rotate your screen and get a landscape orientation. This is why, in this article, we will explore the various ways in which you can rotate the screen on your iPhone — with or without a physical home screen button.
Related: 11 Best Phone Stands for Your Daily Use [2021 GUIDE]
Inside This Article
How to Rotate Screen Orientation on iPhone?
In this guide, we are not talking about rotating your device 90 degrees counterclockwise (or clockwise). Well, we sort of are. However, we are also talking about the actual elements on your screen — app icons and arrangements, display positions, time and battery indicators, etc. — following the orientation of your device.
Without further ado, below is how to make this possible including how you can automatically trigger it on your device.
A. How to Rotate Screen on iPhone 7 & 8
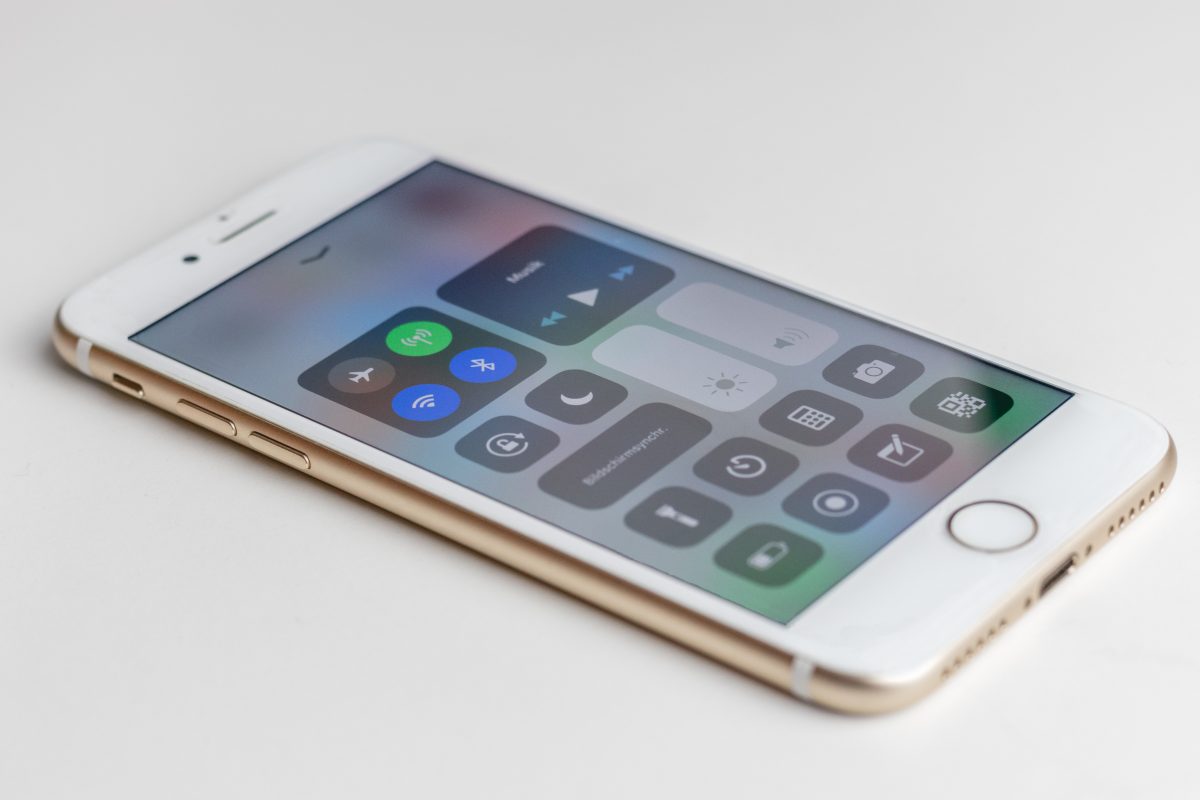
The Rotation Lock feature on the iPhone in general is accessible in the Control Center. Essentially, this feature enables or disables screen rotation from being triggered when the device adopts either landscape or portrait orientation. Nevertheless, this feature should work fine on your iPhone 7 & 8.
- From the home screen, swipe down from the top-right corner of your screen.
- Once the Control Center is on display, tap the Orientation Lock button.
- Swipe up from the bottom of the screen to close the Control Center. Rotate your device sideways in order for the screen to follow the orientation of the device.
For iPhones 8 and below, the home screen also adapts the orientation of the device especially if the Orientation Lock button is off. Moreover, many apps downloadable from the Apple App Store can automatically adapt the screen orientation of your iPhone.
This guide features elements that are present in iOS 15. If you have an iPhone 7 or 8 that is not updated to the latest version of iOS, Control Center is accessible by swiping up from the bottom of the screen. You might also want to read our related article on how to fix error installing iOS 15 for more information on updating your iPhone’s iOS.
B. How to Rotate Screen on iPhone 13, 12, 11, & X
When you have an iPhone beyond the Gen 8 fleet, you will generally enjoy a screen with more pixels. This means better screen quality powered by a Retina display — something Apple devices pride themselves on. Hence, watching movies or any videos just makes sense to be viewed on an appropriate orientation (whatever that may be for you as the user).
This is how to rotate screens on iPhone 13, 12, 11, & X:
- Swipe up from the right-hand side of the screen to access Contol Center.
- Tap the Portrait Orientation Lock button to turn it off.
- Exit from the Control Center by swiping up from the bottom of the screen.
- Turn your iPhone sideways.

You might notice how the home screen of your iPhone X, 11, 12, and 13 aren’t following the orientation of your device while other apps like Messages and Safari (among others) do. While it isn’t clear why Apple revoked this feature, we can safely assume that this is because of Face ID. It makes sense because how else would Face ID read your facial biometrics if your iPhone is in landscape mode instead of portrait, right?
How to Disable Screen Rotation Lock on iPhone Using Back Tap?
There is one trick on how to rotate the screen on iPhone that not many knows. This is achieved by using a rather new feature within the iOS ecosystem called “Back Tap”. Yes! Among the many automation that Apple included on iPhone 8 and later is the ability to perform small tasks with a tap or two on your iPhone.
So, how do you disable screen rotation on your iPhone using Back Tap?
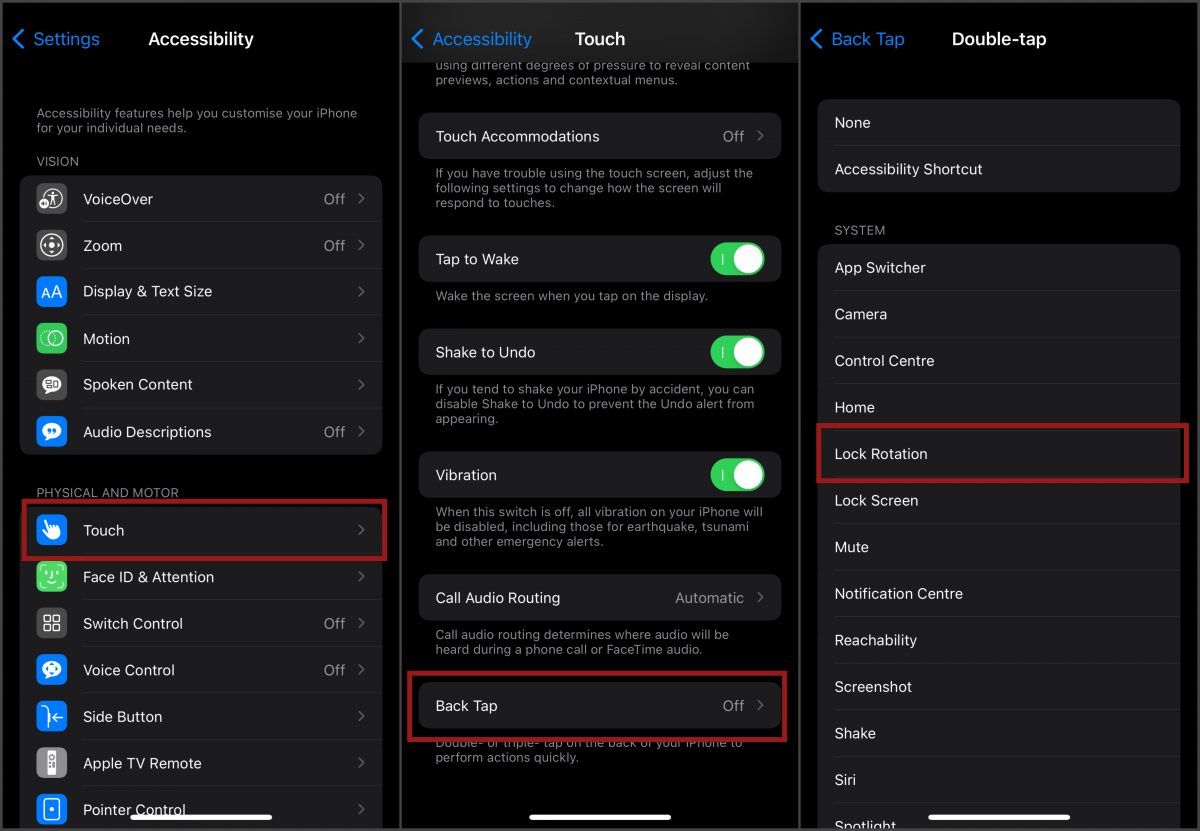
- Open the Settings app and tap on Accessibility.
- Select Touch under the Physical and Motor section.
- Scroll down and tap on Back Tap.
- Tap on Double-tap.
- From the list of system operations iPhone can perform, select Lock Rotation.
From here, despite having the Orientation Lock button on or off, when you double tap the back of your iPhone, this lock button will either turn on or off automatically.
Also Read: Best iPhone 13 Hidden Tips and Tricks
How to Disable Auto Rotate on iPhone?
Without using Back Tap, to reverse the actions and disable auto screen rotation on iPhone, we simply have to turn on the lock on screen rotate. And this is accessible via the Control Center.
- From your home screen. swipe down from the right-hand corner of the screen.
- Tap the Orientation Lock button and make sure it is in red.
- Swipe up from the bottom of the screen.
From here, your screen will adapt to the orientation of the device and will lock it that way (works for iPhones 8 and below). For iPhones X and above, your screen will no longer auto rotate if the Orientation Lock Button is turned off.
Some apps would automatically rotate your screen despite having the Orientation Lock button off. These apps include Netflix, YouTube (when set to full screen), and games among others.
What to Do if iPhone Won’t Rotate?
It is uncommon for the screen rotation on iPhone to malfunction or experience a glitch. Nonetheless, if you find your iPhone’s screen isn’t adopting the orientation of the device, you can try the following.
A. Restart Your iPhone
Restarting your device has its benefits unbeknownst to many. One major benefit of restarting your device every now and then is allowing your device to correct itself for small glitches caused by it powered on for a long time. Put it this way — a human who rests little will feel exhaustion, experience fatigue, and eventually will break down. The same logic is true for devices.
Moreover, restarting resets and cleans your device’s random access memory (RAM) of cache or junk files that could be causing system malfunctions.
B. Force Close Apps
If it isn’t a general problem, it could be an isolated problem pertaining to app performance. So, if you find your screen or app isn’t rotating, try force closing the app first.
For iPhones with Physical Home Button
- Double press the home button to access the apps tray.
- One by one, close each window by swiping up.
For iPhones without a Physical Home Button
- Swipe up from the bottom of the screen until the apps tray appears.
- Similarly, swipe each app window up to close them.
C. Contact Apple Support
Of course, if none of these worked, it’s best to ask Apple itself. Apple Support is available via Twitter and its website. Their representatives would be in a position to provide an in-depth explanation as to why your screen isn’t rotating.
You Now Know How to Rotate Screen on iPhone
You enjoy better screen quality, of course! That’s what’s next after learning how to rotate your screen on iPhone 12, 11, 13, X, 8, and 7. This is an effortless feature that will give you more and make you do more. It’s rare to encounter problems with this feature. However, if you ever bump into one, we hope we were able to provide you DIY support through this article.